1. Introduction
This manual provides instructions for the installation, operation, and maintenance of the MIRKOO Backup Alarm. This device is designed to emit a loud warning sound when a vehicle is reversing, enhancing safety for pedestrians and other vehicles in the vicinity. Please read this manual thoroughly before installation and use.
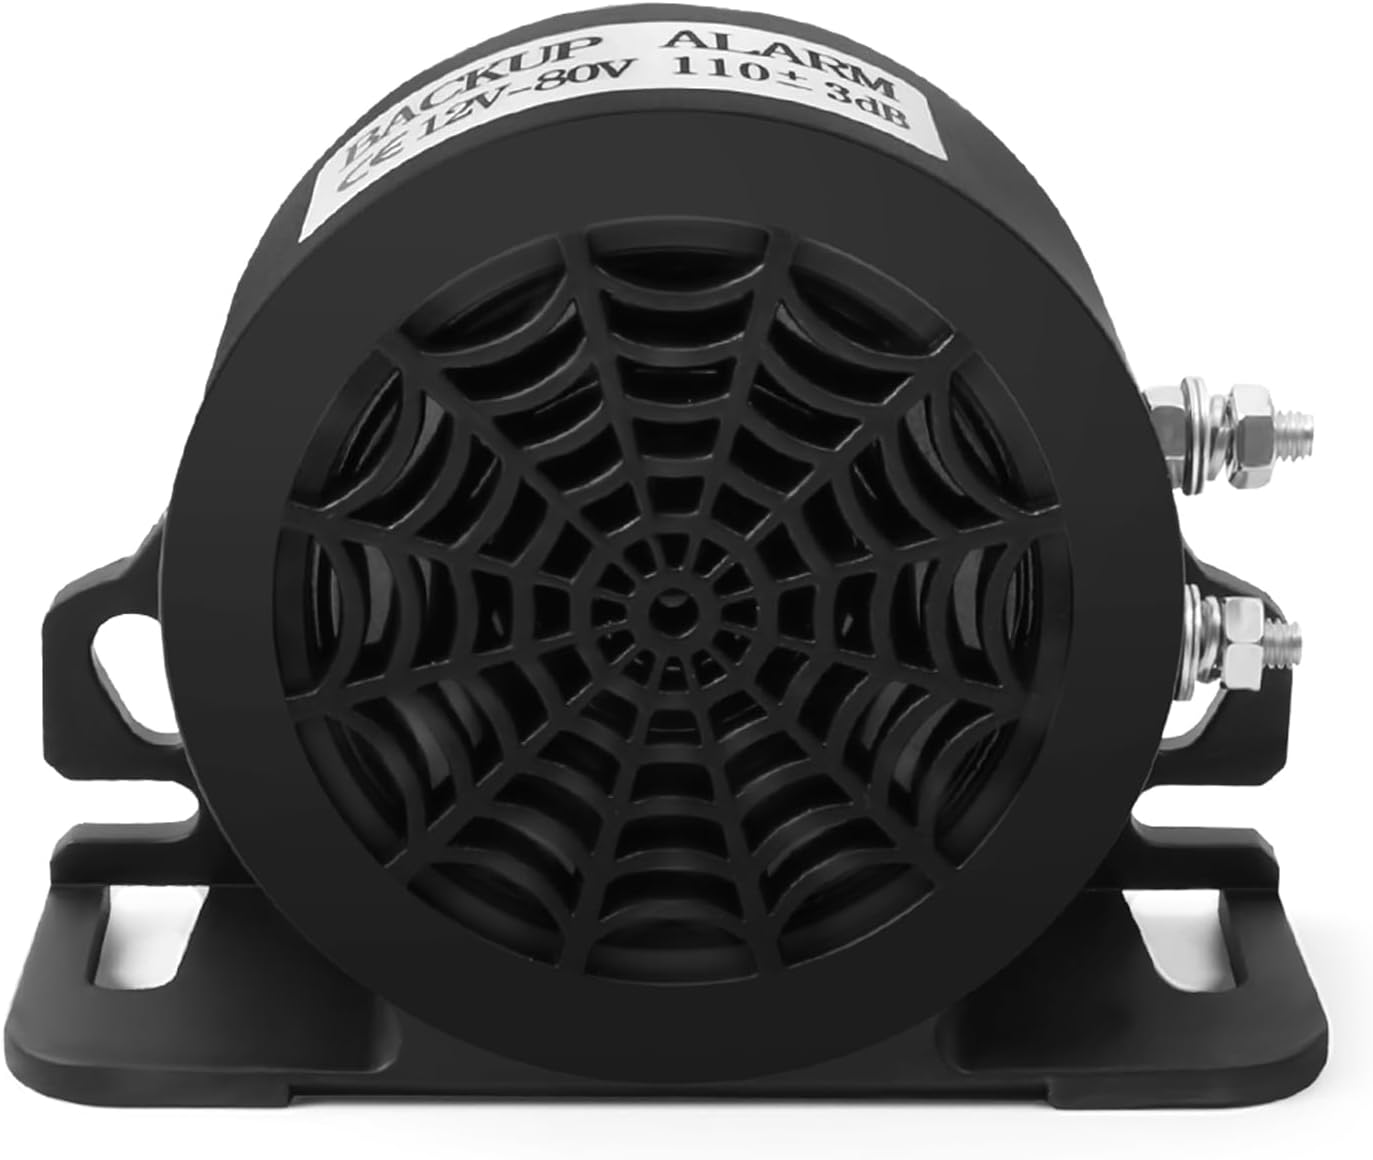
Figure 1: Front view of the MIRKOO Backup Alarm, showing the speaker grille and mounting bracket.
2. Safety Information
- Ensure the vehicle's power is disconnected before attempting any electrical installation.
- Verify the voltage compatibility (12V-80V DC) before connecting the alarm. Incorrect voltage can damage the unit.
- Mount the alarm securely to prevent detachment during vehicle operation.
- The alarm produces a loud sound (110dB). Avoid prolonged exposure to the sound at close range without hearing protection.
- If you are unsure about the installation process, consult a qualified automotive technician.
3. Package Contents
The package includes the following item:
- 1 x MIRKOO Backup Alarm
4. Specifications
| Model Number | MIRKOO-77 |
| Voltage | 12V-80V DC |
| Noise Level | 110dB (±3dB) |
| Power | 15W |
| Current | 0.1-0.6A |
| Impedance | 8 Ω |
| Shell Material | Plastic |
| Product Dimensions | 4 x 1.54 x 3 inches |
| Item Weight | 11.6 ounces |
| Waterproof Rating | Effective waterproofing (advanced glue injection technology) |
| Compatible Devices | Trucks, Vans, Freight Cars, Lorries, Heavy Vehicles, SUVs, and other 12-80V DC vehicles. |

Figure 2: Dimensions of the MIRKOO Backup Alarm.
5. Installation
The MIRKOO Backup Alarm is designed for easy installation. Follow these steps:
- Choose a Mounting Location: Select a secure location on the vehicle, typically near the rear, where the sound can be clearly heard and the alarm is protected from direct impact. Ensure the mounting surface is flat and stable.
- Secure the Alarm: Use appropriate fasteners (not included) to securely mount the alarm to the chosen location.
- Wire the Positive Connection: Splice a wire from the positive screw terminal of the alarm to the power wires of the vehicle's reverse light. Alternatively, connect it to a reverse switch installed on the dashboard. This connection should only receive power when the vehicle is in reverse.
- Wire the Negative Connection: Splice a wire from the negative screw terminal of the alarm to a reliable ground point on the vehicle chassis (negative wire).
- Test the Installation: Once wired, carefully test the alarm by engaging reverse gear (with the engine running and foot on the brake, or in a safe, open area). The alarm should emit a clear, loud beeping sound.

Figure 3: Wiring diagram for the MIRKOO Backup Alarm, showing positive and negative connections.

Figure 4: The backup alarm is compatible with a wide range of 12-80 Volt DC vehicles, including trucks, vans, freight cars, lorries, and SUVs.
6. Operation
The MIRKOO Backup Alarm operates automatically. Once correctly installed and wired to the reverse light circuit, it will activate and emit a continuous 110dB beeping sound whenever the vehicle is shifted into reverse gear. This provides an audible warning to individuals and objects behind the vehicle, significantly reducing the risk of accidents.
Video 1: Demonstration of the MIRKOO Backup Alarm sound in operation. This video illustrates the audible warning produced by the alarm.
Video 2: Another demonstration highlighting the loud sound of the MIRKOO Backup Alarm, emphasizing its effectiveness as a warning signal.

Figure 5: The loud and penetrating sound of the alarm ensures people are alerted even in noisy environments, such as construction sites.

Figure 6: The alarm's volume is sufficient to deter small animals in open areas, preventing accidental collisions.
7. Maintenance
The MIRKOO Backup Alarm is designed for durability and requires minimal maintenance.
- Cleaning: Periodically inspect the alarm for dirt or debris accumulation. Clean the exterior with a damp cloth. Avoid using harsh chemicals or abrasive cleaners.
- Connection Check: Annually, or if issues arise, check the electrical connections to ensure they are secure and free from corrosion.
- Waterproofing: The unit features advanced glue injection technology for effective waterproofing and dust prevention. Avoid disassembling the unit, as this may compromise its protective seals.

Figure 7: The alarm's sealed design ensures effective dust prevention and waterproofing, allowing it to function reliably in various weather conditions.
8. Troubleshooting
If the MIRKOO Backup Alarm is not functioning as expected, refer to the following common issues and solutions:
- No Sound:
- Check all electrical connections to ensure they are secure and properly connected to the reverse light circuit and ground.
- Verify that the vehicle's reverse lights are functioning. If not, the issue may be with the vehicle's electrical system.
- Confirm that the power source is within the 12V-80V DC range.
- Inspect the alarm for any visible damage.
- Intermittent Sound:
- Check for loose or corroded wiring connections.
- Ensure the alarm is securely mounted and not vibrating excessively.
If troubleshooting steps do not resolve the issue, contact customer support for further assistance.
9. Warranty and Support
The MIRKOO Backup Alarm comes with a 1-year warranty from the date of purchase. This warranty covers defects in materials and workmanship under normal use.
For warranty claims, technical support, or any questions regarding your MIRKOO product, please contact MIRKOO customer service through the retailer where the product was purchased or visit the official MIRKOO store online.