Introduction
This manual provides comprehensive instructions for the setup, operation, maintenance, and troubleshooting of your KIMAFUN KM-G70 Wireless Lavalier Microphone System. Designed for clear audio transmission, this system utilizes 2.4G wireless technology, offering stable and reliable performance for various applications such as teaching, public speaking, presentations, and interviews. Please read this manual thoroughly before using the product to ensure optimal performance and longevity.
Package Contents
Upon opening the package, please verify that all the following components are included:
- 1 x Lavalier Microphone Transmitter (TX)
- 1 x Receiver (RX)
- 1 x Lapel Microphone (external clip-on mic)
- 1 x Type-C Dual-head Charging Cable
- 1 x 6.35mm Adapter
- 1 x User Manual (this document)
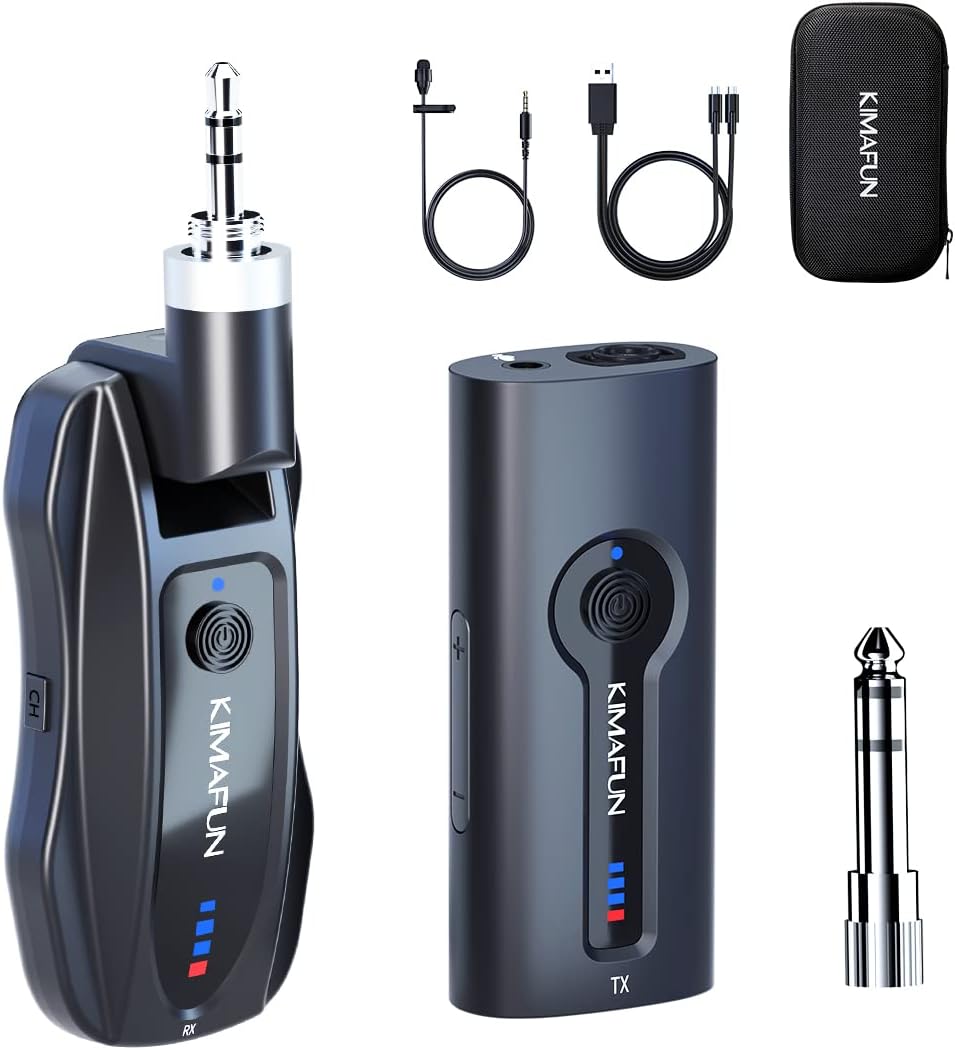
Image: The KIMAFUN KM-G70 Wireless Lavalier Microphone System showing the transmitter, receiver, external lapel mic, charging cable, 6.35mm adapter, and carrying case.
Product Overview
Familiarize yourself with the main components of the system:
Transmitter (TX)
- Built-in Omnidirectional Microphone: Captures sound from all directions.
- 3.5mm External Microphone Port: For connecting the included lapel microphone.
- Power Button: On/Off and pairing.
- Volume Control Buttons: Adjusts microphone input volume.
- Battery Indicator Lights: Shows remaining battery level and charging status.
- USB-C Charging Port: For charging the transmitter.
- Back Clip: For attaching to clothing.
Receiver (RX)
- 3.5mm Stereo Plug: Connects directly to audio input devices.
- Power Button: On/Off and pairing.
- Battery Indicator Lights: Shows remaining battery level and charging status.
- USB-C Charging Port: For charging the receiver.
- Channel Switch (CH): Allows switching between channels if interference occurs.
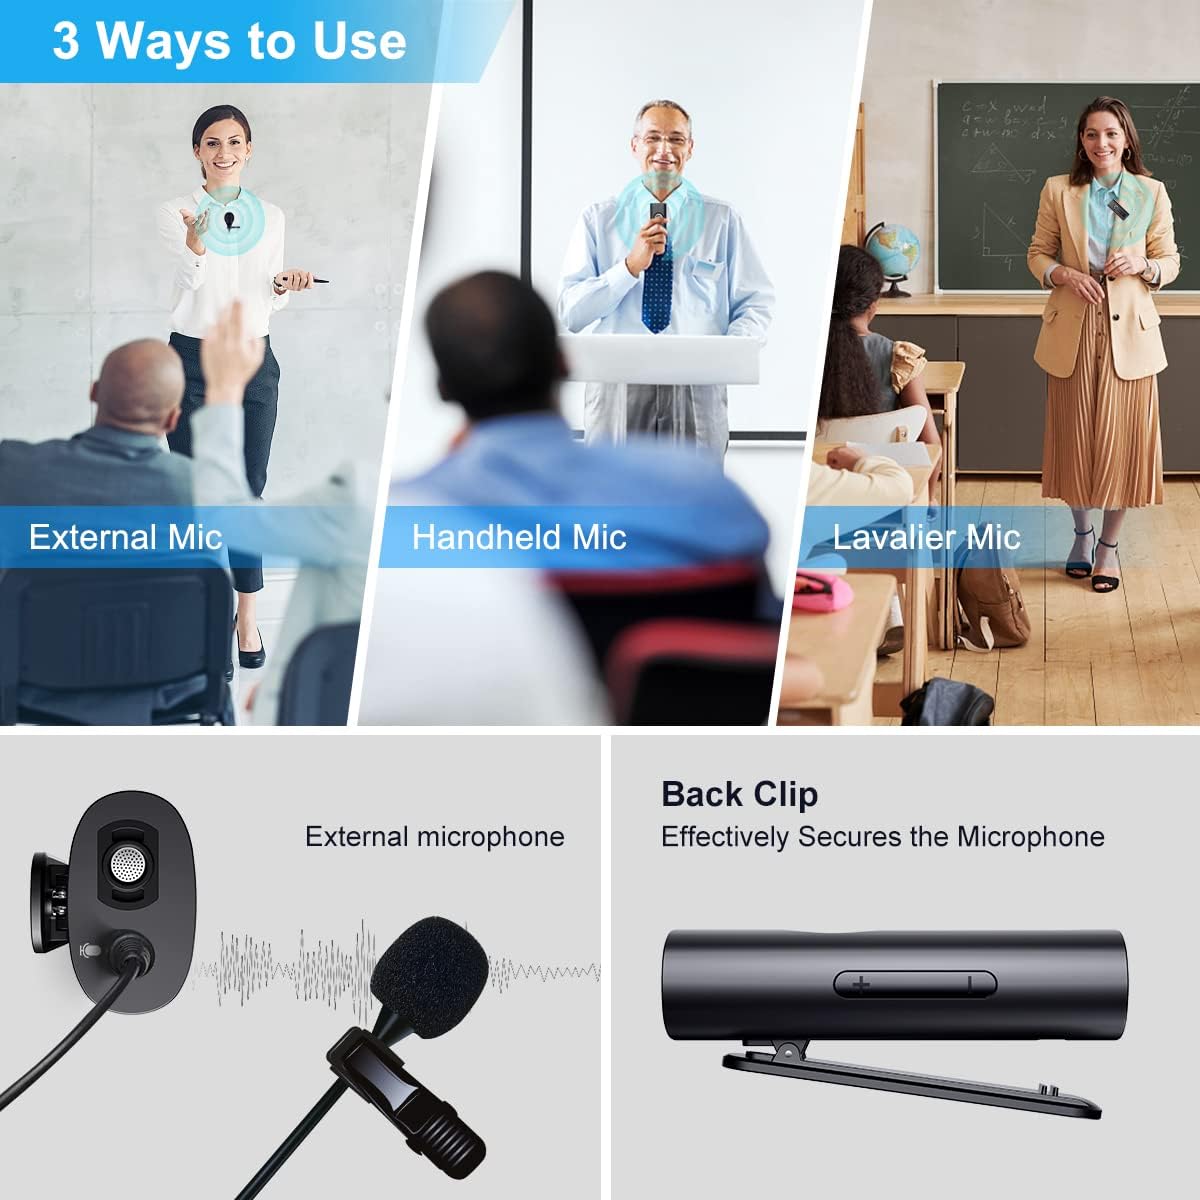
Image: Demonstrates three ways to use the microphone system: with an external lapel mic, as a handheld mic (using the transmitter directly), and as a lavalier mic (transmitter clipped to clothing). Also shows the secure back clip.
Setup
- Charge the Devices: Before first use, fully charge both the Transmitter (TX) and Receiver (RX) using the provided Type-C dual-head charging cable. Connect the cable to a standard USB power adapter (not included). The battery indicator lights will show charging progress. A full charge takes approximately 1 hour.
- Power On: Press and hold the power button on both the Transmitter (TX) and Receiver (RX) until the indicator lights illuminate.
- Automatic Pairing: The TX and RX units are designed to automatically pair within 2 seconds of being powered on. The indicator lights will show a stable connection once paired. No manual pairing is required.
- Connect to Audio Device:
- For devices with a 3.5mm audio input jack (e.g., some PA systems, mixers): Plug the Receiver's 3.5mm stereo plug directly into the audio input.
- For devices with a 6.35mm (1/4 inch) audio input jack (e.g., most public speakers, amplifiers, larger mixers): Attach the included 6.35mm adapter to the Receiver's 3.5mm plug, then insert it into the audio input.
Important Compatibility Note:
- This wireless system is compatible only with outdoor speakers, mixers, and power amplifiers that have a 1/4" or 1/8" audio input port.
- The receiver connects via a physical audio input, not Bluetooth. Therefore, small Bluetooth-only speakers are NOT compatible.
- Do NOT use this product directly with mobile phones, cameras, computers, or laptops.
- Attach Microphone (Optional): If using the external lapel microphone, plug its 3.5mm connector into the external microphone port on the Transmitter (TX).
- Position the Transmitter: Use the back clip to securely attach the Transmitter to your collar, lapel, or belt. Ensure the microphone (either built-in or external) is positioned to capture your voice clearly.
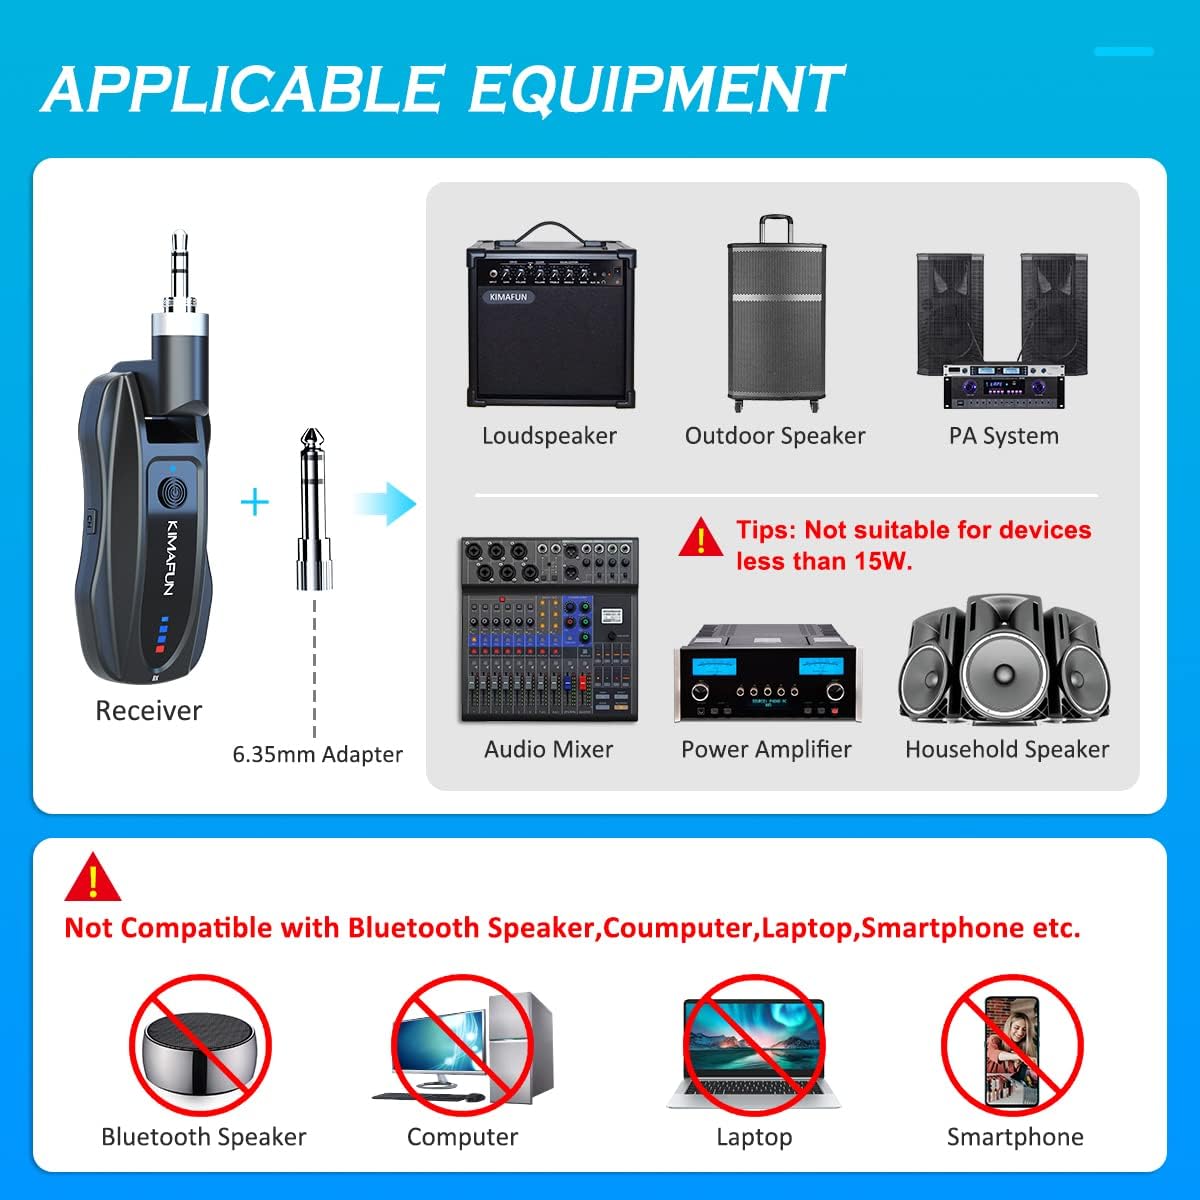
Image: Illustrates compatible audio equipment such as loudspeakers, PA systems, audio mixers, and power amplifiers, along with a clear warning against using the system with Bluetooth speakers, computers, laptops, or smartphones.
Operating Instructions
- Volume Adjustment: Use the volume buttons on the Transmitter (TX) to adjust the input volume of the microphone. Start with a moderate volume and adjust as needed for clear audio output from your connected sound system.
- Monitor Audio: If your audio device has a monitoring output, use headphones to check the audio quality and ensure there is no distortion or unwanted noise.
- Wireless Range: The system offers a stable transmission distance of 30-50 meters (100-165 feet) in obstacle-free environments. Maintain a clear line of sight between the transmitter and receiver for best performance.
- Noise Reduction: The built-in intelligent noise reduction chip helps to effectively identify and reduce ambient noise, ensuring your voice is clearly recorded even in noisy environments.
- Channel Switching: In case of signal interference, you can try switching the channel on the RX unit.
- Power Off: When finished using the system, press and hold the power button on both the Transmitter (TX) and Receiver (RX) until the indicator lights turn off.

Image: Depicts the 165ft (50m) stable wireless transmission range of the KIMAFUN KM-G70 system in an open environment, illustrating its suitability for various settings.

Image: Illustrates the clear sound quality achieved by the system's intelligent noise reduction chip, showing how background noise is eliminated to produce a clear voice output.
Charging and Battery Life
The KIMAFUN KM-G70 system is equipped with rechargeable lithium polymer batteries for both the transmitter and receiver.
- Charging Time: Approximately 1 hour for a full charge.
- Working Time: Up to 6-8 hours of continuous use on a full charge.
- Charging Cable: Use the provided Type-C dual-head charging cable to charge both units simultaneously.
- Battery Indicator: The LED indicator lights on both the TX and RX units clearly show the current battery level and charging status.

Image: Details the large capacity lithium battery, showing 8 hours working time, 400mAh battery capacity, 1 hour charging time, and the Type-C dual-head charging cable.
Maintenance
- Cleaning: Wipe the units with a soft, dry cloth. Do not use harsh chemicals or abrasive cleaners.
- Storage: Store the microphone system in a cool, dry place away from direct sunlight and extreme temperatures.
- Battery Care: For optimal battery life, avoid fully discharging the batteries regularly. If storing for an extended period, charge the units to about 50% every few months.
- Protect from Moisture: Keep the units away from water and high humidity to prevent damage.
Troubleshooting
| Problem | Possible Cause | Solution |
|---|---|---|
| No sound output. |
|
|
| Sound is distorted or unclear. |
|
|
| Short battery life. |
|
|
Specifications
| Feature | Detail |
|---|---|
| Model | KM-G70 |
| Wireless Frequency Band | 2.4G (2400-2483 MHz) |
| Transmission Distance | 30-50 meters (100-165 feet) in open environments |
| Microphone Form Factor | Lavalier (clip-on) and Handheld (transmitter built-in) |
| Polar Pattern | Omnidirectional |
| Signal to Noise Ratio | 70 dB |
| Number of Channels | 2 |
| Power Source | Rechargeable Lithium Polymer Battery (included) |
| Battery Capacity | 400mAh (per unit, estimated from 8H working time and 1H charging time) |
| Charging Time | Approx. 1 hour |
| Working Time | Approx. 6-8 hours |
| Connector Type | 3.5 mm Jack, 6.35 mm Jack (with adapter) |
| Material | Sponge (for mic cover) |
| Item Weight (TX) | 28g (approx.) |
| Item Weight (RX) | 36g (approx.) |
| Total Parcel Weight | 250 Grams |
| Special Features | Battery Indicator Light, Clip, Volume Control, Intelligent Noise Reduction Chip |
Warranty and Support
KIMAFUN products are designed for reliability and performance. For warranty information and technical support, please refer to the contact details provided with your purchase or visit the official KIMAFUN website. Please retain your proof of purchase for warranty claims.
For further assistance, you may contact KIMAFUN customer service through their official channels.
Additional Information
No official product videos were provided in the product data. For visual demonstrations or additional usage tips, please check the manufacturer's official website or authorized retailers.