
CKB CF3555
CKB Pivot Bathtub Shower Door Instruction Manual
Model: CF3555 | Dimensions: 35" W x 55" H
1. Introduction
This manual provides detailed instructions for the installation, operation, and maintenance of your CKB Pivot Bathtub Shower Door, Model CF3555. Please read all instructions carefully before beginning installation to ensure safe and proper assembly and use. Retain this manual for future reference.
2. Safety Information
- Always wear safety glasses during installation.
- Handle glass panels with extreme care. Tempered glass is strong but can shatter if struck at the edges.
- Ensure all mounting surfaces are structurally sound and capable of supporting the weight of the shower door.
- Use appropriate tools and follow all local building and plumbing codes.
- Two people are recommended for installation due to the size and weight of the glass panels.
3. Package Contents
Verify that all components are present and undamaged before beginning installation. If any parts are missing or damaged, contact customer support.
- Tempered Glass Panels (with Easy Clean Coating)
- Wall Profiles
- Hinges and Pivots
- Handle/Knob
- Sealing Strips
- Mounting Hardware (screws, anchors, etc.)
- Installation Manual
4. Product Specifications
- Model: CF3555
- Overall Dimensions: 35 inches (W) x 55 inches (H)
- Door Panel Dimensions: Approximately 33 inches (W) x 55 inches (H) (composed of two panels: 17-1/8" and 15-3/4")
- Glass Type: 1/4 inch (6mm) SGCC ANSI Z97.1 Certified Clear Tempered Glass
- Glass Coating: Double-sided Easy Clean Coating
- Frame Material: Anodized Aluminum
- Finish: Brushed Nickel
- Weight: Approximately 52.1 pounds
- Features: 180° Foldable Design, Reversible Installation (Left/Right), Rise and Fall Hinge Mechanism, Waterproof Sealing Strip, Up to 1/2" out-of-plumb adjustment per wall.

Figure 4.1: This diagram provides the overall width (35 inches / 899mm) and height (55 inches / 1397mm) of the shower door, along with individual door glass panel widths (17-1/8 inches / 435mm and 15-3/4 inches / 400mm).
5. Installation Instructions
5.1. Pre-Installation Checklist
- Confirm all parts are present and undamaged.
- Ensure the bathtub edge and surrounding walls are clean, level, and plumb.
- Gather necessary tools: measuring tape, level, drill, screwdriver, silicone sealant, pencil, safety glasses.
5.2. Reversible Installation
The CKB Pivot Bathtub Shower Door is designed for reversible installation, allowing it to open from either the left or right side of your bathtub. Determine your preferred opening direction before proceeding.

Figure 5.1: This image illustrates how the CKB Pivot Bathtub Shower Door can be installed for either left-hand or right-hand opening, demonstrating its reversible design.
5.3. Step-by-Step Installation
- Prepare the Wall: Mark the desired position for the wall profile on the wall adjacent to the bathtub. Use a level to ensure the line is perfectly vertical.
- Install Wall Profile: Drill pilot holes at the marked positions and secure the wall profile to the wall using the provided screws and anchors. Ensure it is firmly attached.
- Attach Hinges to Glass Panels: Carefully attach the hinges to the glass panels according to the instructions provided with the hardware.
- Mount Glass Panels: With assistance, lift and position the glass panels into the wall profile. Secure the panels to the wall profile using the appropriate hardware.
- Install Handle/Knob: Attach the handle or knob to the designated hole in the glass panel.
- Apply Sealing Strips: Install the transparent sealing strips along the bottom edge of the glass panels and at the junction with the bathtub to ensure a watertight seal.
- Seal with Silicone: Apply a bead of silicone sealant along the exterior joint between the wall profile and the wall, and along the bottom edge of the wall profile where it meets the bathtub. Allow adequate drying time before use.
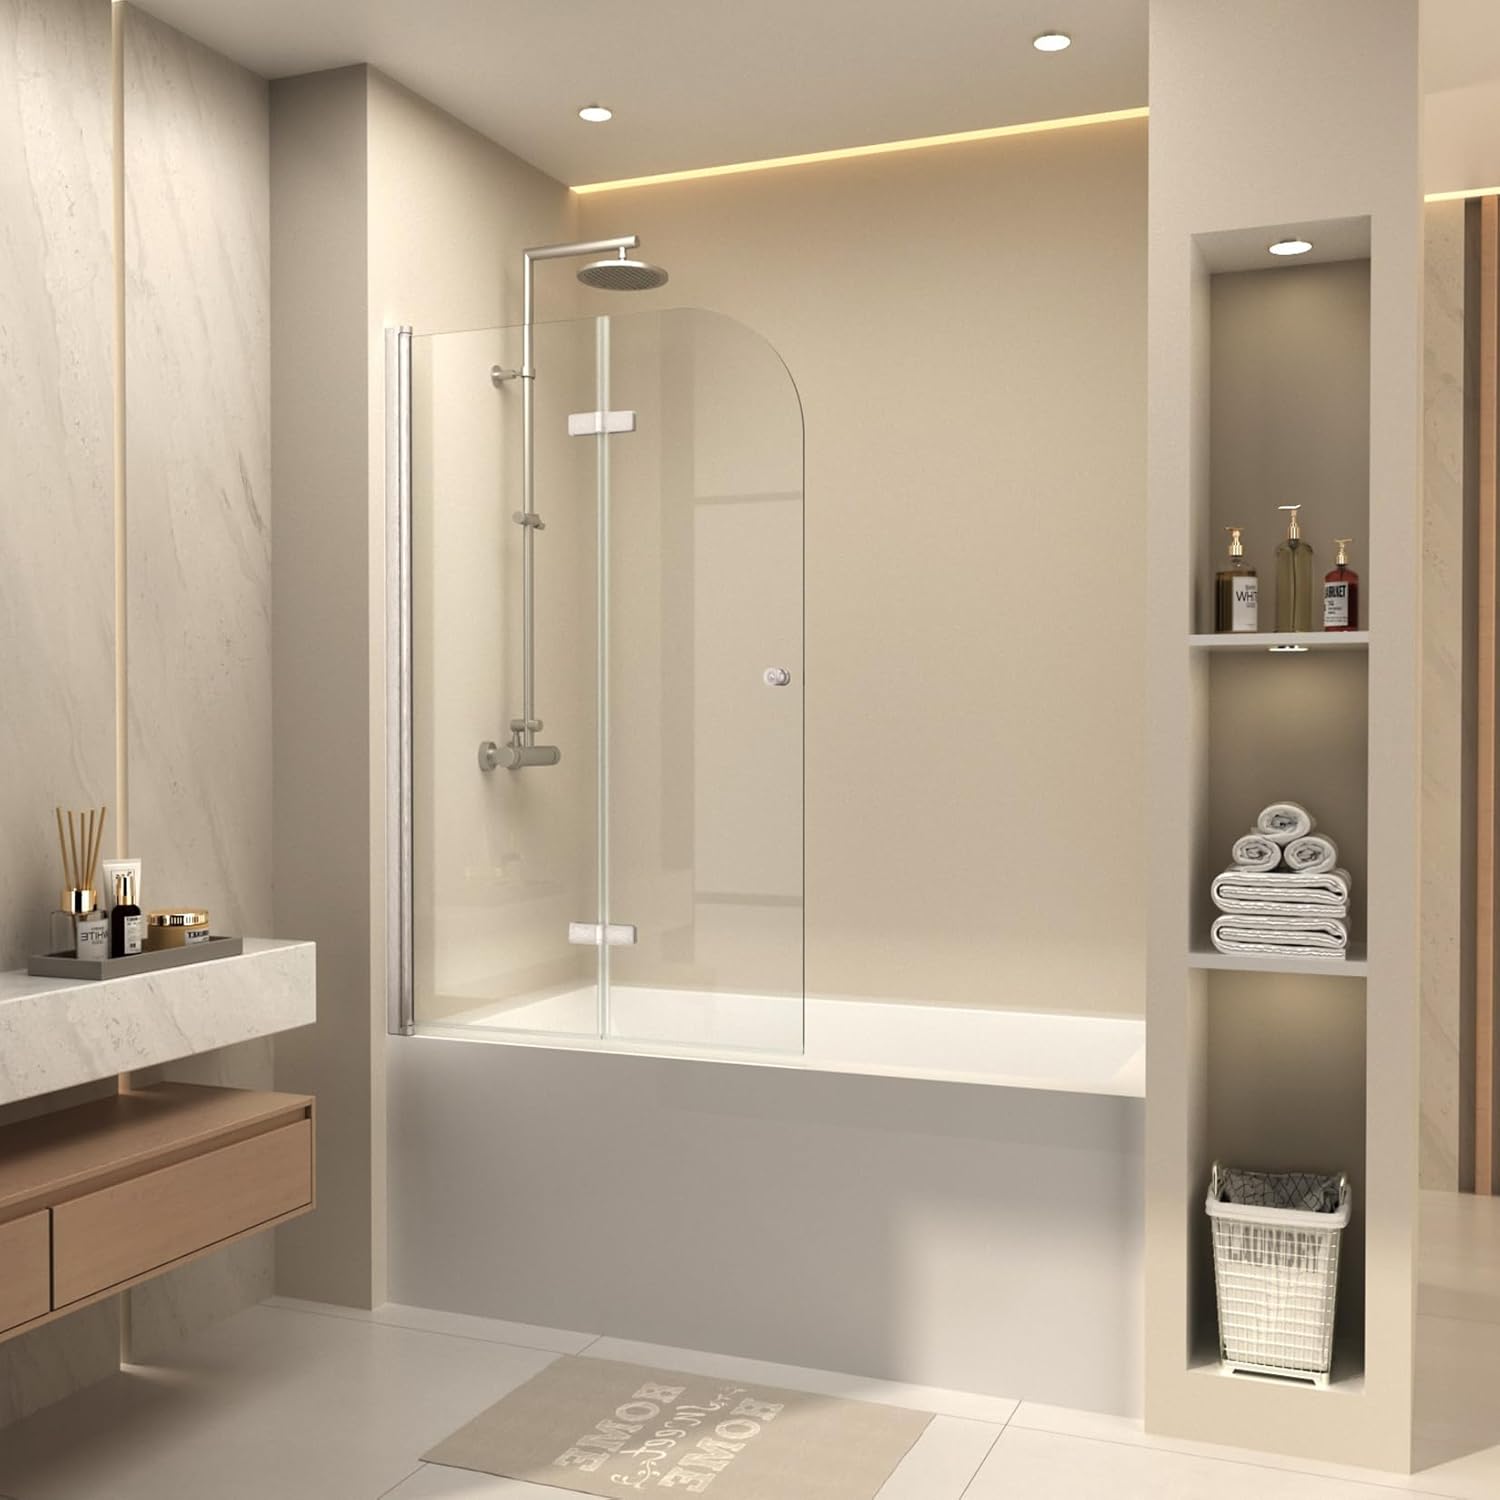
Figure 5.2: This image shows the CKB Pivot Bathtub Shower Door (Model CF3555) installed on a bathtub, demonstrating its clear tempered glass panels and brushed nickel hardware in a contemporary bathroom setting.
6. Operating Instructions
6.1. Opening and Closing
The shower door features a 180-degree rotation and 180-degree full folding capability. Gently push or pull the handle to open or close the door. The rise and fall hinge mechanism ensures smooth and silent operation, lifting the door slightly during movement to prevent abrasion.
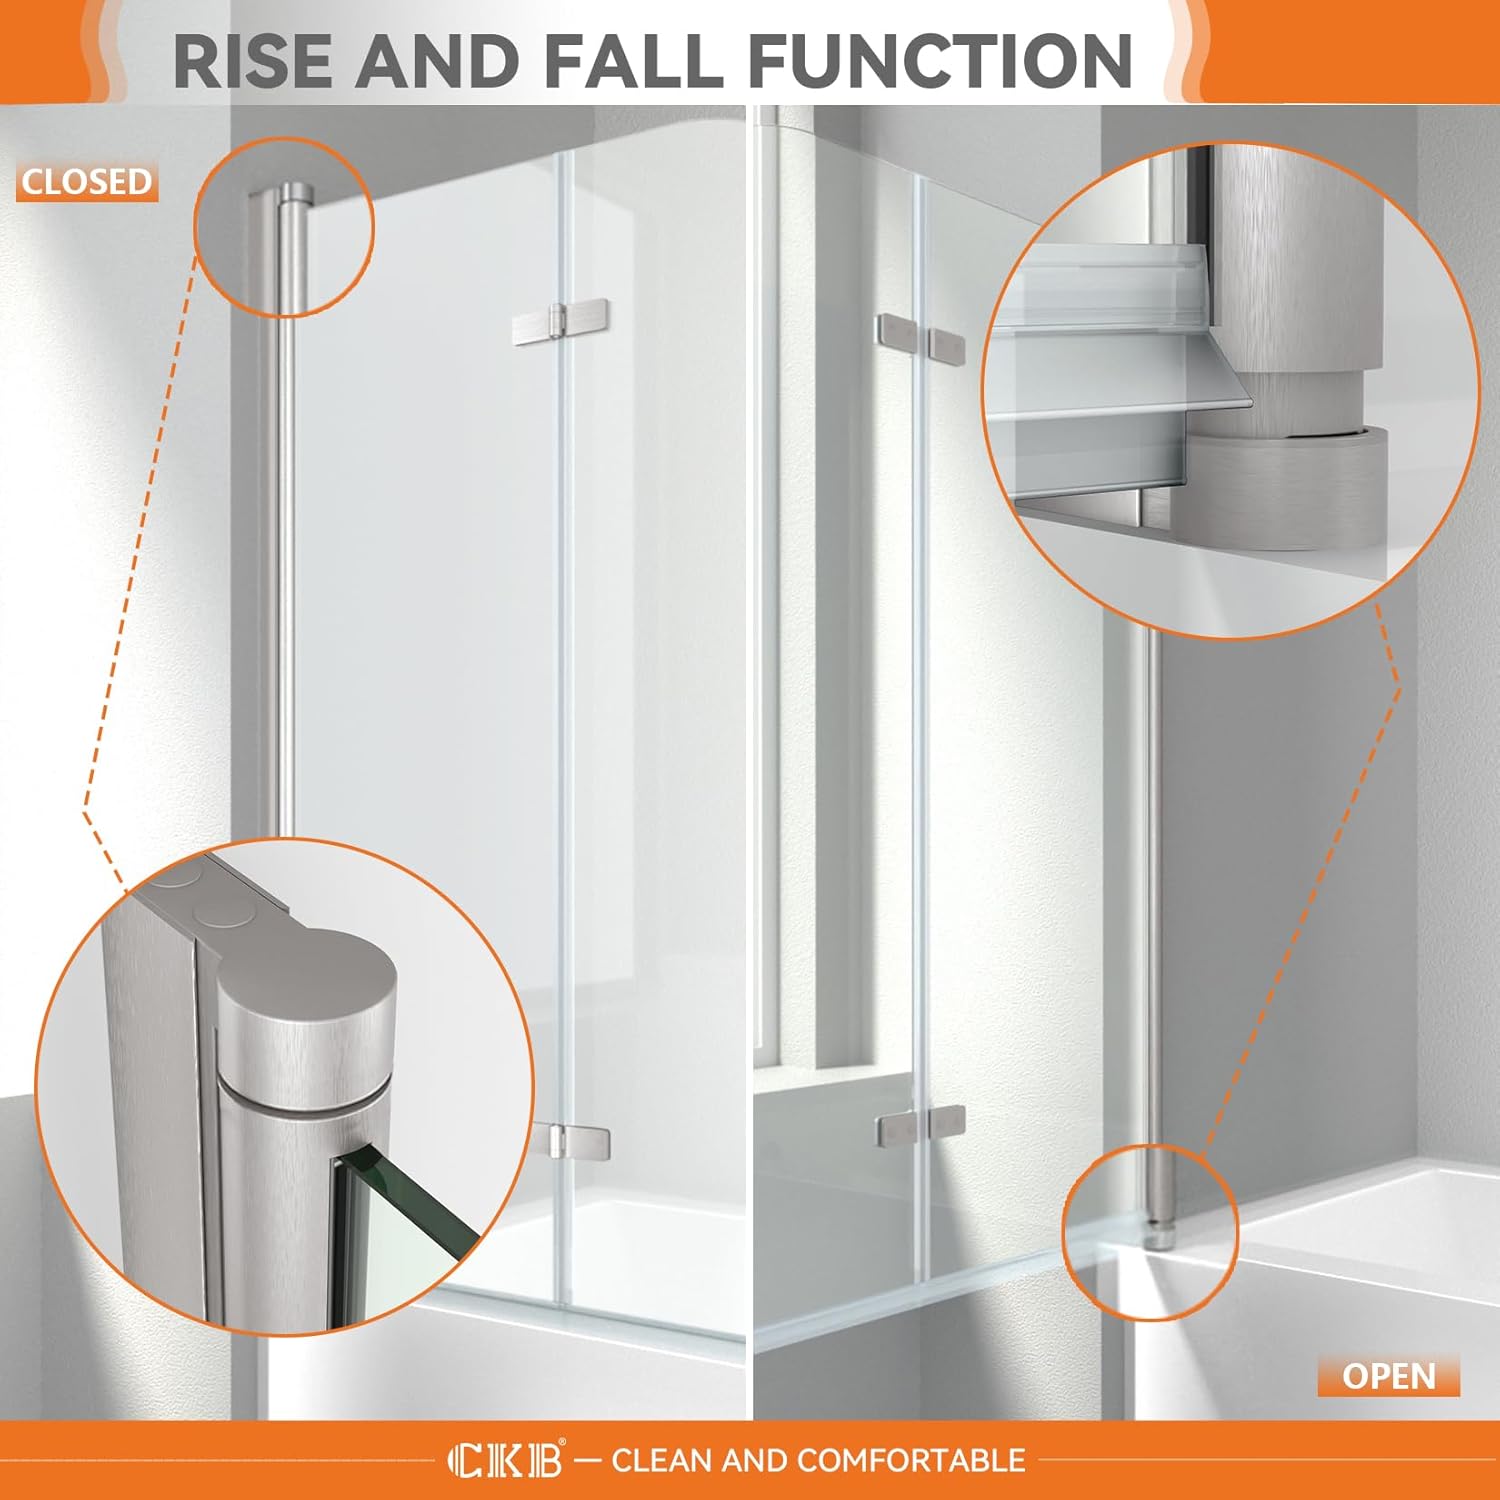
Figure 6.1: This detailed view highlights the rise and fall function of the shower door's hinges, which ensures smooth, silent operation and prevents abrasion when opening and closing.
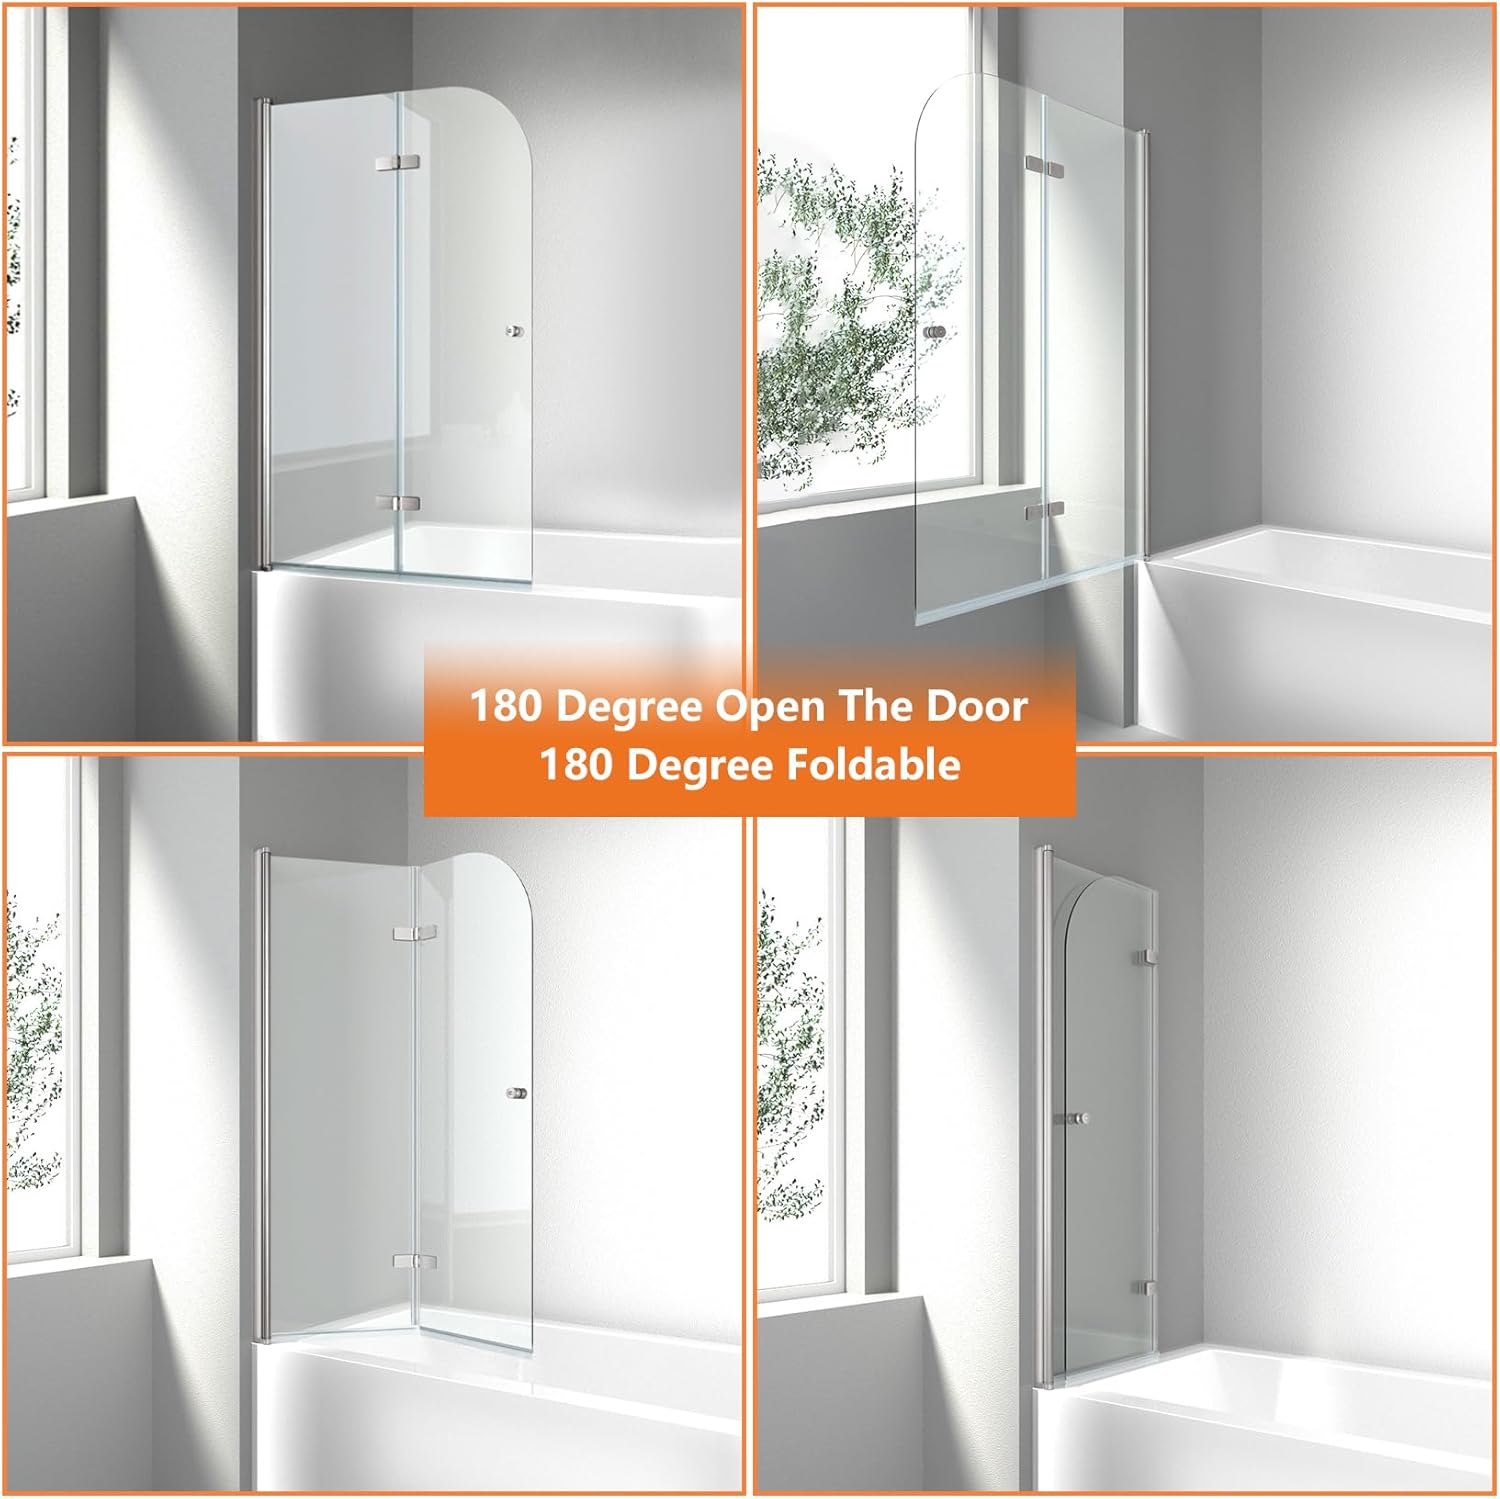
Figure 6.2: This collage demonstrates the shower door's 180-degree folding design, illustrating how the panels can be fully collapsed against the wall to maximize space.

Figure 6.3: The shower door is shown fully folded against the wall, showcasing its space-saving design when not in use.
7. Maintenance and Cleaning
7.1. Glass Cleaning
The shower door glass features a double-sided Easy Clean Coating, which helps prevent dirt, soap scum, and grime from adhering, making cleaning easier.
- For daily cleaning, wipe the glass with a soft cloth or squeegee after each use.
- For deeper cleaning, use a mild, non-abrasive glass cleaner and a soft cloth. Avoid harsh chemicals, abrasive pads, or scouring powders, as these can damage the coating and glass surface.
- Rinse thoroughly with water after cleaning.

Figure 7.1: This diagram explains the GlassShield Coating Technology applied to the shower door glass, highlighting its easy-clean properties compared to untreated glass, and the safety of tempered glass versus normal glass.
7.2. Hardware Cleaning
- Clean brushed nickel hardware with a soft, damp cloth.
- Avoid using abrasive cleaners, ammonia-based products, or bleach, as these can damage the finish.
- Periodically check all screws and fasteners for tightness and tighten if necessary.
8. Troubleshooting
| Problem | Possible Cause | Solution |
|---|---|---|
| Water leaks from the bottom of the door. | Sealing strip not properly installed or damaged; insufficient silicone sealant. | Ensure sealing strip is correctly positioned and undamaged. Reapply silicone sealant along the bathtub edge and wall profile if necessary. |
| Door does not close smoothly or silently. | Hinges require adjustment or lubrication; debris in the hinge mechanism. | Check hinges for proper alignment. Clean any debris from the hinge mechanism. Apply a small amount of silicone-based lubricant if needed. |
| Door feels loose or wobbly. | Mounting screws are loose; wall profile not securely fastened. | Tighten all mounting screws on the wall profile and hinges. Ensure wall anchors are secure. |
| Glass appears cloudy or stained. | Hard water deposits or soap scum buildup. | Clean with a mild, non-abrasive glass cleaner. For stubborn stains, use a vinegar and water solution. Regular cleaning will prevent buildup. |
9. Warranty Information
CKB products are manufactured to high-quality standards. For specific warranty details regarding your CKB Pivot Bathtub Shower Door, please refer to the warranty card included with your purchase or contact CKB customer support directly. Keep your proof of purchase for warranty claims.
10. Customer Support
If you have any questions, require assistance with installation, or need to report a missing or damaged part, please contact CKB customer support. Refer to the contact information provided in your product packaging or visit the official CKB website for support options.
CKB Shower Doors
Your partner for a wonderful shower experience.
Ask a question about this manual
Ask about setup, troubleshooting, compatibility, parts, safety, or missing instructions. Manuals+ will review the question and use this page’s manual context to help answer it.