1. Safety Information
Always prioritize safety when operating this equipment. Failure to follow safety guidelines can result in injury or property damage.
- Pressure Handling: Take precautions when handling liquids under pressure. The paint pot is equipped with a safety valve that automatically releases pressure if it exceeds 0.3 MPa (approximately 43.5 PSI) to ensure safe operation.
- Chemical Exposure: Avoid direct exposure to paint chemicals. Always wear appropriate personal protective equipment (PPE), including safety glasses, gloves, and a respirator, especially in enclosed spaces.
- Mechanical Risks: Be aware of mechanical risks associated with pressurized equipment. Ensure all connections are secure before operation.
- Ventilation: Use the paint spray system in a well-ventilated area to prevent the accumulation of hazardous fumes.
- Air Compressor: This unit requires an external air compressor (not included). Ensure your air compressor meets the pressure requirements and is properly maintained.
2. Product Overview
The VEVOR 2L Portable Paint Pressure Pot with Spray Gun is designed for efficient and versatile painting tasks. Its compact and lightweight design allows for easy portability, making it suitable for various applications, including painting ceilings and other elevated areas.
The system includes a 2-liter (0.5-gallon) pressure tank and a spray gun with a 1.8 mm nozzle, compatible with a wide range of common paints such as latex, metallic, varnish, and DPX colorful paints. The robust metal construction ensures durability and resistance to high pressure, rust, and corrosion.

Figure 2.1: A user demonstrating the portability of the VEVOR paint spray system for painting a wall.

Figure 2.2: The 1.8 mm nozzle is suitable for various paint types, including latex, varnish, metallic, and DPX colorful paints, for diverse applications.
3. Setup
3.1 Unpacking and Inspection
- Carefully remove all components from the packaging.
- Verify that all items listed in the package contents are present.
- Inspect all parts for any signs of damage during shipping. Do not use damaged components.
3.2 Assembly
- Connect the air hose (1/4 inch / 0.64 cm inlet) and fluid hose (3/8 inch / 0.95 cm outlet) to their respective ports on the pressure pot and the spray gun. Ensure all connections are tight and secure.
- Attach the spray gun to the fluid hose.
- If included, apply the provided leak repair sealant to threaded connections for enhanced sealing.
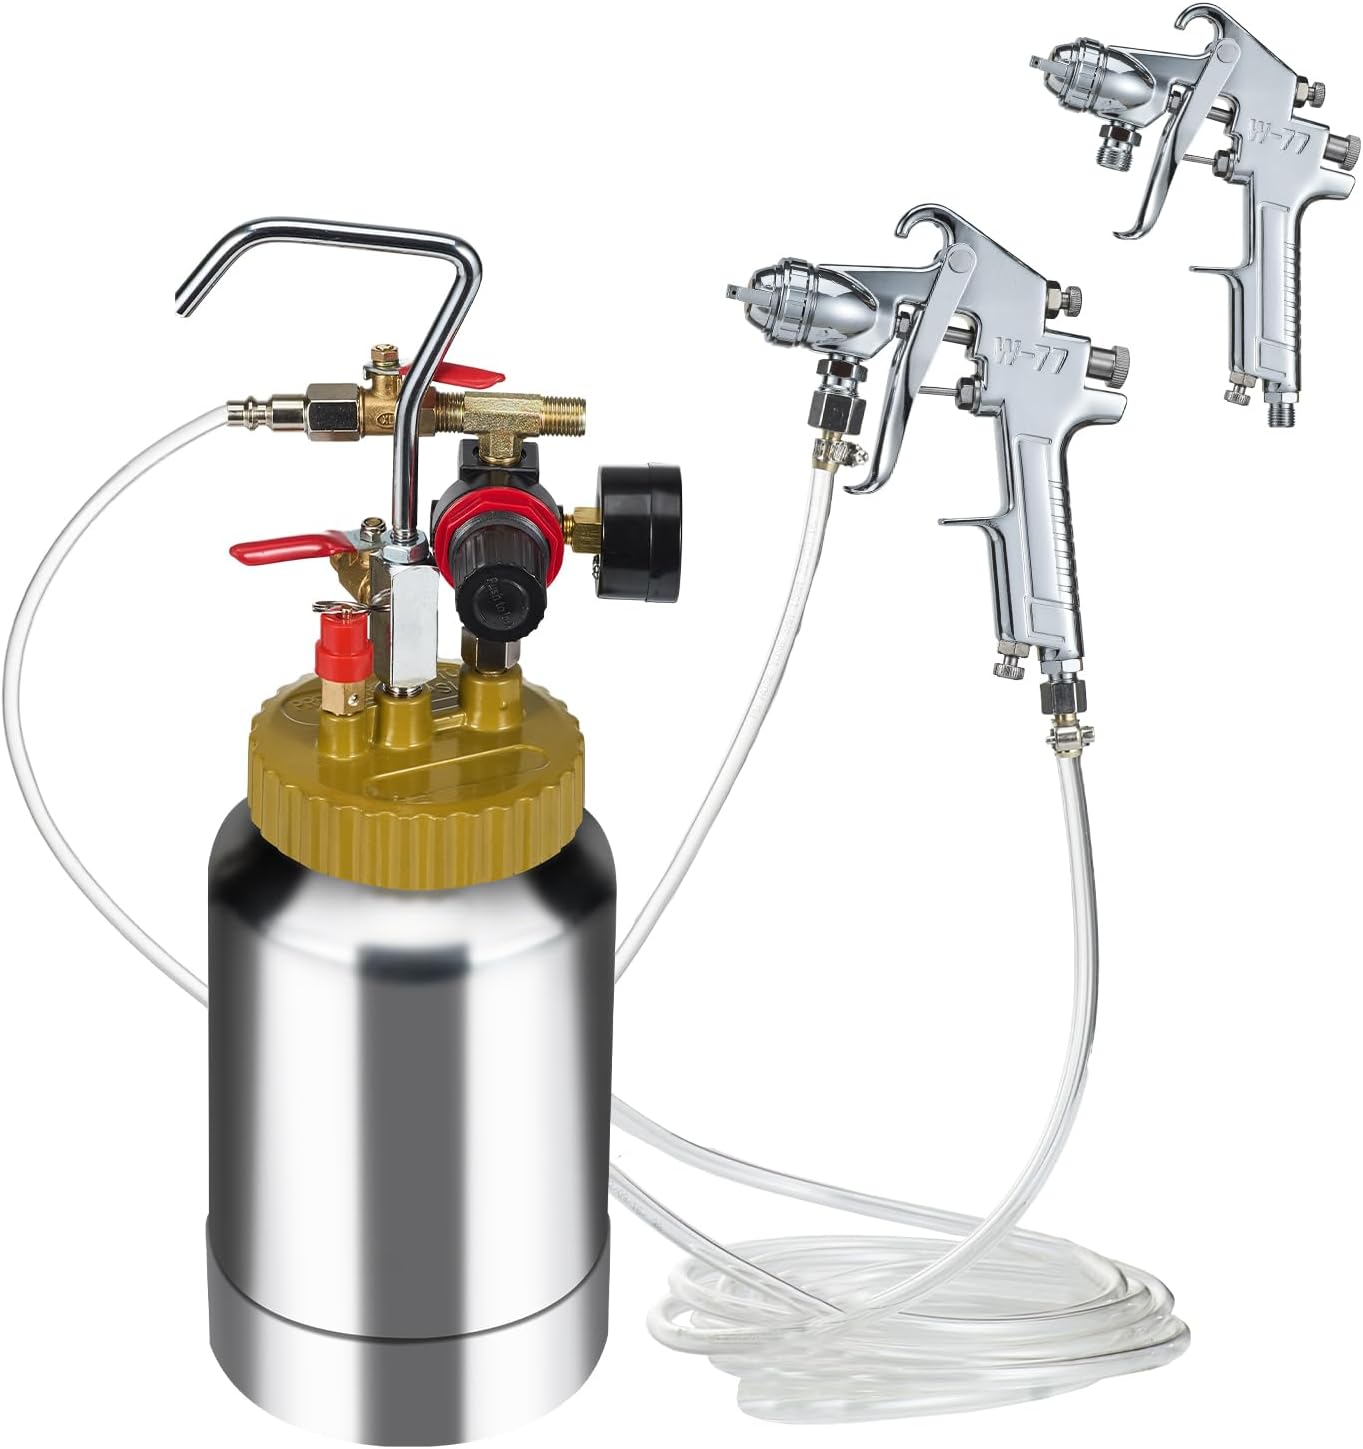
Figure 3.1: The VEVOR paint pressure pot system components, including the tank and spray guns.
4. Operation
4.1 Filling the Tank
- Ensure the pressure pot is depressurized before opening.
- Unscrew the lid of the 2L pressure pot.
- Pour the desired paint into the tank. Do not overfill.
- Securely close the lid, ensuring the rubber sealing ring is properly seated and the four lid clamps are tightened.
4.2 Connecting to Air Compressor
- Connect the air inlet of the pressure pot to your air compressor using a suitable air hose.
- Ensure the air compressor is turned off and its pressure regulator is set to zero before connecting.
4.3 Adjusting Pressure
- Turn on your air compressor.
- Slowly increase the air pressure using the regulating knob on the pressure pot.
- Monitor the pressure gauge to set the desired working pressure, up to a maximum of 45 PSI (3.1 bars).
- The integrated safety valve will automatically release pressure if it exceeds 0.3 MPa (43.5 PSI).

Figure 4.1: The pressure control system features a precise gauge, a regulating knob for adjustment, and a safety valve.
4.4 Spray Gun Adjustments
The spray gun features three adjustment knobs for fine-tuning your spray pattern:
- Air Adjustment: Controls the air flow to the nozzle.
- Flow Adjustment: Regulates the amount of paint released.
- Spray Width Adjustment: Modifies the fan pattern width for different coverage needs.
Adjust these settings on a test surface to achieve uniform atomization and the desired finish before applying to your project.

Figure 4.2: Adjustments on the spray gun for air pressure, paint flow, and spray width.
4.5 Painting Procedure
- Prepare your surface by cleaning and masking as necessary.
- Hold the spray gun at a consistent distance from the surface, typically 6-10 inches (15-25 cm).
- Apply paint in even, overlapping passes. Avoid tilting the gun excessively to prevent uneven coverage.
- Release the trigger at the end of each pass to prevent paint buildup.

Figure 4.3: The portable system is ideal for various projects, such as painting outdoor furniture.
5. Maintenance
5.1 Cleaning After Use
Proper cleaning after each use is crucial for maintaining the performance and longevity of your paint spray system.
- Depressurize the tank and disconnect the air supply.
- Empty any remaining paint from the tank.
- Pour an appropriate cleaning solution (e.g., paint thinner for oil-based paints, water for water-based paints) into the tank.
- Re-seal the tank and briefly pressurize it. Spray the cleaning solution through the gun until it runs clear.
- Disassemble the spray gun nozzle and clean all parts thoroughly with a brush and cleaning solution.
- Wipe down the exterior of the tank and hoses.
5.2 Sealing and Leak Prevention
The pressure pot features an improved sealing design with a high-quality metal tank and a rubber sealing ring at the tank mouth. Four lid clamps ensure a secure closure. For additional protection against leaks, especially at threaded connections, use the provided rust-proof thread sealant.

Figure 5.1: The tank's robust sealing, high-pressure steel construction, and rust-proof sealant ensure leak-free operation.
5.3 Storage
Store the cleaned and dry paint spray system in a cool, dry place, away from direct sunlight and extreme temperatures.
6. Troubleshooting
| Problem | Possible Cause | Solution |
|---|---|---|
| No paint spray | No air supply; clogged nozzle; insufficient pressure; empty tank. | Check air compressor connection and operation; clean nozzle; increase pressure; refill tank. |
| Uneven spray pattern | Incorrect spray gun adjustment; paint too thick; partially clogged nozzle. | Adjust air, flow, and spray width settings; thin paint if necessary; clean nozzle thoroughly. |
| Paint leaks from tank or connections | Loose connections; damaged sealing ring; insufficient sealant. | Tighten all connections; inspect and replace sealing ring if damaged; apply thread sealant to connections. |
| Low pressure | Air compressor issue; leak in air line; pressure regulator setting too low. | Check air compressor; inspect air hoses for leaks; adjust pressure regulator. |
7. Specifications
| Feature | Specification |
|---|---|
| Model Number | JY-SS2L |
| Tank Capacity | 2 L (0.5 Gallon) |
| Product Dimensions (D x H) | 15.2 × 5 inches / 38.5 × 12.6 cm |
| Pot Dimensions (D x H) | Φ 4.9 × 8.1 inches / Φ 12.5 × 20.5 cm |
| Net Weight | 4.2 lbs / 1.9 kg |
| Maximum Pressure | 45 PSI / 3.1 bars |
| Air Inlet | 1/4 inch / 0.64 cm |
| Fluid Outlet | 3/8 inch / 0.95 cm |
| Nozzle Size | 1.8 mm |
| Material | High-quality Metal |
| Included Components | 1 x User Manual, 1 x 10 mL Leak Repair Sealant |
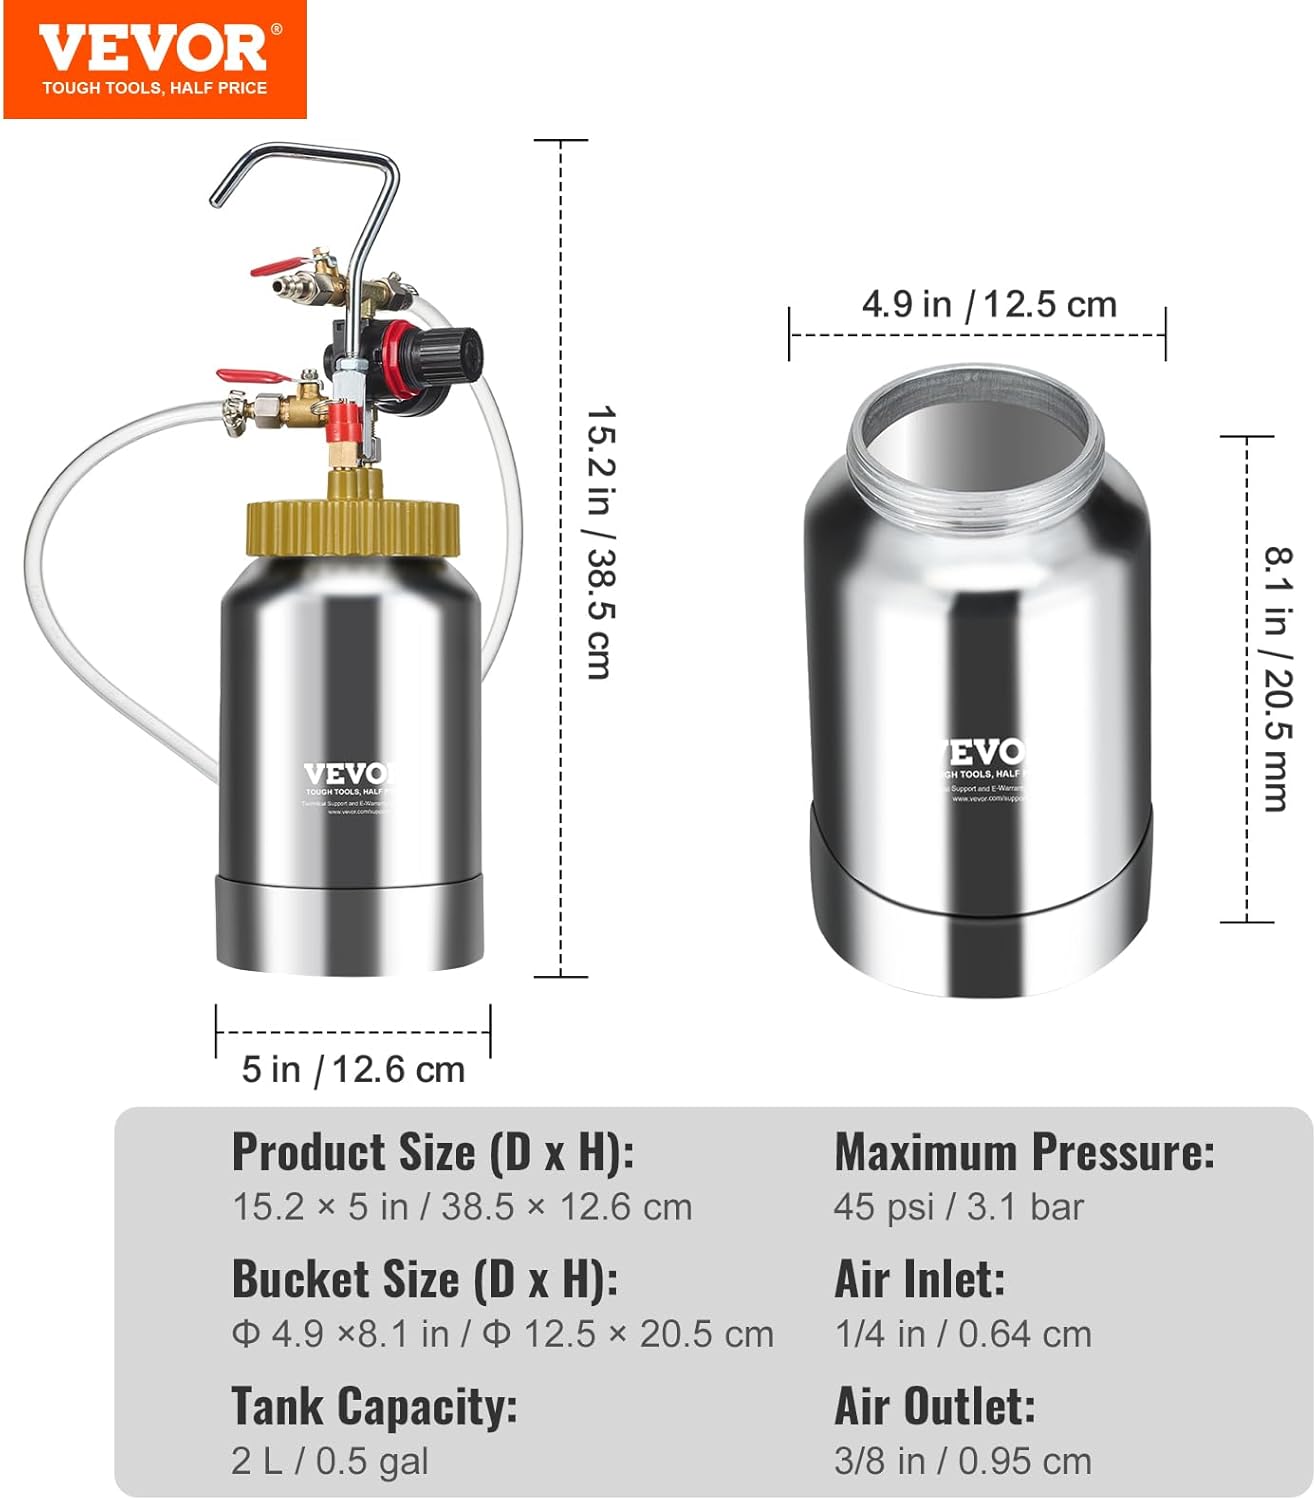
Figure 7.1: Detailed dimensions and specifications of the VEVOR 2L Portable Paint Pressure Pot.
8. Warranty and Support
For warranty information, technical support, or to inquire about replacement parts, please contact VEVOR customer service. Refer to the contact details provided with your purchase or visit the official VEVOR website for assistance.


