AL-WH01X24180-AP
Replacement Washing Machine Belt Instruction Manual
For GE GTW680BSJ7WS, GTW685BPL0DG, GTW685BPL1DG Washers
1. Introduction
This manual provides essential information for the installation, maintenance, and troubleshooting of your new Generic Replacement Washing Machine Belt. This belt is designed to be compatible with specific GE washing machine models, ensuring proper power transmission from the motor to the wash drum.
Please read this manual thoroughly before attempting any installation or maintenance to ensure safe and effective use of the product.
2. Safety Information
WARNING: Risk of Electric Shock and Injury.
- Always disconnect the washing machine from its power source (unplug it or turn off the circuit breaker) before attempting any inspection, repair, or installation.
- Wear appropriate personal protective equipment, such as gloves, to prevent injury from sharp edges or moving parts.
- If you are unsure about any step, it is highly recommended to consult a qualified appliance repair technician.
- Keep children and pets away from the work area.
3. Product Overview
This replacement belt is a crucial component for the proper functioning of your washing machine, transmitting rotational power from the motor to the agitator or drum.
Key Features:
- Part Number: WH01X24180CM
- Replaces Part Numbers: WH01X24180, 290D1101P002, AP6024314, PS11736832
- Dimensions: Approximately 23 inches long
- Ribs/Grooves: 5 Ribs, 4 Grooves (586J5)
- Compatible with GE Washer Models: GTW680BSJ7WS, GTW685BPL0DG, GTW685BPL1DG
Product Images:
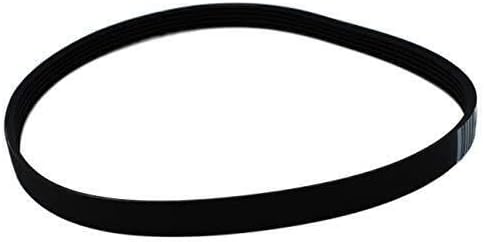
Figure 3.1: The replacement washing machine belt, a continuous black band designed with multiple ribs on its inner surface.

Figure 3.2: A detailed view of the belt's ribbed surface, highlighting the five distinct ribs and four grooves that ensure proper grip and power transmission.
4. Installation Guide
The following steps provide a general guide for replacing a washing machine belt. Specific procedures may vary slightly depending on your washing machine model. Always refer to your appliance's service manual for detailed instructions.
Tools You May Need:
- Screwdrivers (Phillips and flathead)
- Socket wrench set
- Pliers
- Work gloves
Installation Steps:
- Disconnect Power: Unplug the washing machine from the electrical outlet or turn off the circuit breaker supplying power to the appliance.
- Access the Belt Area: Depending on your washer model, you may need to remove the back panel, front panel, or tilt the machine to access the motor and drive system. This usually involves unscrewing several screws.
- Locate the Old Belt: Identify the existing drive belt connecting the motor pulley to the transmission pulley or drum pulley.
- Remove the Old Belt: Carefully pry the old belt off the pulleys. It may be tight and require some force. Inspect the old belt for signs of wear, cracking, or stretching.
- Install the New Belt: First, loop the new belt around the smaller motor pulley. Then, stretch the belt over the larger transmission/drum pulley. This often requires significant effort and careful manipulation to ensure it seats correctly in the grooves. Ensure the ribs of the belt align with the grooves on the pulleys.
- Verify Tension: Once installed, the belt should be taut but not excessively tight. It should have a slight amount of play.
- Reassemble the Washer: Reattach any panels or components that were removed. Ensure all screws are securely fastened.
- Restore Power and Test: Plug the washing machine back in or turn on the circuit breaker. Run a short cycle (e.g., spin cycle) to ensure the belt operates smoothly and quietly. Listen for any unusual noises.
5. Operation (Role of the Belt)
The washing machine belt is a passive component that facilitates the mechanical operation of the appliance. It transfers the rotational energy from the electric motor to the washing machine's transmission or drum assembly. When the motor spins, the belt grips the pulleys, causing the drum or agitator to move, which is essential for the washing and spinning cycles.
A properly installed and tensioned belt ensures efficient power transfer, leading to effective washing and drying performance. If the belt is worn or improperly installed, it can lead to reduced performance or complete failure of the wash cycle.
6. Maintenance
While the washing machine belt itself requires minimal maintenance, periodic inspection can help prolong its lifespan and prevent unexpected failures.
Inspection Guidelines:
- Visual Check: Approximately once a year, or if you notice performance issues, inspect the belt for signs of wear, such as cracks, fraying, glazing (shiny, smooth spots), or missing ribs.
- Tension Check: Ensure the belt maintains adequate tension. A loose belt can slip, while an overly tight belt can put undue stress on the motor and transmission bearings.
- Cleanliness: Keep the belt and pulleys free from lint, debris, or detergent residue, which can cause slippage or premature wear.
If significant wear or damage is observed, replace the belt promptly to avoid further damage to the washing machine.
7. Troubleshooting
Issues related to the washing machine belt often manifest as problems with the machine's ability to agitate or spin.
| Problem | Possible Cause | Solution |
|---|---|---|
| Washing machine not spinning or agitating | Broken or slipped belt | Inspect and replace the belt if broken. Reinstall if slipped. |
| Loud squealing or grinding noise during operation | Worn, loose, or misaligned belt | Check belt tension and alignment. Replace if worn or glazed. |
| Burning smell | Belt slipping due to wear or overload | Replace the belt. Avoid overloading the washer. |
| Intermittent operation | Belt partially slipped or stretched | Inspect belt for proper seating and tension. Replace if stretched. |
If troubleshooting steps do not resolve the issue, it is advisable to contact a professional appliance repair technician.
8. Specifications
| Attribute | Value |
|---|---|
| Brand | Generic |
| Model Name | Washing Machine Belt |
| Item Model Number | AL-WH01X24180-AP |
| Manufacturer Part Number | AL-WH01X24180M-AP |
| Product Dimensions | 4 x 3 x 1 inches (packaged) |
| Compatible Devices | Washing Machine (GE GTW680BSJ7WS, GTW685BPL0DG, GTW685BPL1DG) |
| Belt Type | 586J5, 5 Ribs, 4 Grooves |
| Belt Length | 23 inches |
9. Warranty and Support
This product is a generic replacement part and is not manufactured by or affiliated with the original equipment manufacturer (OEM). As such, it is not covered under any OEM manufacturer's warranty.
For any questions regarding this specific replacement belt, or for support with installation and troubleshooting, please contact the seller directly. The seller for this product is AIIYouNeedAppliencies.
Any use of OEM brand names or model designations for this product is made solely for purposes of demonstrating compatibility.