Cutefun CF-SZ02B
Cutefun SZ02B DIY Book Nook Kit User Manual
Model: CF-SZ02B
1. Introduction
Thank you for choosing the Cutefun SZ02B DIY Book Nook Kit. This kit allows you to construct a miniature dollhouse scene, specifically the 'Rose Detective Agency' theme, designed to fit seamlessly into your bookshelf. This product is a 3D wooden puzzle that requires assembly, offering an engaging and creative experience. The finished model includes intricate details and a functional lighting system.

Image 1.1: The fully assembled Cutefun SZ02B DIY Book Nook Kit, showcasing the detailed Rose Detective Agency scene from multiple angles, along with miniature accessory pieces.

Image 1.2: The assembled Book Nook Kit integrated into a bookshelf, demonstrating its intended use as a decorative insert among books.
2. Safety Instructions
Please read all instructions carefully before beginning assembly. This kit contains small parts that may pose a choking hazard. Keep all components out of reach of small children. Adult supervision is recommended during assembly, especially for users under the age of 14.
- Small Parts: This kit contains numerous small components. Ensure they are kept away from young children to prevent accidental ingestion.
- Sharp Edges: Some wooden pieces may have sharp edges. Handle with care during assembly.
- Adhesives: Liquid silicone glue is required for assembly (not included). Use in a well-ventilated area and follow the glue manufacturer's safety guidelines.
- Batteries: The lighting system requires 2 AAA batteries (not included). Ensure correct polarity when inserting batteries. Do not mix old and new batteries, or different types of batteries.
3. Package Contents
Your Cutefun SZ02B DIY Book Nook Kit includes all necessary wooden pieces, miniature accessories, LED lighting components, and a dust cover. A detailed, full-color English instruction manual is also provided to guide you through each step of the assembly process.
Note: The following items are not included in the kit and must be purchased separately:
- Liquid silicone glue
- 2 x AAA batteries
4. Setup and Assembly
The assembly process requires patience and attention to detail. Follow the provided English manual step-by-step for the best results. The estimated assembly time is approximately 6 hours, and the kit consists of 322 pieces.
4.1. Preparation
- Unpack all components and verify against the parts list in your instruction manual.
- Prepare a clean, well-lit workspace.
- Gather necessary tools: liquid silicone glue, 2 AAA batteries, and a pair of tweezers (recommended for small parts).
4.2. General Assembly Guidelines
The kit is designed with precision-cut wooden pieces that fit together. Some parts may require gentle force or the use of glue for secure attachment. Pay close attention to the orientation of each piece as indicated in the manual.
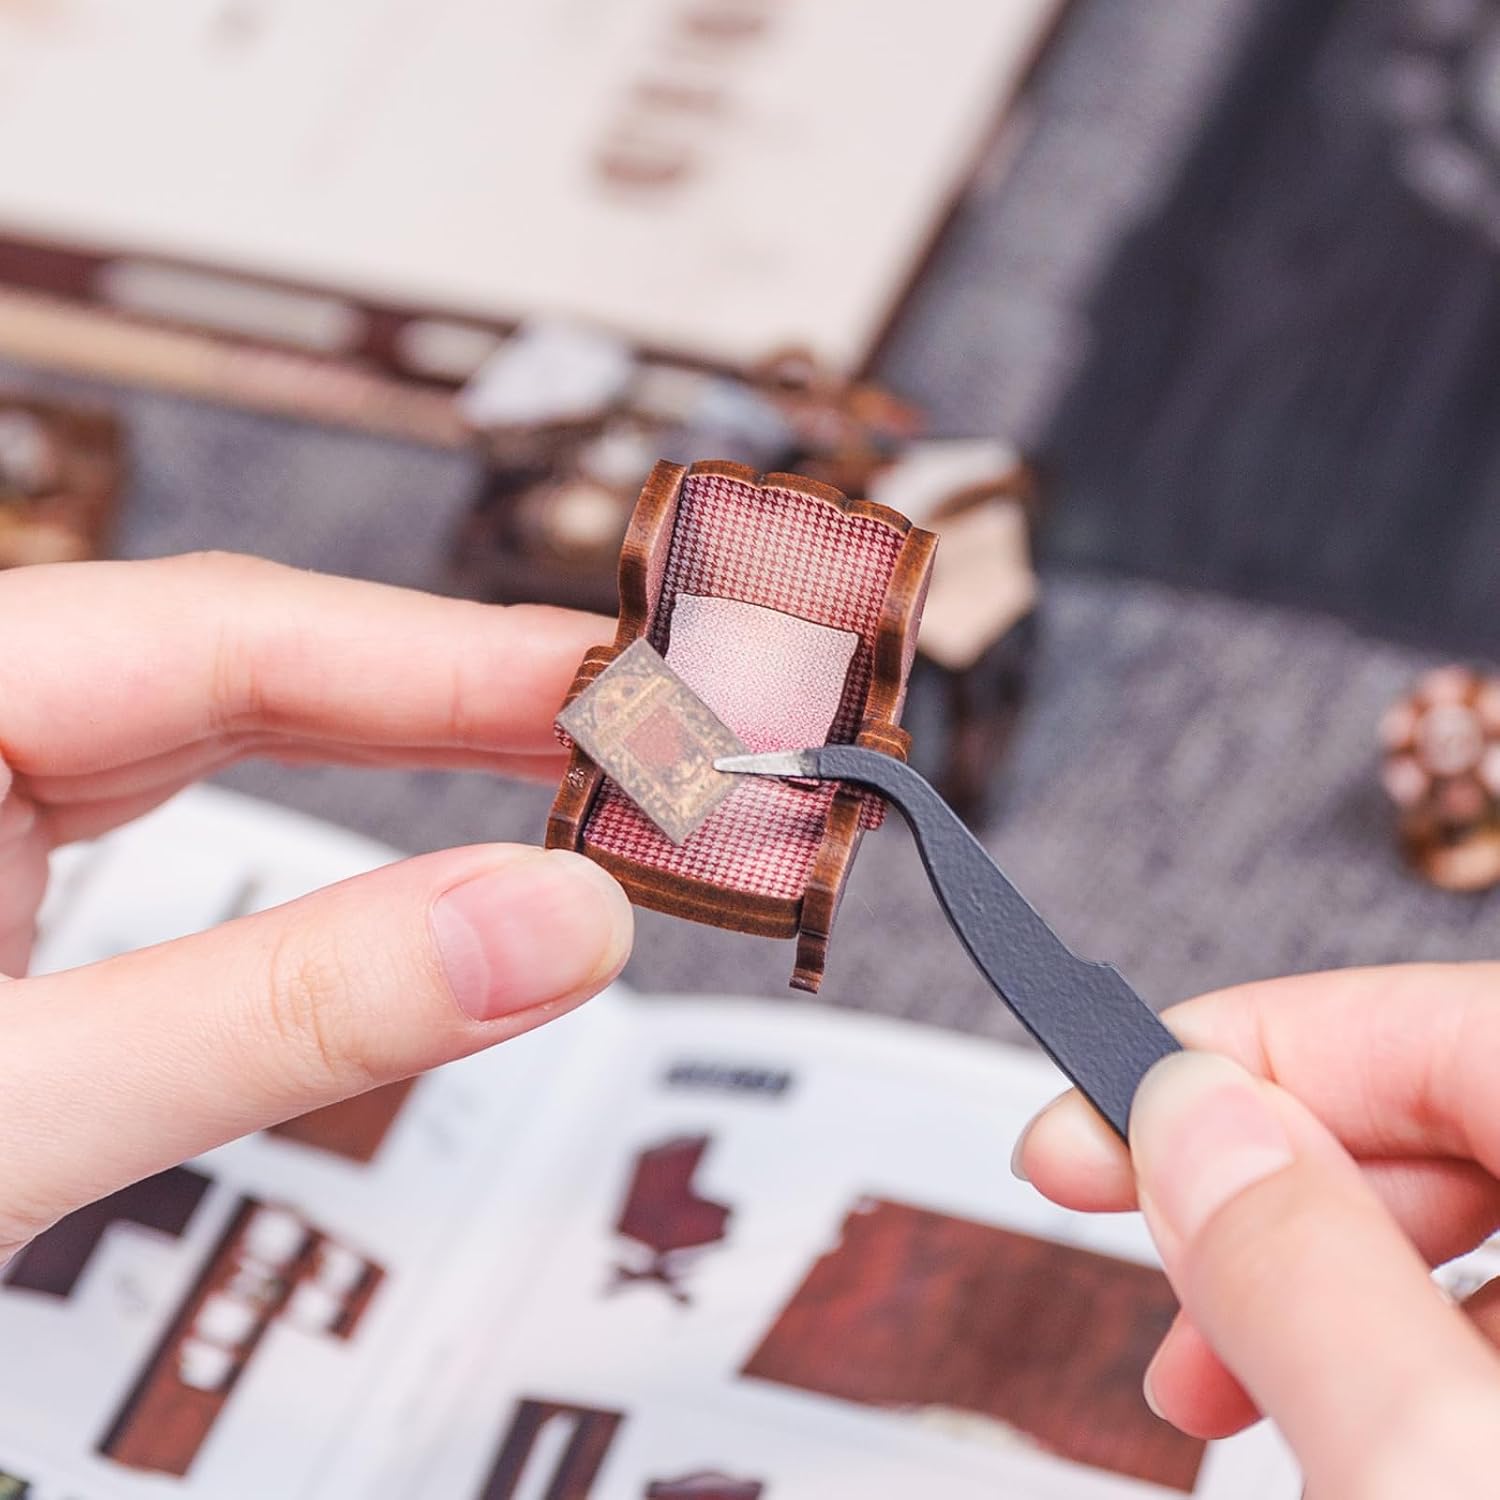
Image 4.1: Demonstrates the use of tweezers for precise placement of small miniature components, such as a book on a chair.
4.3. Dust Cover Assembly
The kit includes an upgraded dust cover designed to protect your finished book nook from dust and dirt while maintaining light transmission. Ensure protective films are removed from both sides of the dust cover pieces before assembly.

Image 4.2: The book nook with its clear dust cover being installed, highlighting the protective feature and the instruction to remove protective films.
4.4. Special Features: Secret Door Mechanism
This model includes an interactive 'Easter Egg' feature: a concealed door that slides open and closed. This mechanism is operated by a slide switch located on the back of the book nook. Follow the manual's specific instructions for assembling and operating this feature.

Image 4.3: An illustration detailing the hidden door mechanism within the book nook, showing its open and closed states, and how to activate it via a slide switch.
5. Operating Instructions
5.1. Installing Batteries
- Locate the battery compartment, typically on the top or back of the book nook.
- Insert 2 AAA batteries, ensuring correct polarity (+/-).
- Close the battery compartment securely.
5.2. Using the Touch Light Switch
The book nook features a touch-sensitive light switch for easy operation of the internal LED lights. Simply touch the designated area on the top of the book nook to turn the lights on or off.

Image 5.1: A hand demonstrating how to use the touch-sensitive light switch located on the top surface of the book nook.
6. Maintenance
- Cleaning: Use a soft, dry cloth to gently wipe the exterior and dust cover. For intricate areas, a soft brush or compressed air can be used to remove dust. Avoid using liquid cleaners directly on the wooden or electronic components.
- Dust Cover: The included dust cover helps protect the delicate interior. Ensure it is properly installed to minimize dust accumulation.
- Battery Replacement: If the lights dim or stop working, replace the AAA batteries.
7. Troubleshooting
7.1. Lights Not Working
- Check Batteries: Ensure 2 AAA batteries are correctly installed with proper polarity and are not depleted. Replace if necessary.
- Check Connections: Verify that all wiring connections for the LED lights are secure and properly connected according to the manual.
- Touch Switch: Ensure you are touching the correct area for the touch switch.
7.2. Missing or Damaged Parts
The kit is carefully checked before delivery to ensure all accessories are complete. If you find any missing or damaged parts upon opening the package, please contact customer support immediately with details and, if possible, photos of the issue.
7.3. Difficulty Assembling
This is a DIY kit that requires patience. If you encounter difficulties, refer to the detailed English manual. Online tutorials or community forums for similar DIY kits may also provide helpful tips. Ensure you are using the recommended liquid silicone glue.
8. Specifications
| Model Number | CF-SZ02B |
| Dimensions (L x W x H) | 18 cm x 11 cm x 23 cm (7.1 in x 4.3 in x 9.1 in) |
| Weight | 1.21 Kilograms |
| Main Material | Wood |
| Recommended Age | 14 years and up |
| Batteries Required | Yes (2 x AAA) |
| Batteries Included | No |
| Assembly Required | Yes |

Image 8.1: Visual representation of the product dimensions: 23cm (9.1in) height, 18cm (7.1in) length, and 11cm (4.3in) width.
9. Warranty and Support
Cutefun products are manufactured with attention to detail and quality. While specific warranty details are not provided, the manufacturer states that each kit is 100% checked before delivery to ensure completeness.
For any questions or assistance during the assembly process, or if you encounter issues such as missing or damaged parts, please contact Cutefun customer support. Refer to the contact information provided on the product packaging or the official Cutefun website for support channels.
Ask a question about this manual
Ask about setup, troubleshooting, compatibility, parts, safety, or missing instructions. Manuals+ will review the question and use this page’s manual context to help answer it.