1. Important Safety Information
Please read all instructions carefully before using this foot control pedal. Failure to follow these safety guidelines may result in electric shock, fire, or personal injury.
- Voltage Compatibility: This pedal is designed for 110/120V electrical systems. Ensure your sewing machine and power outlet match this voltage.
- Dry Environment: Use the pedal only in dry locations. Do not expose it to water or moisture.
- Inspect Before Use: Before each use, inspect the pedal and its cord for any signs of damage, fraying, or exposed wires. Do not use if damaged.
- Proper Connection: Always ensure the pedal is securely and fully plugged into the sewing machine's designated receptacle.
- Unplug When Not In Use: Disconnect the pedal from the sewing machine and the power outlet when not in use, during cleaning, or when changing accessories.
- Children and Pets: Keep the pedal out of reach of children and pets.
- Authorized Repairs: Do not attempt to open or repair the pedal yourself. Refer all servicing to qualified personnel.
2. Product Overview
This GENERIC Foot Control Pedal (Model 033870207) provides variable speed control for compatible sewing machines. It is designed to replace original foot pedals for a wide range of Janome (Newhome), Elna, and Necchi models.
2.1. Compatibility
This foot control pedal is compatible with the following sewing machine models:
- Janome (Newhome): 105, 106, 110, 1110DX, 1506, 1508, 1518, 18W LE, 2014, 2015, 2018, 2020, 2022, 2030, 203, 222, 234, 234D, 3015, 3023, 303, 352, 353, 354, 372, 373, 434, 434D, 4618LE, 534D, 614, 620, 625FA, 630, 640, 641, 642, 654, 656, 657, 661 Jem Gold 2, 691, 792, 802, 844, 900, 910, 920, 980, 990, Combi 10, DS3500, DX2022, JA1502, JA1508, JA1518, Jem Gold 660, L344, L352, L372, L373, L393, ML3023, MS3015, MW3018, MyExcel 23L, MyLock 134D, MyLock 334D, MyLock 634D, Schoolmate S-3015, SL2022, SR2000, SR2100, SW2018, SW2018E.
- Necchi: 521, 522, 523, 6010, 6011, 6015, 6030.
- Elna: 3002, 3004, 3006.
Always verify the connector type on your sewing machine matches the pedal's connector before purchase and use. This pedal features a three-vertical-blade style plug.
2.2. Product Components
Figure 1: Top view of the GENERIC Foot Control Pedal. This image shows the main body of the pedal, designed for foot operation.
Figure 2: Side view of the GENERIC Foot Control Pedal, highlighting the power cord and connector. The connector is a three-vertical-blade type.
3. Setup and Installation
Follow these steps to correctly install your new foot control pedal:
- Unpack the Pedal: Carefully remove the foot control pedal from its packaging. Retain packaging for future storage or transport.
- Inspect the Pedal: Before connecting, visually inspect the pedal and its cord for any damage. Ensure the connector pins are straight and clean.
- Locate Machine Receptacle: Identify the foot control pedal receptacle on your sewing machine. This is typically located on the front or side of the machine, near the power input.
- Connect the Pedal: Align the pedal's connector with the receptacle on your sewing machine. Gently push the connector firmly into place until it is fully seated. Do not force the connection.
- Connect to Power: Plug the sewing machine's power cord (which now includes the pedal connection) into a standard 110/120V electrical outlet.
- Test Functionality: Turn on your sewing machine and gently press the foot pedal to ensure it controls the machine's speed smoothly.
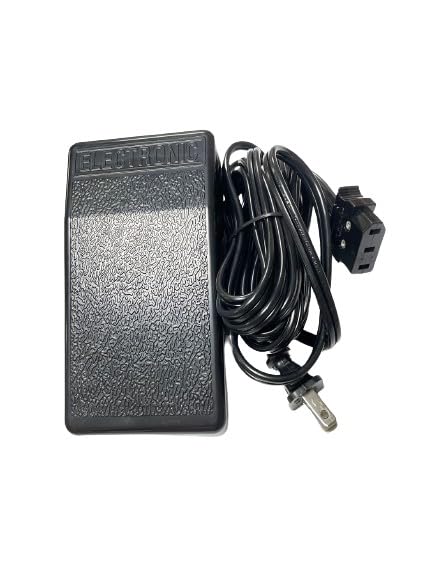
Figure 3: Overall view of the GENERIC Foot Control Pedal. This image provides a general perspective of the product, ready for connection.
4. Operating Instructions
The foot control pedal allows you to regulate the sewing machine's speed with your foot, freeing your hands to guide the fabric.
- Placement: Place the foot pedal on the floor in a comfortable position where you can easily operate it with your foot.
- Starting the Machine: Gently press down on the pedal with your foot. The machine will start sewing at a slow speed.
- Increasing Speed: Apply more pressure to the pedal to increase the sewing speed.
- Decreasing Speed: Release pressure on the pedal to decrease the sewing speed.
- Stopping the Machine: Fully release the pedal to stop the machine.
Practice using the pedal to achieve smooth and consistent speed control before beginning your sewing projects.
5. Maintenance and Care
Proper care will extend the life of your foot control pedal.
- Cleaning: Wipe the pedal surface with a soft, dry cloth. Do not use liquid cleaners or immerse the pedal in water.
- Cord Care: Avoid kinking, twisting, or placing heavy objects on the power cord. Store the cord neatly when not in use.
- Storage: Store the pedal in a dry, dust-free environment, away from extreme temperatures.
- Regular Inspection: Periodically check the pedal and cord for any signs of wear or damage, especially exposed wires.
6. Troubleshooting
If you encounter issues with your foot control pedal, refer to the following common problems and solutions:
| Problem | Possible Cause | Solution |
|---|---|---|
| Pedal does not respond or machine does not start. |
|
|
| Machine runs at full speed only, no variable control. |
|
|
| Intermittent operation or machine stops unexpectedly. |
|
|
If troubleshooting steps do not resolve the issue, or if you suspect electrical damage, discontinue use and contact customer support or a qualified technician.
7. Specifications
- Model: 033870207
- Brand: GENERIC
- Voltage: 110/120V
- Product Dimensions: 6.5 x 3.14 x 1.95 inches
- Item Weight: 9.8 ounces
- Connector Type: Three-vertical-blade style
- Manufacturer: SEW KING
8. Warranty and Support
For warranty information or technical support, please refer to the seller's policy or contact the manufacturer directly. Keep your purchase receipt as proof of purchase.
Manufacturer: SEW KING
For further assistance, please contact your point of purchase.