1. Introduction
This manual provides detailed instructions for the installation, setup, operation, and maintenance of your HEIXSMT HT196 Fingerprint Door Lock. Please read this manual thoroughly before installation and use to ensure proper function and safety.
The HEIXSMT HT196 offers multiple convenient unlocking methods, including fingerprint, passcode, and traditional mechanical keys, providing enhanced security and ease of access for your home or office.
Safety Information
- Do not expose the lock to direct water or corrosive substances.
- Ensure correct battery polarity during installation.
- Keep mechanical keys in a safe location outside the property.
- Regularly check battery levels and replace them when indicated by the low battery warning.
2. Package Contents
Verify that all components are present before beginning installation:
- 1 x HEIXSMT HT196 Fingerprint Door Lock Unit
- 2 x Door Handles (Front and Rear)
- 1 x Deadbolt Latch
- 1 x Mounting Kit (Screws, Spindles, etc.)
- 2 x Mechanical Keys
- 1 x User Manual

Image: The HEIXSMT HT196 Fingerprint Door Lock, showcasing the complete set of components including the main lock unit, handles, mechanical keys, and smart lock tags.
3. Specifications
| Feature | Specification |
|---|---|
| Model | HT196 |
| Color | Silver |
| Material | Zinc Alloy |
| Unlocking Methods | Fingerprint, Passcode, Mechanical Key |
| Fingerprint Capacity | Up to 50 groups |
| Passcode Capacity | Up to 100 groups |
| Applicable Door Thickness | 3.5 cm to 5.5 cm (1.38 to 2.17 inches) |
| Backset Compatibility | 60 mm (2-3/8 inches) or 70 mm (2-3/4 inches) |
| Operating Temperature | -25℃ to 60℃ (-13℉ to 140℉) |
| Power Supply | 4 x AAA Batteries (not included) |
| Emergency Power | USB Interface (for temporary power only) |
| Dimensions (L x W x H) | 21.79 x 17.78 x 17.78 cm (8.58 x 7 x 7 inches) |
| Weight | 798 grams (1.76 lbs) |
4. Installation
4.1 Pre-Installation Check
Before starting, ensure your door meets the following requirements:
- Door Thickness: 3.5 cm to 5.5 cm (1.38 to 2.17 inches).
- Backset: Adjustable for 60 mm (2-3/8 inches) or 70 mm (2-3/4 inches).
- Cross Bore Diameter: Standard 54 mm (2-1/8 inches).

Image: A detailed diagram illustrating the necessary door measurements and lock dimensions for proper installation, including backset and door thickness compatibility.
4.2 Step-by-Step Installation Guide
A small screwdriver is typically the only tool required for installation. Follow the instructions provided in the included mounting kit for detailed steps. The lock is designed for quick and easy installation.
- Prepare the door: Ensure the door is properly drilled according to the template (if provided) and meets the specifications.
- Install the latch: Insert the deadbolt latch into the door edge and secure it with screws. Adjust the backset if necessary.
- Install the exterior assembly: Place the exterior handle assembly onto the door, ensuring the spindle passes through the latch.
- Install the interior assembly: Connect the interior handle assembly to the exterior assembly, aligning the mounting posts and spindle. Secure with screws.
- Install batteries: Insert 4 AAA batteries into the interior unit, observing correct polarity.
- Test the lock: After installation, test all unlocking methods (mechanical key, initial passcode if any) to ensure proper function before closing the door.
4.3 Door Handing
The HEIXSMT HT196 lock is suitable for both left-handed and right-handed doors. The handles can be reversed during installation to match your door's orientation. Refer to the mounting kit instructions for specific steps on adjusting handle direction.

Image: This image demonstrates the lock's adaptability for both left-handed and right-handed door installations, alongside an illustration of its automatic locking feature.
5. Setup and Programming
5.1 Initial Setup
Upon first power-up, the lock will be in factory default mode. You will need to set an administrator fingerprint or passcode first.
5.2 Adding Fingerprints
The lock can store up to 50 unique fingerprints. Follow these steps to add a new fingerprint:
- Access programming mode (refer to your specific lock's programming sequence, usually involving the administrator fingerprint/passcode).
- Select the 'Add Fingerprint' option.
- Place your finger on the sensor multiple times as prompted until successfully registered.
- Repeat for additional fingerprints.

Image: This graphic highlights the lock's capability to manage up to 100 user groups, accommodating various access methods such as fingerprints, user codes, and user fobs.
5.3 Adding Passcodes
The lock supports up to 100 unique passcodes. To add a new passcode:
- Enter programming mode.
- Select the 'Add Passcode' option.
- Enter your desired passcode (typically 6-8 digits) followed by the confirmation key.
- Re-enter the passcode for verification.
6. Operating Instructions
6.1 Unlocking Methods
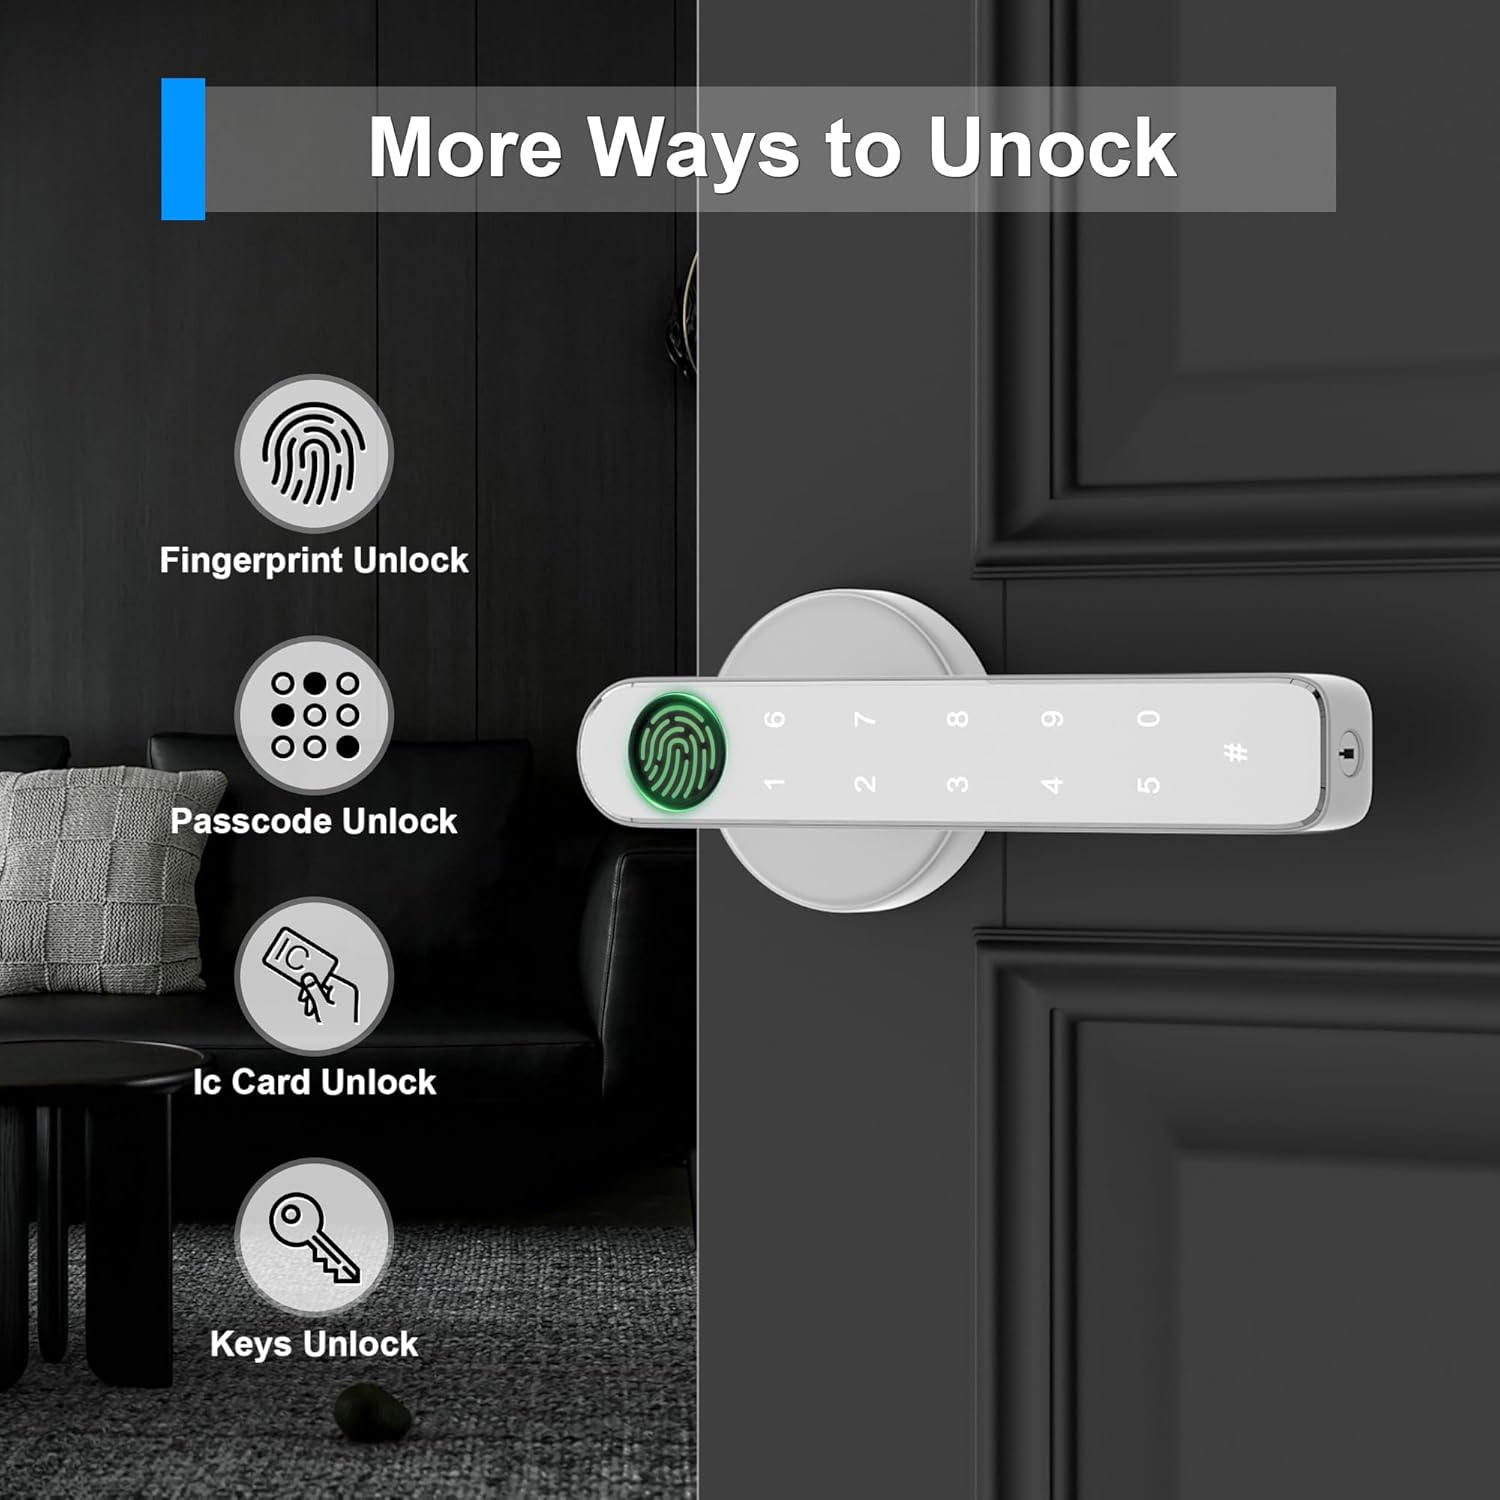
Image: This graphic displays the four primary methods for unlocking the HEIXSMT HT196 door lock: fingerprint recognition, passcode entry, IC card access, and traditional mechanical keys.
Fingerprint Unlock
Place your registered finger firmly on the fingerprint sensor. The lock will unlock within approximately 1 second if the fingerprint is recognized. The recognition rate is up to 98% with 508 DPI resolution.

Image: A visual representation of using the fingerprint sensor on the HEIXSMT HT196 lock, highlighting its quick recognition time and high success rate for up to 100 registered fingerprints.
Passcode Unlock (Anti-Peeping Feature)
To unlock using a passcode, enter your registered passcode followed by the '#' key. For enhanced security, you can enter random digits before and after your actual passcode. This 'anti-peeping' feature prevents others from guessing your code by observing your input.

Image: An illustration demonstrating the anti-peeping passcode function, where users can input additional random numbers before and after their actual code to obscure it from onlookers.
Mechanical Key Unlock
In case of emergency or battery depletion, insert the mechanical key into the keyhole and turn to unlock the door. Always keep a mechanical key accessible outside the property.
6.2 Automatic/Manual Locking
The lock supports both automatic and manual locking modes. You can configure the lock to automatically engage after a set period or require manual locking. Refer to the programming instructions for your specific model to switch between these modes.
6.3 Passage Mode
A passage mode can be activated to keep the door unlocked for continuous access, which is convenient for high-traffic periods or for children and the elderly. Deactivate this mode when normal security is required.
6.4 Emergency Power
If the batteries are completely depleted, the lock features an emergency USB interface. Connect a portable power bank to this interface to temporarily power the lock and gain access. This interface is for emergency power only and does not charge the internal AAA batteries.
7. Maintenance
7.1 Battery Replacement
The lock requires 4 AAA batteries (not included). Depending on usage, batteries can last 8 to 10 months. The lock will provide a low battery reminder (red light flashes three times upon unlocking) when batteries need replacement. Replace all four batteries simultaneously with new, high-quality alkaline batteries.
7.2 Cleaning
Clean the lock's surface and fingerprint sensor with a soft, dry cloth. Avoid using abrasive cleaners, solvents, or harsh chemicals, as these can damage the finish and electronic components.
8. Troubleshooting
- Lock not responding: Check battery levels. If batteries are low or dead, use the emergency USB power or mechanical key.
- Fingerprint not recognized: Ensure your finger is clean and dry. Try re-registering your fingerprint if the issue persists.
- Passcode not working: Verify the correct passcode is entered. Ensure the '#' key is pressed after the passcode.
- Lock is loose: Check all mounting screws and tighten them if necessary.
- Door not locking/unlocking smoothly: Ensure the latch is properly aligned with the strike plate on the door frame. Check for any obstructions.
9. Warranty and Support
HEIXSMT provides customer support for its products. If you encounter any issues or have questions regarding your HT196 Fingerprint Door Lock, please contact our customer service. We aim to respond within 24 hours and offer technical support.
Please refer to your purchase documentation for specific warranty terms and conditions, including any return or refund policies.