
1. Introduction
Thank you for choosing the ROARBATT 3000W Power Inverter. This device is designed to convert 12V DC power from your vehicle's battery or other 12V DC power sources into 110V/120V AC household power, allowing you to operate various electronic devices and appliances. With a continuous output of 3000W and a peak power of 6000W, it is suitable for outdoor activities, emergencies, RVs, boats, and more. This manual provides essential information for safe operation, installation, and maintenance of your inverter.
2. Safety Information
Please read all safety warnings and instructions carefully before using the inverter. Failure to follow these instructions may result in electric shock, fire, or serious injury.
- Ventilation: Ensure adequate ventilation around the inverter. Do not block cooling vents.
- Dry Environment: Do not expose the inverter to water, rain, or spray. Operate in a dry environment.
- Proper Connection: Always connect the inverter to a 12V DC power source with correct polarity. Reverse polarity can damage the inverter and void the warranty.
- Overloading: Do not exceed the inverter's rated continuous power output. Overloading can cause damage to the inverter and connected devices.
- Children and Pets: Keep the inverter out of reach of children and pets.
- Heat: The inverter generates heat during operation. Do not place it near flammable materials or in enclosed spaces.
- Maintenance: Only qualified personnel should perform maintenance or repairs.
3. Product Overview
The ROARBATT 3000W Power Inverter features a robust design with essential components for efficient power conversion.

Figure 3.1: Overall view of the ROARBATT 3000W Power Inverter and included battery cables.
3.1 Front Panel Features
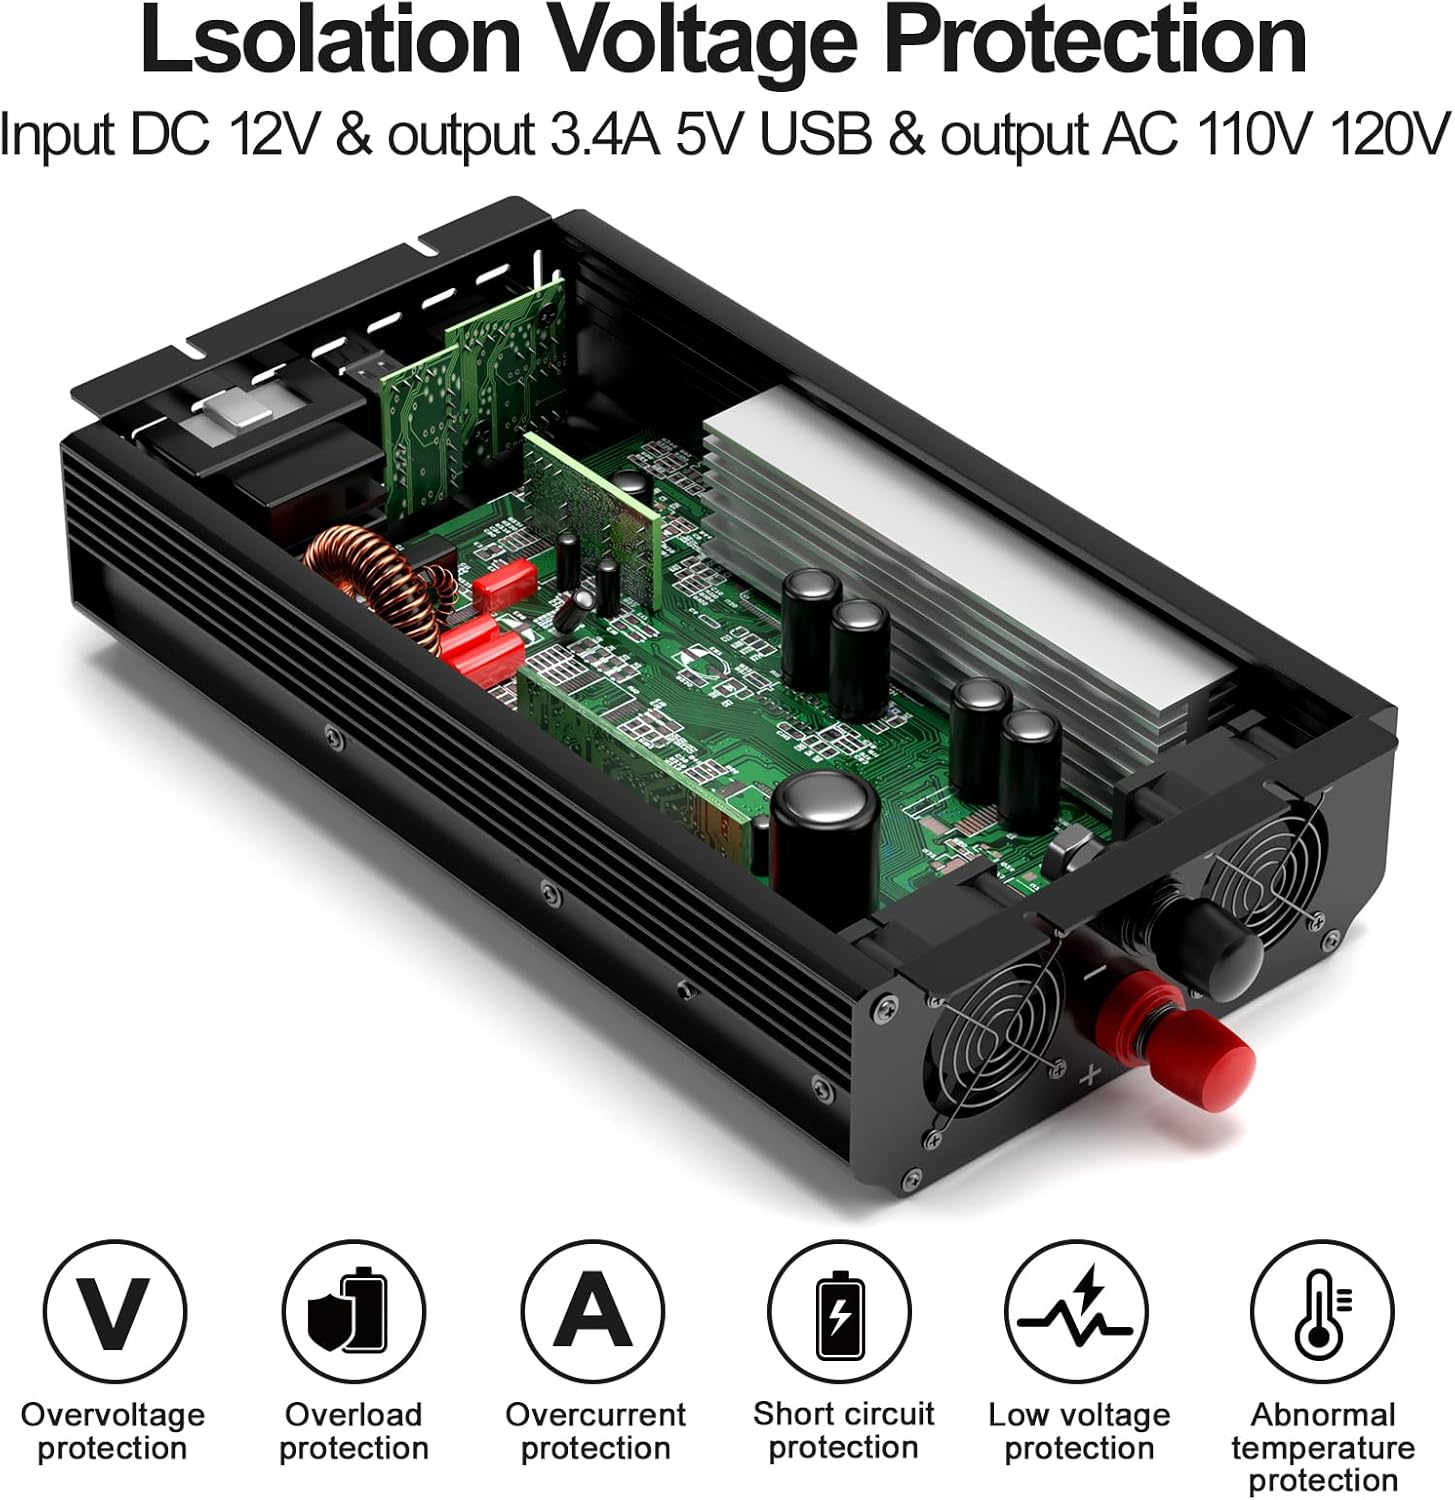
Figure 3.2: Detailed view of the inverter's front panel.
- LCD Display: Shows input voltage, output voltage, and protection indicators.
- AC Outlets (x2): Standard 110V/120V AC outlets for connecting appliances.
- USB Port (2.4A): For charging USB-powered devices like smartphones and tablets.
- Power Switch: ON/OFF control for the inverter.
3.2 Rear Panel Features

Figure 3.3: Detailed view of the inverter's rear panel.
- Cooling Fan: Built-in fan to dissipate heat and maintain optimal operating temperature.
- DC Input Terminals: Red (+) and Black (-) terminals for connecting to the 12V DC battery.
4. Setup and Installation
Proper setup is crucial for the safe and efficient operation of your inverter.
- Choose a Location: Select a cool, dry, and well-ventilated area for the inverter. Avoid direct sunlight, heat sources, and moisture. Ensure there is enough space around the inverter for air circulation, especially around the cooling fan.
- Prepare the Battery: Ensure your 12V DC battery is fully charged and in good condition.
- Connect Battery Cables:
- Connect the red battery cable to the positive (+) terminal of the inverter and the positive (+) terminal of the battery.
- Connect the black battery cable to the negative (-) terminal of the inverter and the negative (-) terminal of the battery.
Important: Ensure connections are tight and secure to prevent loose connections, which can cause overheating. Always connect the inverter to the battery before connecting any AC appliances.
- Initial Check: Once connected, the LCD display should illuminate, showing the input voltage.

Figure 4.1: Example setup showing the inverter connected and powering devices.
5. Operating Instructions
Follow these steps to operate your ROARBATT power inverter.
- Turn On the Inverter: Press the ON/OFF power switch on the front panel. The LCD display will show the input and output voltages. The power indicator light will change from red (protection) to green (working).
- Connect AC Appliances: Plug your 110V/120V AC appliances into the AC outlets on the front panel. Ensure the total power consumption of your appliances does not exceed the inverter's continuous power rating (3000W).
- Charge USB Devices: Plug your USB charging cable into the 2.4A USB port to charge compatible devices.
- Monitor LCD Display: The LCD display provides real-time information:
- Input Voltage: Displays the current DC voltage from your battery.
- Output Voltage: Displays the AC output voltage.
- Protection Indicators: Displays error codes if a protection mode is activated (see Troubleshooting section).
- Turn Off the Inverter: When finished, first disconnect all AC appliances and USB devices, then press the ON/OFF power switch to turn off the inverter. Finally, disconnect the battery cables if storing the inverter.

Figure 5.1: Inverter with 2 AC outlets and 1 USB charging port in use.
5.1 Wide Application

Figure 5.2: The inverter is compatible with various electronic devices and can be used for camping, outdoor office, and recreation.
6. Maintenance
Regular maintenance ensures the longevity and optimal performance of your inverter.
- Cleaning: Keep the inverter clean and free from dust and debris. Use a dry cloth to wipe the exterior. Do not use liquid cleaners.
- Ventilation: Periodically check that the cooling vents are not obstructed. Ensure the cooling fan operates freely.
- Connections: Regularly inspect battery cable connections for tightness and corrosion. Clean terminals if necessary.
- Storage: If storing the inverter for an extended period, disconnect it from the battery and store it in a cool, dry place.
7. Troubleshooting
This section addresses common issues you might encounter with your inverter. Refer to the LCD display for specific error codes.

Figure 7.1: LCD display indicating protection modes and error codes.
| Problem | LCD Code / Indication | Possible Cause | Solution |
|---|---|---|---|
| No Power Output | No display / Red light | Loose battery connection, low battery voltage, inverter OFF. | Check battery cables for secure connection. Recharge battery. Turn inverter ON. |
| Low Output Voltage | LO | Input low voltage protection activated. | Recharge or replace battery. Reduce load. |
| Overload Protection | OL | Connected appliance power exceeds inverter rating. | Disconnect overloaded appliance. Use appliances within inverter's capacity. |
| Overheat Protection | OH | Inverter is too hot. Blocked ventilation. | Allow inverter to cool down. Ensure proper ventilation. Clear any obstructions from fan/vents. |
| Input Over Voltage | HI | Input voltage is too high. | Verify battery voltage is 12V. Disconnect from power source if voltage is too high. |
| Short Circuit | Protection activated | Short circuit in output or connected appliance. | Disconnect all appliances. Check for faulty wiring or damaged appliances. |
8. Specifications
Technical specifications for the ROARBATT 3000W Power Inverter.
| Feature | Specification |
|---|---|
| Continuous Power | 3000W |
| Peak Power | 6000W |
| DC Input Voltage | 12V DC (9.5-16V DC) |
| AC Output Voltage | 110V/120V AC ±10% |
| Output Waveform | Modified Sine Wave |
| USB Output | 5V DC, 2.4A |
| Efficiency | >90% |
| No-Load Current Draw | 1±0.2A |
| Protection Features | Over Voltage, Low Voltage, Overload, Short Circuit, Over Heat |
| Cooling | Built-in Cooling Fan |
| Dimensions (L x W x H) | 12.3 x 7 x 2.9 inches (approx.) |
| Item Weight | 9.79 pounds |
| Operating Temperature | 0°C to 40°C (32°F to 104°F) |
| Storage Temperature | -10°C to 45°C (14°F to 113°F) |
9. Warranty and Support
ROARBATT is committed to providing high-quality products and customer satisfaction. Your ROARBATT 3000W Power Inverter comes with dedicated customer service support.
- Customer Service: For any questions, concerns, or technical assistance, please contact ROARBATT customer service. We offer 24-hour customer service support to ensure your satisfaction.
- Warranty: Please refer to the product packaging or contact customer service for specific warranty details.