Dancing Wings Hobby E3301
Instruction Manual
Product: Radio Control Airplane 800mm PP Foam Biplane S.E.5a
Model: E3301
Brand: Dancing Wings Hobby
Introduction
Thank you for choosing the Dancing Wings Hobby E3301 Radio Control Airplane kit. This manual provides detailed instructions for the assembly, setup, operation, and maintenance of your 800mm PP Foam Biplane S.E.5a. Please read this manual thoroughly before beginning assembly or operation to ensure safe and correct usage.
The E3301 is a build-it-yourself kit designed for adult enthusiasts, offering a rewarding construction experience and an enjoyable flying model.
Safety Information
WARNING: This product is not a toy. It is an advanced hobby model that requires careful assembly and operation. It is NOT suitable for children under 16 years of age due to small parts, sharp tools required for assembly, and the inherent risks associated with operating remote-controlled aircraft.
- Always operate the model in open areas, away from people, buildings, and other obstacles.
- Ensure all components are securely fastened before each flight.
- Always disconnect the battery when the model is not in use or during transport.
- Use appropriate safety gear, such as eye protection, during assembly and maintenance.
- Familiarize yourself with local regulations regarding RC aircraft operation.
What's in the Box
The E3301 kit includes the following components:
- PP Foam Biplane S.E.5a airframe parts (wings, fuselage, tail sections)
- Landing gear components
- Various small parts and hardware for assembly
- Instruction Manual (this document)

Image: Unassembled kit components, including foam airframe parts, landing gear, and various small hardware pieces, laid out on a surface.

Image: A closer view of the unassembled kit parts, highlighting the foam sections for the wings, fuselage, and tail, along with connecting rods and other small components.
Specifications
| Feature | Detail |
|---|---|
| Wingspan | 800mm (31.5 inches) |
| Length | 670mm (26.4 inches) |
| Flying Weight | Approximately 520g |
| Material | PP Foam |
| Recommended Age | 16 years and up |
| Product Dimensions (Box) | 2.4 x 0.6 x 0.4 inches |
| Item Weight (Boxed) | 1 pound |
Suggested Power System (Not included in E3301 kit):
- Motor: MM2212 1100KV
- ESC: 20A
- Servo: 3.7g * 4pcs
- Propeller: 8 inch
- Battery: 3S 1300-1500mAh LiPo

Image: Visual representation of the aircraft's key specifications and recommended electronic components.
Assembly Instructions
This section outlines the general steps for assembling your E3301 biplane. Detailed, step-by-step instructions with diagrams are typically provided within the physical kit. Refer to those specific instructions for precise guidance.
Required Tools (Not Included):
- Hobby knife or sharp blade
- Adhesive suitable for PP foam (e.g., foam-safe CA glue, UHU Por)
- Small screwdrivers
- Pliers
- Measuring tape or ruler
General Assembly Steps:
- Unpack and Inspect: Carefully unpack all components and verify against the parts list provided in your kit's specific manual. Inspect for any damage.
- Prepare Surfaces: Ensure all foam surfaces are clean and free of dust before applying adhesive.
- Fuselage Assembly: Assemble the main fuselage sections, ensuring proper alignment.
- Wing Assembly: Assemble the upper and lower wings. Attach any necessary spars or reinforcements.
- Tail Section Attachment: Securely attach the horizontal and vertical stabilizers to the fuselage.
- Landing Gear Installation: Install the main landing gear and tail wheel assembly.
- Strut and Cabane Installation: Attach the interplane struts and cabane struts that connect the wings and fuselage. Ensure these are rigid and correctly aligned for structural integrity.
- Control Surface Hinges: Install hinges for ailerons, elevator, and rudder. Ensure free movement.
- Electronics Installation (if applicable): Install the motor, ESC, servos, and receiver according to the kit's instructions and the suggested power system. Ensure all wiring is neat and secure.
- Propeller Attachment: Securely attach the propeller to the motor shaft.
- Final Checks: Before proceeding to setup, perform a thorough visual inspection of all joints, connections, and moving parts.

Image: The E3301 kit, emphasizing that it is a build-it-yourself model.
Setup
After assembly, proper setup is crucial for safe and successful flight.
- Radio System Binding: Bind your receiver to your transmitter according to the instructions provided with your radio system.
- Control Surface Centering: With the radio system on and connected, ensure all servos are centered and control surfaces (ailerons, elevator, rudder) are in their neutral positions. Adjust linkages as necessary.
- Control Throws: Set the correct control throws (the amount of movement for each control surface) as recommended by the kit's specific manual or general RC biplane guidelines. Start with lower throws for initial flights.
- Center of Gravity (CG): This is critical. Locate the recommended CG point in your kit's manual. Balance the aircraft at this point using your fingers or a dedicated CG stand. Adjust battery placement or add small weights if necessary to achieve the correct balance. An incorrect CG can make the aircraft unflyable.
- Motor Direction and Propeller Balance: Verify the motor spins in the correct direction for thrust. Ensure the propeller is balanced to reduce vibrations.
- Pre-Flight Check: Before every flight, perform a thorough pre-flight check:
- Check battery charge levels (transmitter and flight battery).
- Verify all control surfaces respond correctly to transmitter inputs and move in the correct direction.
- Inspect for any loose connections, cracks, or damage.
- Ensure propeller is secure.
Operating Instructions (Flying)
Operating an RC airplane requires practice and a suitable flying environment. If you are new to RC flying, seek guidance from an experienced pilot or join a local RC club.
Flying Environment:
- Choose a large, open field free from obstacles, power lines, and people.
- Avoid flying in windy conditions, especially for initial flights.
- Ensure you have clear line of sight to the aircraft at all times.
Take-off:
- Place the aircraft on a smooth surface, facing into the wind.
- Gradually apply throttle while maintaining directional control with the rudder.
- Once sufficient speed is gained, gently apply up elevator to lift off.
Flight:
- Maintain a safe altitude and distance.
- Practice gentle turns and straight passes.
- Monitor battery voltage if your radio system provides telemetry.
Landing:
- Reduce throttle and approach the landing area into the wind.
- Control descent with elevator and throttle.
- Aim for a gentle touchdown on the main landing gear, then allow the tail to settle.
For a visual demonstration of the S.E.5a in flight, you may refer to the following video: https://www.youtube.com/watch?v=8rxLD3Ahh5U

Image: The completed E3301 S.E.5a biplane, ready for flight.

Image: The assembled biplane on a paved surface, showing its front profile and landing gear.
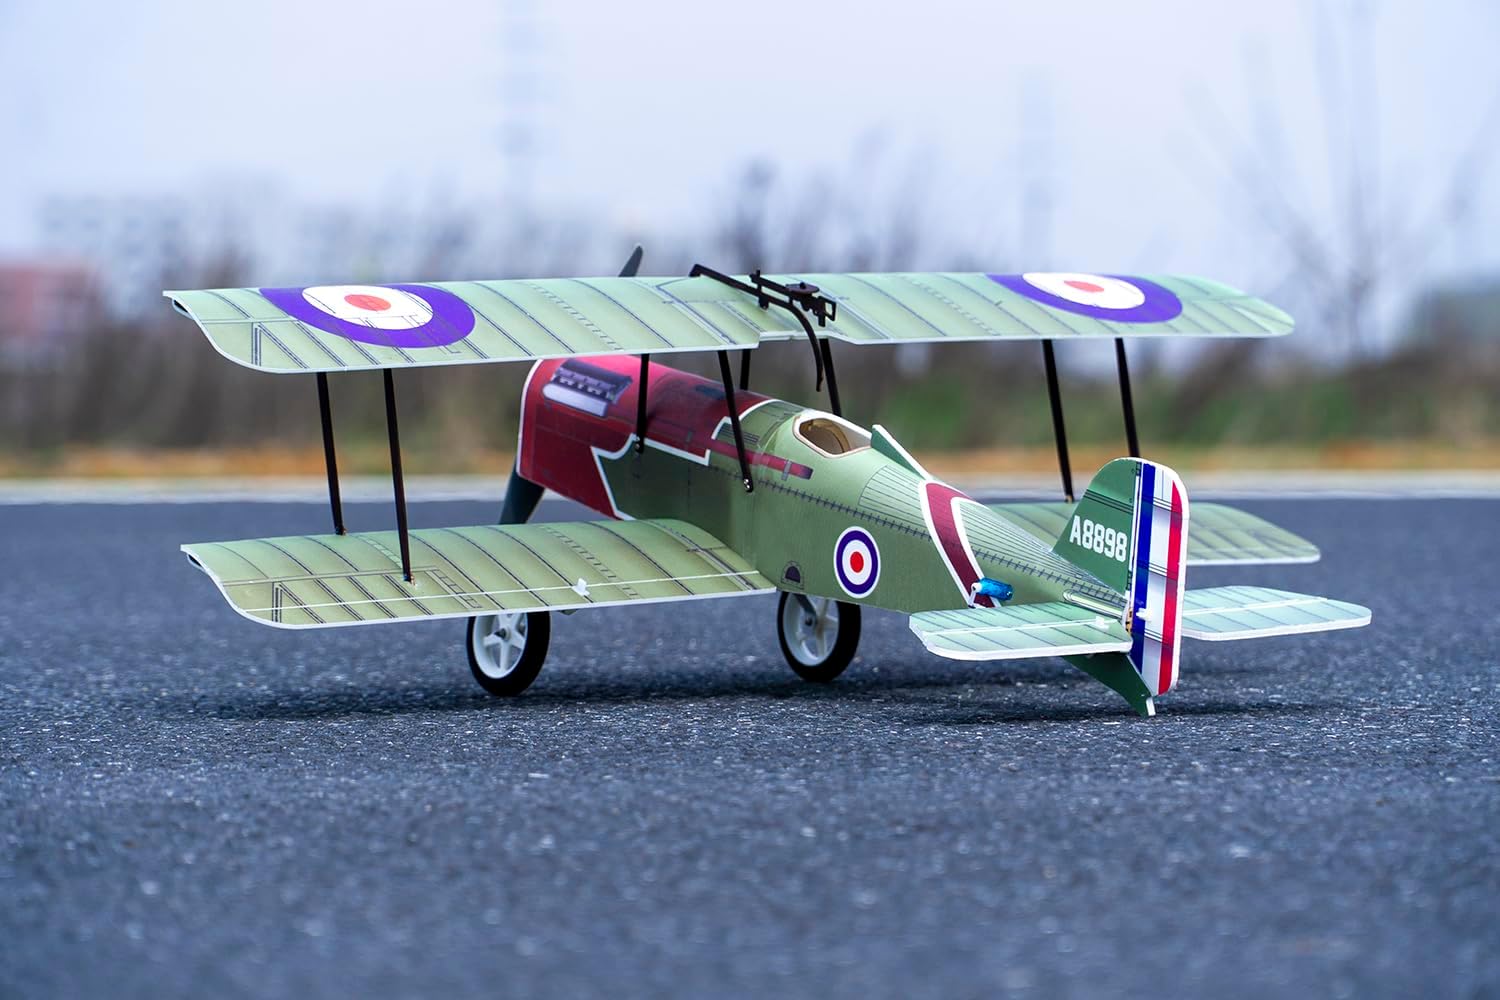
Image: The assembled biplane on a paved surface, showing its rear profile and tail section.
Maintenance
Regular maintenance will extend the life of your RC airplane and ensure safe operation.
- Post-Flight Inspection: After each flight, inspect the airframe for any cracks, dents, or loose components. Check control surface hinges and linkages.
- Cleanliness: Keep the aircraft clean. Remove any dirt, grass, or debris from the airframe, motor, and propeller.
- Propeller Check: Regularly inspect the propeller for nicks, cracks, or bends. Replace damaged propellers immediately as they can cause severe vibrations and reduce performance.
- Battery Care: Follow the manufacturer's instructions for charging, discharging, and storing LiPo batteries. Never overcharge or over-discharge. Store in a fire-safe bag.
- Motor and ESC: Ensure the motor spins freely and the ESC connections are secure. Avoid overheating.
- Storage: Store the model in a cool, dry place, away from direct sunlight and extreme temperatures.
Troubleshooting
This section addresses common issues you might encounter.
| Problem | Possible Cause | Solution |
|---|---|---|
| Aircraft does not respond to controls. |
|
|
| Motor not spinning or spinning weakly. |
|
|
| Aircraft flies erratically or is difficult to control. |
|
|
Warranty and Support
As this is a hobby kit, specific warranty details may vary. Please refer to the documentation included with your purchase or contact the retailer for information regarding returns or defects in manufacturing.
For technical support or further assistance with assembly and operation, please visit the official Dancing Wings Hobby website or contact their customer service channels. Always provide your model number (E3301) when seeking support.
Manufacturer: DW Hobby
Ask a question about this manual
Ask about setup, troubleshooting, compatibility, parts, safety, or missing instructions. Manuals+ will review the question and use this page’s manual context to help answer it.