
podofo 2+32G Double Din 7 Inch Car Stereo
Podofo 2+32G Double Din 7 Inch Car Stereo User Manual
Model: 2+32G Double Din 7 Inch Car Stereo
Introduction
This manual provides detailed instructions for the installation, operation, and maintenance of your Podofo 2+32G Double Din 7 Inch Car Stereo. This advanced head unit features Wireless Apple CarPlay, Android Auto, GPS navigation, Bluetooth connectivity, Mirror Link, and more, designed to enhance your in-car entertainment and navigation experience. Please read this manual thoroughly before using the product to ensure proper operation and to prevent damage.

Image: The Podofo 7-inch car stereo unit, showcasing its display with various application icons and a map. Below the unit, a GPS antenna, RCA cables, and a smartphone displaying Carplay/Android Auto Mirror Link are shown, indicating the product's comprehensive features.
Safety Information
- Do not operate the device while driving. Always ensure your vehicle is safely parked before interacting with the stereo's functions.
- Ensure professional installation to avoid electrical damage or vehicle malfunction. Incorrect wiring can lead to fire or injury.
- Keep the device away from water and moisture. Exposure to liquids can cause electric shock or damage.
- Do not attempt to disassemble or modify the unit. This will void the warranty and may cause damage or injury.
- Use only specified power cables and accessories provided by the manufacturer.
- Protect the screen from sharp objects to prevent scratches or damage.
Package Contents
Verify that all items listed below are included in your package:
- 1 x Podofo Car Player (Main Unit)
- 1 x Power Cable
- 1 x GPS Antenna
- 1 x Rear Camera Input Cable
- 1 x RCA Cable
- 2 x USB Cable
- 2 x Mounting Bracket
- 4 x Screw
- 1 x Instruction Manual
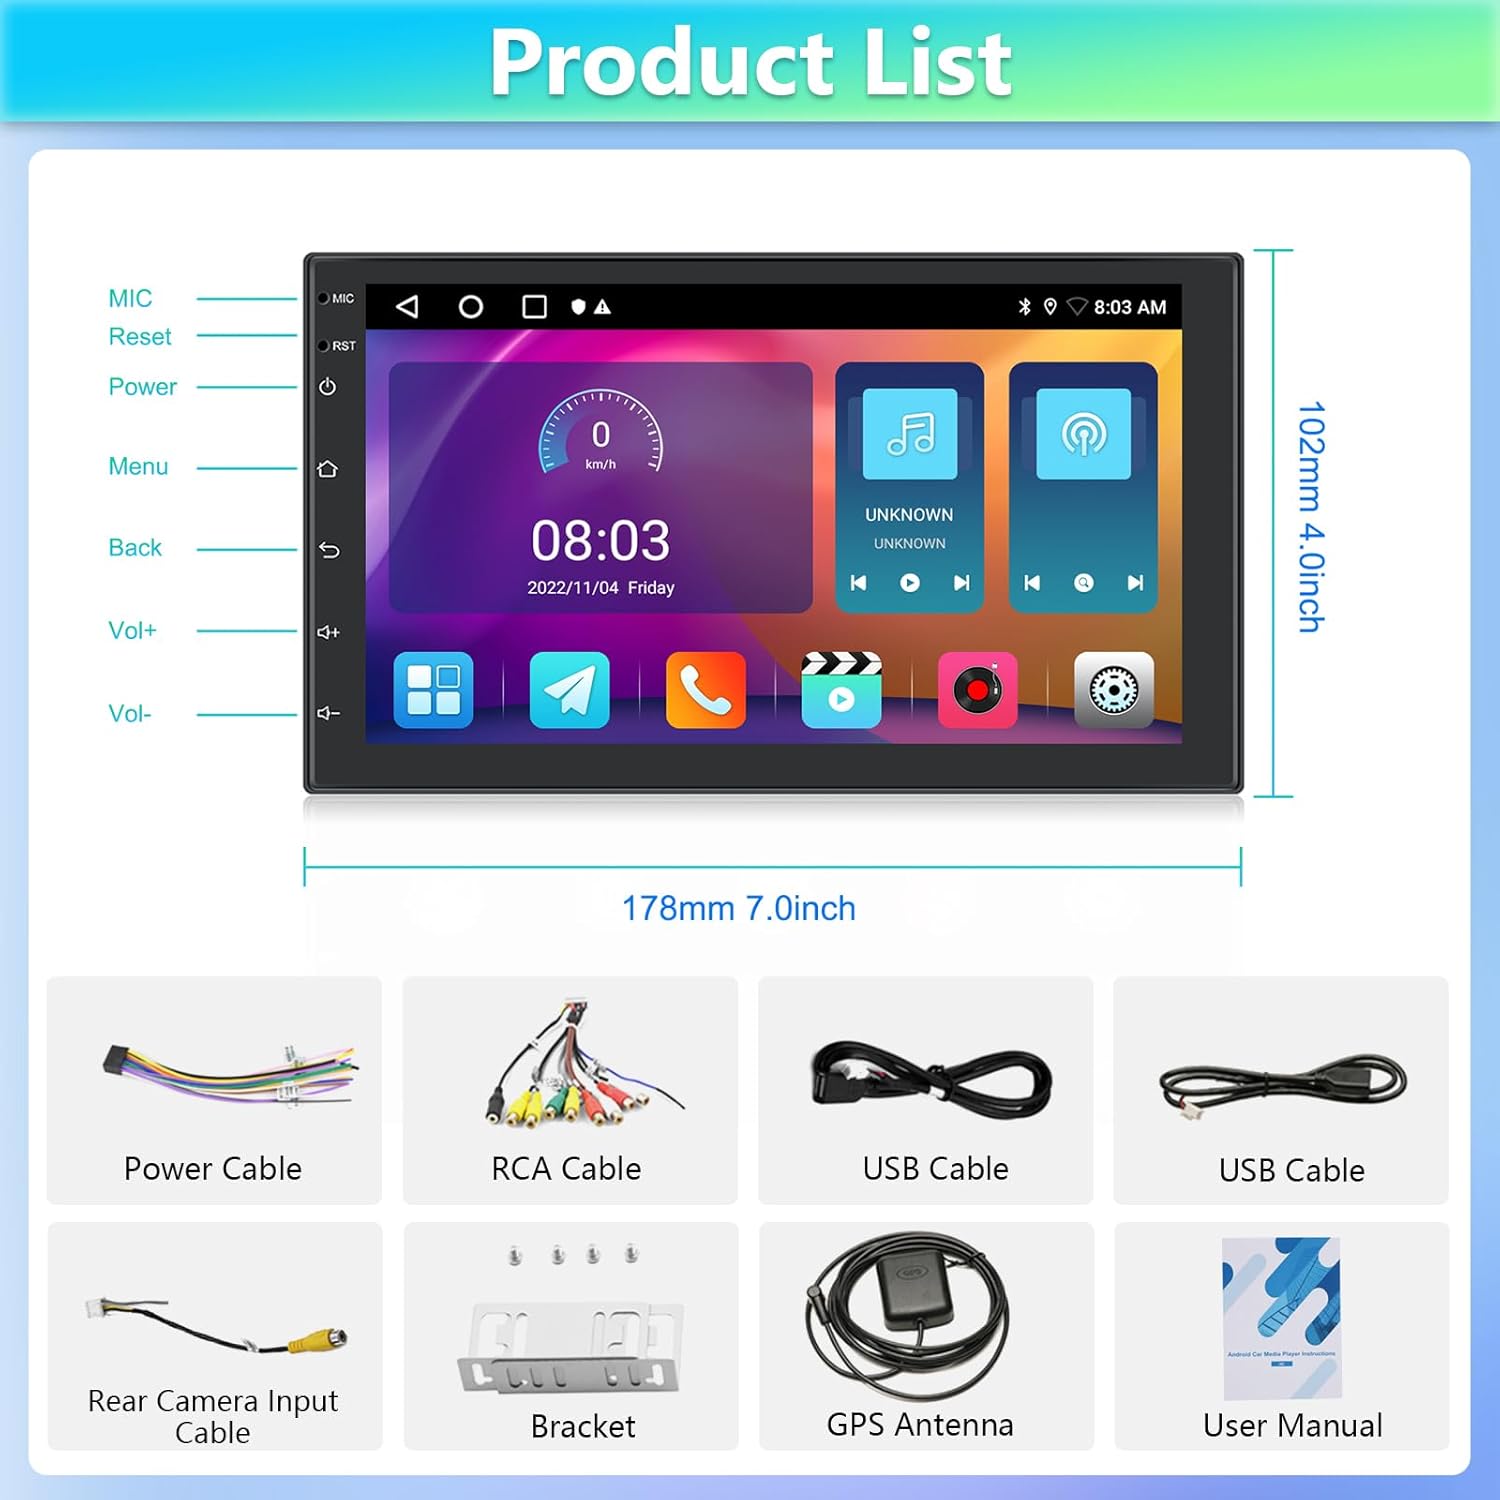
Image: A visual representation of the Podofo car stereo's dimensions (178mm x 102mm) and a clear display of all included accessories: Power Cable, RCA Cable, USB Cables, Rear Camera Input Cable, Mounting Bracket, GPS Antenna, and the User Manual.
Product Overview
The Podofo 7-inch car stereo features a responsive touchscreen and intuitive controls for a seamless user experience. Below is an overview of the main unit and its connection points.

Image: The Podofo 7-inch car stereo seamlessly integrated into a vehicle's dashboard, demonstrating its universal fit and sleek appearance when installed.
Rear Panel Connections

Image: A detailed diagram of the car stereo's rear panel, highlighting various connection ports including Power Cable, RCA Cable, USB Cable, Camera Input, GPS Antenna, and Radio Cable, with corresponding labels for easy identification.
- Power Cable Port
- RCA Cable Ports
- USB Cable Ports
- Camera Input Port
- GPS Antenna Port
- Radio Cable Port
Setup and Installation
Proper installation is crucial for the optimal performance and safety of your car stereo. It is highly recommended to have the unit installed by a qualified professional.
Wiring Diagram
Refer to the provided wiring diagram for correct connections. Ensure all connections are secure to prevent short circuits or damage.
- Power Cable: Connect the yellow wire to the constant 12V power supply, the red wire to the accessory 12V power supply (ignition switched), and the black wire to ground.
- Speaker Wires: Connect speaker wires according to their positive (+) and negative (-) terminals to the corresponding vehicle speaker wires.
- Reverse Camera Input: Connect the camera's video output to the "CAM IN" port and the camera's power wire to the vehicle's reverse light power.
- GPS Antenna: Mount the GPS antenna in a location with a clear view of the sky, typically on the dashboard or under the windshield.
- USB Cables: Route the USB cables to an accessible location for connecting USB devices.
Mounting the Unit
Use the included mounting brackets and screws to secure the double din unit into your vehicle's dashboard opening. Ensure it is firmly seated and does not obstruct any vehicle controls.
Operating Instructions
Power On/Off
The unit will power on automatically when the vehicle's ignition is turned on. To manually power off, press and hold the power button on the front panel.
Wireless Apple CarPlay / Android Auto
This feature allows seamless integration of your smartphone for navigation, music, calls, and messages. Both wired and wireless connections are supported.

Image: The car stereo display showing the Wireless Apple CarPlay and Android Auto interface, with various app icons and voice command prompts like "Hey Siri, Play music" and "Navigation home," illustrating its intuitive smartphone integration.
- Wireless Connection:
- Ensure Bluetooth is enabled on your smartphone.
- On the car stereo, go to the Bluetooth settings and search for devices.
- Pair your phone with the car stereo (Default Bluetooth name: CarBT123, Password: 0000).
- Once paired, the unit's hotspot will automatically turn on.
- Open the "Zlink" app on the stereo; it should automatically display the CarPlay/Android Auto interface.
- You can now use phone maps, send messages, make calls, listen to music, and play videos.
- Wired Connection: Connect your smartphone to the stereo using a USB cable. The system will automatically detect and launch CarPlay/Android Auto.
Note: If Bluetooth pairing fails, manually connect the car stereo's WiFi to your phone's hotspot (Go to Car Setting -> Android Car Setting -> Network -> Hotspot Sharing -> turn on Hotspot -> Show -> Hotspot Name). Delete previous Bluetooth records and try again.
Bluetooth Connectivity
Connect your smartphone via Bluetooth for hands-free calling and audio streaming.
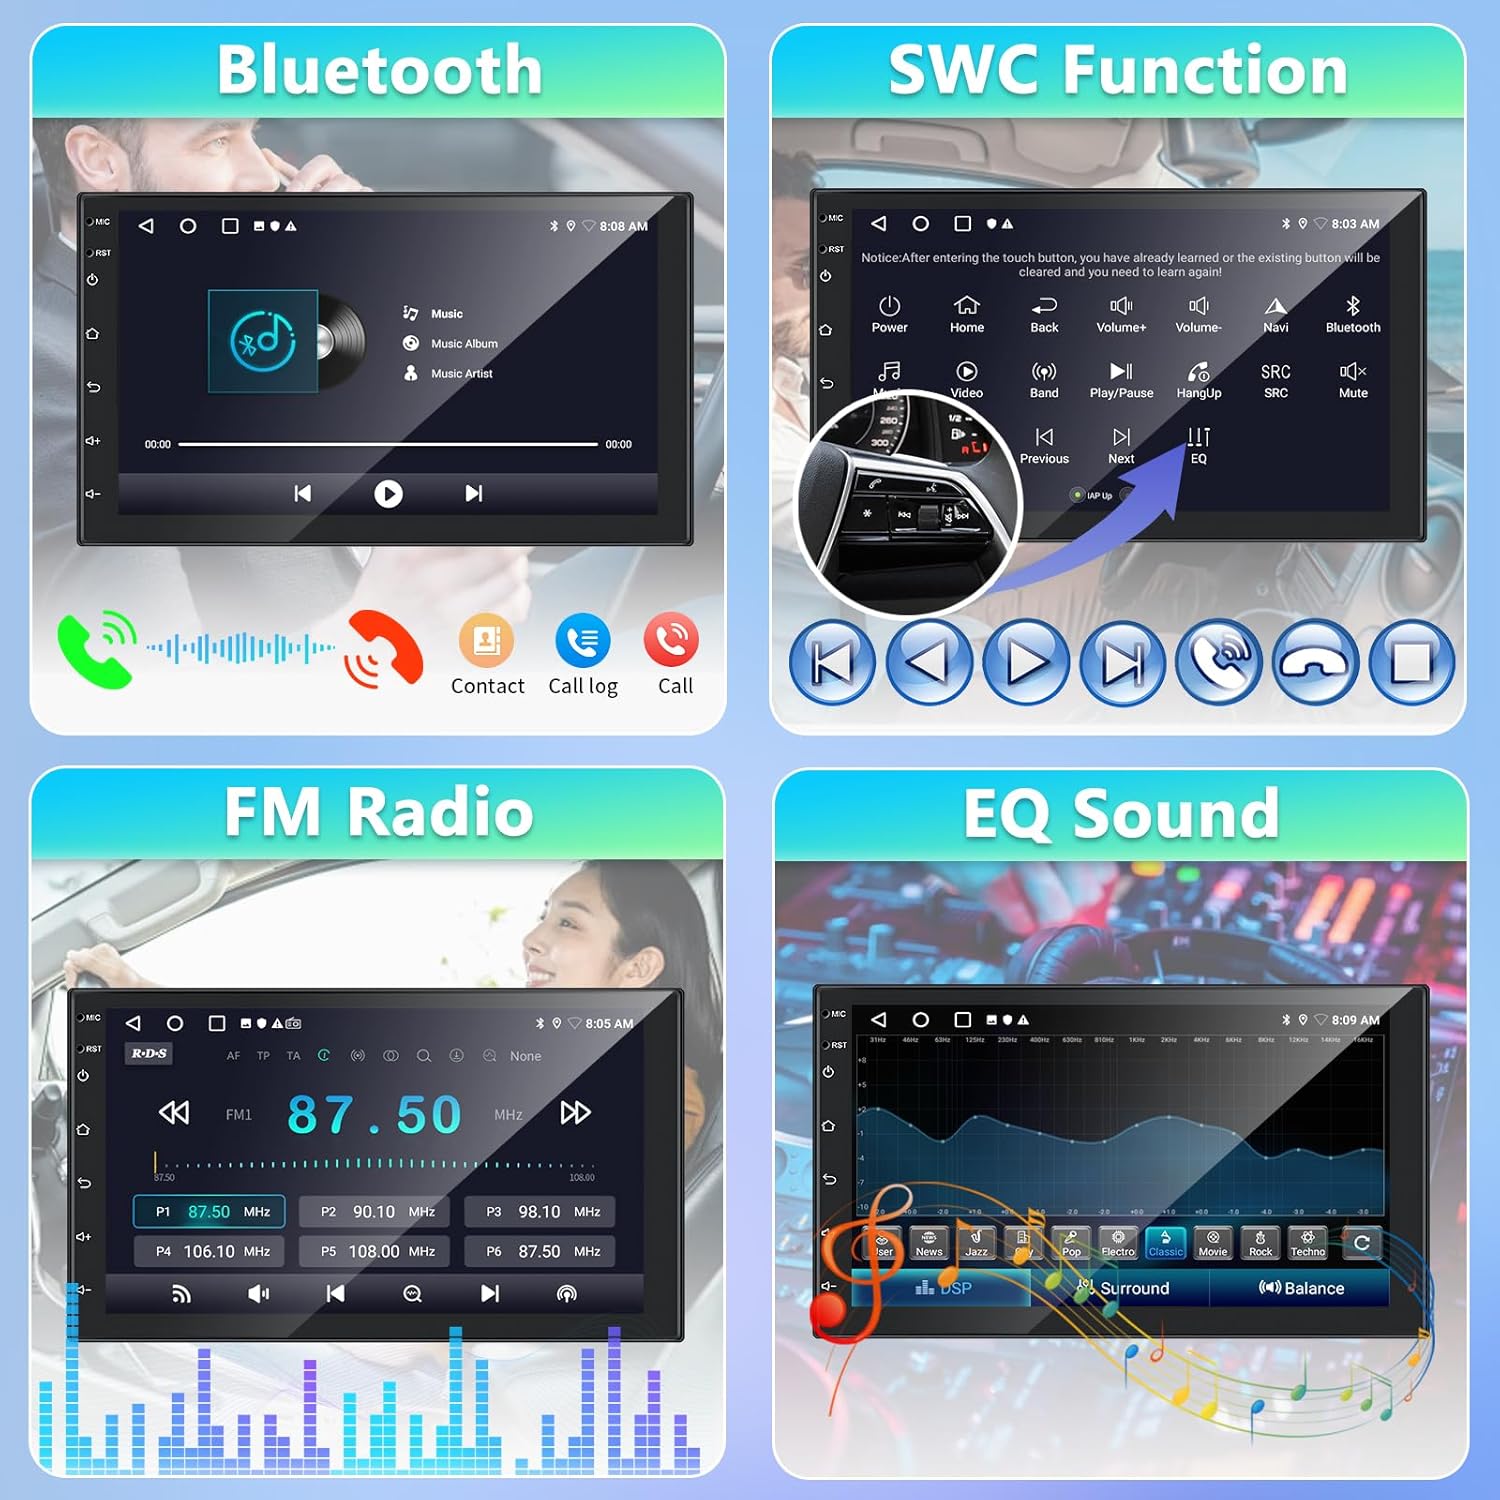
Image: The car stereo display showing the Bluetooth interface, with music playback controls, current song information, and options for making calls, viewing contacts, and call logs, demonstrating its comprehensive Bluetooth functionality.
- Pairing: Navigate to the Bluetooth menu, enable Bluetooth, and search for your device. Select your phone from the list and confirm pairing.
- Hands-Free Calling: Once paired, you can dial numbers, answer calls, and access your phonebook directly from the stereo screen.
- Audio Streaming: Play music from your phone through the car stereo speakers.
GPS Navigation
The built-in GPS module allows for accurate navigation. You can use pre-installed maps or download your preferred navigation apps via Wi-Fi.
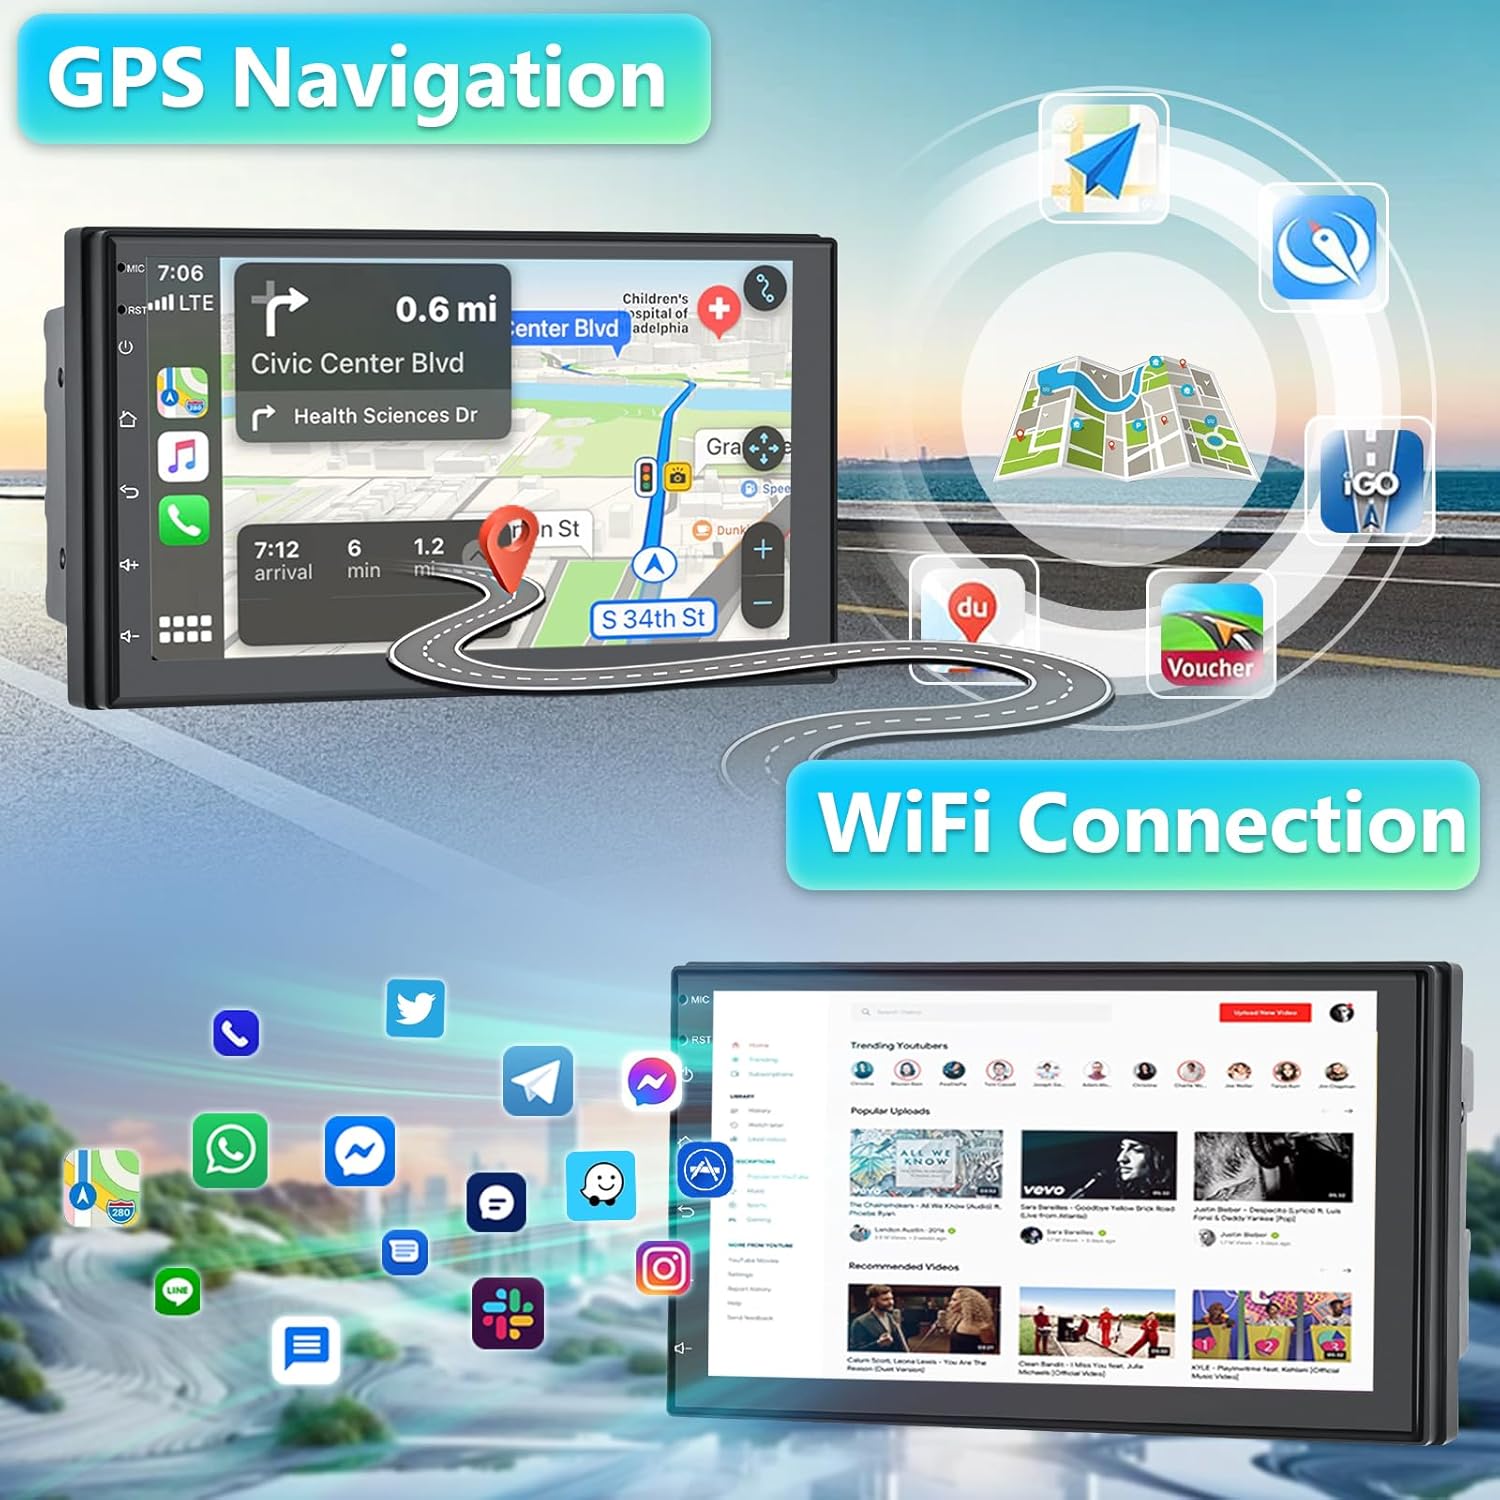
Image: The car stereo display showing a GPS navigation map with route information and nearby points of interest. Below, the WiFi connection interface is shown, indicating the ability to browse the internet and access online content.
- Ensure the GPS antenna is properly installed and has a clear signal.
- Access the navigation app from the main menu.
- Enter your destination to receive turn-by-turn directions.
FM Radio
Tune into your favorite radio stations with the integrated FM tuner.

Image: A close-up of the car stereo's display showing the RDS FM Radio interface, with a large frequency display (108.00 MHz) and preset station buttons, indicating clear reception and easy station management.
- Select the "FM Radio" icon from the main menu.
- Use the scan function to automatically find and save stations, or manually tune to a specific frequency.
- Save your favorite stations to the preset buttons for quick access.
Mirror Link
Mirror Link allows you to display your smartphone's screen directly onto the car stereo's display, enabling you to use apps and content from your phone on the larger screen.

Image: The car stereo display demonstrating both split-screen functionality (showing navigation and media simultaneously) and Mirror Link, where a smartphone's screen is mirrored onto the stereo, displaying a vehicle image.
- Connect your smartphone via USB or Wi-Fi (depending on your phone's compatibility).
- Open the "Mirror Link" app on the stereo.
- Follow the on-screen prompts to establish the connection.
Split Screen Functionality
Multitask efficiently by displaying two applications simultaneously on the 7-inch screen, such as navigation and music playback.

Image: The car stereo display demonstrating the split-screen feature, showing a navigation map on one side and a web browser or media player on the other, highlighting its multitasking capability.
- While an app is open, long-press the recent apps button or drag from the side (depending on the interface) to activate split-screen mode.
- Select a second app to display on the other half of the screen.
Steering Wheel Control (SWC)
If your vehicle supports it, you can connect the stereo to your steering wheel controls for convenient operation without taking your hands off the wheel.

Image: The car stereo display showing the Steering Wheel Control (SWC) learning interface, with various button icons (power, home, volume, next, previous) and a hand on a steering wheel, indicating the ability to map vehicle controls to stereo functions.
- Connect the SWC wires from your vehicle to the stereo's SWC input.
- Access the "Steering Wheel Control" settings in the stereo's menu.
- Follow the on-screen instructions to program each button on your steering wheel to the desired function.
EQ Sound Effects and DSP
Customize your audio experience with the built-in Equalizer (EQ) and Digital Sound Processor (DSP) functions.
Image: The car stereo display showing the EQ Sound settings, with a graphical equalizer, preset sound modes (Pop, Rock, Jazz, etc.), and options for adjusting bass, treble, and balance, allowing for personalized audio tuning.
- Navigate to the "Sound Settings" or "EQ" menu.
- Choose from preset EQ modes (e.g., Pop, Rock, Jazz) or manually adjust frequency bands to suit your preference.
- Adjust balance and fader settings for optimal sound distribution.
Backup Camera Input
The unit supports a rear-view camera (optional, not included) for safer parking and reversing.

Image: The car stereo display showing a live feed from a backup camera with parking guidelines, alongside illustrations of various parking scenarios and a diagram for connecting the camera, emphasizing the reverse assistance feature.
- Connect the backup camera to the "CAM IN" port on the stereo's rear panel.
- Ensure the camera's power wire is connected to the vehicle's reverse light circuit.
- When the vehicle is shifted into reverse, the stereo will automatically display the camera feed.
WiFi Connection
Connect to a Wi-Fi network (e.g., your phone's hotspot) to access online features, download apps, and browse the internet.

Image: The car stereo display showing the WiFi connection interface, with a large "WiFi" logo and various app icons in the background, indicating the ability to connect to the internet and access online services.
- Go to "Settings" and then "Network & Internet".
- Turn on Wi-Fi and select your desired network from the list.
- Enter the password if prompted and connect.
Maintenance
- Screen Cleaning: Use a soft, lint-free cloth to gently wipe the touchscreen. For stubborn smudges, slightly dampen the cloth with water or a screen-safe cleaner. Avoid abrasive materials or harsh chemicals.
- General Cleaning: Keep the unit free from dust and debris. Use a soft brush or compressed air to clean vents and button areas.
- Software Updates: Periodically check the manufacturer's website for available software updates to ensure optimal performance and access to new features.
Troubleshooting
| Problem | Possible Cause | Solution |
|---|---|---|
| No Power | Incorrect wiring; Blown fuse; Loose connection. | Check power cable connections (yellow, red, black wires). Verify vehicle fuses. Ensure all connectors are secure. |
| No Sound | Speaker wires incorrectly connected; Volume too low; Mute function active. | Check speaker wiring for correct polarity. Increase volume. Disable mute. |
| Bluetooth Pairing Fails | Incorrect password; Device not in pairing mode; Interference. | Ensure correct password (0000). Put phone in pairing mode. Delete previous Bluetooth records on both devices and retry. Try connecting stereo WiFi to phone hotspot. |
| GPS Signal Weak/Lost | GPS antenna improperly placed; Obstruction. | Relocate GPS antenna to a position with a clear view of the sky. Ensure antenna cable is securely connected. |
| Touchscreen Unresponsive | Software glitch; Screen calibration issue. | Perform a soft reset (refer to manual for reset button location, usually a small pinhole). If issue persists, contact support. |
| CarPlay/Android Auto Not Connecting | Incorrect USB cable; Phone settings; App issue. | Use original or certified USB cable. Ensure CarPlay/Android Auto is enabled on your phone. Restart phone and stereo. Check Zlink app. |
Specifications
| Feature | Detail |
|---|---|
| Display Size | 7 Inch |
| Operating System | Android 13 |
| Memory (RAM) | 2GB |
| Storage (ROM) | 32GB |
| Connectivity | Wireless Apple CarPlay, Android Auto, Bluetooth, Wi-Fi, USB |
| Special Features | GPS Navigation, Mirror Link, Split Screen, SWC (Steering Wheel Control), FM/RDS Radio, EQ/DSP Sound, Backup Camera Input |
| Output Power | 45 Watts |
| Dimensions (Approx.) | 178mm x 102mm (7.0 inches x 4.0 inches) |
| Item Weight | 1.96 pounds |
Warranty and Support
Podofo is committed to providing high-quality products and customer satisfaction. For any issues or inquiries, please refer to the following:
- Warranty: The product comes with a 24-month replacement availability. Please retain your proof of purchase for warranty claims.
- Returns: Enjoy a 60-day worry-free return period.
- Technical Support: Lifetime after-sales consultation and technical support are available. For quick assistance, expect a reply within 18 hours.
- Contact Information: Refer to the contact details provided on the product packaging or the official Podofo website for customer service.

Image: A banner displaying Podofo's commitment to customer experience, highlighting key support features: 18-hour quick reply, 60-day worry-free return, 24-month replacement availability, and lifetime after-sales consultation and technical support.
Ask a question about this manual
Ask about setup, troubleshooting, compatibility, parts, safety, or missing instructions. Manuals+ will review the question and use this page’s manual context to help answer it.