1. Introduction and Safety Information
This manual provides essential instructions for the safe operation, assembly, maintenance, and troubleshooting of your RYOBI ONE+ HP 18V Brushless Cordless Battery String Trimmer and Leaf Blower Combo Kit. Please read this manual thoroughly before using the product.
Important Safety Warning:
Always wear safety glasses and other protective gear when using this product. Keep bystanders at a safe distance. Do not operate if the product is damaged or modified. Always follow the instructions in the user manual for safe operation.
2. Product Overview
The RYOBI ONE+ HP 18V Brushless Combo Kit includes a high-performance string trimmer and a powerful leaf blower, designed for efficient yard maintenance. Both tools are powered by the RYOBI 18V ONE+ battery system.

Image 1: Overview of the RYOBI ONE+ HP 18V Brushless Cordless Battery String Trimmer and Leaf Blower Combo Kit, including the battery and charger.
Key Features:
- Trimmer: Brushless motor for 1.5x more power, longer runtime, and extended motor life.
- Trimmer: Auto-feed line head eliminates the need for bumping.
- Trimmer: Adjustable 11 in. to 13 in. cutting width.
- Trimmer: Shaft twists for easy edging.
- Blower: Jet fan design delivers 350 CFM and 110 MPH clearing power.
- Blower: Variable speed trigger for controlled airflow.
- Blower: Lightweight design for reduced user fatigue.
3. Setup and Assembly
3.1 Battery Charging
- Ensure the battery and charger are clean and dry before charging.
- Insert the 18V ONE+ battery into the charger. Ensure it is fully seated.
- Plug the charger into a standard electrical outlet.
- Allow the battery to charge until the indicator light on the charger signals a full charge (refer to your charger's specific instructions for light patterns).
- Once charged, unplug the charger and remove the battery.
3.2 Tool Assembly
This product is designed for minimal assembly. Ensure all components are securely attached before operation.
- String Trimmer: Attach the auxiliary handle and guard as per the instructions provided with the trimmer. Ensure all fasteners are tightened.
- Leaf Blower: Attach the blower tube to the main housing. Ensure it clicks into place or is securely fastened.
4. Operating Instructions
4.1 Operating the String Trimmer

Image 2: A user operating the RYOBI ONE+ HP 18V Brushless Cordless String Trimmer to trim grass along a pathway.
- Ensure the battery is fully charged and securely inserted into the trimmer.
- Adjust the cutting width between 11 inches and 13 inches as needed.
- Select the desired speed using the 2-speed switch.
- To start, depress the trigger. The variable speed trigger allows for precise control.
- For edging, press the button on the shaft to twist the head into the edging position.
- The auto-feed line head will automatically advance the cutting line as needed, eliminating the need to bump the head.
- Always maintain a firm grip on the trimmer with both hands during operation.
4.2 Operating the Leaf Blower
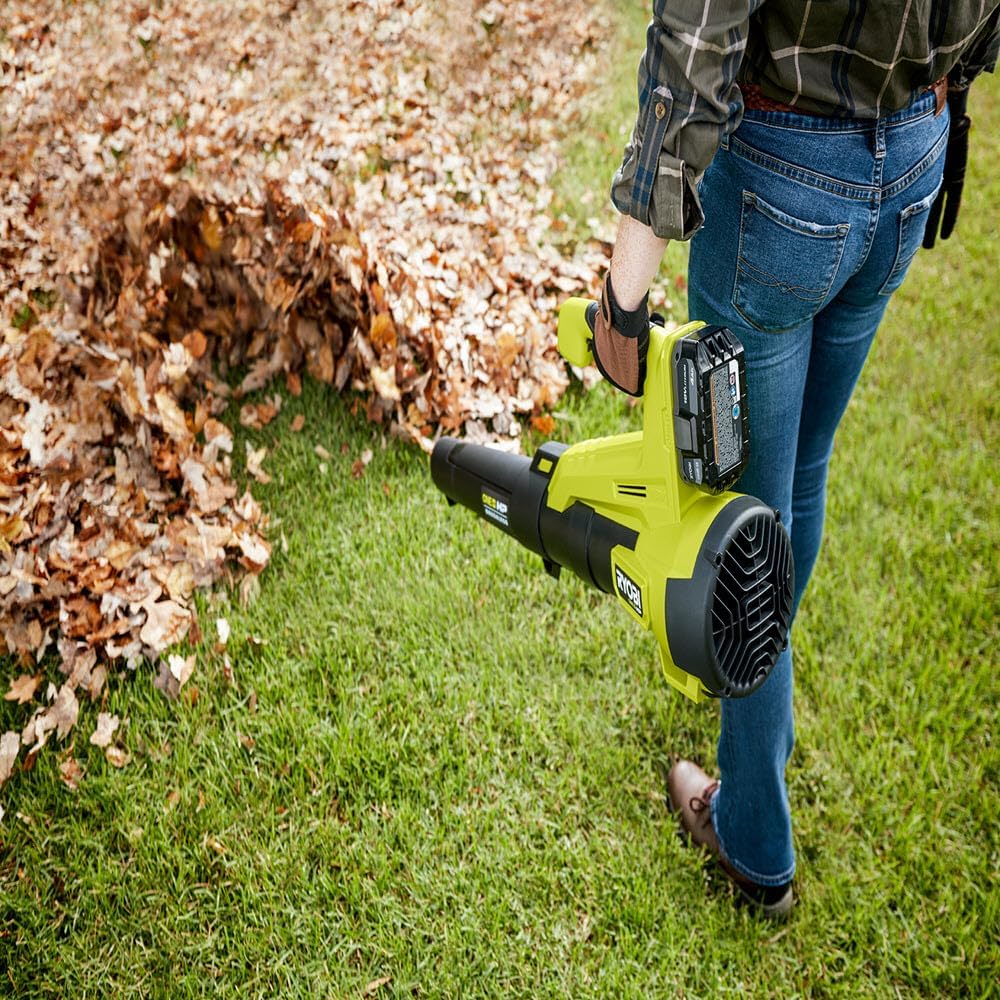
Image 3: A user operating the RYOBI ONE+ HP 18V Brushless Cordless Leaf Blower to clear leaves from a lawn.
- Ensure the battery is fully charged and securely inserted into the blower.
- Hold the blower firmly with one hand on the handle.
- To start, depress the variable speed trigger. The airflow can be controlled by the amount of trigger depression.
- Direct the blower tube towards the debris you wish to clear.
- Move in a sweeping motion to effectively gather leaves and debris.
- Avoid blowing debris towards people, animals, or fragile objects.
5. Maintenance
Regular maintenance ensures optimal performance and extends the life of your tools.
- Cleaning: After each use, clean the exterior of both tools with a damp cloth. Remove any grass, dirt, or debris from air vents and cutting areas. Do not use harsh chemicals or abrasive cleaners.
- String Trimmer Line: Periodically check the trimmer line for wear. Replace with recommended RYOBI line when necessary.
- Battery Care: Store batteries in a cool, dry place away from direct sunlight and extreme temperatures. Do not store batteries in a discharged state for extended periods.
- Storage: Store the tools in a dry, secure location, out of reach of children. Disconnect the battery before storing.
6. Troubleshooting
If you encounter issues with your RYOBI ONE+ HP Combo Kit, refer to the following common troubleshooting steps:
- Tool does not start:
- Ensure the battery is fully charged and properly inserted.
- Check for any obstructions in the cutting head or blower fan.
- Verify that the trigger is fully depressed.
- Trimmer line not advancing:
- Check if the line spool is empty or tangled.
- Ensure the line is not fused together on the spool.
- Reduced blower performance:
- Check for blockages in the blower tube or air intake.
- Ensure the battery is fully charged.
- Overheating:
- Allow the tool to cool down.
- Ensure air vents are clear of debris.
If problems persist, contact RYOBI customer support or an authorized service center.
7. Technical Specifications
| Specification | Value |
|---|---|
| Brand | RYOBI |
| Model Number | P20121 |
| Power Source | Battery Powered (18V ONE+) |
| Item Weight | 7.85 Kilograms (total kit) |
| Trimmer Cutting Width | 11 - 13 Inches (Adjustable) |
| Blower Air Volume | 350 CFM |
| Blower Air Speed | 110 MPH |
| Cordless | Yes |
| UPC | 604467665699 |
8. Warranty and Support
For detailed warranty information, please refer to the warranty card included with your product or visit the official RYOBI website. Warranty terms and conditions may vary.
For technical support, replacement parts, or service inquiries, please contact RYOBI customer service through their official website or the contact information provided in your product packaging.
Manufacturer: Ryobi