
1. Introduction
Thank you for choosing the ASHUAQI 12-Light Gold Wagon Wheel Chandelier. This manual provides essential information for safe installation, operation, and maintenance of your new lighting fixture. Please read these instructions thoroughly before beginning installation and retain them for future reference.

Image 1: The ASHUAQI 12-Light Gold Wagon Wheel Chandelier, featuring a gold finish and a handwoven twine-wrapped frame.
2. Safety Information
WARNING: To reduce the risk of fire, electric shock, or personal injury, always follow these safety precautions:
- Turn off power at the circuit breaker or fuse box before installation, servicing, or changing bulbs.
- Consult a qualified electrician if you are not familiar with electrical installation.
- Ensure all electrical connections comply with local codes and ordinances.
- Use only the specified bulb type and wattage to avoid overheating.
- Do not connect this fixture to an ungrounded electrical system.
- Handle the fixture with care to prevent damage to components.
3. Package Contents
Verify that all components are present and undamaged before proceeding with installation. If any parts are missing or broken, contact customer support.

Image 2: Overview of the chandelier components, including the main frame, canopy, chain, wiring, and mounting hardware.
The package typically includes:
- Chandelier Frame (with handwoven twine wrap)
- Ceiling Canopy
- Adjustable Hanging Chain (59 inches)
- Mounting Hardware (screws, wire nuts, ground wire)
- Instruction Manual
Note: Light bulbs are not included and must be purchased separately.
4. Specifications

Image 3: Detailed dimensions and electrical requirements for the chandelier.
| Feature | Specification |
|---|---|
| Model Number | ZJD00044 |
| Dimensions (Wheel Diameter) | 26.77 inches (68 cm) |
| Fixture Height | 17.72 inches (45 cm) |
| Adjustable Chain Length | Up to 59 inches (150 cm) |
| Bulb Base | E12 (Candelabra) |
| Number of Lights | 12 |
| Max Wattage per Bulb | 60W |
| Voltage | 110-120V (AC) |
| Material | Metal, Hemp Rope |
| Finish | Gold (Brushed) |
| Installation Type | Ceiling Mount |
| Dimmable | Yes (with dimmable bulbs and compatible dimmer switch, not included) |
5. Setup and Installation
Professional installation is recommended. Ensure power is OFF at the circuit breaker before starting.
5.1 Pre-Installation
- Unpack: Carefully remove all components from the packaging.
- Inspect: Check for any damage or missing parts.
- Tools Required (not included): Screwdriver, wire strippers, electrical tape, ladder, safety glasses.
5.2 Mounting the Fixture
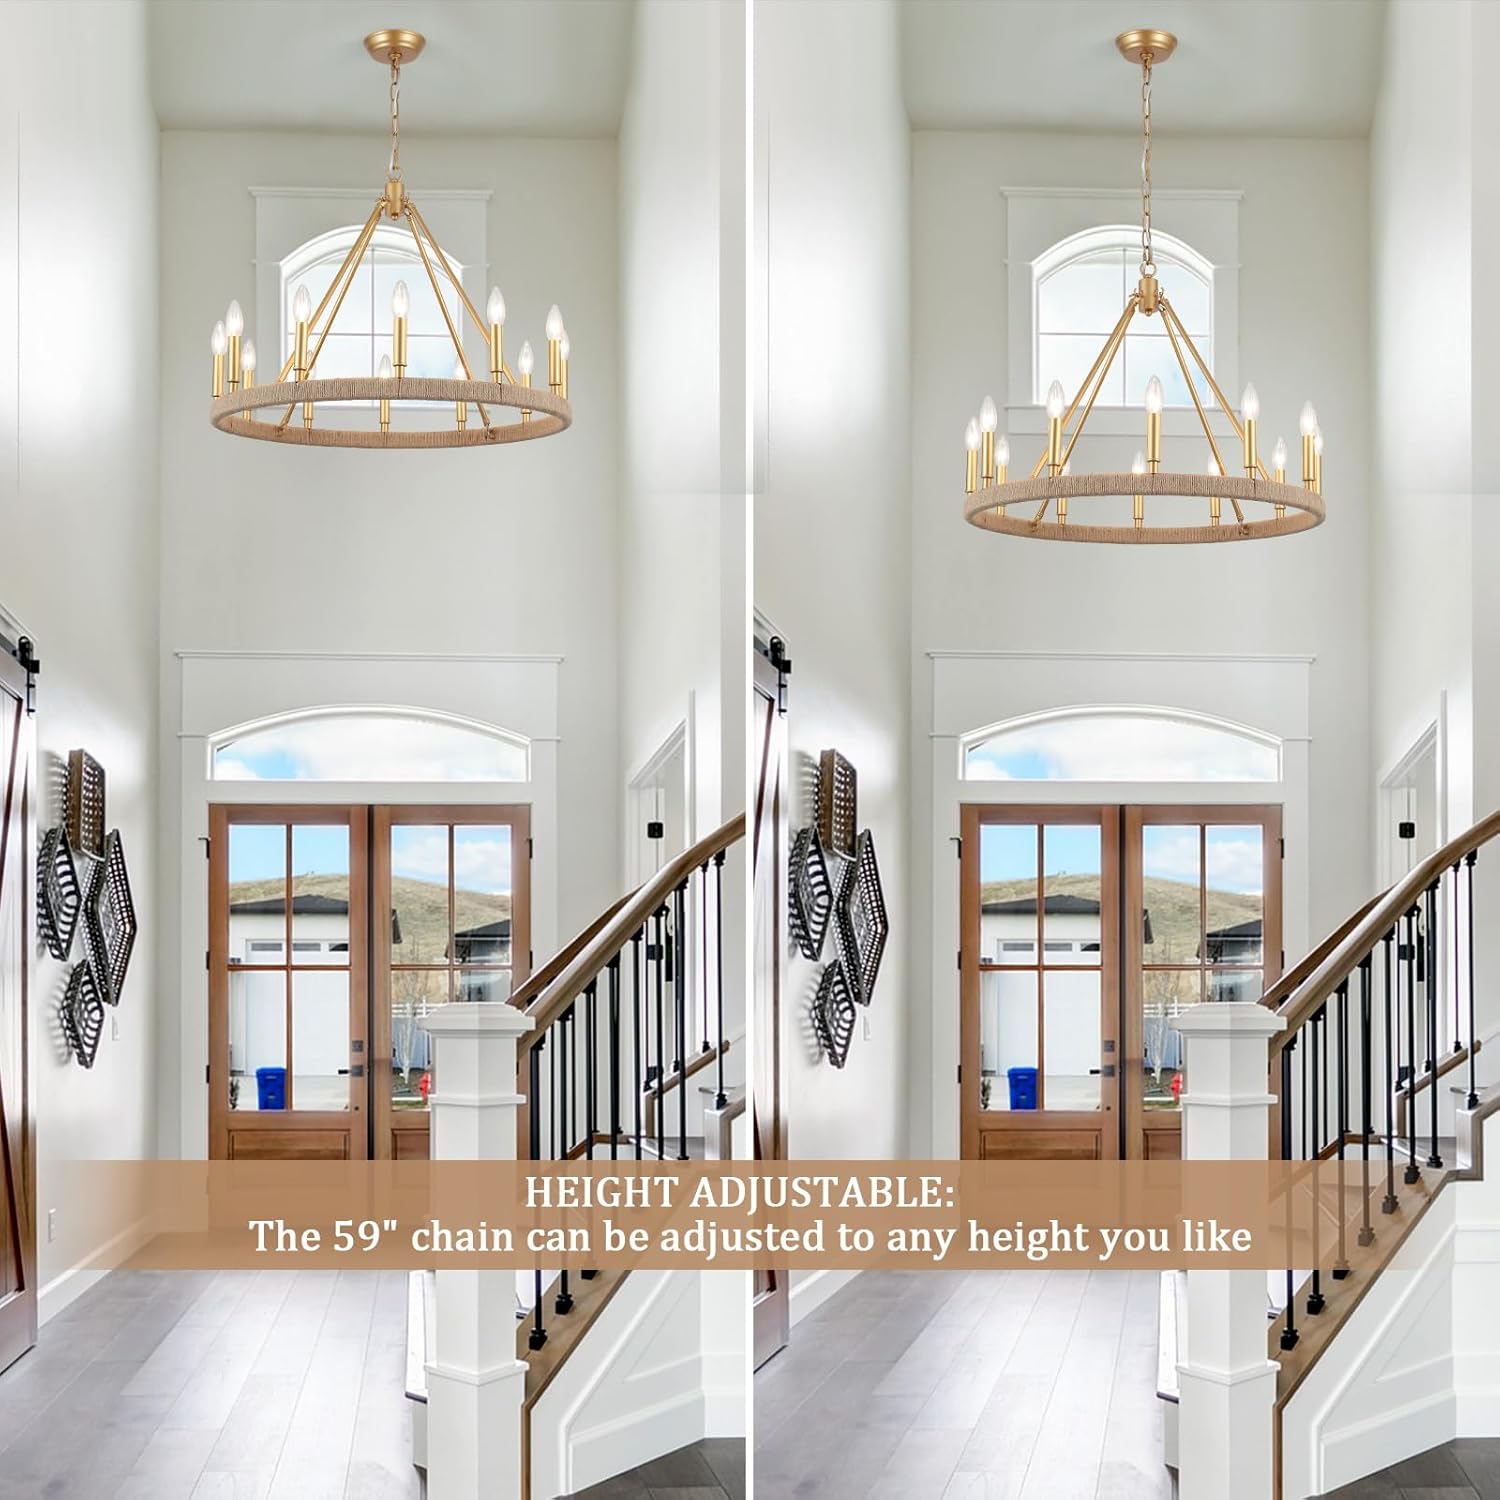
Image 4: The chandelier's adjustable chain allows for customization of hanging height to suit various ceiling types and room dimensions.
- Turn off power: Locate the circuit breaker controlling the light fixture and turn it off.
- Attach Mounting Bracket: Secure the mounting bracket to the junction box in the ceiling using the provided screws.
- Adjust Chain Length: Determine the desired hanging height. The 59-inch chain can be adjusted using the two detachable buckles. Shorten the chain by removing links as needed.
- Wire Connections: Connect the fixture's wires to the house wires according to standard electrical practices (black to black, white to white, ground to ground). Use wire nuts to secure connections.
- Secure Canopy: Tuck the wires into the junction box and secure the ceiling canopy to the mounting bracket.
- Install Bulbs: Screw E12 base bulbs (not included) into each of the 12 sockets. Do not exceed 60W per bulb.
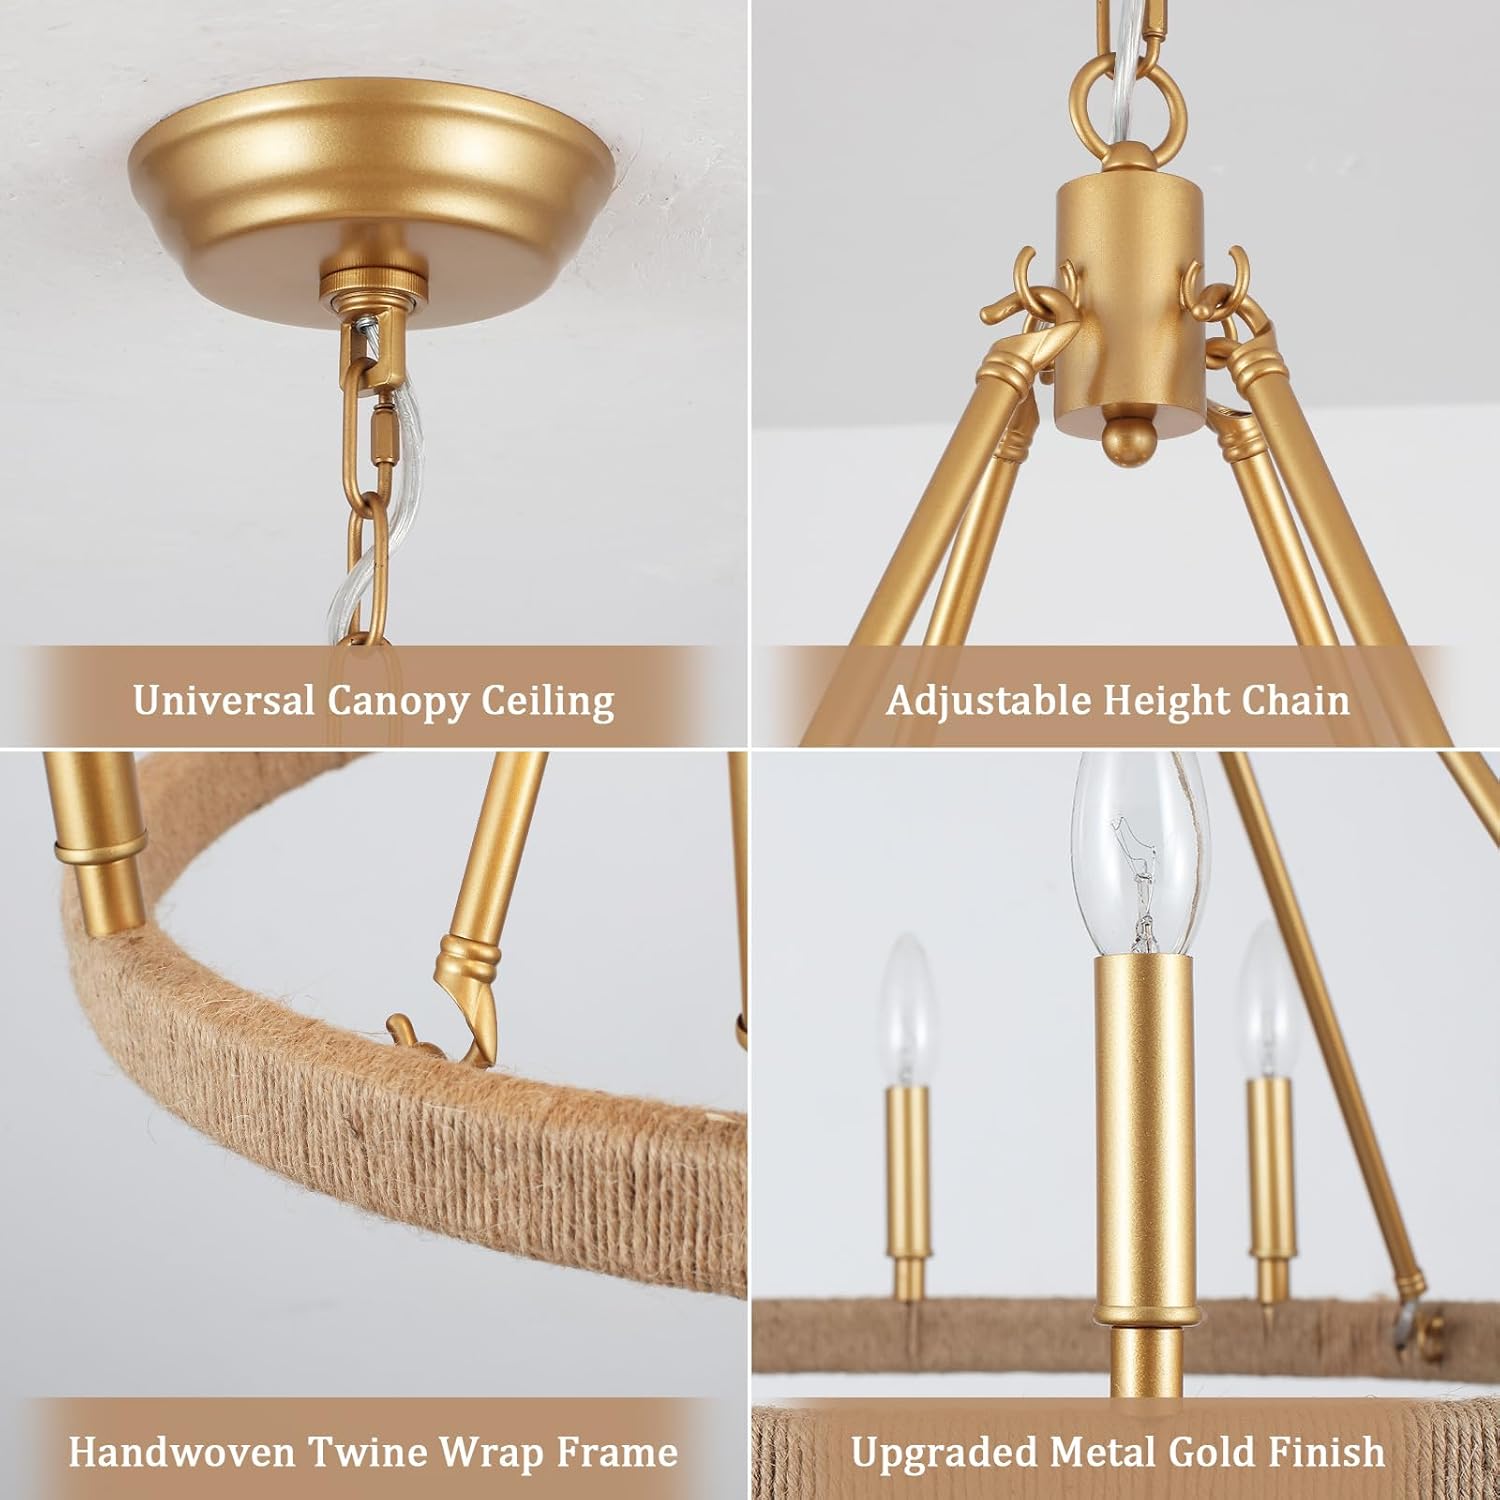
Image 5: Details of the ceiling canopy, adjustable chain mechanism, and the decorative twine-wrapped frame.
6. Operating Instructions
Once installed, restore power at the circuit breaker. The chandelier is now ready for use.
- Bulb Type: This fixture requires 12 E12 base bulbs. Compatible bulb types include LED, Edison, CFL, halogen, or incandescent.
- Wattage: Do not exceed 60 watts per bulb.
- Dimmability: The chandelier is fully dimmable when used with dimmable E12 bulbs and a compatible dimmer switch (both sold separately).
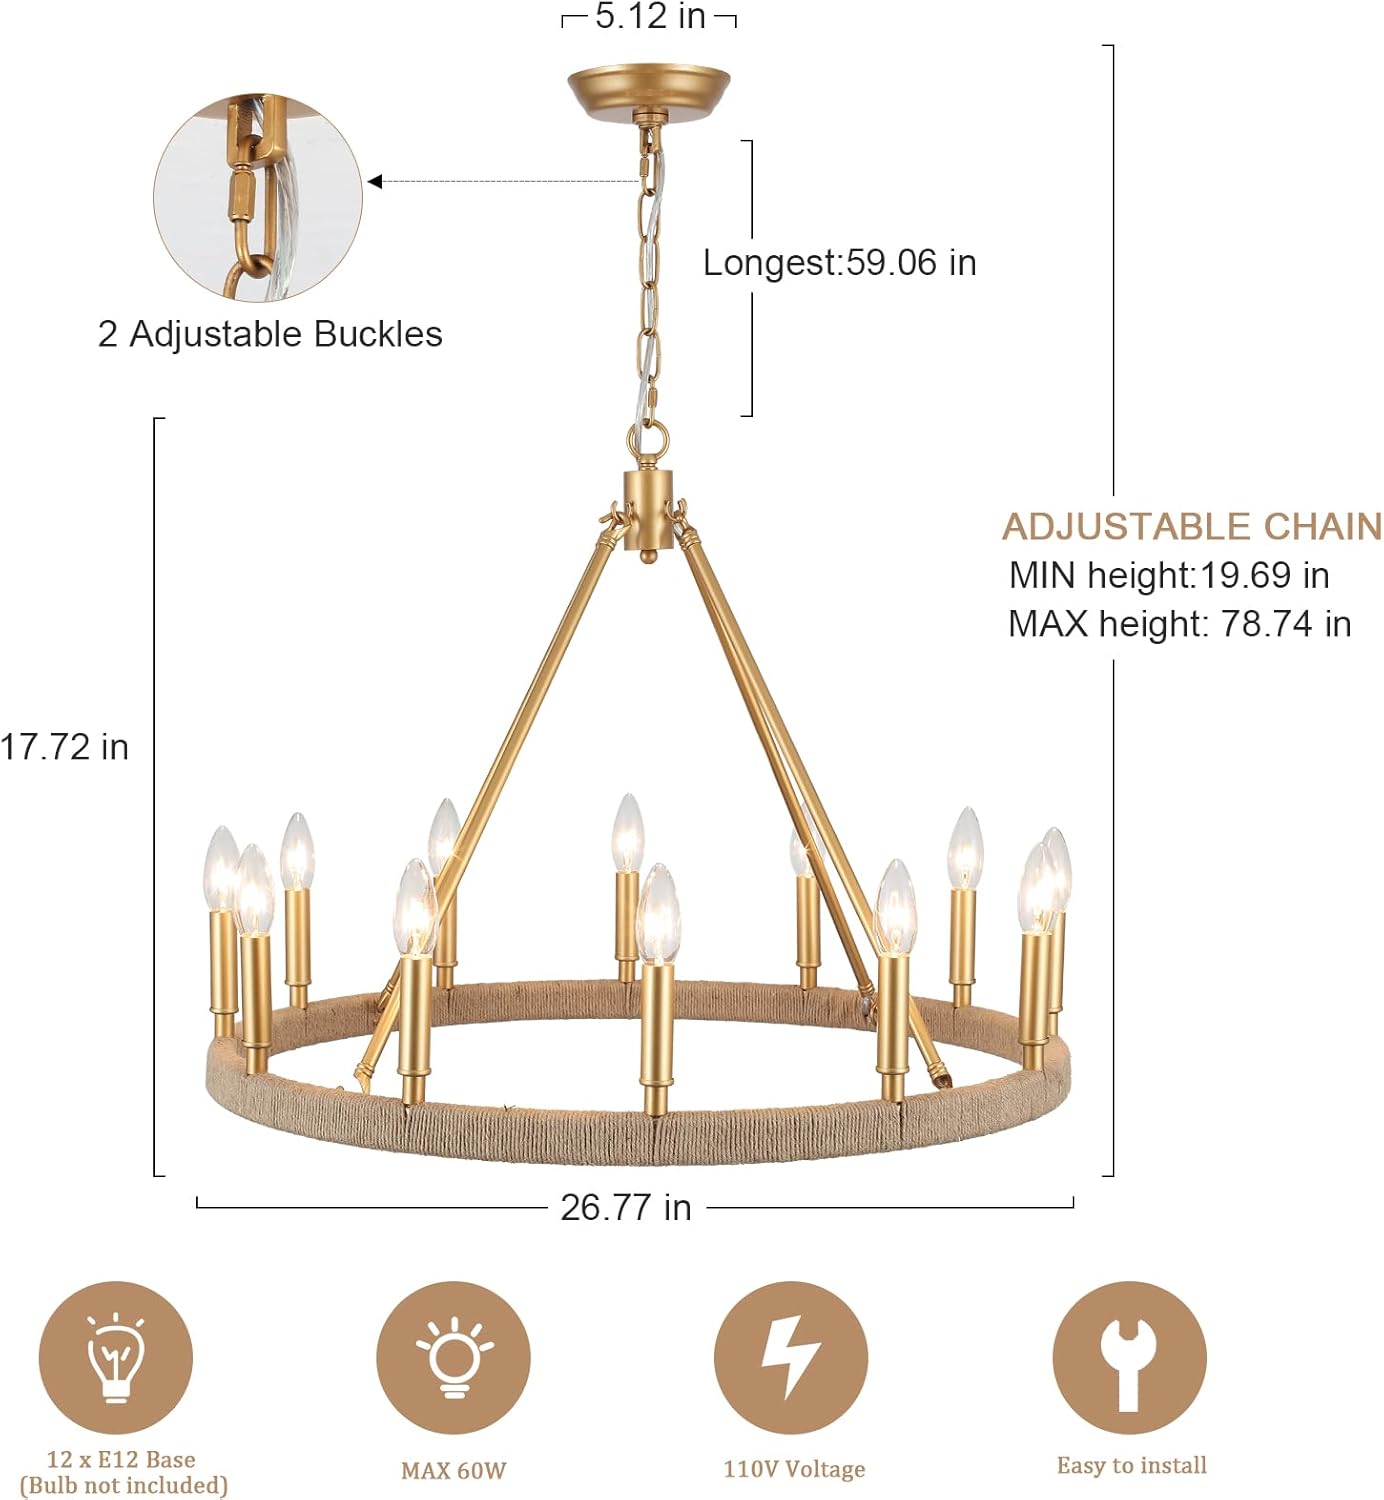
Image 6: The chandelier with lights off (left) and illuminated (right), demonstrating its functionality.
7. Maintenance
Regular maintenance ensures the longevity and appearance of your chandelier.
- Cleaning: Turn off power before cleaning. Use a soft, dry cloth to wipe the metal and twine surfaces. Avoid abrasive cleaners or solvents, as they may damage the finish.
- Bulb Replacement: Ensure power is off before replacing bulbs. Allow bulbs to cool completely before touching.
8. Troubleshooting
If you encounter issues with your chandelier, refer to the following common problems and solutions:
| Problem | Possible Cause | Solution |
|---|---|---|
| Light does not turn on | No power, loose wiring, faulty bulb | Check circuit breaker, ensure connections are secure, replace bulb. |
| Lights flicker | Loose bulb, incompatible dimmer, unstable power supply | Tighten bulbs, ensure dimmer is compatible with bulbs, consult electrician. |
| Fixture is unstable | Improper mounting | Ensure mounting bracket is securely fastened to the junction box. |
9. Warranty and Support
For warranty information or technical support, please contact ASHUAQI customer service. Keep your purchase receipt as proof of purchase.
You can visit the ASHUAQI store for more products and support: ASHUAQI Store