1. Product Overview
The LABSTANDARD Curved LED Combo Beam Light Bar (Model LED-12) is a high-performance auxiliary lighting solution designed for various vehicles including trucks, boats, SUVs, and ATVs. It features a curved design for wider light distribution, combining both spot and flood beam patterns to provide comprehensive illumination. Constructed with durable aluminum, this light bar is built to withstand challenging environmental conditions.

Figure 1: LABSTANDARD Curved LED Combo Beam Light Bar (Model LED-12).
2. Specifications
| Feature | Detail |
|---|---|
| Model | LED-12 |
| Power | 180W |
| Voltage Range | DC 10-30V |
| Beam Pattern | Combo (Spot & Flood) |
| Length | 32 inches (approx. 81 cm) |
| Dimensions (L x W x H) | 22 x 3.4 x 4.3 inches (55.88 x 8.64 x 10.92 cm) |
| Weight | 8.8 pounds (4 kg) |
| IP Rating | IP68 (Waterproof) |
| Operating Temperature | -45°C to +85°C |
| Housing Material | Aluminum |
| Lifespan | Over 30,000 hours |
| UPC | 653430985616 |

Figure 2: Dimensional drawing of the LED Light Bar, showing key measurements.
3. Setup and Installation
Proper installation is crucial for the performance and longevity of your light bar. It is recommended to have installation performed by a qualified professional if you are unfamiliar with vehicle electrical systems.
3.1 Included Components
- LABSTANDARD Curved LED Light Bar (Model LED-12)
- Mounting Brackets and Hardware (standard for installation)
3.2 Installation Steps
- Unpack and Inspect: Carefully remove the light bar and all components from the packaging. Inspect for any damage that may have occurred during shipping.
- Choose Mounting Location: Select a suitable mounting location on your vehicle (e.g., roof, bumper, grille) that provides clear visibility and does not obstruct other vehicle functions. Ensure the surface is strong enough to support the light bar's weight.
- Install Mounting Brackets: Secure the provided mounting brackets to the chosen location using appropriate hardware. Ensure they are firmly attached and level.
- Mount Light Bar: Attach the LED light bar to the installed brackets. Adjust the angle as needed for optimal light projection. Tighten all fasteners securely.
- Electrical Connection:
- Ensure the vehicle's power is off before making any electrical connections.
- Connect the positive (+) wire from the light bar to a fused 10-30V DC power source. It is recommended to use a relay and a separate switch for control.
- Connect the negative (-) wire from the light bar to a suitable ground point on the vehicle chassis.
- Verify all connections are secure and properly insulated to prevent short circuits.
- Test Functionality: Once all connections are made, turn on the vehicle's power and test the light bar to ensure it functions correctly.
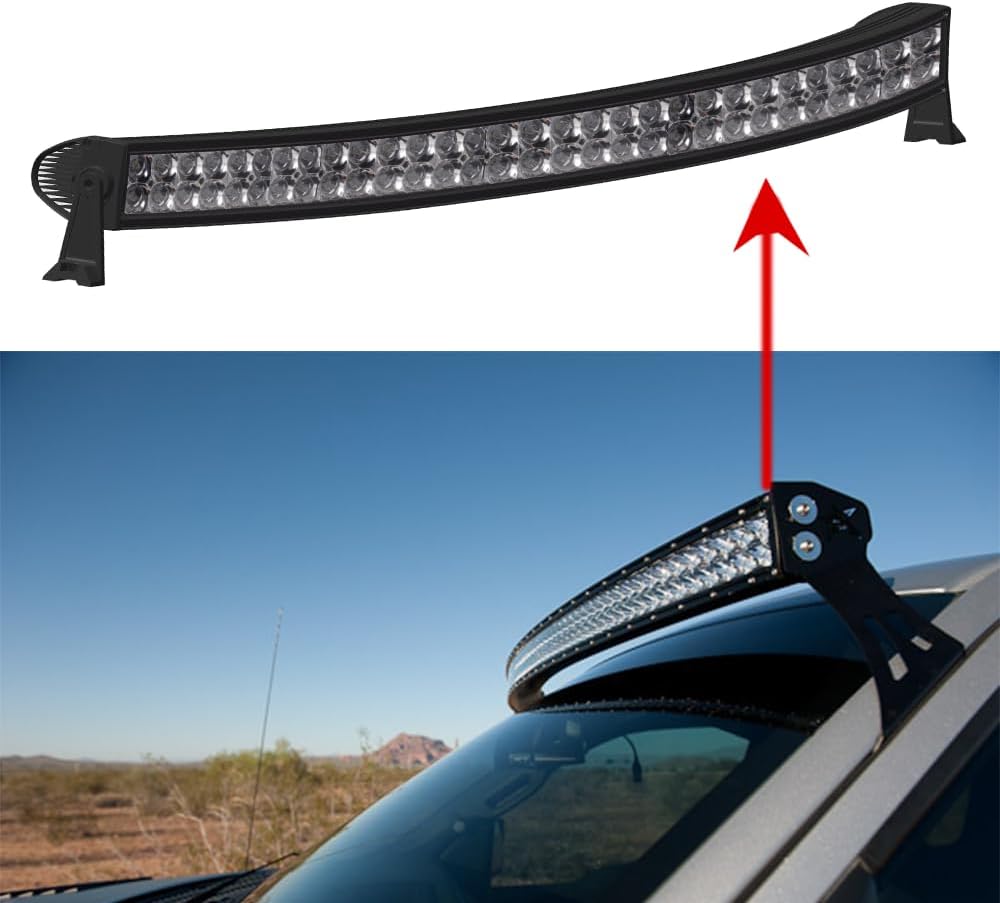
Figure 3: Example of the LED Light Bar mounted on a vehicle roof.
4. Operating Instructions
The LABSTANDARD LED Light Bar is designed for straightforward operation once properly installed.
- Power On/Off: Activate the external switch connected to the light bar's power circuit to turn the light bar on or off.
- Beam Pattern: The light bar features a combo beam pattern, providing both a focused spot beam for long-distance illumination and a wide flood beam for peripheral visibility. This combination is ideal for various off-road and work lighting needs.
- Voltage: Ensure the operating voltage remains within the specified DC 10-30V range for optimal performance and to prevent damage.
5. Maintenance
Regular maintenance helps ensure the longevity and optimal performance of your LED light bar.
- Cleaning: Periodically clean the lens and housing with a soft cloth and mild soap and water. Avoid abrasive cleaners or harsh chemicals that could damage the lens or finish.
- Connection Check: Routinely inspect all electrical connections for corrosion or looseness. Ensure wiring is intact and properly insulated.
- Mounting Hardware: Check mounting bolts and brackets periodically to ensure they remain tight and secure, especially after off-road use or exposure to vibrations.
- Waterproof Rating: The light bar has an IP68 rating, indicating high resistance to dust and water ingress. However, avoid directing high-pressure water jets directly at the seals for extended periods.
6. Troubleshooting
If you encounter issues with your LABSTANDARD LED Light Bar, refer to the following troubleshooting guide:
| Problem | Possible Cause | Solution |
|---|---|---|
| Light bar does not turn on. | No power supply; Loose or incorrect wiring; Faulty switch or fuse. | Check power source (10-30V DC). Verify all wiring connections are secure and correct. Inspect the fuse and switch for proper function. |
| Light output is dim or flickering. | Insufficient voltage; Loose connection; Damaged wiring. | Ensure the voltage supply is within the 10-30V DC range. Check all electrical connections for tightness. Inspect wiring for any signs of damage. |
| Moisture inside the lens. | Seal compromise; Extreme temperature changes. | Small amounts of condensation can occur with rapid temperature changes and usually dissipate. If persistent or significant, inspect seals for damage. Contact support if issue persists. |
| Mounting brackets are loose. | Vibration from vehicle operation; Insufficient tightening during installation. | Tighten all mounting bolts and nuts securely. Consider using thread-locking compound if vibrations are severe. |