GAZEBEST PG01
GAZEBEST Patio Pergola User Manual
Model: PG01
Introduction
This user manual provides essential information for the assembly, operation, and maintenance of your GAZEBEST Patio Pergola with Retractable Canopy. Designed for outdoor living spaces, this pergola offers a versatile solution for sun shade and shelter, featuring a weather-resistant steel frame and a retractable canopy. Please read this manual thoroughly before installation and use to ensure safe and proper operation.
The GAZEBEST Patio Pergola (Model: PG01) measures approximately 10 feet in length, 10 feet in width, and 6.6 feet in height. It is constructed from durable polyester, aluminum, and metal components, designed to withstand wind rates up to 40 MPH.
Safety Information
Your safety is paramount. Adhere to the following guidelines during installation, operation, and maintenance:
- Always check the instructions carefully before beginning installation.
- It is recommended that 1-2 people assist with the installation process for efficiency and safety.
- For safer and more efficient installation, utilize appropriate tools such as a ladder, protective gloves, and an electric wrench.
- Regularly clear snow from the roof to prevent accumulation and potential damage, especially in areas with heavy snowfall.
- Take protective measures, such as retracting the canopy or securing the structure, when wind speeds approach or exceed the rated value of 40 MPH.
- Before purchasing and installing, consult your local city, municipality, and applicable HOA guidelines for building codes and zoning requirements. A license may be required for this structure in some areas.
- If any parts are damaged during shipping or assembly, do not proceed with installation. Contact customer service for assistance.
Package Contents
Before beginning assembly, verify that all components are present and undamaged. The package includes:
- Two (2) boxes containing aluminum frame components.
- One (1) Anti-UV Tarpaulin (retractable canopy).
- Installation Accessories (hardware, fasteners, etc.).
- Assembly Instructions Manual.
Setup and Assembly
Assembly of the GAZEBEST Patio Pergola requires careful attention to detail. Follow the provided assembly instructions manual step-by-step. While the process is designed for user assembly, having 1-2 helpers is highly recommended.
Key Assembly Steps:
- Frame Assembly: Begin by assembling the solid steel frame components. Ensure all connections are secure and tightened according to the instructions. The frame is designed for stability and features a UV-fighting PU coating.
- Canopy Installation: Install the retractable canopy onto the frame. The canopy is divided into two pieces, designed to slide easily along the slotted frame.
- Securing the Structure: The pergola features triangular sections on the roof for added stability. The four individual feet of the frame have openable covers, allowing you to nail down the structure with ground stakes for reinforcement directly into the ground. This step is crucial for stability, especially in windy conditions.

Image: The GAZEBEST Patio Pergola with its retractable canopy extended, situated next to a swimming pool. This image illustrates the product in a typical outdoor leisure setting.

Image: The GAZEBEST Patio Pergola providing shade over an outdoor dining set in a backyard. This demonstrates the pergola's utility as a shelter for social gatherings.

Image: Detailed view highlighting the solid structure of the pergola's metal frame with supporting beams and the stable base of each pole, which can be firmly fixed and includes a waterproof cover.
Operating Instructions
The primary operational feature of your GAZEBEST Patio Pergola is its retractable canopy, designed for flexible shade control.
Retracting and Extending the Canopy:
- The outdoor pergola's canopy is divided into two pieces. These pieces can be moved independently or connected to move together.
- Utilize the slotted design to easily slide the canopy sections. This allows you to fully customize the level of shade throughout the day, adapting to changing sun positions or weather conditions.
- To extend the canopy, gently pull the sections outwards along their tracks until the desired coverage is achieved.
- To retract the canopy, push the sections inwards along their tracks to expose more of the area to sunlight or to protect the canopy during adverse weather.

Image: A close-up demonstrating the adjustable canopy, showing how the retractable sidewalls can be flexibly adjusted. Also shown is the high-quality tarpaulin material of the durable awning, designed to shade away harmful UV rays.

Image: A diagram illustrating the movement of the retractable canopy, showing how sections can be extended or retracted along the frame to adjust shade coverage.
Maintenance
Proper maintenance will extend the lifespan and preserve the appearance of your pergola.
- Snow Removal: In regions with snowfall, regularly clear snow from the canopy to prevent excessive weight accumulation, which could damage the structure.
- Wind Protection: During periods of high wind (approaching or exceeding 40 MPH), it is advisable to fully retract the canopy to minimize wind resistance and prevent potential damage to the fabric or frame. Consider additional anchoring if your area experiences frequent strong winds.
- Cleaning: Clean the frame with a mild soap and water solution. For the canopy fabric, use a soft brush or cloth with mild detergent and rinse thoroughly. Allow the canopy to dry completely before retracting for extended periods.
- Inspection: Periodically inspect all bolts, screws, and connections to ensure they remain tight. Re-tighten as necessary. Check the canopy fabric for any tears or wear and address them promptly.
Troubleshooting
This section addresses common issues you might encounter with your pergola. For problems not listed here, please contact customer support.
| Problem | Possible Cause | Solution |
|---|---|---|
| Difficulty during assembly. | Incorrect part orientation; missing or damaged parts; insufficient assistance. | Review the assembly instructions carefully, ensuring all parts are oriented correctly (e.g., A1 vs. A2 posts). Confirm all parts are present before starting. Seek assistance from 1-2 people. If parts are missing or damaged, contact customer service. |
| Canopy does not slide smoothly. | Obstruction in the tracks; dirt or debris; misaligned canopy sections. | Inspect the canopy tracks for any obstructions or debris and clear them. Ensure the canopy sections are properly aligned within their tracks. Clean the tracks if necessary. |
| Pergola feels unstable. | Loose connections; insufficient anchoring to the ground. | Check and tighten all bolts and fasteners on the frame. Ensure the pergola is properly anchored to the ground using the provided ground stakes, especially if installed on soft surfaces. |
| Water pooling on canopy. | Canopy not fully taut; heavy rainfall. | Ensure the canopy is fully extended and taut. While the canopy is water-resistant, heavy rainfall may cause some pooling. Retract the canopy during heavy rain to prevent excessive water accumulation. |
Specifications
| Feature | Detail |
|---|---|
| Brand | GAZEBEST |
| Model Number | PG01 |
| Product Dimensions | 120"L x 120"W x 93.6"H (10'L x 10'W x 7.8'H) |
| Material | Polyester, Aluminum, Alloy Steel, Polyurethane |
| Frame Material | Aluminum |
| Color | Flat top (Beige/Tan canopy) |
| Water Resistance Level | Water Resistant |
| UV Protection | Yes |
| Assembly Required | Yes |
| Wind Rate | Up to 40 MPH |

Image: A diagram illustrating the key dimensions of the pergola, including its length, width, and height, providing a clear visual reference for its size.
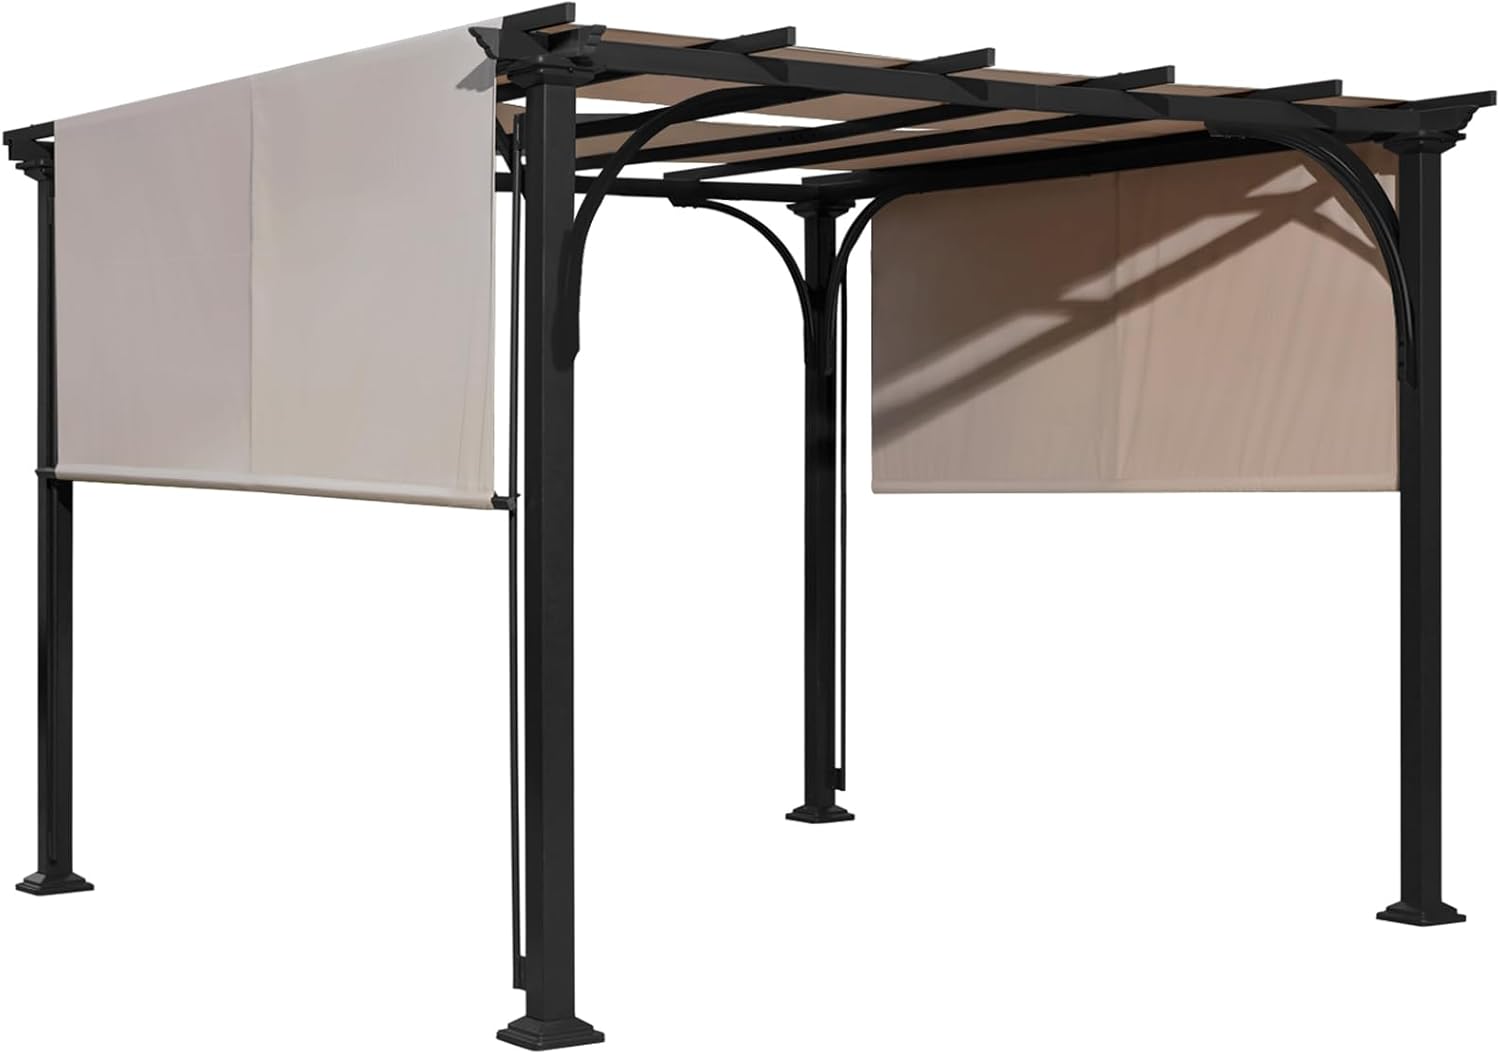
Image: A full perspective view of the GAZEBEST Patio Pergola structure, showcasing its overall design and the retractable canopy in a partially extended position.
Warranty and Support
For warranty information, product support, or to inquire about replacement parts, please contact GAZEBEST customer service directly. Refer to the contact information provided with your purchase documentation or visit the official GAZEBEST website.
If any parts are damaged upon receipt or during assembly, please do not attempt to modify or force them. Contact customer service immediately for assistance and replacement parts.
Official Product Videos
No official product videos from the seller are available for this model at this time.
Ask a question about this manual
Ask about setup, troubleshooting, compatibility, parts, safety, or missing instructions. Manuals+ will review the question and use this page’s manual context to help answer it.