1. Introduction
This manual provides comprehensive instructions for the installation, operation, and maintenance of your ANKEWAY 15W Wireless Fast Charging Phone Mount Holder. Please read this manual thoroughly before use to ensure proper functionality and safety.
1.1 Product Compatibility
- Vehicle Compatibility: Specifically designed for Tesla Model 3 (2017-2023) and Tesla Model Y (2020-2024).
- Note: Not compatible with Tesla Model 3 Highland, Model Y Juniper, Model X, or Model S.
- Phone Compatibility: Supports smartphones with wireless charging capabilities, including iPhone 12 to 17 series, iPhone SE, iPhone 11, iPhone 11 Pro, iPhone 11 Pro Max, iPhone XR, iPhone XS, iPhone XS Max, iPhone X, iPhone 8/8 Plus; Samsung Galaxy S24/S24+/S24 Ultra/S23/S22/S21/S20/Note 20/Note10/Note10+/S10/S10+/S10e/S9/S8; LG G6 G7 G8 ThinQ, LG V30 V35 V40 V50 V60 ThinQ; Google Pixel 3 4 5 6 7 XL Pro, and other Qi-enabled devices.
2. Package Contents
Verify that all items are present in the package:
- 1x Wireless Charging Phone Mount
- 1x USB-C to USB-C Cable (5ft)
- 2x Magnetic Rings (for non-MagSafe compatible phones/cases)
3. Setup Instructions
3.1 Installing the Phone Mount
The mount features a non-destructive installation method, utilizing six hooks that fit perfectly into the Tesla's vent grid. No adhesive is required, allowing for easy repositioning without damage.

The mount features a mechanical fixing design that securely attaches without the need for adhesive, ensuring no damage upon removal.
- Identify your desired installation location on the Tesla's air outlet. The mount can be placed in various positions on the dashboard.
- Gently insert the mount's hooks into the vent grid.
- Slide the mount to the right until the hook touches the edge of the vent.
- Push down the cleat to lock the mount securely in place.

Follow these steps for a secure installation: 1. Position the mount. 2. Slide to engage the hook. 3. Lower the cleat to lock it in place.

The mount can be placed in multiple locations on the air outlet, featuring silicone pads for protection. It is compatible with Tesla Model 3 (2017-2023) and Model Y (2020-2024).
3.2 Attaching Magnetic Rings (for non-MagSafe phones/cases)
If your phone or phone case does not have built-in MagSafe compatibility, use the provided magnetic rings to enable magnetic attachment to the mount.
- Find the centered position on the back of your phone or case.
- Paste a transparent protective film onto your phone or case at the centered position.
- Carefully paste the magnetic ring onto the transparent film.
- Press firmly for several seconds and wait for at least 10 minutes before using the mount to ensure strong adhesion.

For phones or cases without built-in MagSafe, use the provided magnetic rings. Find the centered position, apply a transparent film, then attach the magnetic ring. Allow 10 minutes for adhesion before use.
4. Operating Instructions
4.1 Attaching and Charging Your Phone
The mount features 20 powerful N52 magnets for strong attraction and stable phone retention, even on difficult roads. It supports up to 15W fast wireless charging.
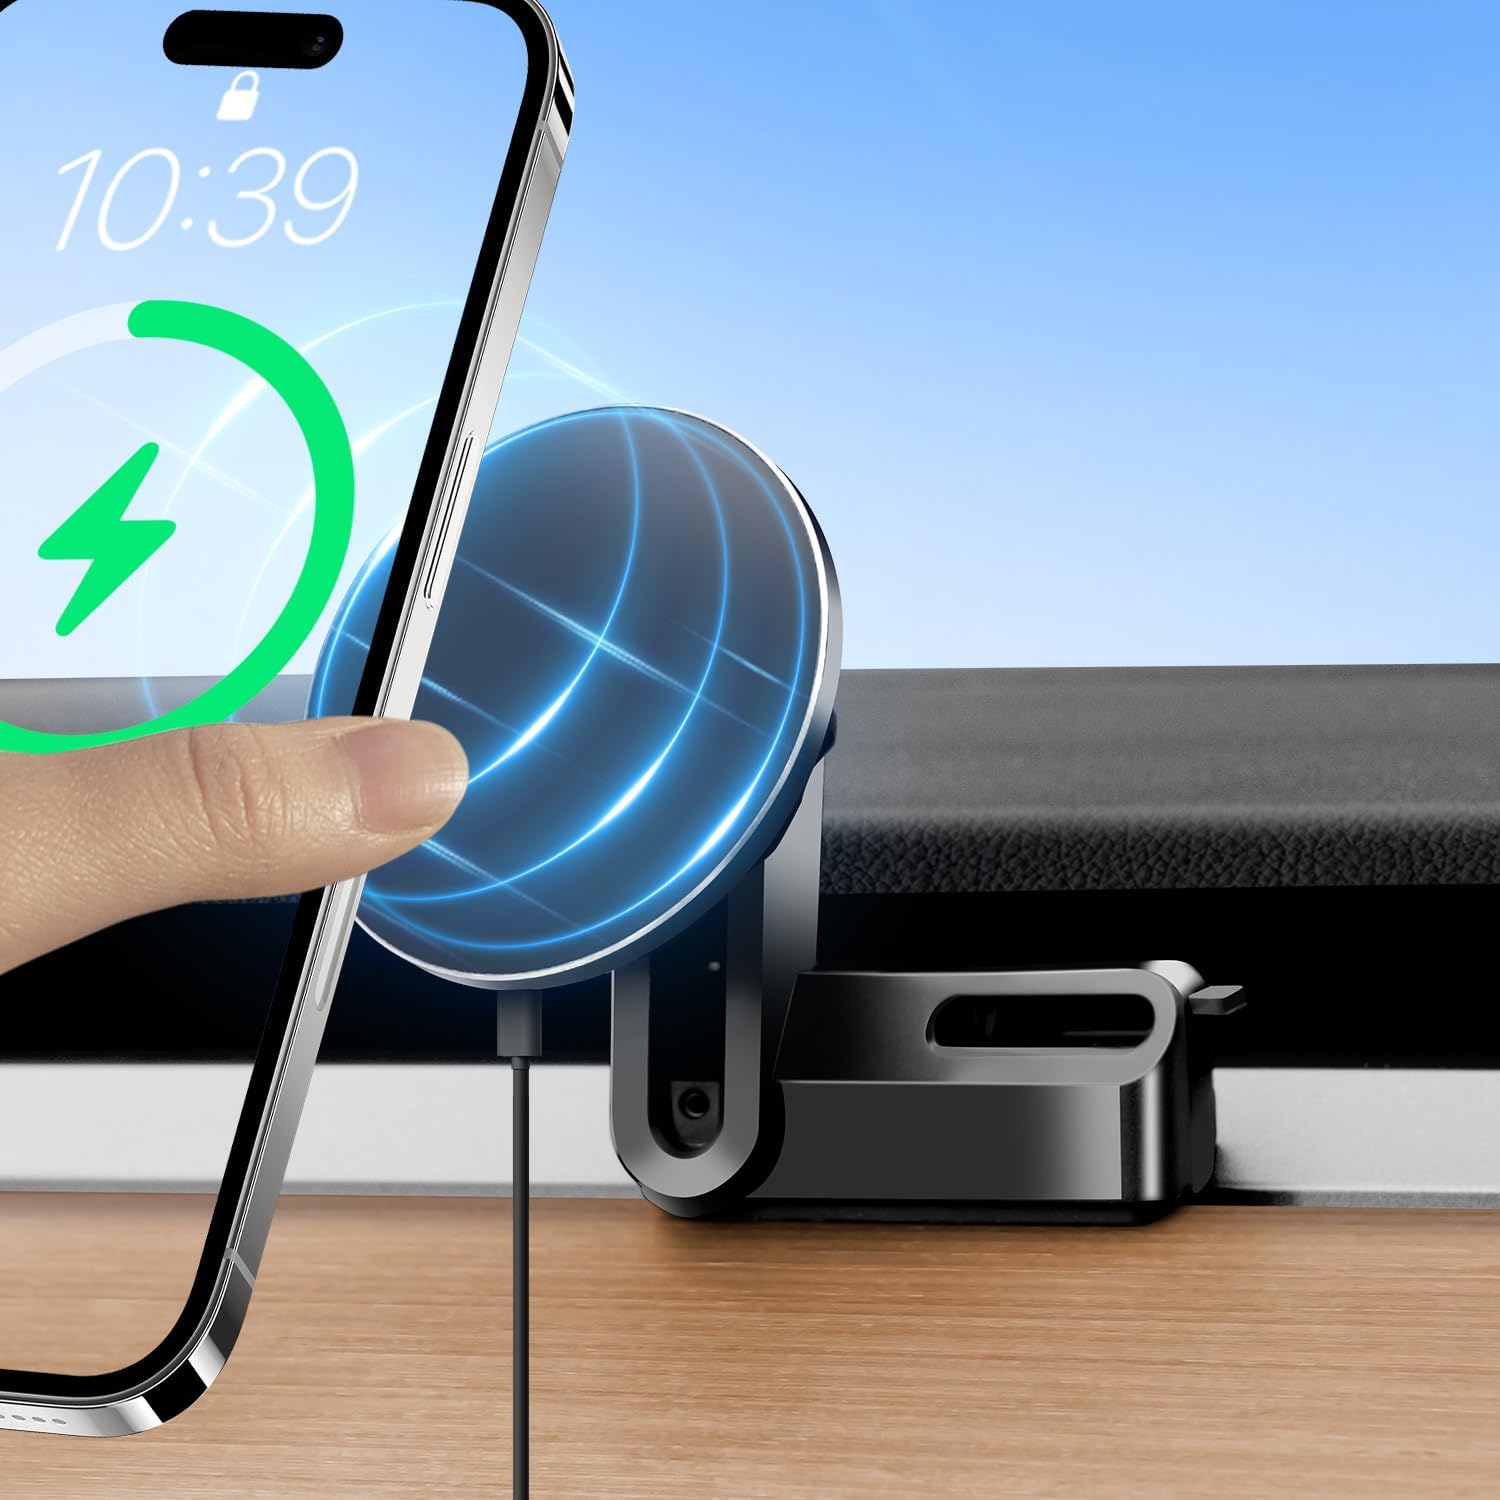
Simply place your compatible smartphone onto the magnetic charging pad. The device will automatically begin 15W fast wireless charging.
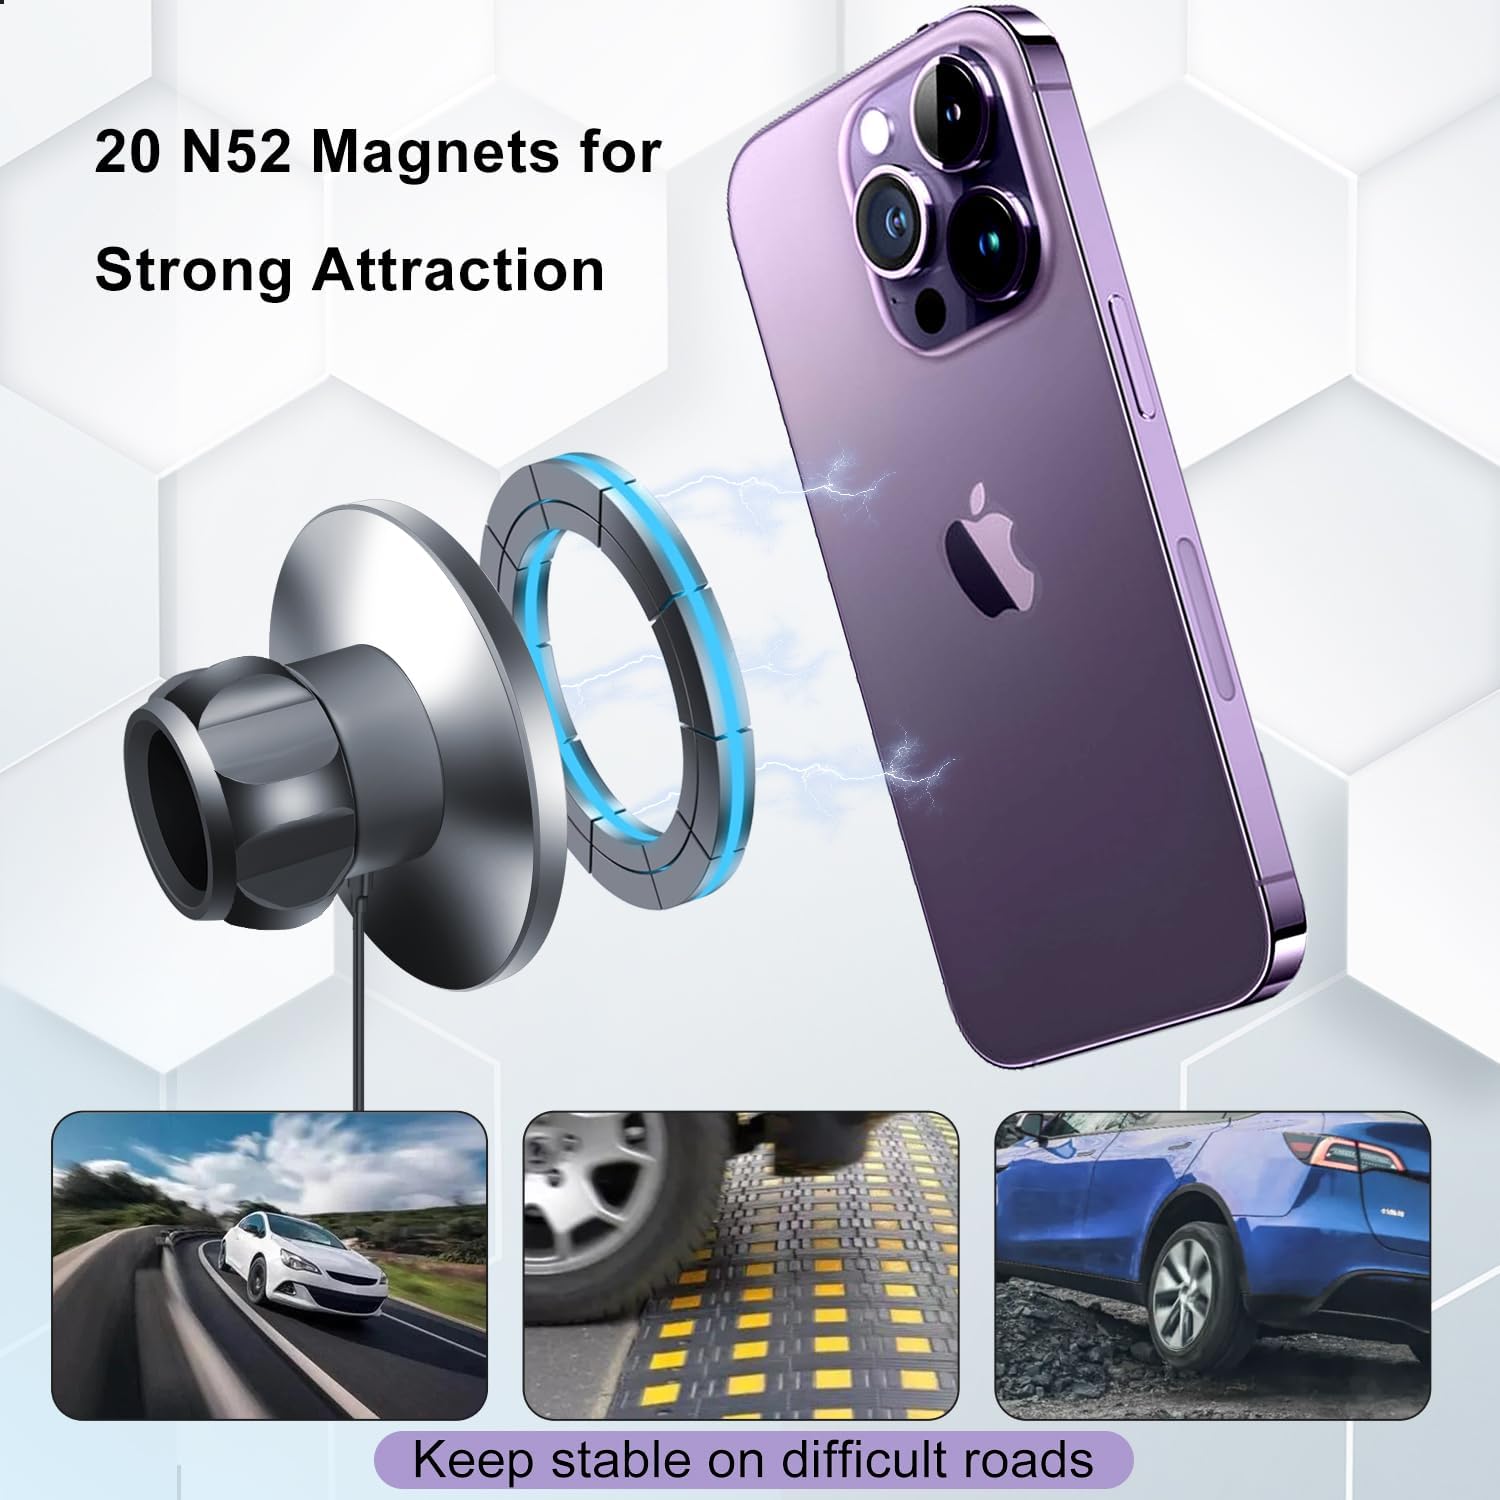
Equipped with 20 powerful N52 magnets, the mount ensures a strong and stable hold for your phone, even on uneven or difficult roads.
- Connect the provided USB-C to USB-C cable to the charging port on the mount and to a compatible USB-C port in your Tesla.
- Gently place your MagSafe-compatible phone (or phone with an attached magnetic ring) onto the magnetic charging pad of the mount.
- The phone will magnetically snap into place and begin wireless charging automatically.
4.2 Adjusting the Viewing Angle
The mount allows for flexible adjustment of your phone's viewing angle, supporting both portrait and landscape orientations for optimal visibility while driving.

The mount allows for flexible adjustment of your phone's viewing angle, supporting both portrait and landscape orientations for optimal visibility.

The versatile design allows for convenient placement in either the driver's or co-pilot's seat, providing easy access to navigation and other phone functions.
5. Maintenance
- Regularly wipe the mount's surface with a soft, dry cloth to remove dust and debris.
- Avoid using harsh chemicals or abrasive cleaners, as these can damage the material.
- Ensure the magnetic charging surface is clean for optimal charging performance.
- Periodically check the mount's attachment to the vent to ensure it remains secure.
6. Troubleshooting
- Phone not charging: Ensure your phone supports wireless charging and is correctly aligned on the magnetic pad. Verify the USB-C cable is securely connected to both the mount and the Tesla's power source.
- Weak magnetic hold: Confirm that your phone or case has built-in MagSafe or that the magnetic ring is properly attached and cured. Ensure no foreign objects are between the phone and the mount.
- Mount feels loose: Re-check the installation steps in Section 3.1 and ensure the cleat is fully engaged to lock the mount firmly into the vent grid.
7. Specifications
| Feature | Detail |
|---|---|
| Brand | ANKEWAY |
| Model Number | CT5-49 |
| Compatible Vehicle Type | Tesla Model 3 (2017-2023), Tesla Model Y (2020-2024) |
| Compatible Devices | Smartphones with wireless charging capability |
| Wireless Charging Output | Up to 15W |
| Magnetic Strength | 20 N52 Magnets |
| Mounting Type | Vent Clip (Non-destructive) |
| Special Feature | One-Hand Operation, Adjustable Angle |
| Item Weight | 0.16 Kilograms |
| Enclosure Material | Plastic |
8. Warranty and Support
8.1 Warranty Information
This product comes with a 1-year warranty from the date of purchase. The warranty covers manufacturing defects and malfunctions under normal use. It does not cover damage caused by misuse, accidents, or unauthorized modifications.
8.2 Customer Support
For any questions, technical assistance, or warranty claims, please contact ANKEWAY customer support through the retailer's platform or visit the official ANKEWAY store online.
9. Product Video
Watch this official product video for a visual overview of the ANKEWAY Tesla MagSafe Charger Mount.
This short video demonstrates the ANKEWAY Tesla MagSafe Charger Mount, highlighting its design and how it integrates into the Tesla Model 3 or Y interior.