XFOX M4
XFOX M4 Smart Door and Window Sensor User Manual
Model: M4 | Brand: XFOX
1. Introduction
The XFOX M4 Smart Door and Window Sensor is a wireless contact sensor designed to enhance home security and enable smart home automation. It detects the opening and closing status of doors, windows, drawers, or other entry points, sending real-time notifications to your smartphone via the Tuya Smart or Smart Life app. This sensor integrates with Amazon Alexa and Google Assistant for voice control and can be used to trigger various smart routines.
2. Package Contents
- XFOX M4 Smart Door and Window Sensor (Main Unit)
- Magnetic Contact Unit
- 3M Adhesive Pads for Installation
- User Manual (This Document)
Note: Two AAA batteries are required per sensor and are not included in the package.
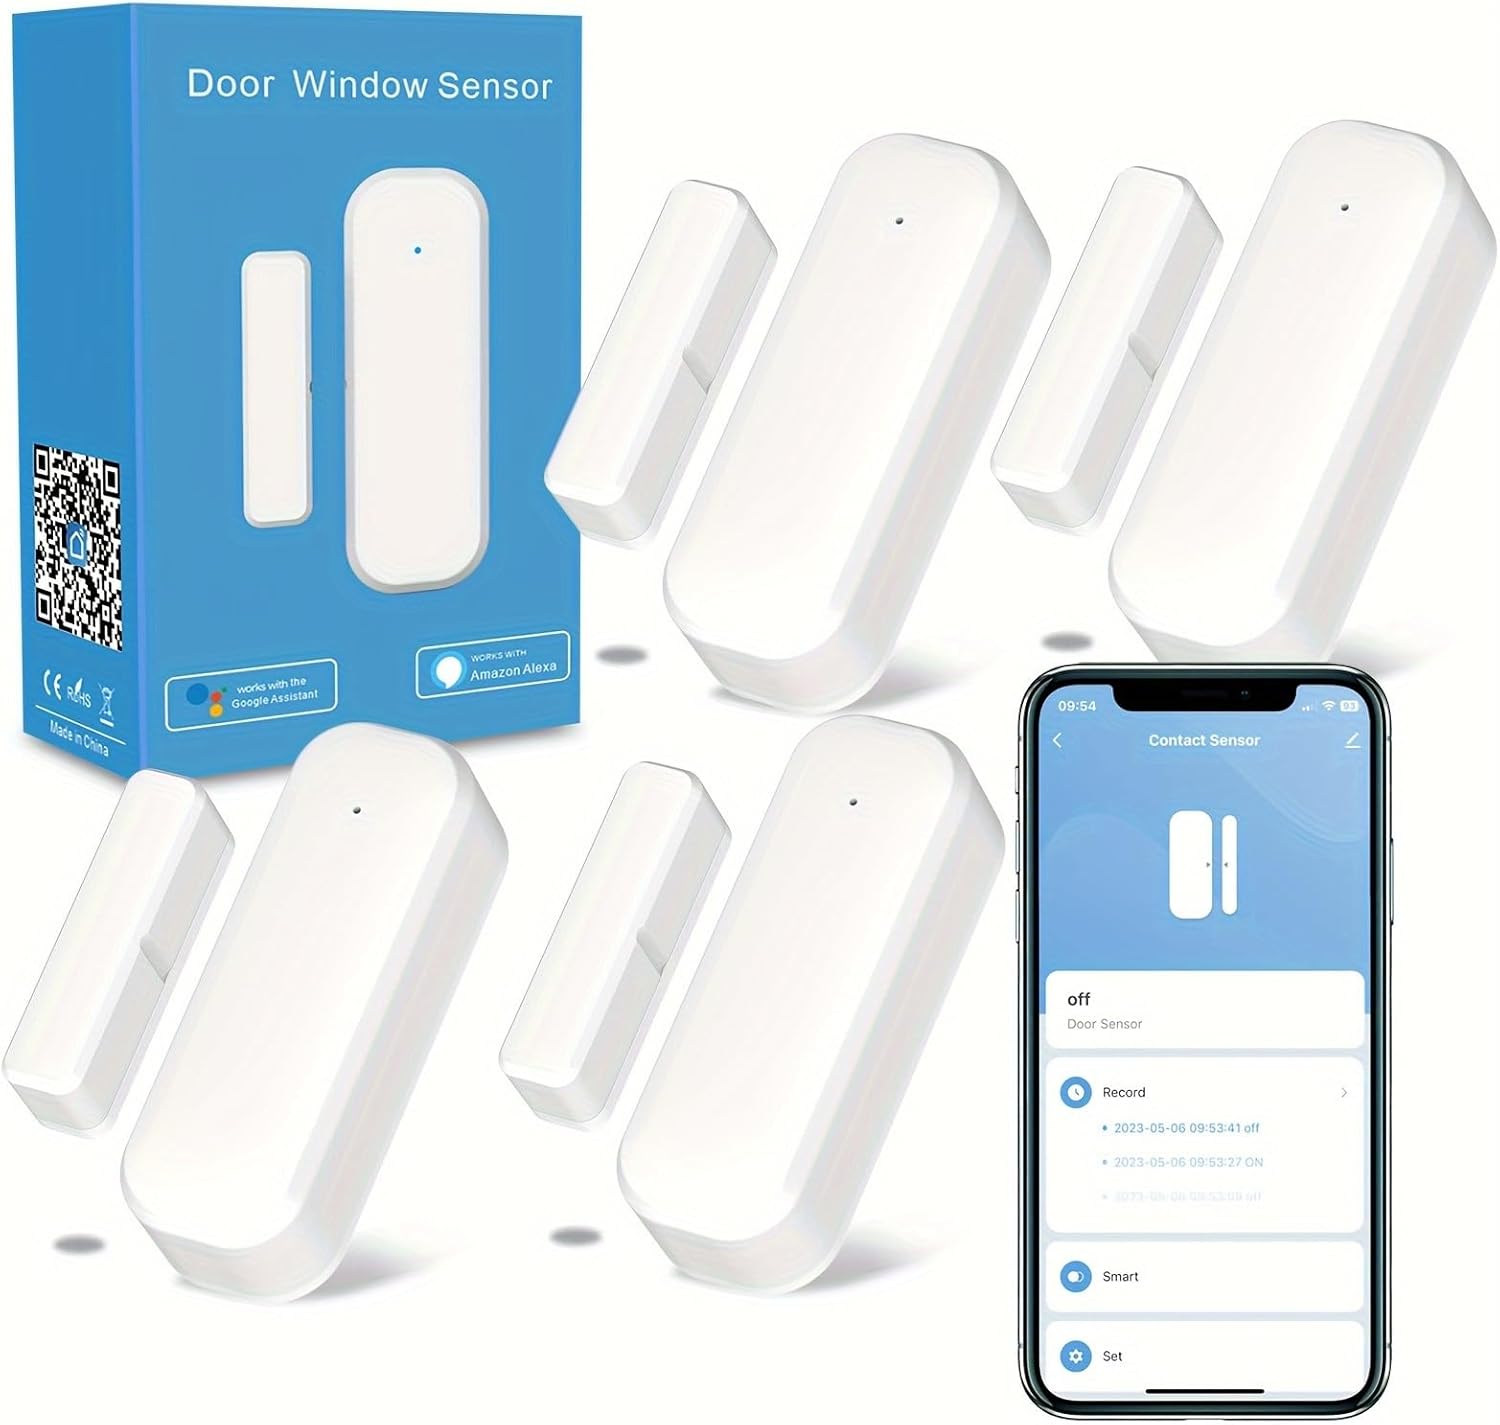
The image displays the XFOX Smart Door and Window Sensor 4-pack, showing the main sensor unit and its magnetic counterpart, along with a smartphone screen illustrating the 'Contact Sensor' interface within the app.
3. Product Overview
The XFOX M4 sensor consists of two main parts: the larger main unit and a smaller magnetic contact unit. When these two parts are separated (e.g., a door opens), the sensor detects the change and sends a signal. A small LED indicator on the main unit briefly lights up when triggered.
Key Features:
- Real-time Monitoring: Receive instant notifications on your smartphone when a door or window opens or closes.
- Home Automation: Create smart routines to link the sensor with other smart devices (e.g., turn on lights when a door opens).
- Voice Control: Compatible with Amazon Alexa and Google Assistant for status inquiries.
- Activity Log: View a historical record of sensor activity within the app.
- Low Power Warning: Receive app notifications when batteries are low.
4. Setup and Installation
4.1 Battery Installation
- Gently slide open the back cover of the main sensor unit.
- Insert two AAA batteries, ensuring correct polarity (+/-).
- Close the back cover securely.
4.2 Physical Installation
The sensor can be installed on various surfaces such as doors, windows, or drawers using the provided 3M adhesive pads. Ensure the installation surface is clean and dry for optimal adhesion.
- Identify the desired location for the sensor. The main unit and magnetic unit must be mounted parallel to each other.
- Ensure the gap between the main unit and the magnetic unit is no more than 0.78 inches (2 cm) when the door/window is closed.
- Peel off the protective film from the 3M adhesive pads and firmly press the main unit onto the desired surface.
- Attach the magnetic unit to the adjacent surface, aligning it with the main unit within the specified gap.

This image provides a four-step visual guide for installing the sensor without tools, showing how to prepare the sensor, attach the adhesive, and mount it on a surface.

The image demonstrates the versatile application of the sensor, showing it installed on a drawer, a standard door, and a window, indicating its adaptability to various entry points.
5. App Integration and Pairing
5.1 Download and Install the App
The XFOX M4 sensor works with either the Tuya Smart or Smart Life app. Download the app from your device's app store or by scanning the QR code on the product packaging.
5.2 Pairing the Sensor with the App
Ensure your smartphone is connected to a 2.4GHz Wi-Fi network. The sensor needs to be within an effective distance of 20m/100ft from your Wi-Fi router.
- Open the Tuya Smart or Smart Life app and log in or register a new account.
- Tap 'Add Device' or the '+' icon in the top right corner.
- Select 'Security & Video Surveillance' > 'Contact Sensor (Wi-Fi)'.
- Press and hold the reset button on the main sensor unit for approximately 5 seconds until the indicator light blinks rapidly (for fast pairing mode) or slowly (for AP mode).
- Follow the in-app instructions to connect the sensor to your Wi-Fi network. You will need to enter your Wi-Fi password.
- Once successfully added, you can rename the sensor and assign it to a specific room.

A detailed nine-step visual tutorial on connecting the smart door sensor to the Smart Life app, covering adding devices, Wi-Fi connection, and viewing sensor status.
5.3 Integrating with Alexa and Google Assistant
After pairing the sensor with the Tuya Smart or Smart Life app, you can link it to your Amazon Alexa or Google Home account for voice control.
- Open the Alexa or Google Home app.
- Navigate to 'Skills & Games' (Alexa) or 'Works with Google' (Google Home).
- Search for 'Tuya Smart' or 'Smart Life' and enable the skill/service.
- Link your Tuya Smart/Smart Life account when prompted.
- Discover devices. Your XFOX M4 sensor should now appear in your Alexa or Google Home device list.
You can now ask your voice assistant about the sensor's status, e.g., "Alexa, is the front door closed?" or "Hey Google, is the garage door open?"

The image shows Amazon Alexa and Google Home devices, highlighting their compatibility with the sensor for voice control, such as asking 'Hey Google, is home gate locked?'
6. Operating Instructions
6.1 Real-time Notifications
Once the sensor is paired, you will receive instant push notifications on your smartphone whenever the monitored door or window is opened or closed. Ensure app notifications are enabled in your phone's settings.
6.2 Activity Record
The app maintains a detailed log of all sensor activities, including timestamps for when the door/window was opened and closed. This allows you to review the history of access at any time.

This image depicts a smartphone screen showing the 'Record' section of the app, which logs the opening and closing times of the door sensor, providing a real-time activity history.
6.3 Home Automation Routines
Leverage the sensor to create smart routines within the Tuya Smart/Smart Life app or through Alexa. For example:
- Scenario: When the front door opens, turn on the living room lights.
- Scenario: If a window is open for more than 5 minutes, send an alert.
Note: A delay of 6-8 seconds is normal when the sensor transitions from hibernation state to trigger an automation.

This image illustrates an intelligent linkage scenario where opening a door (detected by the sensor) automatically triggers the living room lights to turn on, demonstrating smart home automation.
7. Maintenance
7.1 Battery Replacement
The sensor will send a low battery notification to your app when the battery level is critical. To replace the batteries:
- Gently slide open the back cover of the main sensor unit.
- Remove the old AAA batteries.
- Insert two new AAA batteries, observing correct polarity.
- Close the back cover securely.
7.2 Cleaning
Wipe the sensor units with a soft, dry cloth. Avoid using liquid cleaners or abrasive materials.
8. Troubleshooting
- Sensor not connecting to Wi-Fi: Ensure your Wi-Fi network is 2.4GHz. Check that the sensor is within range of the router. Restart the sensor and try pairing again.
- No notifications: Verify that app notifications are enabled in your smartphone settings and within the Tuya Smart/Smart Life app. Check battery levels.
- Sensor falling off: Ensure the installation surface was clean and dry. If issues persist, consider using stronger double-sided adhesive tape.
- Alexa/Google Assistant not responding: Confirm the Tuya Smart/Smart Life skill/service is enabled and linked correctly in your Alexa/Google Home app. Try re-discovering devices.
- Automation delay: A delay of 6-8 seconds is normal for automations triggered by the sensor when it wakes from a low-power state.
9. Specifications
| Feature | Specification |
|---|---|
| Model Number | M4 |
| Power Source | 2 x AAA Batteries (Not Included) |
| Battery Type | Alkaline |
| Wireless Connectivity | 2.4GHz Wi-Fi |
| Control Method | App (Tuya Smart / Smart Life) |
| Compatible Devices | Amazon Alexa, Google Home Assistant |
| Sensor Technology | Contact Sensor |
| Mounting Type | Wall Mount (Adhesive) |
| Maximum Gap | 0.78 inches (2 cm) |
| Product Dimensions | Main Unit: 2.75 x 0.98 x 0.79 inches; Magnetic Unit: 1.73 x 0.43 x 0.59 inches |
| Item Weight | 5.3 ounces (total for 4-pack) |
10. Safety Information
- Do not expose the device to extreme temperatures or humidity.
- Avoid dropping or subjecting the device to strong impacts.
- Keep out of reach of children.
- Dispose of batteries according to local regulations.
11. Warranty and Support
If you encounter any questions or issues with your XFOX Smart Door and Window Sensor, please contact our customer service team. We are committed to providing support and ensuring your satisfaction.
Ask a question about this manual
Ask about setup, troubleshooting, compatibility, parts, safety, or missing instructions. Manuals+ will review the question and use this page’s manual context to help answer it.