
1. Introduction
The KOQICALL Wireless Calling System is designed to streamline customer queuing and service management in various environments such as restaurants, coffee shops, clinics, and banks. This system provides an organized and efficient method for managing customer flow, reducing wait times, and improving overall service experience.
2. Product Components
- 1 LED Number Display: Shows the current number being served.
- 2 Next Call Buttons: Used by service personnel to call the next customer.
- 1 Red Ticket Dispenser: Provides sequential number tickets to customers.
- 3-Digit Ticket Roll: Contains 2,000 tickets (000-999, two sets).
- 1 Remote Control: For adjusting settings and calling numbers remotely.
3. Setup
3.1 Powering the Display
Connect the LED Number Display to a power source using the provided adapter. The display will power on automatically.
3.2 Installing Batteries
- Next Call Buttons: Each button requires a 12V 23A alkaline battery. To install, open the back case of the call button.
- Remote Control: Requires 1.5V AAA batteries.
3.3 Loading Paper into the Ticket Dispenser
Open the ticket dispenser and insert the 3-digit ticket roll. Ensure the paper is loaded in the correct direction for proper printing. The dispenser is designed to prevent the paper from getting stuck.
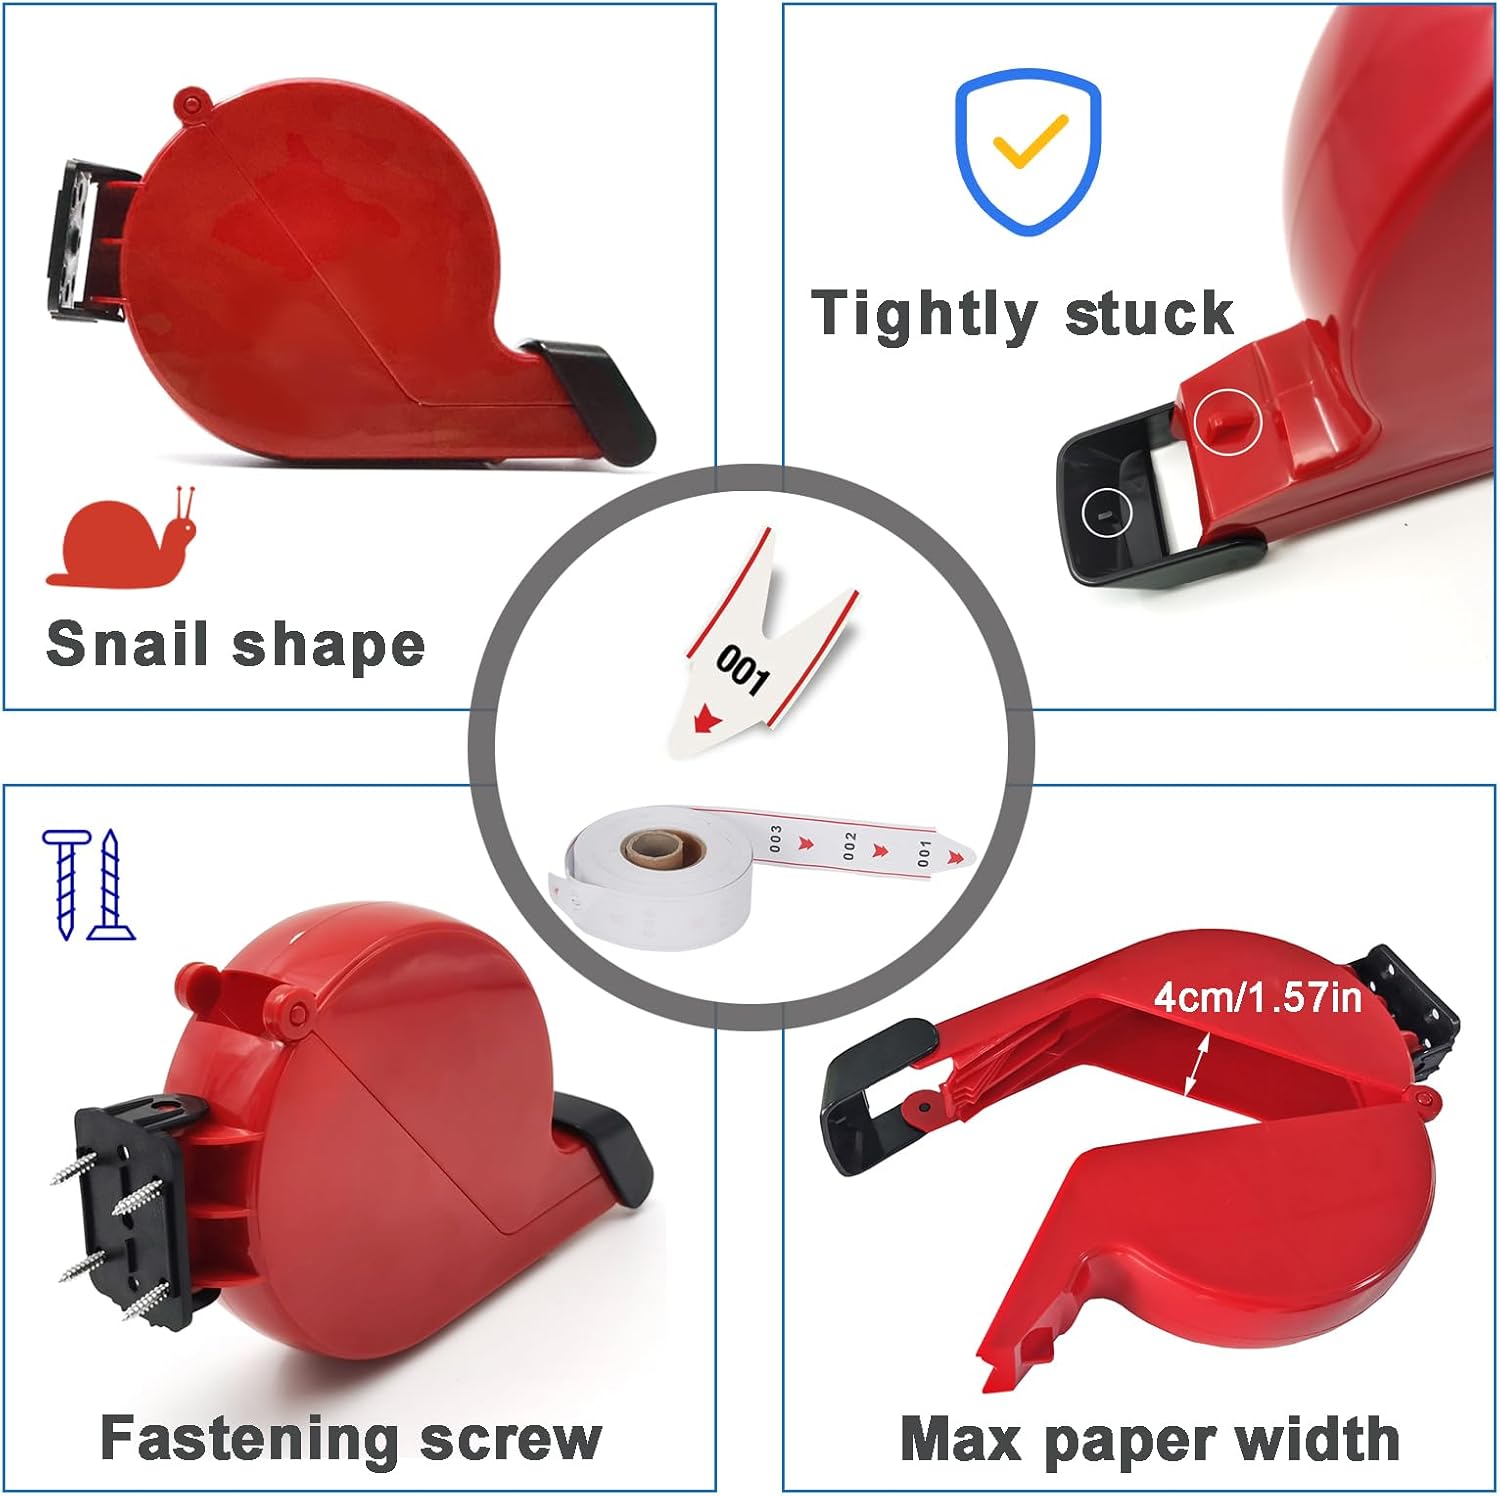
Figure 1: Overview of the KOQICALL Wireless Calling System components.

Figure 2: Detailed view of the ticket dispenser and ticket roll.
Video 1: Correct Paper Loading Direction for Ticket Printer.
4. Operating Instructions
4.1 Basic Operation Flow
- Customers take a number ticket from the dispenser.
- Service personnel press the "NEXT" button to call the next customer. The indicator light on the button will illuminate.
- The LED display will show the calling number, accompanied by a broadcast voice.
- The client proceeds to the designated service area.

Figure 3: Basic operation flow of the KOQICALL Wireless Calling System.
4.2 Adjusting Volume
- On the Display: Turn the knob located at the bottom right of the display unit to adjust the volume. Alternatively, in standby mode (display shows "- - -"), press the Up/Down arrow keys on the display to select a volume level from 01 (minimum) to 09 (maximum). Mute cannot be selected directly in standby; refer to F6-E4 function for mute settings.
- On the Remote Control: When the display shows "- - -" in standby, press the "-" or "+" keys on the remote control to adjust the volume. Volume levels range from 01 to 09.
Video 2: How to Set the Volume on the Display.
Video 3: How to Adjust the Volume on the Remote Control.
4.3 Setting the Starting Number
You can set the desired starting number (e.g., from 001 or A01). To set a specific starting number:
- Press and hold the Gear (Settings) key on the display until "F1" appears.
- Press the Up arrow key 3 times until "FP" appears.
- Press and hold the Return key once until "000" appears.
- Use the Up/Down arrow keys to select your desired starting number (e.g., press Down arrow 4 times for "005").
- Press the Return key 2 times to exit the setup state. The system will now start calling from your chosen number.
Video 4: How to Set the Starting Number.
4.4 Resetting the Number
To quickly reset the current calling number to zero (000):
- Press the RESET/ENT key on the remote control 3 times in quick succession. The display will show "RESET" and then return to "- - -". The next call will restart from 000.
Video 5: Resetting the Number.
4.5 Power-off Memory Function
The system features a power-off memory function. If this function is enabled, the last called number is automatically stored. When power is reconnected, the system will resume calling from the last number plus one. For example, if the last number called was 009, the system will start calling from 010 upon power restoration.
Video 6: Power-off Memory Function Demonstration.
4.6 Adjusting Voice Mode
The default voice prompt is "Number XXX". You can change this to various other voice types or a simple ding-dong sound:
- Press and hold the Gear (Settings) key on the display until "F1" appears.
- Press the Down arrow key 5 times until "F6" appears.
- Press the Gear (Settings) key 2 times until "E1" appears.
- Use the Up/Down arrow keys to choose a voice mode number from 0 to 7. Available voice types include: Counter, Window, Room, Doctor Room, Consulting Room, Booth, Teller, Reception, Number XXX, DingDong, and Music.
- Press the Return key 3 times to exit the setup state.

Figure 4: Various Voice Types Optionals.
Video 7: How to Adjust the Voice Mode.
5. Maintenance
5.1 Battery Replacement
- Next Call Buttons: Replace the 12V 23A alkaline battery when the button's indicator light does not illuminate or the signal becomes weak.
- Remote Control: Replace the 1.5V AAA batteries when the remote's functionality is inconsistent or unresponsive.
Video 8: How to Open the Back Case of a Call Button.
5.2 Cleaning
Wipe all components with a soft, dry cloth. Avoid using abrasive cleaners or solvents that may damage the surfaces.
6. Troubleshooting
- No Display/Power: Ensure the LED display is properly connected to a working power outlet.
- No Sound/Low Volume: Check the volume settings on both the display and the remote control. If mute is desired, ensure it is set via the F6-E4 function, as it cannot be selected in standby.
- Call Button Unresponsive: Replace the battery in the call button. Ensure the button is within the effective transmission range.
- Remote Control Unresponsive: Replace the batteries in the remote control. Ensure there are no obstructions between the remote and the display.
- Limited Transmission Range: The system has a transmission distance of 100-150 meters in open space. Indoors, the signal distance may be reduced to 30-50 meters due to obstacles like doors, windows, and walls. Reposition units if range is an issue.
- Ticket Dispenser Not Printing: Check if the ticket roll is correctly loaded and if there is paper remaining. The system provides an out-of-paper reminder.
7. Specifications
| Feature | Detail |
|---|---|
| Brand | KOQICALL |
| Model Number | 302+O3-N+K-TP1 1+3+1 |
| Item Weight | 4.07 pounds |
| Package Dimensions | 16.77 x 9.09 x 5.31 inches |
| Call Button Battery Type | 12V 23A alkaline battery |
| Call Button Battery Capacity | 50-60mA |
| Call Button Battery Size | 28.3 x 10mm |
| Remote Control Battery Type | 1.5V AAA battery |
| Remote Control Battery Size | Ø10.5mm Height: 44.5mm |
| Max Storage (Numbers) | 999 |
| Ticket Roll Capacity | 2,000 tickets (3-digit) |
| Transmission Distance (Open Space) | 100-150 meters |
| Transmission Distance (Indoors) | 30-50 meters (affected by obstacles) |
8. Warranty and Support
For any product inquiries, technical support, or warranty information, please contact KOQICALL customer service. While specific warranty details are not provided in this manual, extended protection plans may be available for purchase.
Manufacturer: quanzhou koqi electronic co., ltd