
LUCKDANO LUCKDANO04yb63ahxz-02
LUCKDANO Smart Biometrics Reader User Manual
Model: LUCKDANO04yb63ahxz-02
1. Introduction
Thank you for choosing the LUCKDANO Smart Biometrics Reader. This device is an advanced access control system designed for secure and convenient entry management using fingerprint, card, or password verification. This manual provides detailed instructions for installation, operation, and maintenance to ensure optimal performance and longevity of your device.
2. Product Overview
The LUCKDANO Smart Biometrics Reader combines robust security features with user-friendly operation. It is suitable for various environments requiring controlled access.

Figure 2.1: Front view of the LUCKDANO Smart Biometrics Reader, showing the keypad, fingerprint scanner, and card reader area.
Key Features:
- Fast Identification: Utilizes the latest fingerprint algorithm for quick and efficient matching (≤0.5 seconds).
- Multiple Verification Methods: Supports fingerprint, password, and ID card verification.
- High Capacity: Stores up to 500 fingerprints and 500 cards.
- Standalone Operation: Functions as an independent access controller and reader, with all settings manageable via the keypad.
- Enhanced Security: Can be integrated with third-party electronic locks, door sensors, exit buttons, alarms, and doorbells.
- Durable Construction: Made from ABS plastics, designed for reliable performance.

Figure 2.2: Visual representation of the device's capabilities, including fingerprint, password, and card verification, along with capacity and speed indicators.

Figure 2.3: Examples of environments where the access control system can be effectively utilized, such as factories, offices, and healthcare facilities.
3. Specifications
| Specification | Value |
|---|---|
| Material | ABS plastics |
| Fingerprint Capacity | 500 |
| Card Capacity | 500 |
| Algorithm Version | Finger VX10.0 |
| Working Method | Offline |
| Access Control Interface | Third-party electronic lock, door sensor, exit button, alarm, doorbell |
| Power Supply | DC 12V |
| Verification Speed | ≤0.5 seconds |
| Working Temperature | 0°C - 45°C (32°F - 113°F) |
| Working Humidity | 20%-80% |
| Card Reading Method | IC card, ID card (optional) |
| Operating Frequency | IC: 13.56MHz, ID: 125KHz |
| Item Weight | 9.4 ounces (approx. 270g) |
| Model Number | LUCKDANO04yb63ahxz-02 |
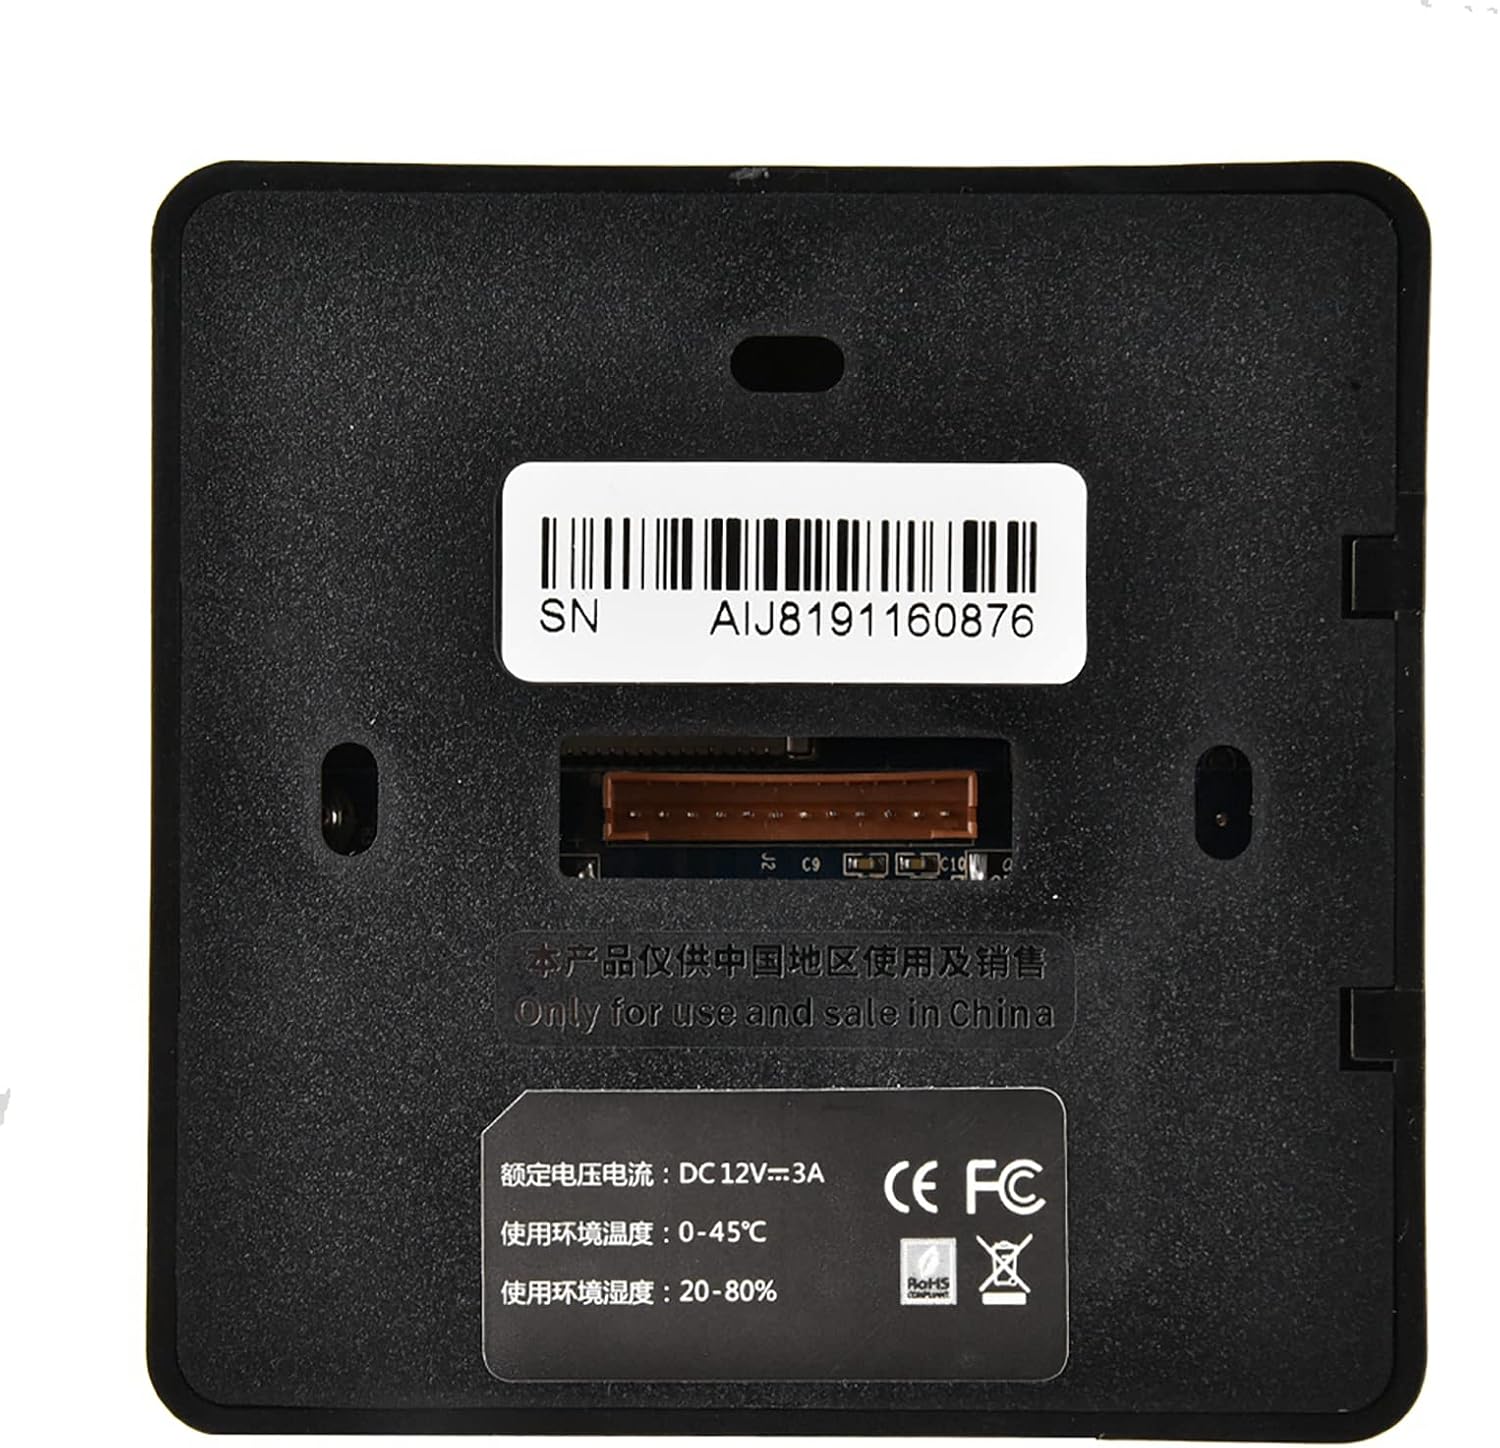
Figure 3.1: Rear view of the device, displaying the serial number (AIJ8191160876) and power requirements (DC 12V).
4. Package Contents
Upon opening the package, please verify that all the following items are included:
- 1 x Fingerprint Access Control Unit
- 1 x Connection Cable
- 1 x Screw Package (for mounting)
- 1 x Inner (likely referring to an inner mounting plate or component)
- 10 x Access Cards (ID type)
- 1 x User Manual (this document)

Figure 4.1: All components included in the package, such as the main unit, access cards, connection cables, and mounting hardware.
5. Setup and Installation
The LUCKDANO Smart Biometrics Reader is designed for straightforward installation. Ensure the power is disconnected before beginning any wiring.
5.1 Mounting the Device
- Choose a suitable location for installation, typically near a door frame.
- Use the provided screw package to securely mount the device to the wall or door frame. Ensure it is at an accessible height for all users.
- If an inner mounting plate is provided, attach it first, then secure the main unit to the plate.
5.2 Wiring Connections
Connect the device to your power supply and other access control components using the provided connection cable. Refer to the wiring diagram (not provided in this manual, typically found in a separate installation guide or on the device itself) for specific pin assignments.
- Connect the DC 12V power supply to the designated power input terminals.
- Connect to a third-party electronic lock (e.g., electric strike, magnetic lock) via the lock control output.
- Connect optional components such as a door sensor, exit button, alarm, or doorbell to their respective terminals.
5.3 Initial Power-Up
- Once all connections are secure, connect the DC 12V power supply.
- The device will power on and enter standby mode.
- The default administrator password is typically
123456(or similar, refer to specific device documentation if this does not work). It is highly recommended to change this immediately after initial setup.
6. Operating Instructions
This section details how to manage users and operate the access control system. All operations are performed directly on the device's keypad.
6.1 Entering Programming Mode
- Press * then enter the Administrator Password (default:
123456), then press #. - A confirmation tone or light indicator will signify entry into programming mode.
6.2 User Management
6.2.1 Registering a Fingerprint User
- Enter Programming Mode.
- Press a specific key combination (e.g.,
1then #) to enter fingerprint registration. - Place the user's finger on the scanner. The device will prompt for multiple scans (typically 3 times) for accurate registration.
- Wait for confirmation.

Figure 6.1: Demonstrating the process of placing a finger on the biometric scanner for registration or verification.
6.2.2 Registering an ID Card User
- Enter Programming Mode.
- Press a specific key combination (e.g.,
2then #) to enter card registration. - Present the ID card to the card reader area.
- Wait for confirmation.
6.2.3 Registering a Password User
- Enter Programming Mode.
- Press a specific key combination (e.g.,
3then #) to enter password registration. - Enter the desired password (e.g., 4-6 digits) and confirm it.
- Wait for confirmation.
6.2.4 Deleting Users
Users can be deleted individually or all at once. Refer to the device's specific menu options for deletion procedures (e.g., delete by user ID, delete all fingerprints, delete all cards).
6.3 Accessing the Door
To gain access, present your registered credential to the device:
- Fingerprint: Place your registered finger on the scanner.
- ID Card: Present your registered ID card to the card reader area.
- Password: Enter your registered password on the keypad, then press #.
Upon successful verification, the door lock will disengage for a preset duration.
7. Maintenance
Proper maintenance ensures the longevity and reliable operation of your LUCKDANO Smart Biometrics Reader.
- Cleaning: Use a soft, dry cloth to wipe the device's surface. For the fingerprint scanner, use a lint-free cloth lightly dampened with a non-abrasive cleaner (e.g., isopropyl alcohol) if necessary, then wipe dry immediately. Avoid excessive moisture.
- Avoid Harsh Chemicals: Do not use strong detergents, solvents, or abrasive cleaners, as these can damage the device's finish and internal components.
- Environmental Conditions: Ensure the device operates within the specified temperature (0°C - 45°C) and humidity (20%-80%) ranges to prevent malfunction.
- Regular Checks: Periodically check all cable connections for looseness or damage.
8. Troubleshooting
If you encounter issues with your device, refer to the following table for common problems and their solutions.
| Problem | Possible Cause | Solution |
|---|---|---|
| Device does not power on. | No power supply; incorrect wiring. | Check power adapter and ensure it is connected to a live outlet. Verify all wiring connections are correct and secure. |
| Fingerprint not recognized. | Finger not placed correctly; dirty scanner; unregistered fingerprint; dry/wet finger. | Ensure finger covers the entire scanner. Clean the scanner surface. Re-register fingerprint if necessary. Ensure finger is clean and not excessively dry or wet. |
| ID card not recognized. | Card not presented correctly; unregistered card; incompatible card type. | Present the card flat against the reader. Register the card if it's new. Ensure you are using the correct ID card type (125KHz). |
| Door does not unlock after successful verification. | Lock wiring issue; lock malfunction; incorrect lock settings. | Check wiring between the access control unit and the electronic lock. Test the lock independently. Verify lock release duration settings in programming mode. |
| Cannot enter programming mode. | Incorrect administrator password. | Double-check the administrator password. If forgotten, refer to the device's specific reset procedure (may involve a hardware reset, which typically clears all data). |
9. Warranty Information
LUCKDANO products are manufactured to high quality standards. This product comes with a standard manufacturer's warranty against defects in materials and workmanship. The specific duration and terms of the warranty may vary by region and retailer. Please retain your purchase receipt as proof of purchase for any warranty claims.
The warranty typically covers manufacturing defects but does not cover damage resulting from:
- Improper installation or use not in accordance with this manual.
- Accidental damage, misuse, abuse, or neglect.
- Unauthorized repairs or modifications.
- Natural disasters or acts of God.
For detailed warranty terms and conditions, please refer to the warranty card included with your product or contact LUCKDANO customer support.
10. Customer Support
If you require further assistance or have questions not covered in this manual, please contact LUCKDANO customer support.
- Online Support: Visit the official LUCKDANO store on Amazon for product information and support resources: LUCKDANO Amazon Store
- Email Support: Refer to your product packaging or warranty card for specific email contact information.
When contacting support, please have your product model number (LUCKDANO04yb63ahxz-02) and serial number (AIJ8191160876, if applicable) ready.
Ask a question about this manual
Ask about setup, troubleshooting, compatibility, parts, safety, or missing instructions. Manuals+ will review the question and use this page’s manual context to help answer it.