
1. Product Overview
The KOZWAY 12V Motorized Jockey Wheel is designed to simplify the maneuvering of your caravan, trailer, boat, or horse float. This electric mini mover features forward and reverse movement, an automatic braking function, and an oversized anti-slip wheel, making it ideal for positioning your valuable assets in challenging spaces.
The unit consists of a motor and gear system, a control box, a clamp for attachment, a lift handle for height adjustment, and a control handle for direction.
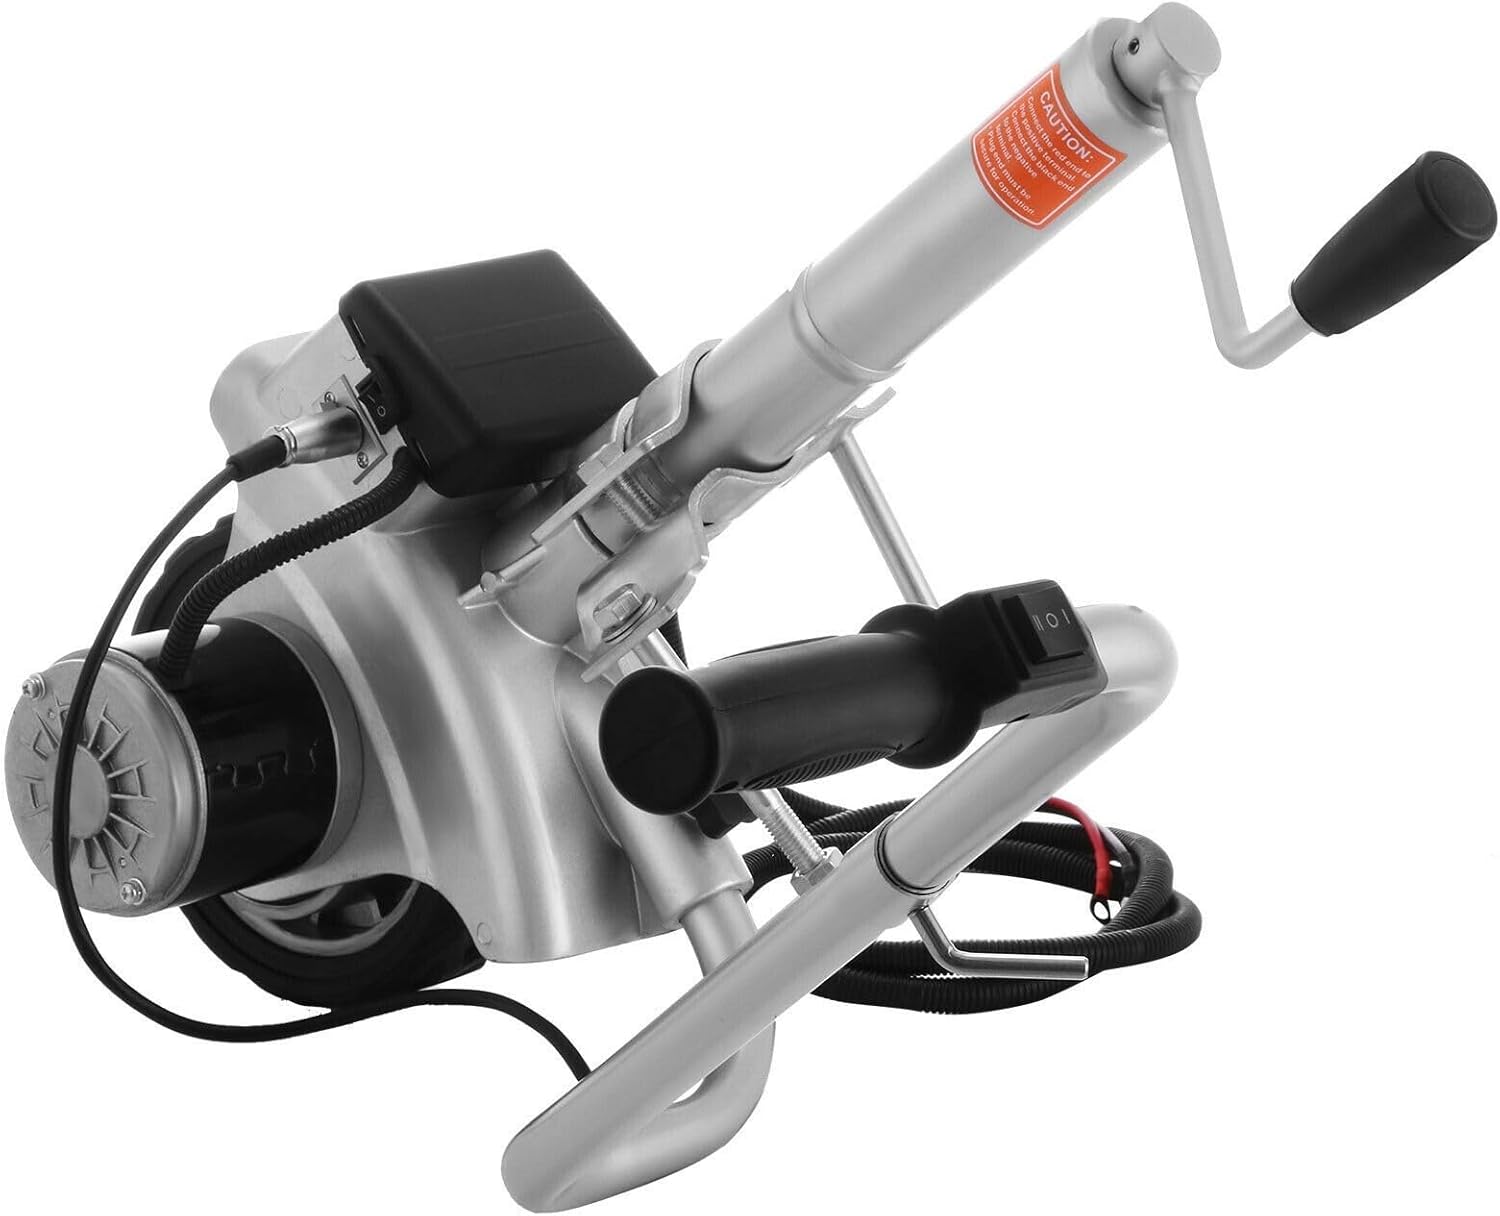
Figure 1: Front view of the 12V Motorized Jockey Wheel.
2. Safety Information
Adhere to the following safety guidelines to ensure safe operation and prevent damage to the unit or injury.
- The jack is rated for a 3500kg (7716 lbs) pulling weight and a 272kg (600 lbs) jockey wheel load. Overloading can damage the Mini Mover, motor, tire, etc.
- Ensure the positioning key of the handle is fully screwed into the Mini Mover before beginning operation.
- Verify that the battery cables are correctly connected to the battery terminals.
- Do not use leads that are torn, crushed, or damaged.
- Avoid using the machine outdoors during rainy weather conditions.
3. Components and Parts
The package includes the following components:
- 1 x Motorized Jockey Wheel
- 1 x Mounting Bracket
- 1 x Battery Leads
- 1 x Pair of Bolts
Key parts of the unit:
- Motor & Gear System: The DC motor powers the gear mechanism, converting motor power into moving force.
- Control Box: Contains electrical components and protects the motor from overheating.
- Clamp: Similar to a normal jockey wheel clamp, used to fix the Trail Jack to the vehicle chassis.
- Lift Handle: Adjusts the height of the Trailer Jack.
- Control Handle: Allows the operator to turn the handle right or left for steering.

Figure 2: Illustration of the Control Handle for direction and Lifting Poker for height adjustment. The mounting bracket must fit precisely into the bulge on the shaft for secure attachment.
4. Setup and Assembly
- Attach the Mounting Bracket: Secure the mounting bracket to the vehicle chassis using the provided bolts. Ensure it is firmly attached and aligned correctly.
- Insert the Jockey Wheel: Slide the Motorized Jockey Wheel into the clamp on the mounting bracket. Ensure the bulge on the shaft fits exactly into the bracket for a secure fit.
- Connect Battery Leads: Connect the battery leads to a 12V battery. Ensure correct polarity (positive to positive, negative to negative) and that connections are secure. Refer to Section 2 for safety warnings regarding damaged leads.
- Adjust Height: Use the lift handle to adjust the height of the jockey wheel to the appropriate level for your trailer or caravan.
5. Operating Instructions
Once assembled and connected to a 12V power source, the Mini Mover is ready for operation.
- Power On: Locate the power switch on the unit and turn it on.
- Control Movement: Use the control handle to steer the unit. Swinging the handle left or right will control the direction of movement.
- Forward/Reverse: The unit supports both forward and reverse movement. Specific controls for this (e.g., a switch or lever) will be located near the control handle.
- Automatic Brake: The unit features an automatic braking function, which engages when the power is disengaged or the unit stops moving.
- Maneuvering: Guide your caravan, trailer, boat, or horse float into the desired position. The oversized anti-slip wheel allows for use on slight inclines.

Figure 3: The Trailer Mover Dolly in operation, demonstrating its ability to move trailers easily. Note the maximum vehicle load of 5000 lbs (2270 kg) and maximum wheel load of 600 lbs (272 kg).

Figure 4: Close-up of the powerful 12V DC 350-Watt motor, designed for low-noise, time-saving, and labor-saving operation, moving trailers at approximately 0.25 miles per hour.

Figure 5: Examples of various applications for the Mini Mover, including use with trucks, boats, caravans, and utility trailers.
6. Specifications
| Feature | Specification |
|---|---|
| Motor | 12V / 350W |
| Max. Incline | 5 Degrees |
| Tire Diameter | 8 inches (190 mm) |
| Max. Speed | 22 Ft/min (6.7 m/min) |
| Max. Vehicle Load | 5000 lbs (2270 kg) |
| Max. Jockey Wheel Load | 600 lbs (272 kg) |
| Adjusted Clamp Height | 12.6 - 16.5 inches (320 - 420 mm) |
7. Maintenance
Regular maintenance ensures the longevity and optimal performance of your Mini Mover.
- Cleaning: Keep the unit clean and free from dirt, dust, and debris. Use a damp cloth to wipe down surfaces. Avoid using harsh chemicals.
- Storage: Store the Mini Mover in a dry, protected area when not in use, especially during adverse weather conditions.
- Cable Inspection: Periodically inspect all cables and connections for signs of wear, fraying, or damage. Replace any damaged components immediately.
- Battery Care: Ensure your 12V battery is properly maintained and charged according to its manufacturer's instructions.
- Mechanical Check: Check all bolts and fasteners regularly to ensure they are tight. Lubricate moving parts as necessary, referring to any specific lubrication points indicated in the product's physical manual if available.
8. Troubleshooting
If you encounter issues with your Mini Mover, consider the following common troubleshooting steps:
- Unit Not Powering On:
- Check battery connections for proper polarity and secure fit.
- Ensure the 12V battery is charged.
- Verify the power switch is in the "ON" position.
- Inspect battery leads for any damage (tears, crushes).
- Unit Not Moving or Moving Slowly:
- Check for obstructions around the wheel.
- Ensure the load does not exceed the maximum vehicle load (5000 lbs / 2270 kg) or jockey wheel load (600 lbs / 272 kg).
- Verify the terrain is not excessively steep (max incline 5 degrees).
- Confirm the positioning key of the handle is fully screwed in.
- Unusual Noises:
- Turn off the unit immediately.
- Inspect for loose parts or foreign objects.
- If noises persist, contact customer support.
For issues not resolved by these steps, please contact customer support.
9. Warranty and Support
For warranty information, technical support, or service inquiries, please refer to the documentation provided with your purchase or contact KOZWAY customer service through the retailer where the product was purchased. Keep your proof of purchase for warranty claims.