jioeuinly K100
User Manual
Koobee K100 Phone Case with Tempered Glass Screen Protector
Model: K100 | Brand: jioeuinly
1. Introduction
This manual provides comprehensive instructions for the installation, operation, and maintenance of your jioeuinly Koobee K100 Phone Case, which includes a tempered glass screen protector and a multi-functional ring support. Designed for the Koobee K100 phone, this product offers robust protection and enhanced usability.

Figure 1: Overview of the Koobee K100 Phone Case, including the case, detachable ring holder, and tempered glass screen protector.
Package Contents:
- 1 x Koobee K100 Phone Case (IMDZ-HUA1 Color)
- 1 x Tempered Glass Screen Protector
- 1 x Adhesive Metal Finger Ring Support
2. Product Features
The Koobee K100 Phone Case is engineered with multiple features to provide superior protection and convenience for your device.
- Advanced Protection: Features a combination of a hard PC back panel and a soft silicone frame. The four corners are equipped with shock airbags to absorb impacts, providing comprehensive drop protection. The case design is elevated above both the camera and screen for enhanced flat surface protection.
- Durable and Aesthetic Design: The back panel features a unique IMD (In-Mold Decoration) laser style with a frosted surface, offering a delicate feel and colorful reflective light effects. The back is constructed with four layers: a solid PC base, an ultra-high definition pattern layer, a special process layer, and a clear, scratch-resistant surface layer.
- Integrated Ring Support: An adhesive metal finger ring support is included, which can be attached to the case or used separately. This ring offers 360-degree rotation for comfortable grip and serves as a kickstand. It also supports magnetic car mounts.
- High-Quality Tempered Glass Screen Protector: Provides 9H high hardness for superior scratch resistance, perfect adhesion for seamless integration, and is shatterproof. It maintains 99.9% super transparency for clear viewing and features an anti-fingerprint coating. The screen protector is designed to be case-friendly.
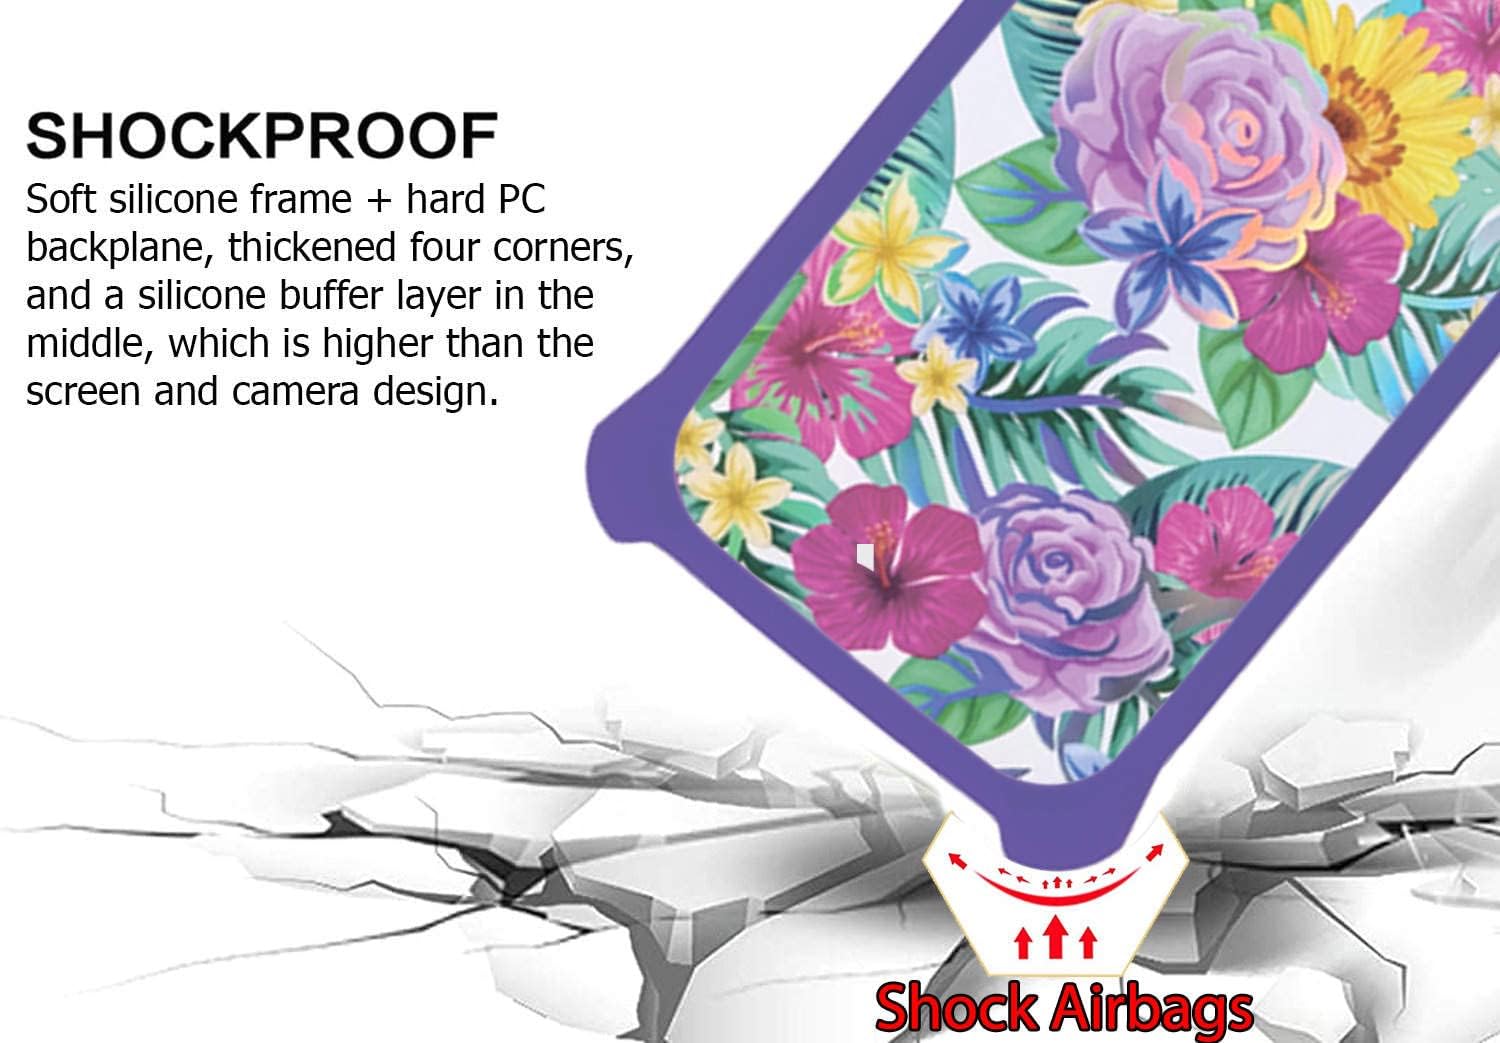
Figure 2: Illustration of the shockproof design, highlighting the reinforced corners with shock airbags for impact absorption.
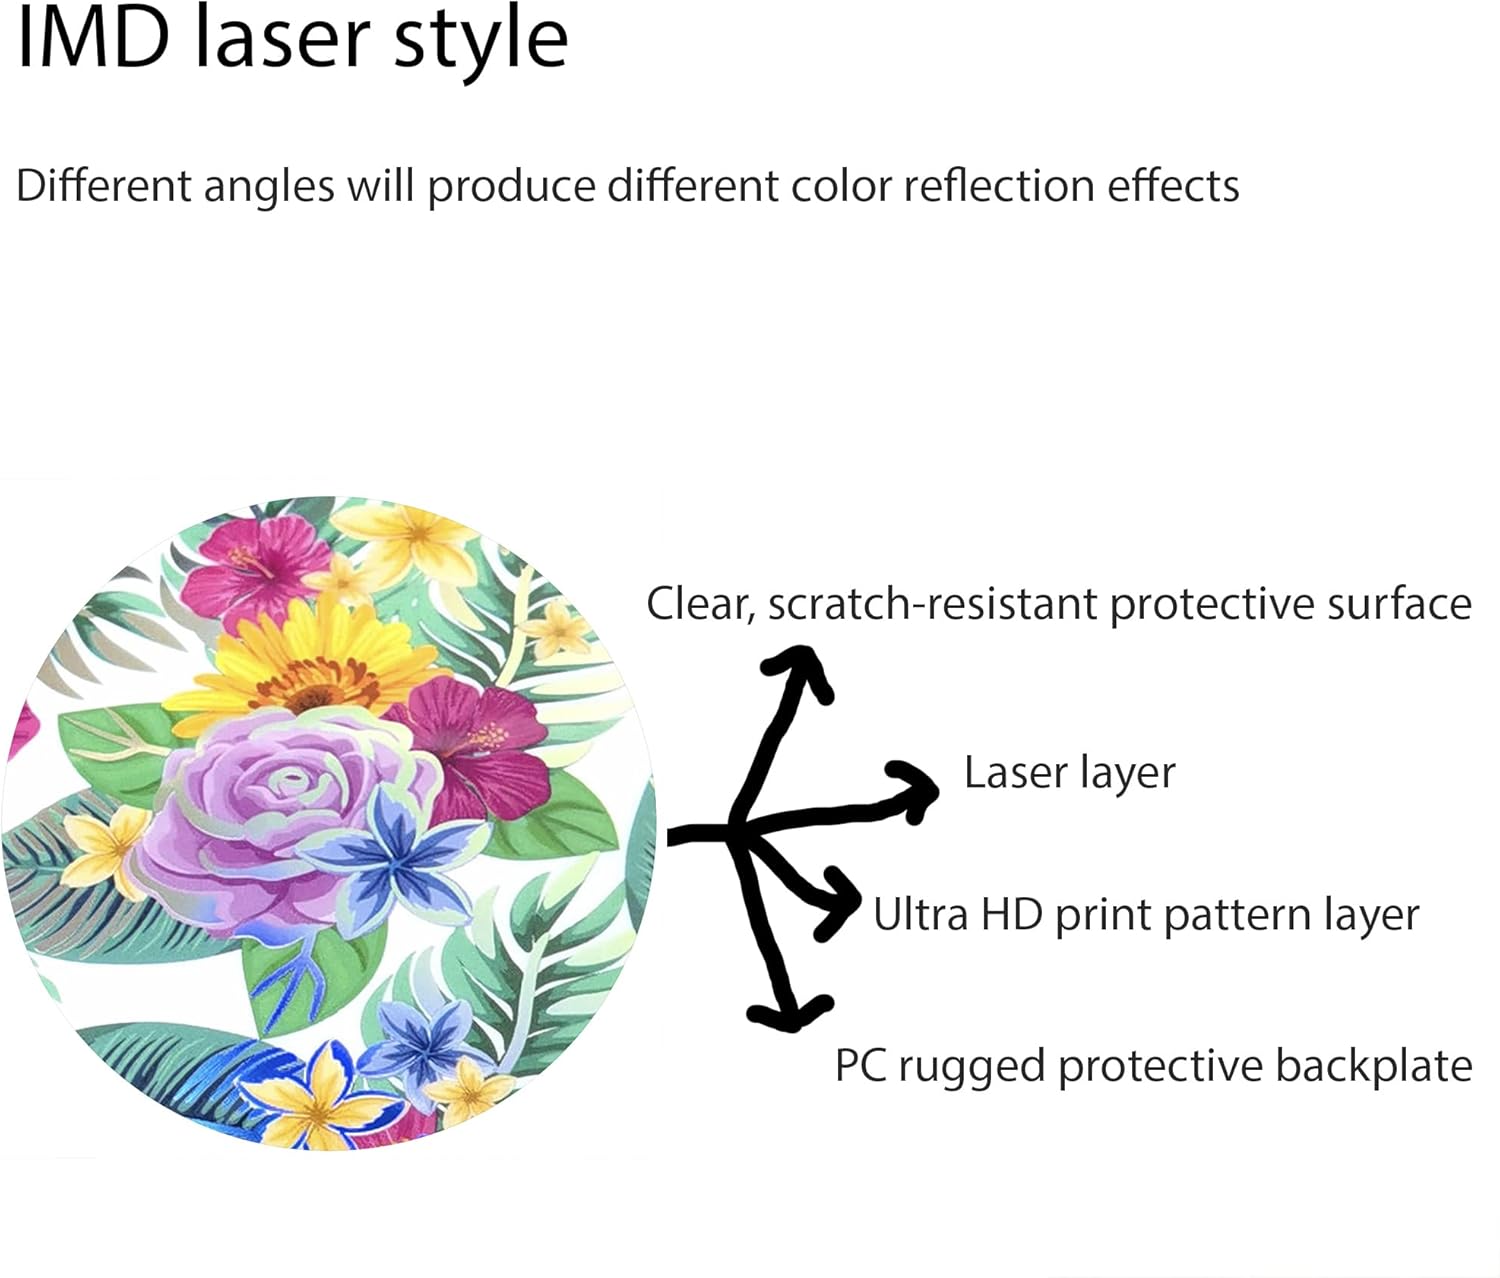
Figure 3: Diagram illustrating the multi-layered construction of the case's back panel, including the PC backplate, print layer, laser layer, and scratch-resistant surface.

Figure 4: Key features of the tempered glass screen protector, including 9H hardness, shatterproof design, and anti-fingerprint properties.
3. Setup and Installation
3.1 Installing the Phone Case:
- Ensure your Koobee K100 phone is clean and free of dust or debris.
- Align the phone with the case, starting with the top or bottom edge.
- Gently press the phone into the case, ensuring all corners and edges are securely fitted.
- Verify that all ports, buttons, and camera cutouts align correctly with the phone.
3.2 Applying the Tempered Glass Screen Protector:
- Clean the Screen: Use the provided cleaning wipes (if any) or a microfiber cloth to thoroughly clean your phone's screen. Ensure no dust, smudges, or fingerprints remain.
- Remove Dust: Use a dust-absorber sticker (if provided) to remove any remaining dust particles from the screen.
- Peel Off Protective Film: Carefully peel off the protective film from the adhesive side of the tempered glass screen protector. Avoid touching the adhesive surface.
- Align and Apply: Carefully align the screen protector with your phone's screen, paying attention to the cutouts for the speaker, camera, and home button. Once aligned, gently lower the protector onto the screen.
- Press and Smooth: Lightly press the center of the screen protector. The adhesive will spread outwards. Use a clean cloth or your finger to gently push out any air bubbles towards the edges.
3.3 Attaching the Finger Ring Support:
- Clean the desired attachment area on the back of your phone case or phone. Ensure it is dry and free of dust.
- Peel off the protective film from the adhesive side of the finger ring support.
- Carefully position the ring support on the chosen area. Press firmly for about 30 seconds to ensure strong adhesion.
- Allow the adhesive to cure for a few hours (ideally 24 hours) before heavy use to ensure maximum bond strength.
4. Operating Instructions
4.1 Using the Finger Ring Support:
- Enhanced Grip: Slide your finger through the ring to secure your phone, reducing the risk of accidental drops, especially during one-handed operation.
- Kickstand Function: Rotate the ring to your desired angle (up to 180 degrees) and prop your phone up on a flat surface for hands-free viewing of videos or video calls.
- Magnetic Car Mount Compatibility: The metal ring on the support allows it to securely attach to magnetic car mounts (not included).

Figure 5: Demonstrates how the finger ring support enables easier one-handed operation of the phone.

Figure 6: Illustrates the compatibility of the ring support with magnetic car mounts for convenient in-car use.
Note: The phone case and ring support do not support wireless charging when attached to the phone. You may need to remove the phone from the case or detach the ring for wireless charging.
5. Maintenance and Care
- Cleaning the Case: To clean the phone case, gently wipe it with a soft, damp cloth. For stubborn stains, a mild soap solution can be used. Avoid harsh chemicals or abrasive materials, as they may damage the case's finish or reflective properties.
- Cleaning the Screen Protector: Use a microfiber cloth to wipe the screen protector. For smudges, a screen cleaning spray designed for electronics can be used. Do not use paper towels or rough cloths, which can scratch the surface.
- Ring Support Care: Ensure the ring mechanism remains free of dirt or debris to maintain smooth rotation. If the adhesive weakens over time, it may be necessary to replace the ring support.
- Storage: When not in use, store the case and screen protector in a clean, dry place away from direct sunlight and extreme temperatures.
6. Troubleshooting
| Problem | Possible Cause | Solution |
|---|---|---|
| Air bubbles under screen protector | Dust particles or improper application. | Gently lift the nearest edge of the protector and re-apply, using a card to push bubbles out. Ensure screen is dust-free before re-application. |
| Ring support feels loose or detaches | Adhesive weakening or improper initial application. | Ensure the surface was clean and dry before application. If adhesive is worn, consider replacing the ring support. |
| Case does not fit properly | Incorrect model or misaligned during installation. | Verify that the product is for Koobee K100. Remove and re-install the case, ensuring all corners snap into place. |
7. Specifications
| Brand | jioeuinly |
| Model Number | K100 |
| Compatible Phone Models | Koobee K100 |
| Material | PC hard back panel + soft silicone frame + metal support finger ring |
| Color | IMDZ-HUA1 |
| Product Dimensions | 0.39 x 0.39 x 0.39 inches |
| Item Weight | 2.46 ounces |
| Special Features | Finger ring + support + car bracket magnetic suction, Shock Airbags, IMD Laser Style |
| Whats in the box | Screen Protector (and Phone Case, Ring Support) |
8. Warranty and Support
For any questions, concerns, or support needs regarding your jioeuinly Koobee K100 Phone Case, please refer to the seller's return policy or contact the seller directly through the platform where the purchase was made. Please retain your proof of purchase for any warranty claims.