Introduction
This manual provides detailed instructions for the installation, operation, and maintenance of your CASAINC 12 Inch Rain Shower Head with Handheld Thermostatic Shower System. Please read this manual thoroughly before installation and use to ensure proper function and longevity of your product. Keep this manual for future reference.
Product Components
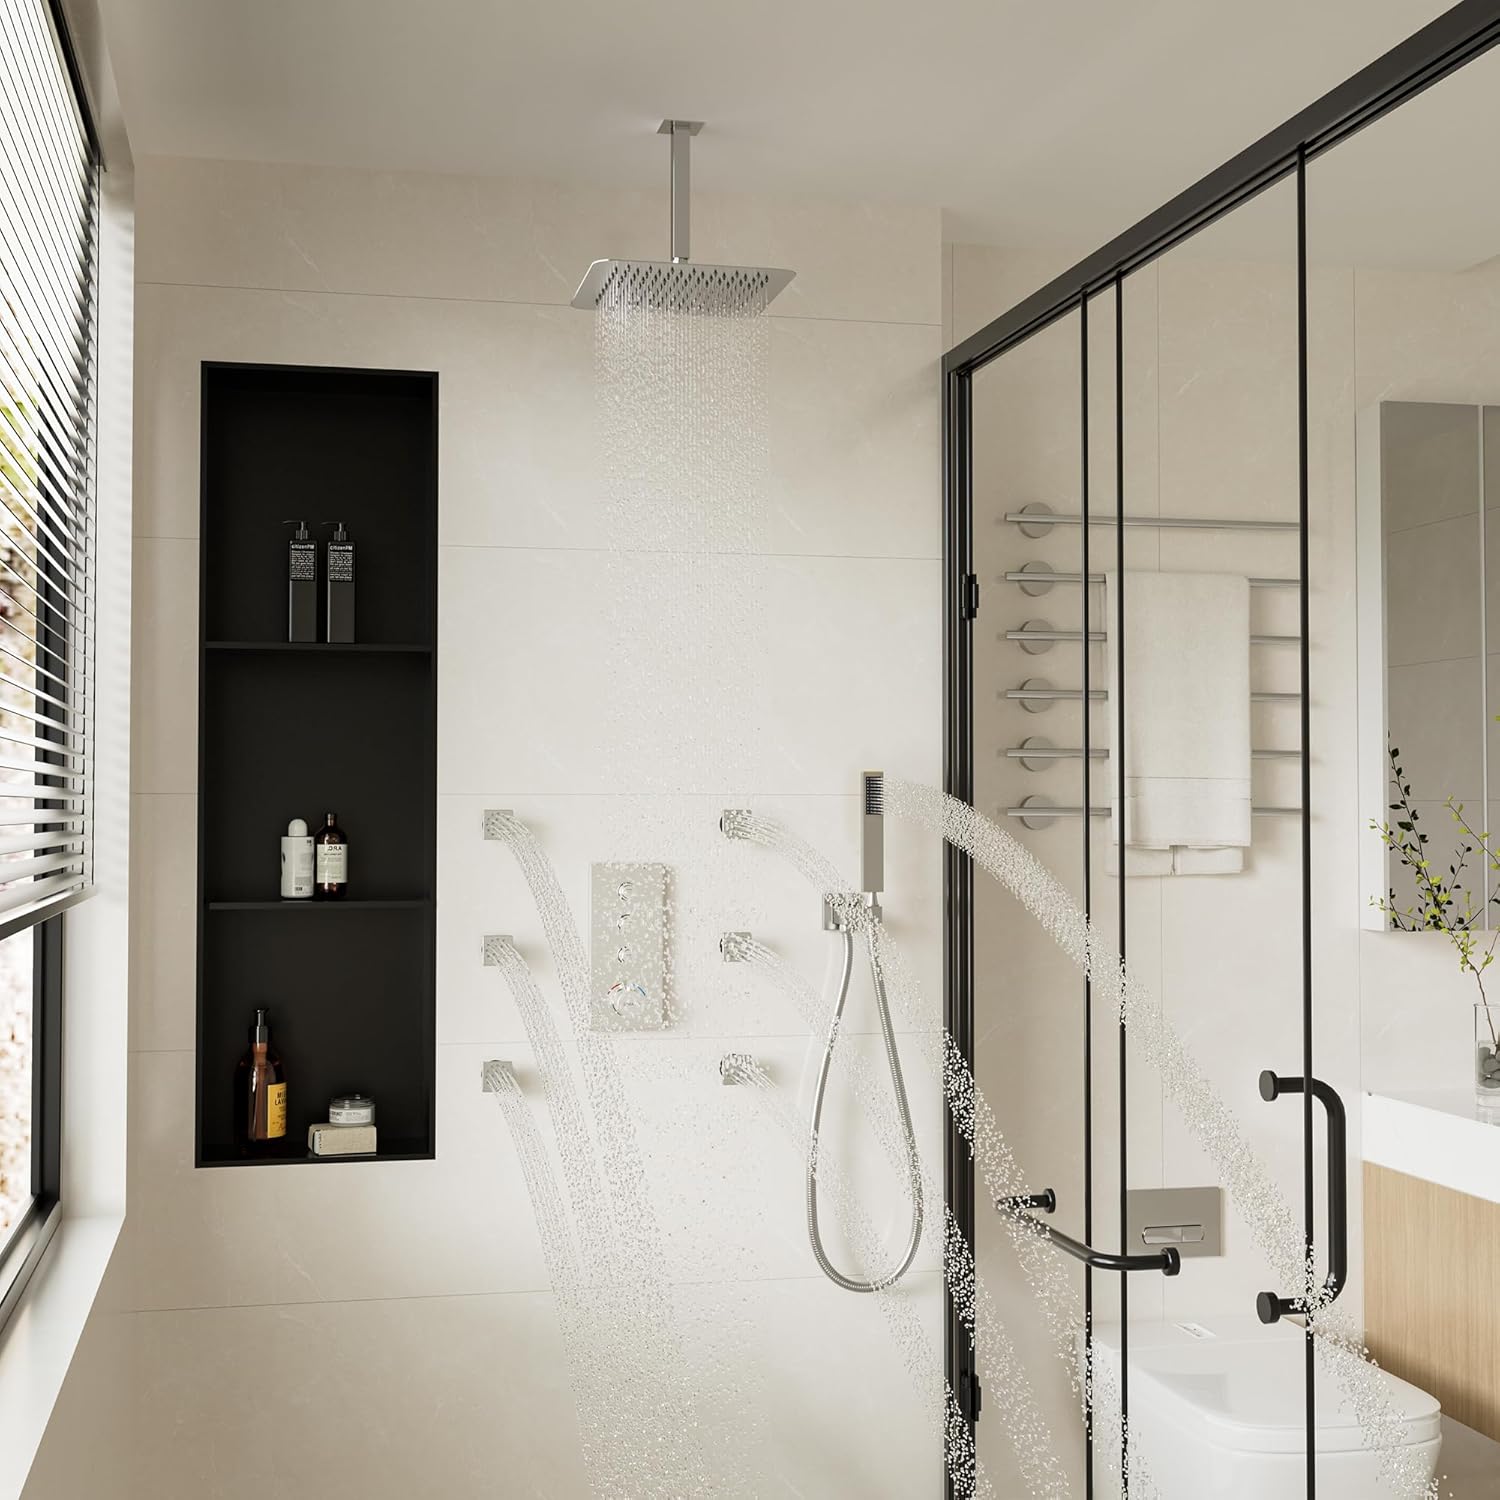
The CASAINC Thermostatic Shower System includes the following main components:
- 12-inch Square Rain Shower Head
- Handheld Shower with Hose
- Thermostatic Mixing Valve with Push-Button Controls
- Multiple Body Spray Jets (6 pieces)
- Concealed Installation Box
- Mounting Hardware and Accessories


Installation Instructions
Professional installation is recommended. Ensure all local plumbing codes are followed. Before beginning, verify all parts are present and undamaged.
Pre-Installation Precautions:
- Refer to the Standard Part List when unpacking; check all parts are available.
- Do not disassemble the mixer body by yourself.
- Connect inlet hoses to supply valves.
- Ensure inlet pipes and supply valves have been installed and cleaned. Also, ensure no impurities are in the pipeline.
- After installation, check all joints for leakages.
- It is suggested not to fit the faucet in severely corrosive environments.
Installation Video Guide:
Video 1: Detailed installation guide for the CASAINC Thermostatic Shower System, demonstrating the process from rough-in to final assembly.
Key Installation Steps:
- Prepare the Wall: Install anchors to the wall according to the installation size. Trace and drill the holes.
- Concealed Box Placement: The inlet and outlet pipes are pre-buried. Pay attention to the correct direction of installing the pre-buried box, and make sure that the mark 'TOP' on the top of the installation box is facing upward.
- Pipe Connections: Connect the hot water inlet (NPT1/2") and cold water inlet (NPT1/2"). Connect the overhead shower outlet (NPT1/2"), body jets outlet (NPT1/2"), and handheld shower outlet (NPT1/2"). Each outlet is controlled by a button switch, allowing you to arrange connections as needed.
- Testing: Rinse the pipes to clear any debris. Turn on the water source and test for leaks at all connections. Adjust the flow switch to be on, flush the outlet pipes for about 1 minute, and test for unobstructed flow.
- Valve Cartridge Adjustment: During handle mounting, the spool tooth rod must not rotate at any angle to ensure the default temperature for handle installation is 38°C (100°F). If rotation occurs accidentally, adjust the default temperature according to the limit calibration line of the spool.
- Shower Head Installation: Wrap raw material tape around the thread of the connecting pipe. Screw the thread into the water pipe inside the wall. Connect the rain shower head to the arm.
- Side Spray Installation: Wrap the side spray thread around the raw material belt and screw it into the water pipe.
- Handheld Shower Installation: Install the decorative cover into the fixed base, wrap the fixed base with raw material tape, and screw it into the water pipe. Connect the hose to the wall seat and the hand-held shower.

Operation Instructions
Your CASAINC Thermostatic Shower System offers multiple functions for a customized showering experience.
- Temperature Control: The thermostatic valve maintains a constant water temperature regardless of pressure fluctuations. Use the main knob to set your desired temperature. The system has a preset temperature at 100°F/38°C for safety. A temperature limiting button prevents accidental high-temperature adjustments, especially useful for children.
- Function Selection: The three push-button controls allow you to select between the rain shower head, handheld shower, and body spray jets. You can use one function at a time or enjoy all three simultaneously, depending on your water pressure.
- Rain Shower Head: Provides a wide, even rainfall experience. The 360° rotation allows for adjustment of the spray direction.
- Handheld Shower: Offers focused spray for rinsing specific areas. The hose provides flexibility and reach.
- Body Spray Jets: Deliver a massaging spray from multiple angles. Each jet has an adjustable angle.
Maintenance
To maintain the finish and performance of your CASAINC shower system, follow these guidelines:
- Cleaning: Clean regularly with a soft cloth and mild soap or a non-abrasive cleaner specifically designed for brushed nickel finishes. Avoid abrasive cleaners, scouring pads, or harsh chemicals, as these can damage the finish.
- Nozzle Care: The rain shower head and body jets feature self-cleaning nozzles. Periodically rub the rubber nozzles to dislodge any mineral buildup.
- Hard Water: In areas with hard water, more frequent cleaning may be necessary to prevent mineral deposits.
- Inspection: Periodically check all connections for any signs of leaks or wear.
Troubleshooting
| Problem | Possible Cause | Solution |
|---|---|---|
| Low Water Flow | Clogged nozzles; low water pressure; partially closed shut-off valve. | Clean shower head and body jet nozzles. Check main water supply and shut-off valves are fully open. Consult a plumber if house water pressure is consistently low. |
| Water Temperature Fluctuations | Thermostatic valve issue; unbalanced hot/cold water pressure. | Ensure the thermostatic valve is correctly calibrated (refer to installation video). Check hot and cold water supply lines for consistent pressure. |
| Leaks from Connections | Loose connections; damaged O-rings/seals; insufficient thread tape. | Tighten connections. Apply more thread tape if necessary. Replace any damaged O-rings or seals. |
| Buttons Not Switching Functions Properly | Debris in valve; internal mechanism issue. | Flush the system. If the problem persists, contact customer support. |
Specifications
| Feature | Detail |
|---|---|
| Brand | CASAINC |
| Model Number | BV-4 |
| Color | Brushed Nickel |
| Material | Zinc (main components), Brass (handle material) |
| Finish Type | Brushed |
| Mounting Type | Ceiling Mount (Rain Shower Head) |
| Maximum Pressure | 3 Bars |
| Item Weight | 9.87 Kilograms |
| UPC | 738056130326 |
| Thermostatic Valve Core | French Vernet |
Warranty and Support
This CASAINC shower head and shower trim kit are backed by MM CASA INC Faucet's Lifetime Limited Warranty. For any questions or concerns regarding your product, please do not hesitate to contact CASAINC customer support. Professional product consultants are available to assist you.