Flever QT-041
Flever Sakura Noodles Shop Miniature DIY House Kit Instruction Manual
Brand: Flever | Model: QT-041
1. Product Overview
The Flever Sakura Noodles Shop Miniature DIY House Kit (Model QT-041) provides a detailed and engaging crafting experience to build a miniature Japanese-style noodle shop. This kit includes all necessary pre-cut pieces, decorations, and tools to construct a charming, illuminated display model.
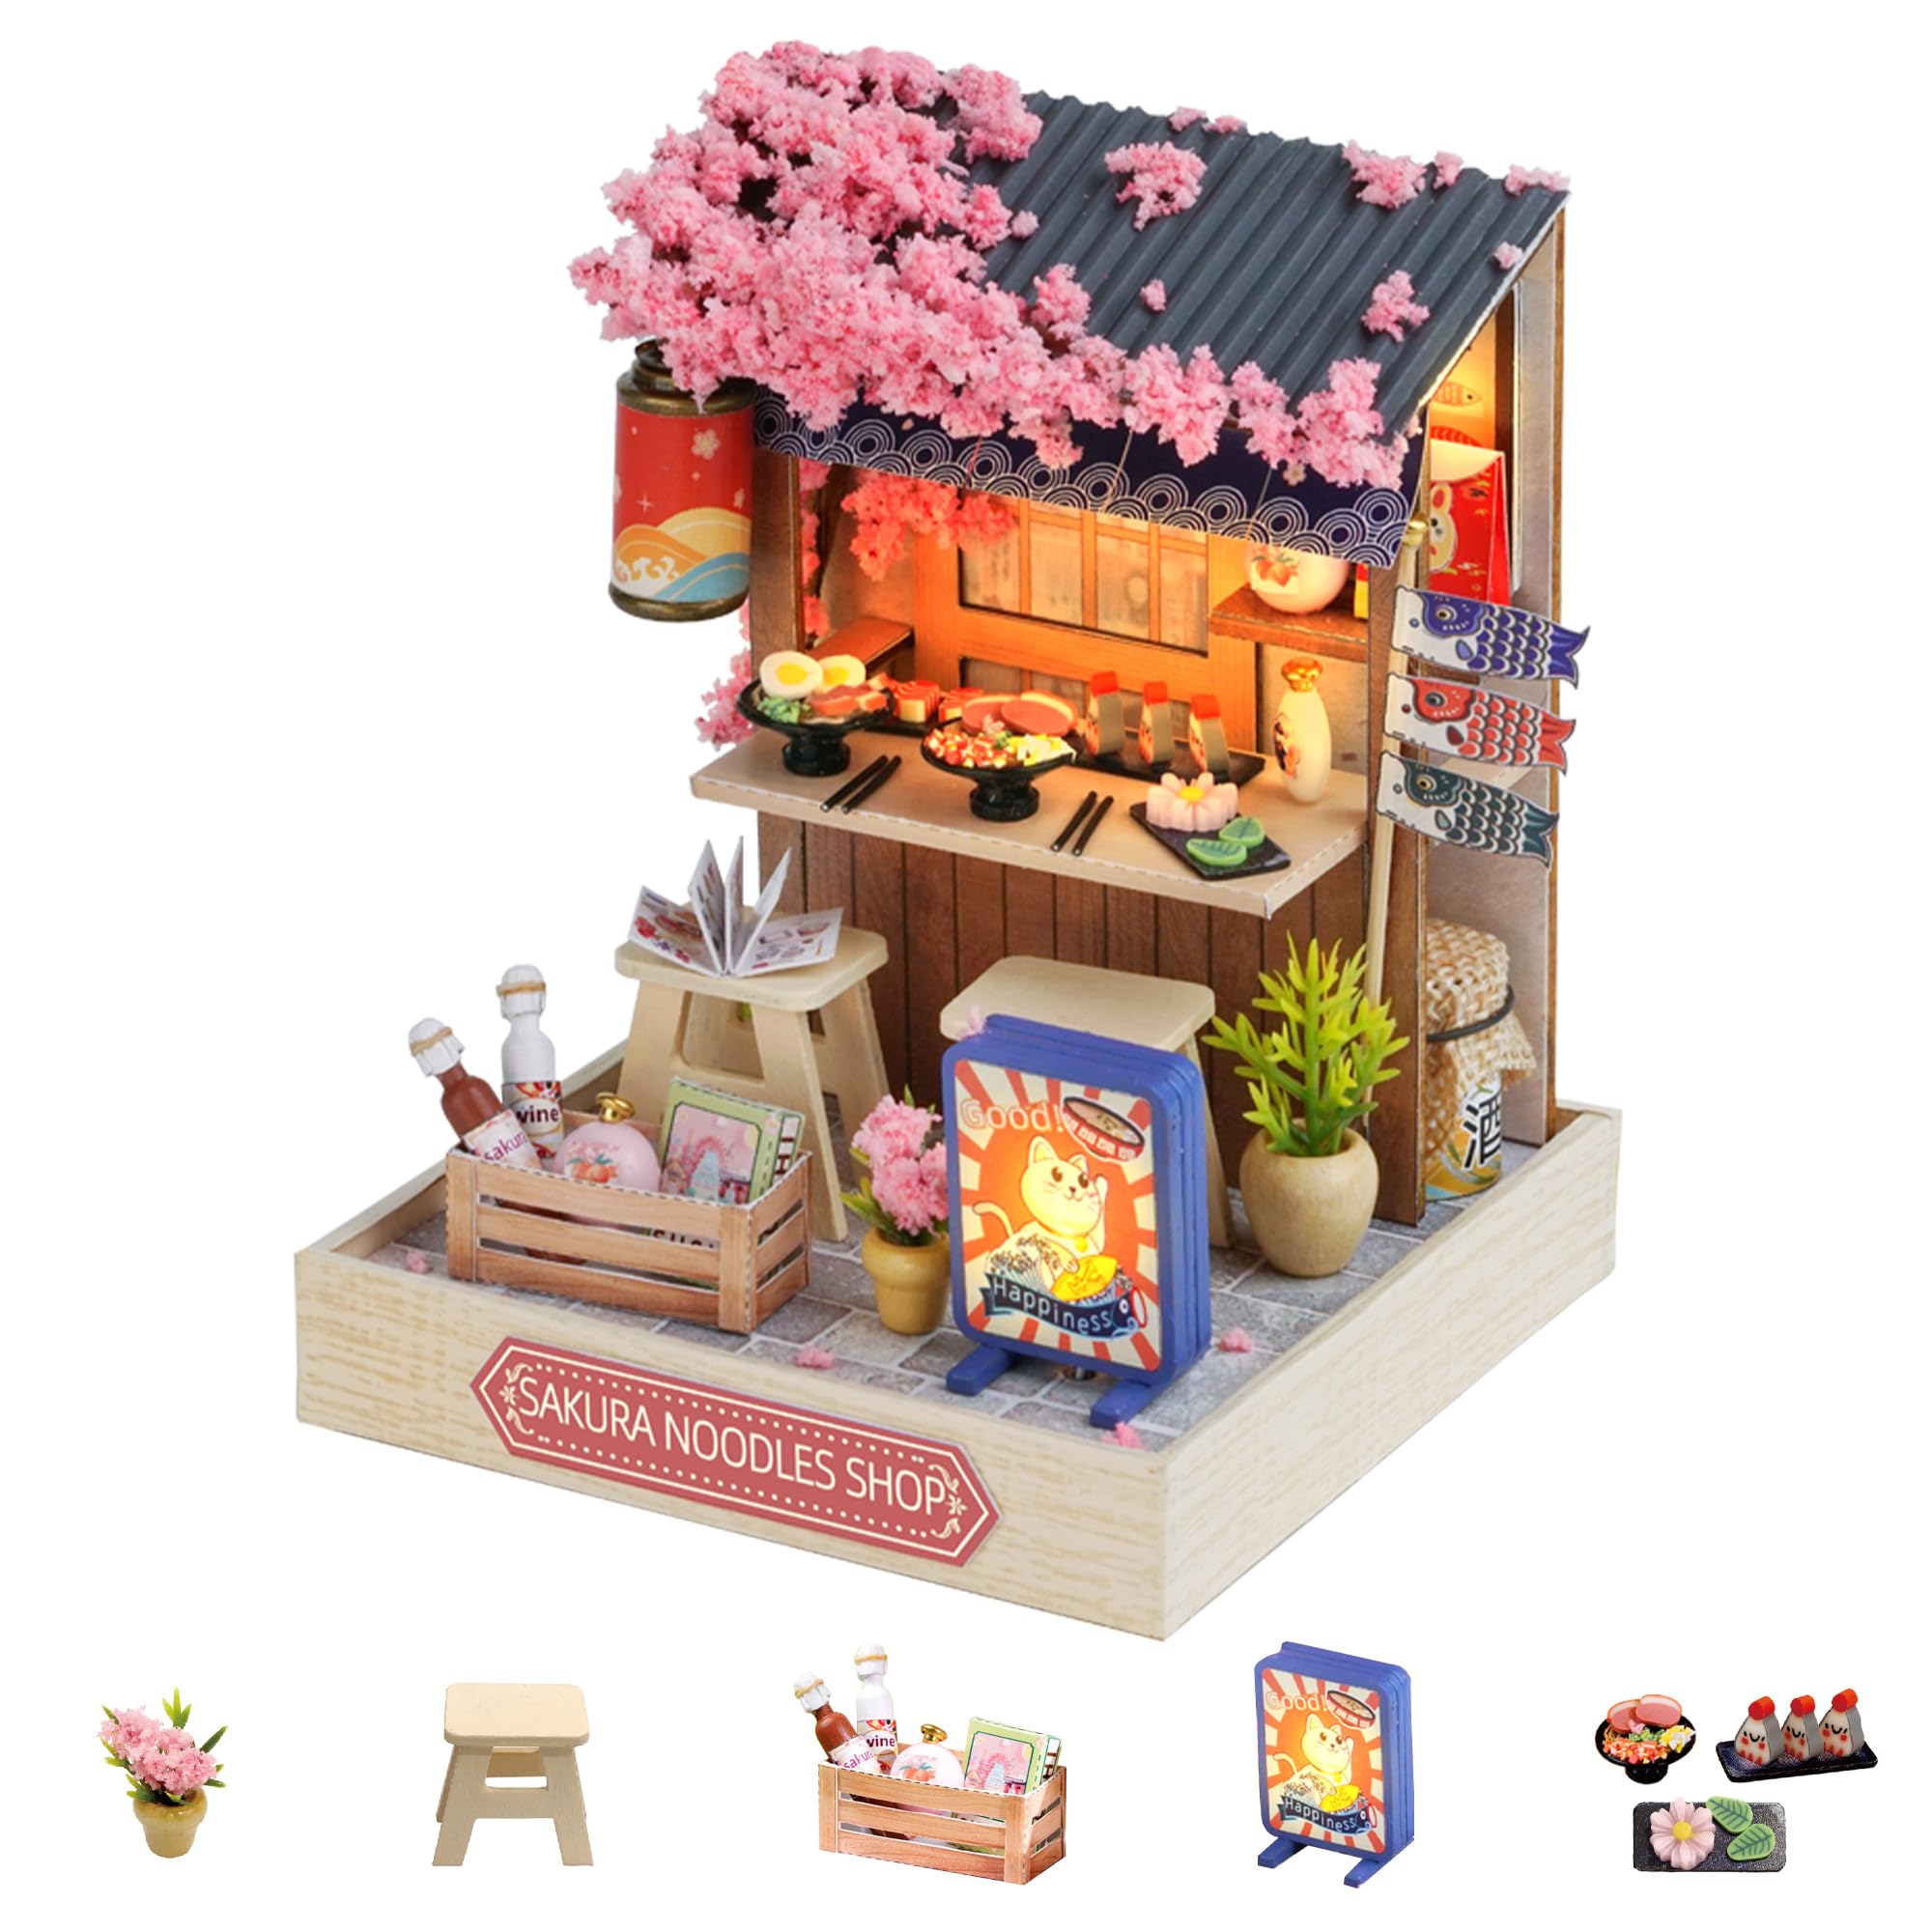
Image 1.1: Completed Sakura Noodles Shop Miniature Kit.
2. Safety Information
- Recommended Age: This kit is recommended for individuals 14 years old and up.
- Small Parts Warning: The kit contains small parts which may pose a choking hazard. Keep out of reach of young children.
- Sharp Tools: Assembly requires the use of sharp tools such as scissors and a knife. Exercise caution during use.
- Battery Safety: Use only the specified LR44 button cell batteries. Do not mix old and new batteries. Dispose of batteries properly.
3. Package Contents
The Flever Sakura Noodles Shop kit includes the following items:
- Pre-cut MDF wooden pieces for the house structure and furniture.
- Fabric and printed paper for decorations and accessories.
- Plexiglass pieces for the dust cover.
- LED light wires and other miniature decorations & accessories.
- English instruction manual (paper version, or PDF available from seller).
- Toolkit including scissors, knife, tweezers, ruler, and screwdriver.
Items Not Included (Required for Assembly):
- 3 pcs of LR44 button cell batteries.
- Quick-dry tacky glue (recommended).
4. Specifications
| Feature | Detail |
|---|---|
| Product Dimensions (Finished) | 3.5" (Length) x 3.5" (Width) x 4.5" (Height) |
| Scale | 1:32 |
| Item Weight | 0.5 pounds (8 ounces) |
| Model Number | QT-041 |
| Recommended Age | 14 years and up |
| Batteries Required | 3 x LR44 button cells (not included) |
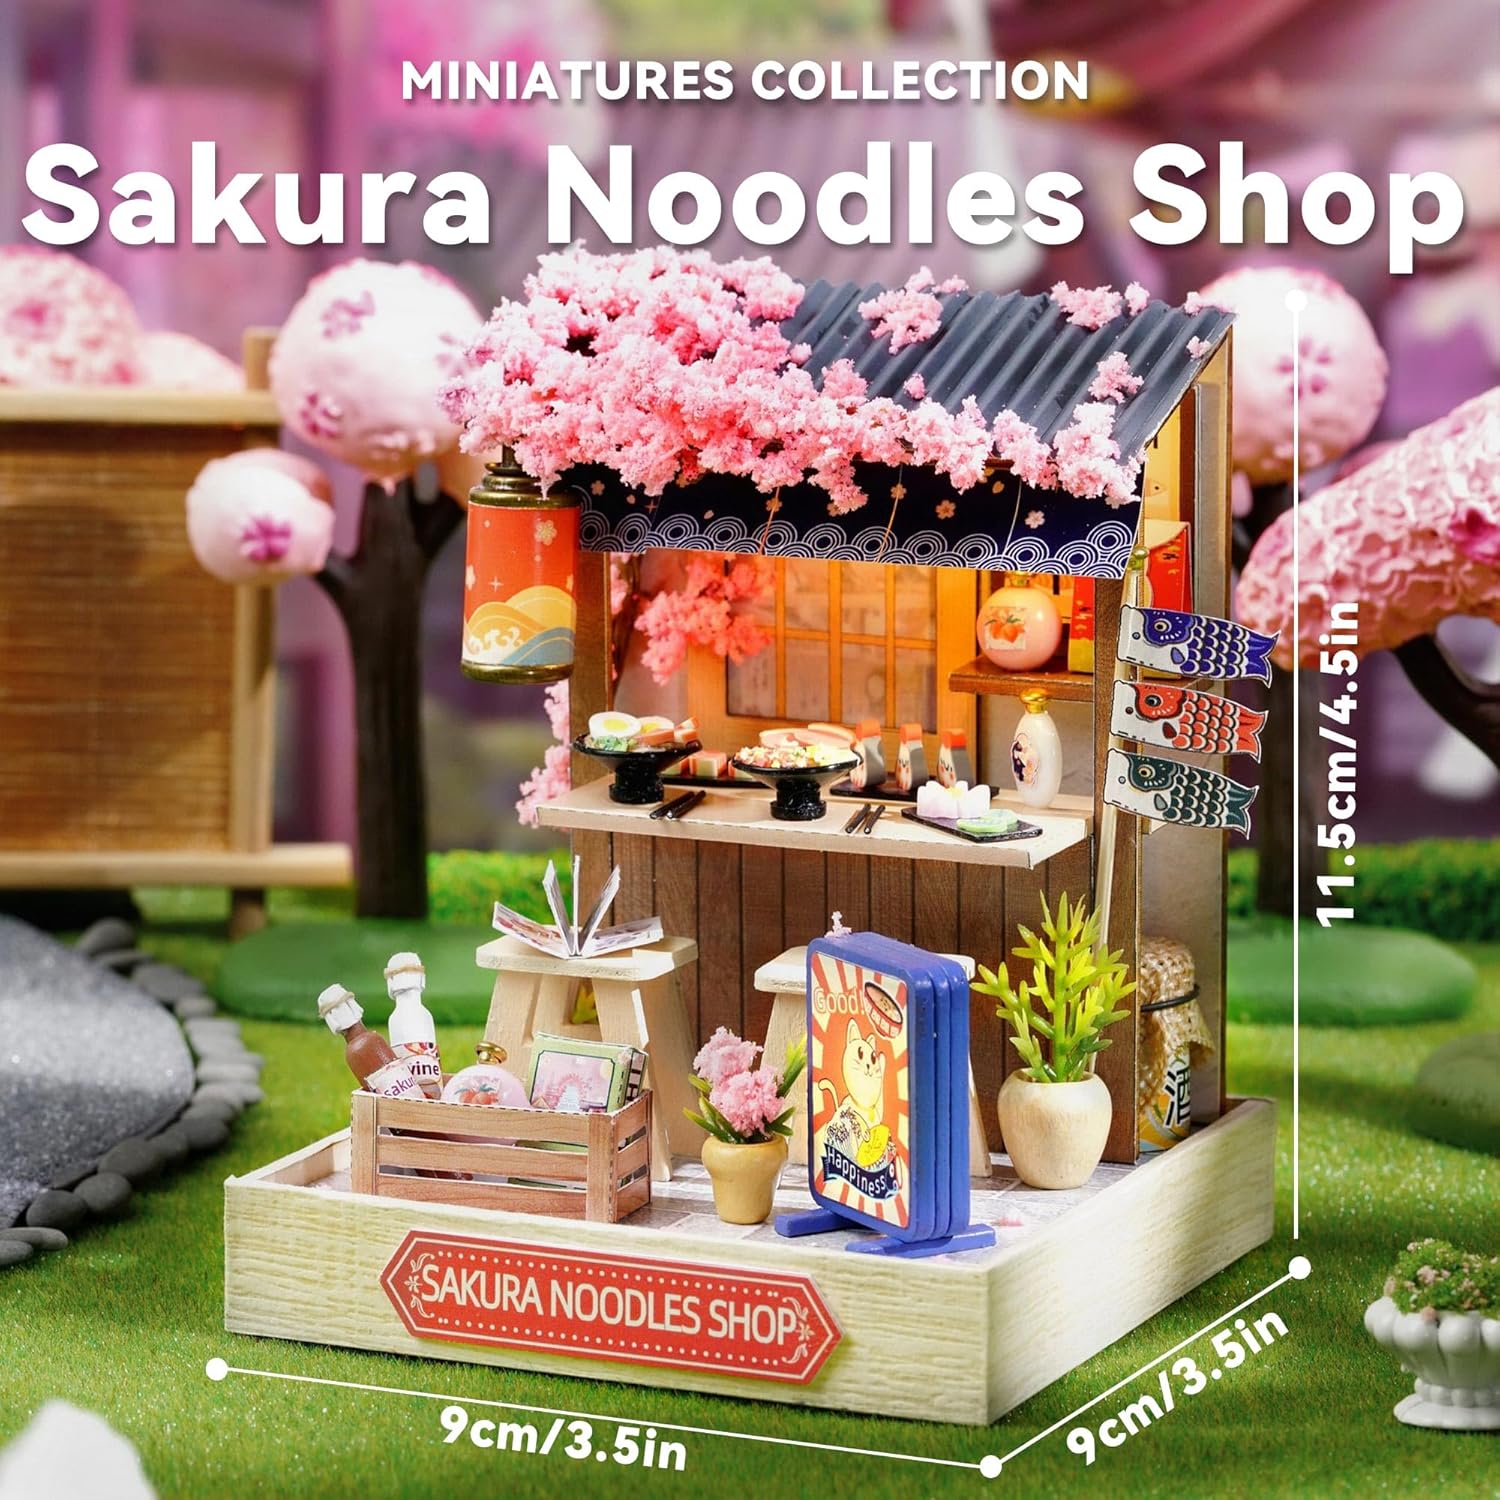
Image 4.1: Product Dimensions.
5. Assembly Instructions (Setup)
Assembly time typically ranges from 6 to 12 hours, depending on individual crafting experience. Patience and attention to detail are key for a successful build.
- Preparation: Unpack all components and organize them. Refer to the included English manual for a detailed parts list and diagrams.
- Tool Gathering: Ensure you have the provided toolkit (scissors, knife, tweezers, ruler, screwdriver) and your own quick-dry tacky glue.
- Furniture Assembly: Follow the manual's step-by-step instructions to assemble each piece of miniature furniture.
- Accessory Creation: Cut out and assemble paper and fabric accessories as indicated in the manual.
- Structure Construction: Build and glue the wooden structure of the noodle shop.
- LED Wiring: Carefully connect the LED light wires according to the diagrams. Ensure proper polarity for functionality.
- Final Decorations: Attach all fabric, printed paper, and other decorative elements.
- Dust Cover: Assemble and attach the plexiglass dust cover to protect your finished model.

Image 5.1: Example of the detailed instruction manual.
Assembly Video Resources:
Video 5.2: Customer Review: Sakura Noodles Shop
This video provides a customer's perspective on assembling the Sakura Noodles Shop kit, offering insights into the process and finished product.
Video 5.3: Sakura Noodles Shop Yummy Candy Beatific Atelier Coffee Time
This video showcases multiple Flever miniature kits, including the Sakura Noodles Shop, providing a visual overview of the completed models and their intricate details.
6. Operating Instructions
The Sakura Noodles Shop kit features LED lighting to enhance its display. To operate the lights:
- Insert 3 LR44 button cell batteries (not included) into the designated battery compartment. Ensure correct polarity.
- Locate the small switch, typically found on the side or back of the base, and toggle it to the "ON" position to illuminate the miniature scene.

Image 6.1: Battery placement and dust cover.
7. Maintenance
- Cleaning: Use a soft, dry cloth or a small brush to gently remove dust from the miniature components. Avoid using water or cleaning solutions.
- Dust Cover: Keep the plexiglass dust cover in place when not interacting with the model to prevent dust accumulation and damage.
- Storage: Store the assembled kit in a cool, dry place away from direct sunlight to prevent fading or warping of materials.
- Battery Replacement: Replace batteries when the LED lights dim. Ensure the power switch is off before replacing batteries.
8. Troubleshooting
- Lights Not Working:
- Check if batteries are inserted correctly with the right polarity.
- Ensure batteries are new and fully charged.
- Verify all wire connections are secure.
- Missing or Damaged Parts: If you encounter any missing or damaged parts, please contact the seller for assistance.
- Difficulty with Assembly: Refer to the detailed instruction manual and available video guides. Patience is essential for intricate miniature kits.
9. Warranty and Support
This product is subject to a 30-day return/replacement policy. For any product-related inquiries, technical support, or to request a PDF version of the English manual, please contact Flever customer service through the platform where the product was purchased.
For additional information and resources, you may visit the official Flever store: Flever Store