1. Introduction
Thank you for choosing the TOTAL TG1101256E Angle Grinder. This manual provides essential information for the safe operation, maintenance, and care of your tool. Please read it thoroughly before first use and keep it for future reference. This 950W angle grinder with a 125mm disc is designed for efficient cutting, grinding, and polishing across various materials, suitable for both domestic and professional applications.
2. General Safety Instructions
Always observe basic safety precautions to reduce the risk of fire, electric shock, and personal injury. Keep your work area clean and well-lit. Do not operate power tools in explosive atmospheres, such as in the presence of flammable liquids, gases, or dust. Always wear appropriate personal protective equipment (PPE), including safety glasses, hearing protection, gloves, and a dust mask.
- Electrical Safety: Ensure the power cord is undamaged and suitable for outdoor use if applicable. Avoid body contact with earthed or grounded surfaces.
- Personal Safety: Stay alert, watch what you are doing, and use common sense. Do not operate the tool while tired or under the influence of drugs, alcohol, or medication.
- Tool Use and Care: Do not force the power tool. Use the correct power tool for your application. Disconnect the plug from the power source before making any adjustments, changing accessories, or storing power tools.
- Kickback and Related Warnings: Kickback is a sudden reaction to a pinched or snagged rotating wheel. Always maintain a firm grip on the tool and position your body and arm to allow you to resist kickback forces.
3. Package Contents
Carefully unpack the contents and ensure all items are present and undamaged. If any parts are missing or damaged, contact your supplier immediately.
- TOTAL TG1101256E Angle Grinder
- Auxiliary Handle
- Wheel Guard
- Spanner Wrench

Image: The TOTAL TG1101256E Angle Grinder shown with its auxiliary handle, wheel guard, and spanner wrench.
4. Setup
Before connecting the tool to the power supply, ensure all components are correctly assembled.
4.1 Attaching the Auxiliary Handle
The auxiliary handle can be screwed into one of the three threaded holes on the gear housing, depending on the application and user preference. Ensure it is tightened securely before operation.
4.2 Attaching and Adjusting the Wheel Guard
The wheel guard must always be used to protect against sparks and debris. Loosen the guard's clamping screw, position the guard to cover the disc as much as possible, and then tighten the screw firmly. The guard can be rotated for optimal protection during different operations.
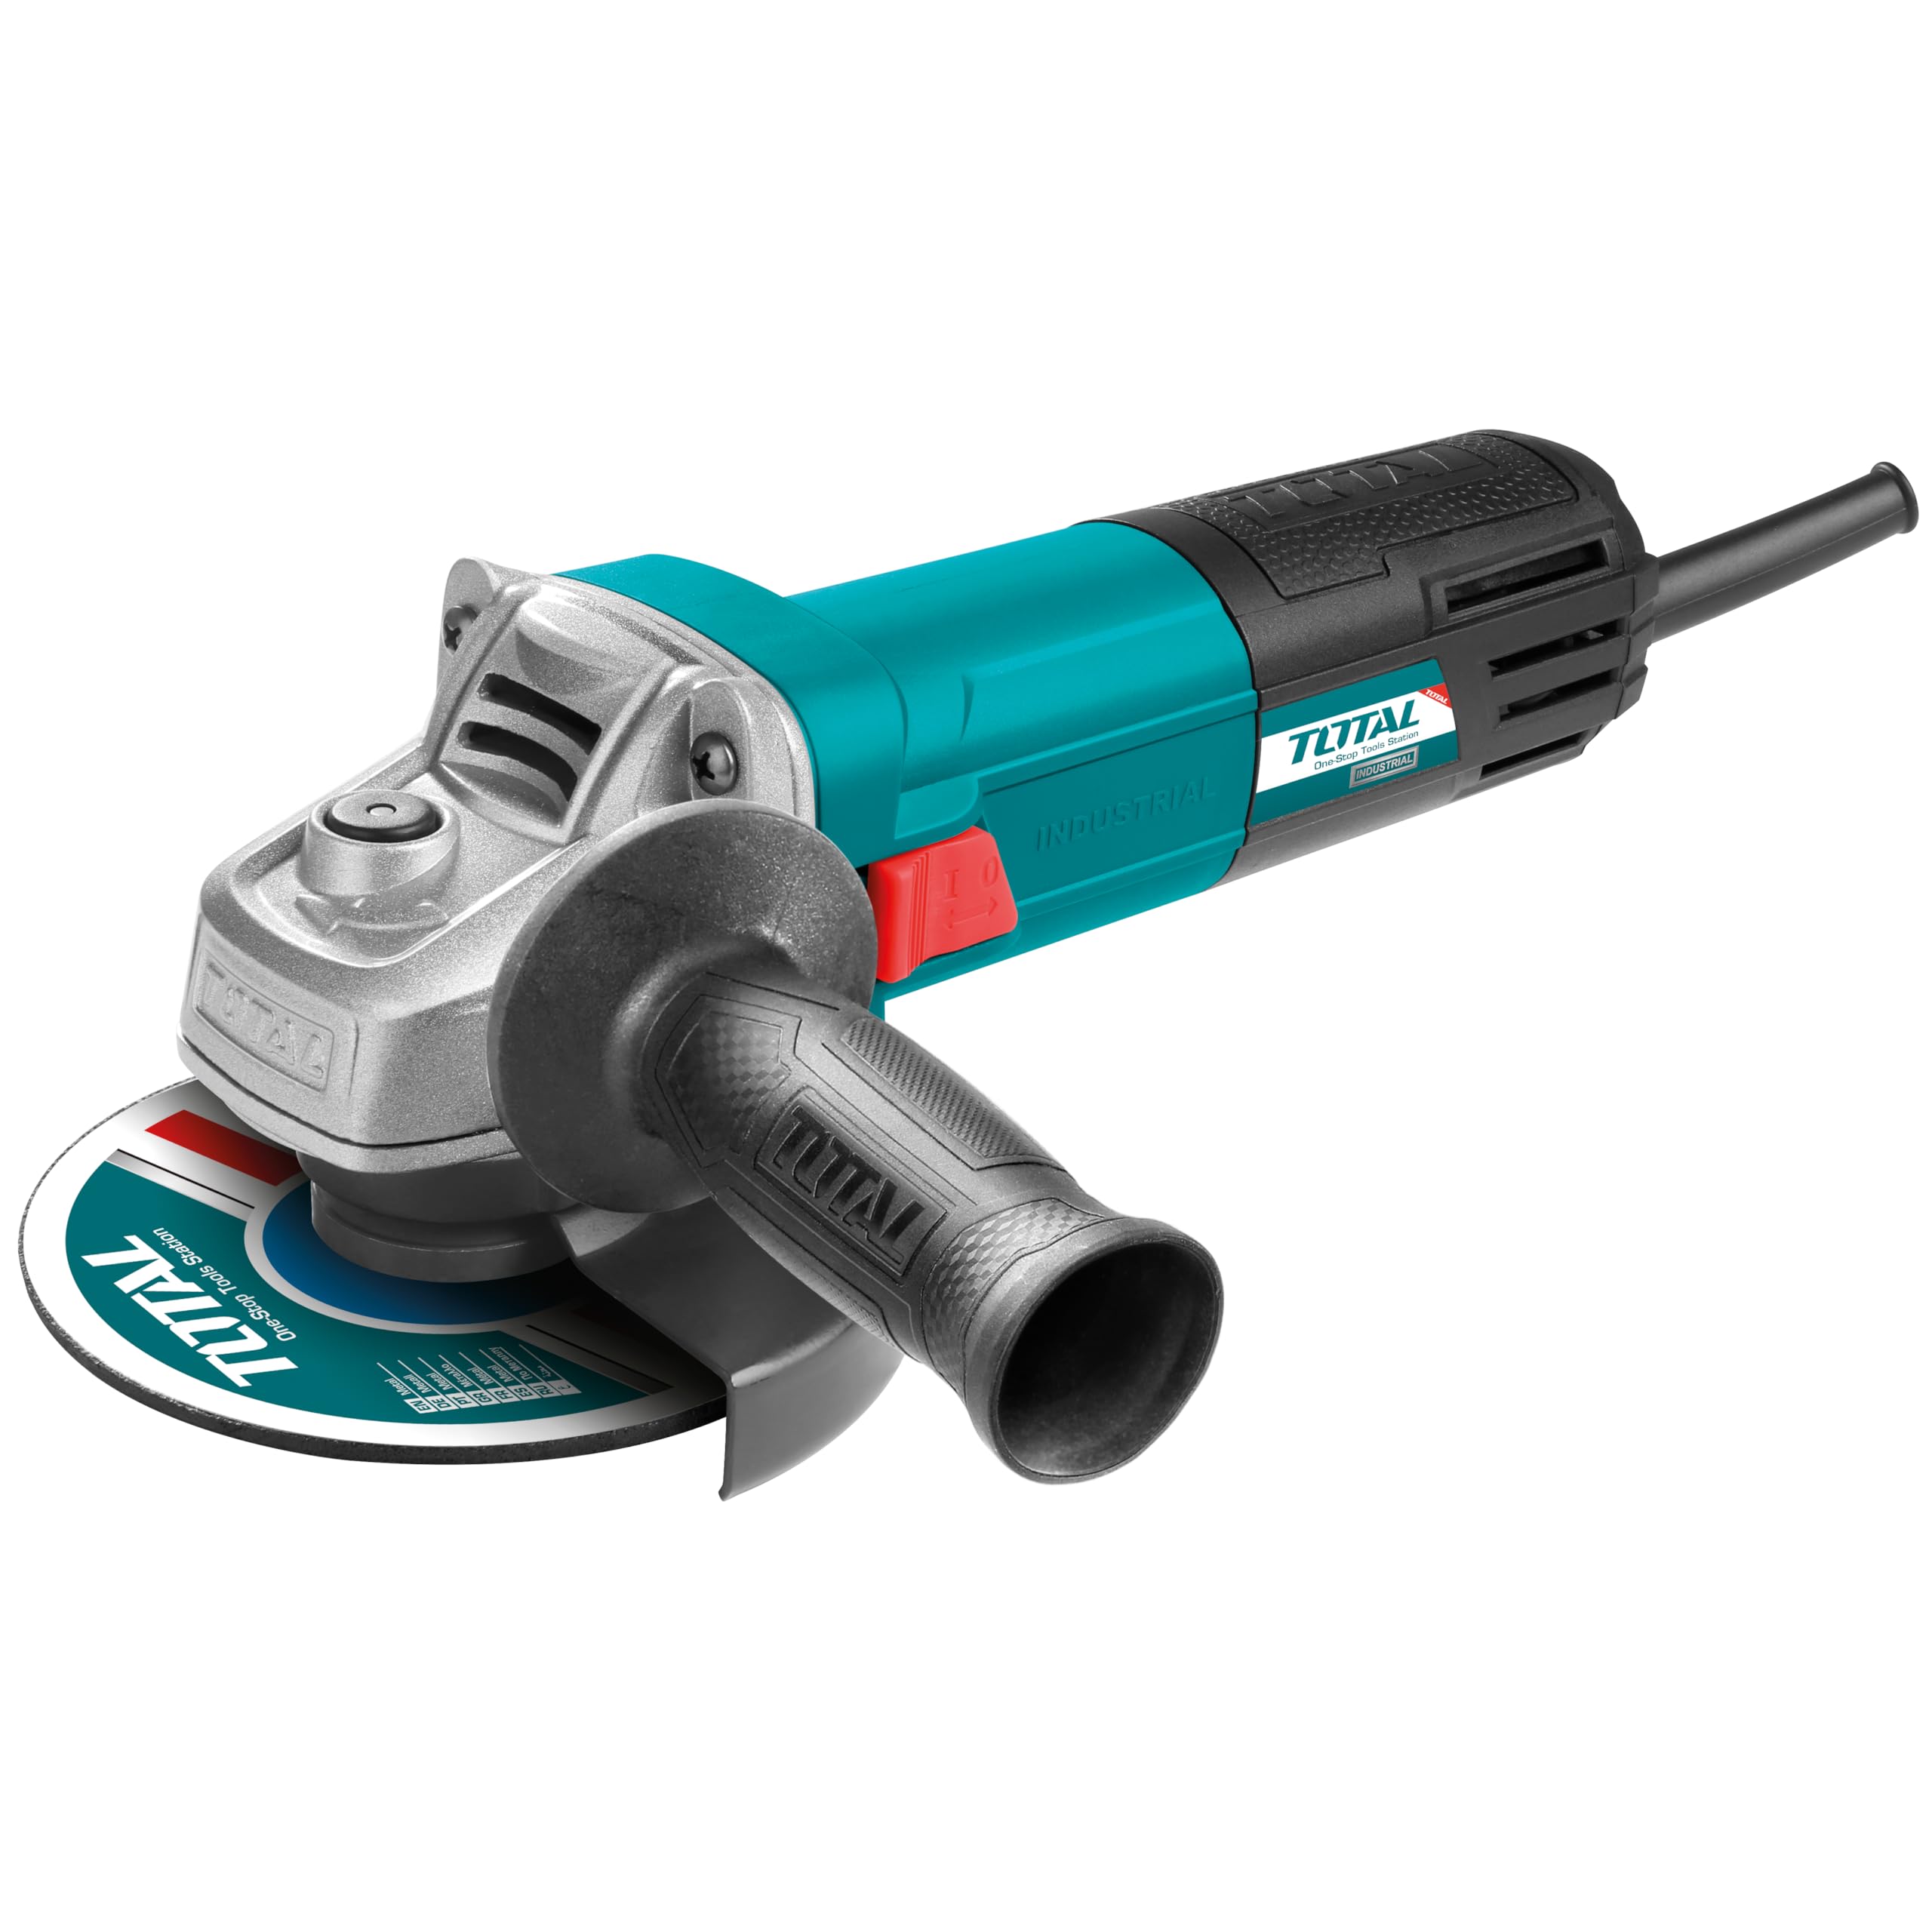
Image: The adjustable wheel guard on the angle grinder, showing its range of motion for user protection.
4.3 Mounting the Grinding/Cutting Disc
- Ensure the tool is unplugged.
- Press the spindle lock button to prevent the spindle from rotating.
- Place the inner flange onto the spindle.
- Position the grinding or cutting disc onto the inner flange, ensuring it sits correctly.
- Screw the outer flange (locking nut) onto the spindle.
- Use the spanner wrench to firmly tighten the outer flange while holding the spindle lock button.
- Release the spindle lock.
Always use discs appropriate for the tool's diameter (125mm) and maximum RPM (11,000 r/min).
5. Operating Instructions
Before starting, ensure the work piece is securely clamped. Always wear appropriate PPE.
5.1 Powering On/Off
- To Turn On: Slide the ON/OFF switch forward. For continuous operation, push the switch further forward until it locks.
- To Turn Off: For continuous operation, press the rear part of the ON/OFF switch. For momentary operation, simply release the switch.
5.2 Grinding and Cutting Techniques
Allow the disc to reach full speed before making contact with the workpiece. Apply moderate pressure; excessive force can reduce efficiency and damage the disc or tool.
- Grinding: Hold the tool at an angle of approximately 15-30 degrees to the workpiece. Move the tool smoothly across the surface.
- Cutting: Hold the tool perpendicular to the workpiece (90 degrees). Make straight, steady cuts. Do not apply side pressure to the cutting disc, as this can cause it to shatter.

Image: Demonstrating cutting metal with the angle grinder, highlighting proper technique and spark generation.

Image: The angle grinder being used to grind a metal pipe, showing the tool's application for surface finishing.

Image: The angle grinder in use on a concrete block, demonstrating its versatility for different materials.
6. Maintenance
Regular maintenance ensures the longevity and safe operation of your angle grinder. Always unplug the tool before performing any maintenance.
6.1 Cleaning
Keep the ventilation openings clean to prevent motor overheating. Use a soft brush or compressed air to remove dust and debris from the tool's housing. Do not use water or chemical cleaners.
6.2 Disc Replacement
Replace worn or damaged discs immediately. Follow the disc mounting instructions in Section 4.3. Always use discs that are compatible with the tool's specifications.
6.3 Carbon Brush Inspection
The carbon brushes may need periodic inspection and replacement. If the motor sparks excessively or the tool loses power, the carbon brushes might be worn. This procedure should ideally be performed by a qualified service technician.
7. Troubleshooting
If you encounter issues with your angle grinder, refer to the following common problems and solutions.
- Tool does not start:
- Check if the power cord is properly plugged into a functional outlet.
- Inspect the power cord for damage.
- Ensure the ON/OFF switch is fully engaged.
- Check the carbon brushes for wear (refer to Section 6.3).
- Excessive vibration:
- Ensure the grinding/cutting disc is correctly mounted and tightened.
- Check the disc for damage or imbalance; replace if necessary.
- Reduced power or excessive sparking:
- The carbon brushes may be worn and require replacement.
- Ensure the ventilation openings are clear.
If the problem persists after attempting these solutions, contact customer support or a qualified service center.
8. Specifications
Technical data for the TOTAL TG1101256E Angle Grinder.
| Feature | Specification |
|---|---|
| Model Number | TG1101256E |
| Brand | TOTAL |
| Power | 950 Watts |
| Disc Diameter | 125 mm (Not explicitly in specs, but in title/description) |
| No-load Speed | 11,000 r/min (Not explicitly in specs, but in description) |
| Power Source | Corded Electric |
| Item Weight | 2 Kilograms |
| Product Dimensions (L x W x H) | 30.5 x 14.2 x 9.2 cm |
| Included Components | Auxiliary Handle |

Image: Dimensions of the TOTAL TG1101256E Angle Grinder.
9. Warranty and Support
For warranty information, please refer to the documentation provided with your purchase or contact the retailer where the product was acquired. TOTAL products are designed for reliability and performance. If you require technical assistance or have questions regarding your TOTAL TG1101256E Angle Grinder, please contact your local TOTAL service center or the seller for support.