1. Product Overview
The Giantex Slim Bathroom Storage Cabinet (Model GT-10766-JVWH) is a tall, narrow freestanding unit designed to provide efficient storage in compact spaces. It features multiple storage compartments, including an upper cabinet, open shelves, a drawer, and a lower cabinet, with adjustable shelving for versatile organization.

Image 1.1: Front view of the Giantex Slim Bathroom Storage Cabinet.
Key Features:
- Ample Storage: Includes 1 upper cabinet, 5 open shelves, 1 drawer, and 1 lower cabinet.
- Adjustable Shelves: Features 5 adjustable shelves (three 3-level adjustable, two 4-level adjustable) for customized storage heights.
- Anti-Tipping Device: Enhances stability and safety by allowing secure wall attachment.
- Durable Construction: Crafted from premium MDF with waterproof paint treatment.
- Space-Saving Design: Narrow profile (8"D x 8"W x 71"H) ideal for small areas.
- Elevated Design: Keeps items away from dampness.
- User-Friendly Details: Nickel handles and magnetic catches for easy operation.
2. Safety Information
Please read and understand all safety instructions before assembly and use. Failure to follow these instructions may result in injury or product damage.
- Anti-Tipping Device: Always secure the cabinet to the wall using the provided anti-tipping device. This is crucial to prevent accidental tipping, especially in households with children or pets.
- Weight Limit: Do not exceed the maximum weight capacity of 110 pounds for the entire cabinet. Distribute weight evenly across shelves.
- Water Exposure: While the cabinet has a waterproof paint treatment, avoid prolonged exposure to excessive water or high humidity to maintain its integrity and prevent damage.
- Assembly: Ensure all parts are correctly assembled and fasteners are tightened securely before use.
- Placement: Place the cabinet on a flat, stable surface.

Image 2.1: Illustration of the anti-tipping device installation for enhanced stability.
3. Setup and Assembly
This cabinet requires assembly. Please ensure all components are present before beginning. It is recommended to assemble the cabinet on a soft, clean surface to prevent scratches.
3.1. Package Contents
Verify that all parts listed in the assembly instructions (typically included in the product packaging) are present. If any parts are missing or damaged, contact customer support.
3.2. Assembly Steps
- Unpack Components: Carefully remove all parts from the packaging and lay them out. Identify each component using the provided parts list.
- Assemble Frame: Follow the step-by-step diagrams in the included assembly manual to construct the main frame of the cabinet. Ensure all screws and fasteners are securely tightened.
- Install Shelves: Insert the adjustable shelves into the desired positions. The shelves can be moved to different heights to accommodate various item sizes.
- Attach Doors and Drawer: Install the cabinet doors using the provided hinges and attach the drawer slides and drawer front. Ensure doors close properly with magnetic catches and the drawer slides smoothly.
- Install Anti-Tipping Device: This is a critical safety step. Attach the anti-tipping device to the top rear of the cabinet and secure it to a wall stud or appropriate wall anchor. Refer to the specific instructions for the anti-tipping device.
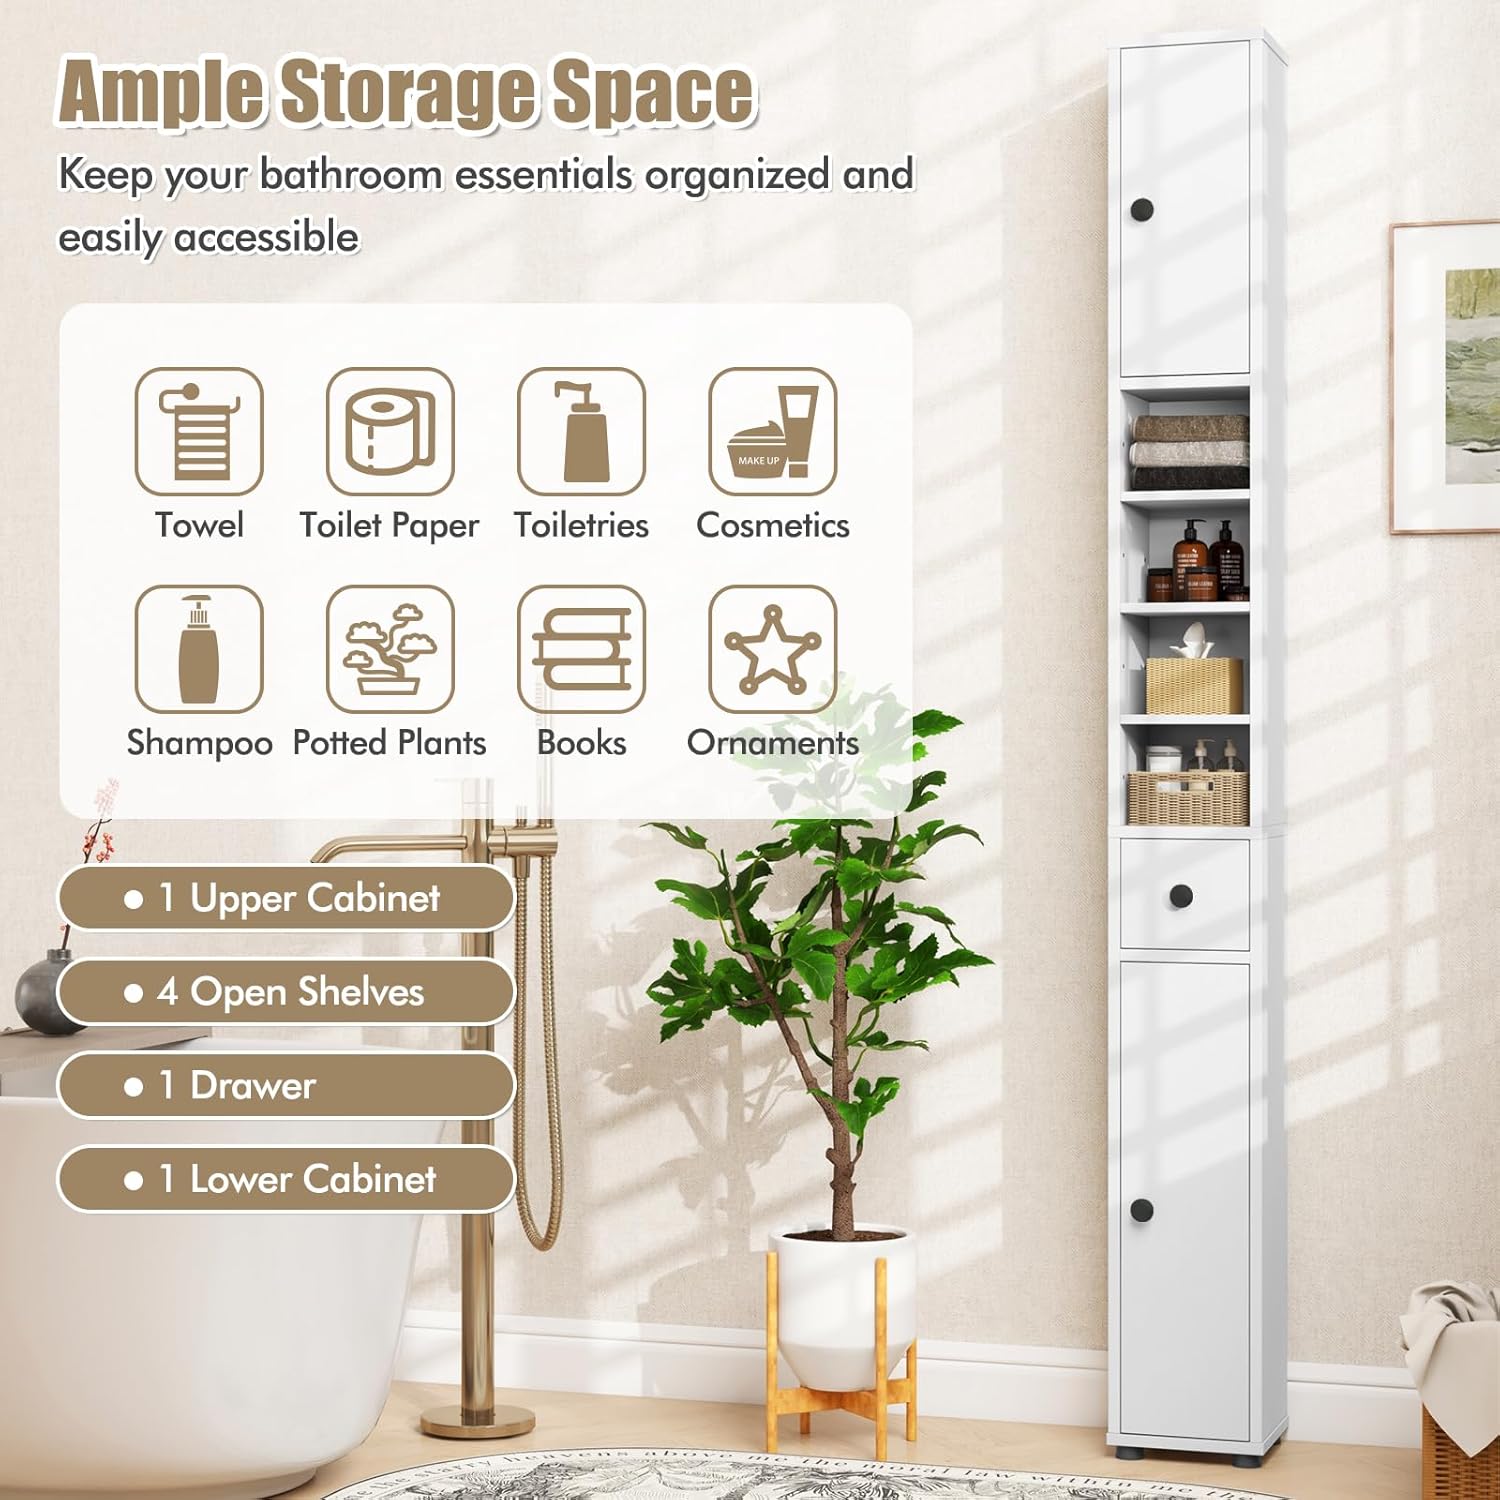
Image 3.1: Cabinet dimensions and internal layout for assembly reference.
4. Operating Instructions
The Giantex Slim Bathroom Storage Cabinet is designed for straightforward use.
4.1. Utilizing Storage Compartments
- Upper and Lower Cabinets: Use the doors to access enclosed storage for items you wish to keep out of sight or protected from dust. The magnetic catches ensure doors remain closed.
- Open Shelves: Ideal for frequently accessed items, decorative objects, or items that benefit from air circulation.
- Drawer: Provides a convenient space for smaller items, offering easy access while maintaining a tidy appearance.

Image 4.1: Example of ample storage space and organization within the cabinet.
4.2. Adjusting Shelves
The cabinet features adjustable shelves to customize your storage needs.
- Remove Items: Clear all items from the shelf you wish to adjust.
- Remove Shelf: Carefully lift the shelf and remove the shelf pins from their current holes.
- Reposition Pins: Insert the shelf pins into the desired new set of holes. Ensure all four pins are at the same height to keep the shelf level.
- Reinsert Shelf: Place the shelf back onto the pins, ensuring it is stable and secure.

Image 4.2: Visual guide for adjusting shelf heights.
5. Maintenance and Care
Proper maintenance will ensure the longevity and appearance of your Giantex storage cabinet.
- Cleaning: Wipe the cabinet surfaces with a soft, damp cloth. Avoid using abrasive cleaners, harsh chemicals, or excessive water, as these can damage the finish.
- Spills: Promptly wipe up any spills to prevent staining or water damage.
- Hardware: Periodically check all screws and fasteners to ensure they remain tight. Retighten if necessary to maintain structural integrity.
- Environmental Conditions: Keep the cabinet in a stable environment, avoiding extreme temperature changes or prolonged direct sunlight, which can cause material degradation.
6. Troubleshooting
This section addresses common issues you might encounter with your cabinet.
- Cabinet Feels Unstable:
- Ensure the cabinet is placed on a level surface.
- Verify that the anti-tipping device is correctly installed and securely fastened to the wall.
- Check all assembly screws and tighten any that are loose.
- Ensure weight is distributed evenly within the cabinet and not concentrated on one side or top.
- Doors Do Not Close Properly:
- Check if the magnetic catches are aligned and functioning.
- Inspect hinges for proper installation and adjustment.
- Ensure the cabinet frame is square and not warped from uneven assembly.
- Drawer Sticks or Does Not Slide Smoothly:
- Verify that the drawer slides are correctly installed and aligned.
- Check for any obstructions in the drawer tracks.
- Ensure the drawer is not overloaded.
- Missing or Damaged Parts During Assembly:
- Carefully re-check all packaging materials.
- Contact Giantex customer support with your purchase details and a description of the missing or damaged part.
7. Specifications
| Attribute | Detail |
|---|---|
| Brand | Giantex |
| Model Number | GT-10766-JVWH |
| Color | White |
| Product Dimensions | 8"D x 8"W x 71"H |
| Item Weight | 27.5 pounds |
| Weight Limit | 110 Pounds |
| Material | Engineered Wood (MDF) |
| Number of Shelves | 5 (Adjustable) |
| Special Features | Anti-Tipping Device, Large storage space |
| Mounting Type | Floor Mount (with wall anchor option) |
| Assembly Required | Yes |
8. Warranty and Support
8.1. Warranty Information
Specific warranty details for the Giantex Slim Bathroom Storage Cabinet are not provided in this manual. Please refer to your purchase documentation or the manufacturer's official website for current warranty terms and conditions.
8.2. Customer Support
For assistance with assembly, missing parts, or any other product-related inquiries, please contact Giantex customer support. Contact information can typically be found on the product packaging, the manufacturer's website, or through the retailer where the product was purchased.