Introduction
Thank you for purchasing the CLoxks Countertop Ice Maker Machine. This manual provides essential information for the safe operation, installation, maintenance, and troubleshooting of your new ice maker. Please read these instructions thoroughly before using the appliance and retain them for future reference.
Important Safety Instructions
- Ensure the power supply voltage matches the rating label on the appliance.
- Do not operate the appliance with a damaged cord or plug. Contact qualified service personnel for repair.
- Place the ice maker on a stable, level surface, away from direct sunlight and heat sources.
- Allow adequate ventilation around the appliance. Maintain at least 5 inches of space on all sides.
- Do not immerse the appliance, cord, or plug in water or other liquids.
- Unplug the ice maker before cleaning or when not in use for extended periods.
- This appliance is not intended for use by persons with reduced physical, sensory, or mental capabilities, or lack of experience and knowledge, unless they have been given supervision or instruction concerning use of the appliance by a person responsible for their safety.
- Use only potable water in the water tank.
- Do not store explosive substances such as aerosol cans with a flammable propellant in this appliance.
Product Diagram and Components
Familiarize yourself with the parts of your CLoxks Countertop Ice Maker Machine.

Figure 1: Front view of the CLoxks Countertop Ice Maker Machine. Key components include the transparent lid, ice basket (inside), control panel, and air vents.
- Transparent Lid: Allows monitoring of ice production.
- Ice Basket: Removable basket for collecting and storing ice.
- Ice Scoop: For convenient ice retrieval.
- Water Tank: Reservoir for water used in ice production.
- Control Panel: For operating the machine and displaying status.
- Air Vents: Located on the sides and back for heat dissipation. Ensure they are not blocked.
Control Panel Overview
The control panel provides easy access to all functions of your ice maker.

Figure 2: Detailed view of the control panel, showing the ICE/CLEAN button, Timer button, Up/Down arrows, and LCD display.
- ICE/CLEAN Button: Press to start or stop ice making. Hold to activate the self-cleaning function.
- TIMER Button: Press to set the operation timer.
- Up/Down Arrows (▲/▼): Used to adjust timer settings.
- LCD Display: Shows current status, timer settings, and indicators for 'Ice Full' and 'Water Shortage'.
Setup and First Use
- Unpack: Carefully remove all packaging materials and inspect the ice maker for any damage.
- Clean: Before first use, clean the interior of the ice maker, including the water tank and ice basket, with a mild detergent and warm water. Rinse thoroughly and wipe dry.
- Placement: Place the ice maker on a firm, level surface. Ensure there is at least 5 inches (12.7 cm) of clear space around the appliance for proper ventilation. Avoid placing it near heat sources or in direct sunlight.
- Power Connection: Plug the power cord into a grounded electrical outlet.
- Initial Water Fill: Open the transparent lid and fill the water tank with potable water up to the MAX fill line. Do not overfill.
Operating Instructions
Follow these steps to produce ice with your CLoxks ice maker.

Figure 3: The ice maker is capable of producing up to 44 lbs of ice in 24 hours, with a cycle time of approximately 6 minutes for 9 pieces of ice, using a 2.4L water tank.
- Add Water: Ensure the water tank is filled with potable water to the MAX level.
- Start Ice Making: Press the ICE/CLEAN button once. The ice making indicator on the LCD display will illuminate, and the machine will begin the ice production cycle.
- Monitor Production: The machine will produce chewable nugget ice. The transparent lid allows you to observe the process.
- Ice Full Indicator: When the ice basket is full, the 'Ice Full' indicator will light up, and the machine will automatically pause ice production. Remove ice to resume.
- Water Shortage Indicator: If the water level in the tank is too low, the 'Water Shortage' indicator will light up. Add more water to the tank, and the machine will automatically resume ice making after a short delay.
- Using the Timer:
- Press the TIMER button. The display will show a flashing time.
- Use the ▲ and ▼ arrows to set the desired delay time (1-24 hours) for the machine to start or stop.
- Press the TIMER button again to confirm the setting. The timer indicator will light up.
- Stop Ice Making: To stop ice production manually, press the ICE/CLEAN button again.
Self-Cleaning Function
The self-cleaning function helps maintain the hygiene of your ice maker.
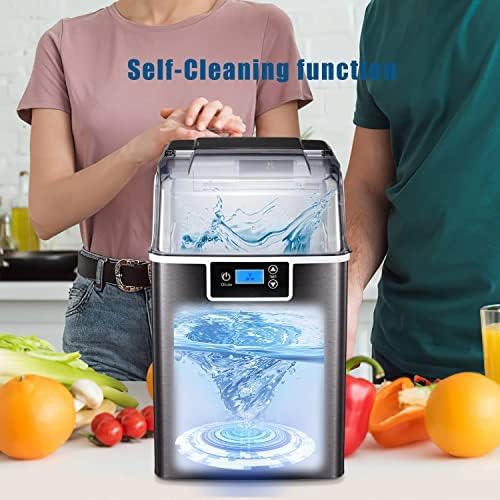
Figure 4: The self-cleaning cycle circulates water within the machine to clean internal components.
- Empty Water: Ensure the water tank is empty before starting the self-cleaning cycle.
- Add Water for Cleaning: Fill the water tank with clean, potable water up to the MAX fill line. You may add a small amount of food-grade cleaning solution if desired (refer to solution instructions).
- Activate Self-Clean: With the machine plugged in and water added, press and hold the ICE/CLEAN button for approximately 3-5 seconds until the self-cleaning indicator illuminates or the machine starts the cleaning cycle.
- Cycle Completion: The cleaning cycle will run for a set duration (typically 20-30 minutes) and then automatically stop.
- Drain Water: After the cycle, drain all water from the machine. Refer to the 'Care and Maintenance' section for draining instructions.
- Rinse: Fill the tank with fresh water and run a short ice-making cycle or rinse cycle (if available) to flush out any cleaning solution residue. Drain again.
Care and Maintenance
Regular cleaning and maintenance will prolong the life of your ice maker and ensure hygienic ice production.
- Daily Cleaning: Wipe the exterior with a soft, damp cloth. Empty and dry the ice basket.
- Weekly Cleaning: For optimal performance, clean the water tank and ice-making components weekly. Unplug the unit, remove the ice basket, and clean the interior with a solution of water and mild detergent. Rinse thoroughly.
- Draining Water: To drain water from the unit, locate the drain plug (usually at the bottom or back). Place a container beneath it, remove the plug, and allow all water to drain. Replace the plug securely.
- Descaling: If hard water is used, mineral deposits may accumulate. Use a descaling solution suitable for ice makers or a mixture of vinegar and water to clean the internal components. Follow the self-cleaning instructions, substituting the cleaning solution.
- Storage: If the ice maker will not be used for an extended period, drain all water, clean and dry the interior thoroughly, and store it in a cool, dry place with the lid slightly ajar to prevent odors.
Troubleshooting
Refer to this section for solutions to common issues you might encounter.
| Problem | Possible Cause | Solution |
|---|---|---|
| Ice maker not working | No power; machine not plugged in. | Ensure the power cord is securely plugged into a working outlet. Check circuit breaker. |
| 'Water Shortage' indicator on | Water tank is empty or water level is too low. | Add potable water to the MAX fill line in the water tank. |
| 'Ice Full' indicator on | Ice basket is full. | Remove ice from the ice basket. The machine will resume ice making. |
| Ice production is slow or ice is small | Room temperature too high; water temperature too high; poor ventilation. | Operate in a cooler environment. Use cold water. Ensure proper ventilation around the unit. |
| Unusual noise during operation | Normal operation sounds (compressor, water pump); loose parts. | Some operational noises are normal. If noise is excessive or unusual, unplug and contact support. |
Technical Specifications
Detailed specifications for the CLoxks Countertop Ice Maker Machine.

Figure 5: Product dimensions for proper placement and fit.
| Feature | Specification |
|---|---|
| Brand | CLoxks |
| Model Name | Countertop Ice Maker |
| Product Dimensions (D x W x H) | 9.4" x 13.2" x 15.3" |
| Ice Production Capacity | Up to 44 lbs per 24 hours |
| Water Tank Capacity | 2.4 Liters |
| Refrigerant | R600a |
| Material Type | Stainless Steel |
Warranty and Customer Support
For warranty information or technical assistance, please contact the manufacturer or your retailer. Keep your purchase receipt as proof of purchase. Do not attempt to repair the appliance yourself, as this may void the warranty and pose safety risks.