1. Introduction
The eMylo Smart Electricity Meter (Model YS-AC953) is a 1-phase digital AC meter designed for DIN rail installation. It provides real-time power consumption measurement, surge protection, and smart control features through Tuya WLAN connectivity. This device is compatible with voice assistants like Alexa and Google Assistant, offering convenient remote management of your electrical circuits.
This manual provides essential information for the safe and efficient use of your eMylo Smart Electricity Meter, including installation, operation, maintenance, and troubleshooting.

Figure 1: eMylo Smart Electricity Meter and its mobile application interface.
This image displays the eMylo Smart Electricity Meter, a compact white device designed for DIN rail mounting, alongside a smartphone showing its corresponding mobile application. The meter's LCD screen indicates 220V, 0.4A, and 0.0 kWh, with control buttons below. The app interface on the phone shows energy consumption data and control options.
2. Safety Information
Before installation or operation, please read and understand all safety warnings. Improper installation or use can lead to electric shock, fire, or property damage.
- Installation must be performed by a qualified electrician in accordance with local electrical codes.
- Ensure the main power supply is disconnected before any installation or wiring work.
- Do not operate the device if it is damaged or shows signs of malfunction.
- The device is designed for indoor use only. Avoid exposure to moisture or extreme temperatures.
- Only connect to AC 220V single-phase power systems.
3. Setup and Installation
3.1 Package Contents
- 1 x eMylo Smart Electricity Meter (YS-AC953)
- 1 x User Manual
3.2 Physical Installation (DIN Rail)
- Power Disconnection: Turn off the main power supply at the circuit breaker before beginning installation. Verify that power is off using a voltage tester.
- Mounting: Attach the eMylo Smart Electricity Meter onto a standard 35mm DIN rail within your electrical distribution box. Ensure it is securely fastened.
- Wiring: Connect the input (IN) and output (OUT) terminals as shown in the wiring diagram below.
- Connect the live (L) and neutral (N) wires from your power source to the 'IN' terminals.
- Connect the live (L) and neutral (N) wires of the load (device to be controlled/monitored) to the 'OUT' terminals.
Caution: Ensure correct polarity (Live and Neutral) to prevent damage to the device and connected appliances.
- Power Restoration: Once all connections are secure, restore power to the circuit. The meter's display should illuminate.

Figure 2: Wiring Diagram.
This image illustrates the wiring connections for the eMylo Smart Electricity Meter. It clearly labels the 'IN' terminals for incoming power (Live and Neutral) and 'OUT' terminals for connecting to the load, emphasizing the correct and secure connection points.
3.3 App Pairing and WiFi Connection
- Download App: Download the 'Tuya Smart' or 'Smart Life' app from your smartphone's app store (iOS or Android).
- Register/Login: Open the app and register for a new account or log in if you already have one.
- Add Device: In the app, tap the '+' icon (usually in the top right corner) to add a new device. Select 'Electrical Engineering' > 'Circuit Breaker (Wi-Fi)' or 'Energy Meter (Wi-Fi)'.
- Pairing Mode: On the eMylo meter, press and hold the 'SET' button for 5-7 seconds until the Wi-Fi indicator light on the meter starts blinking rapidly. This indicates pairing mode.
- Connect to Wi-Fi: Follow the in-app instructions to connect the device to your 2.4GHz Wi-Fi network. (Note: The smart meter only supports 2.4GHz Wi-Fi, not 5GHz).
- Device Renaming: Once successfully added, you can rename the device in the app for easier identification (e.g., "Living Room Circuit").
4. Operation
4.1 Device Overview and Controls
The eMylo Smart Electricity Meter features an LCD display and several control buttons for local operation and monitoring.

Figure 3: Display and Button Functions.
This image provides a detailed view of the eMylo Smart Electricity Meter's front panel, highlighting the LCD display and its various indicators (Voltage, Current, Electricity Consumption, Leakage Display). It also labels the functions of each button: 'SET' (Mode switch key), 'Increase Button' (up arrow), 'Decrease Button' (down arrow), and 'Switch Button' (power icon).
- LCD Display: Shows real-time data including voltage (V), current (A), electricity consumption (kWh), and leakage current (mA).
- SET Button: Used to cycle through display modes or enter settings menu. Press and hold to enter Wi-Fi pairing mode.
- Up/Down Buttons: Used to navigate menus or adjust values in settings.
- Switch Button (Power Icon): Manually turns the connected circuit ON or OFF.
4.2 Key Features and App Control
The eMylo Smart Electricity Meter offers a range of smart features accessible via the Tuya Smart/Smart Life app.

Figure 4: Key Features Overview.
This diagram visually represents the main functionalities of the eMylo Smart Electricity Meter, including APP Remote Control, Voice Control, Timing Control, Leakage Protection, Real-Time Data, Adjustable Parameters, Filtration Protection, and Status Feedback, each represented by an icon.
- Real-time Monitoring: Track voltage, current, and cumulative power consumption (kWh) directly on the LCD screen and within the app. This allows for clear insight into electrical device usage.
- Remote Control: Turn connected devices on or off from anywhere using the Tuya Smart/Smart Life app on your smartphone or tablet.
- Voice Control: Compatible with Amazon Alexa and Google Assistant. Control devices using simple voice commands (e.g., "Alexa, turn on the light").
- Overload Protection: Set custom thresholds for current, voltage, or leakage protection within the app. If a threshold is exceeded, the meter will automatically trip the circuit to prevent damage. A shut-off delay can also be configured (0.5s trigger delay, 5-90s reset/start delay).
- Timer and Countdown Functions: Schedule devices to automatically turn on or off at specific times or after a set countdown period via the app. This is useful for automating routines, such as heating water before arrival home.
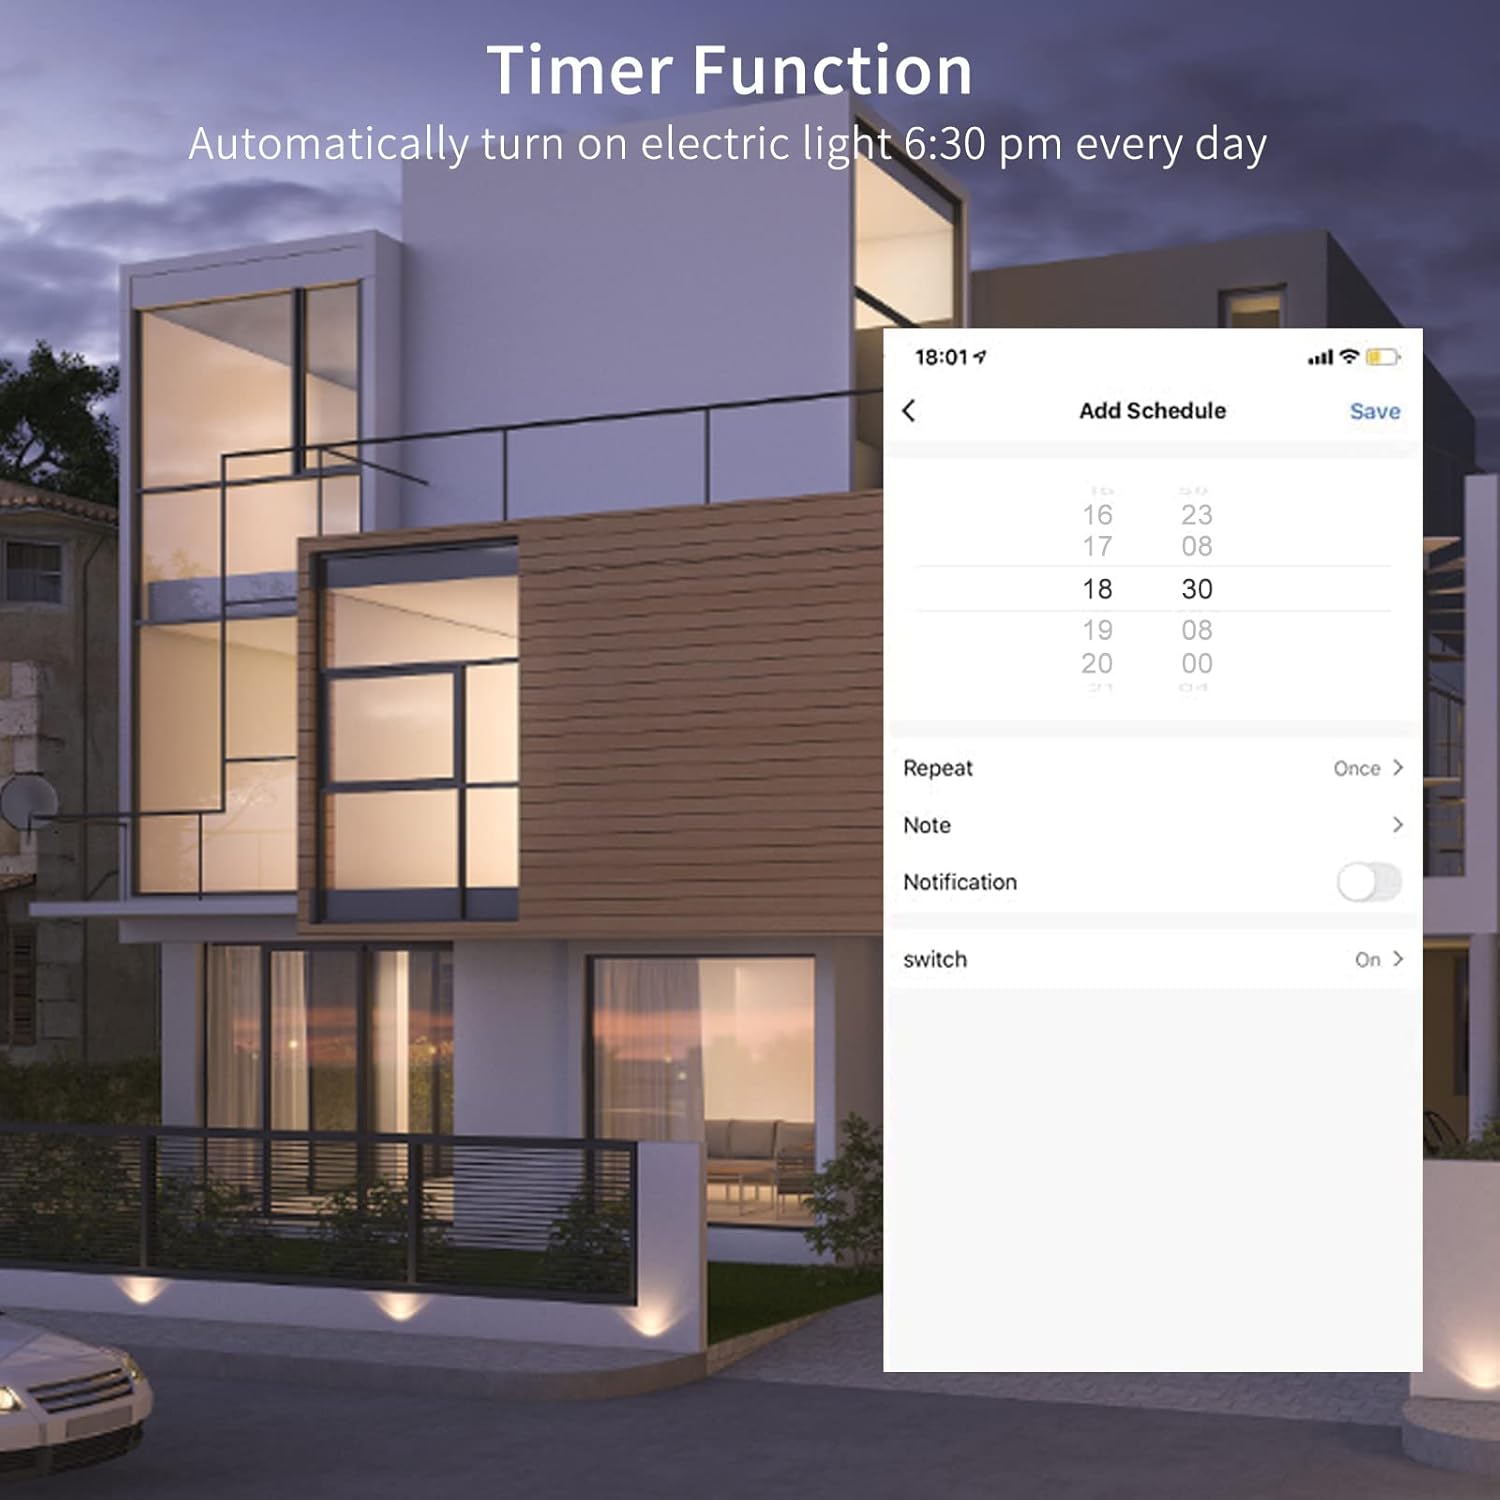
Figure 5: App Remote Control.
This image depicts a person using a smartphone to remotely control an air conditioner, symbolizing the app's capability to switch devices on or off from a distance.

Figure 6: Voice Control with Alexa and Google Assistant.
This image shows a family interacting with smart speakers, demonstrating the meter's compatibility with Alexa and Google Assistant for voice-activated control of connected devices.

Figure 7: Timer Function Setup.
This image displays a smartphone screen showing the 'Add Schedule' interface within the app, illustrating how users can set specific times for devices, such as an electric light, to automatically turn on or off.
5. Maintenance
- Cleaning: Gently wipe the device with a dry, soft cloth. Do not use abrasive cleaners or solvents.
- Firmware Updates: Periodically check the Tuya Smart/Smart Life app for available firmware updates to ensure optimal performance and access to new features. Follow in-app instructions for updates.
- Connection Check: Occasionally inspect wiring connections to ensure they remain secure.
6. Troubleshooting
| Problem | Possible Cause | Solution |
|---|---|---|
| Device not powering on | No power supply; incorrect wiring; device fault. | Check main power supply. Verify wiring connections (IN/OUT, Live/Neutral). If problem persists, contact support. |
| Cannot connect to Wi-Fi | Incorrect Wi-Fi password; 5GHz Wi-Fi network; device not in pairing mode; weak signal. | Ensure correct 2.4GHz Wi-Fi network and password. Put device into pairing mode (hold SET button). Move device closer to router or use a Wi-Fi extender. |
| App shows device offline | Wi-Fi disconnected; power outage; router issues. | Check Wi-Fi router status. Verify device has power. Reconnect device to Wi-Fi if necessary. |
| Overload protection trips frequently | Connected load exceeds set thresholds; faulty appliance. | Review and adjust overload protection thresholds in the app if appropriate for your load. Check connected appliances for faults. |
| Inaccurate power readings | Incorrect wiring; device malfunction. | Verify wiring connections. If readings remain inaccurate, contact support. |
7. Specifications
- Model: YS-AC953
- Dimensions: 8.5 x 3.5 x 6.5 cm
- Weight: 0.17 kg (170 g)
- Wi-Fi Frequency: 2.4GHz IEEE 802.11 b/g/n (5GHz not supported)
- Rated Power Supply Voltage: AC 220V
- Operating Voltage Range: AC 80-400V (single-phase)
- Rated Frequency: 50/60Hz
- Current Range: Up to 63 A
- Trigger Delay (Overload): 0.5s
- Reset/Start Delay: 5-90s
- Voltage Measurement Accuracy: ≤ 2%
- Nominal Insulation Voltage: 1000 V
- Working Temperature: -30℃ to 70℃
- Power Display Range: 0-999999 kWh
- Leakage Current Protection: Standard 50 mA
- Color: White
- Style: Electricity meter circuit breaker
8. Warranty Information
eMylo products are manufactured to high-quality standards. This product is covered by a manufacturer's warranty against defects in materials and workmanship. The specific terms and duration of the warranty may vary by region. Please retain your proof of purchase for warranty claims. For detailed warranty information, refer to the documentation provided with your purchase or contact eMylo customer support.
9. Customer Support
If you encounter any issues or have questions regarding your eMylo Smart Electricity Meter that are not addressed in this manual, please contact eMylo customer support through the following channels:
- Manufacturer: eMylo
- Email: yasornuk@163.com
- Website: Refer to your product packaging or purchase documentation for the official website.
When contacting support, please provide your product model (YS-AC953) and a detailed description of the issue.