1. Introduction
This manual provides comprehensive instructions for the installation, operation, and maintenance of the VIRTIONZ 41A4315-7D Gear Sprocket Replacement Kit. This kit is designed to replace worn or damaged gear and sprocket assemblies in compatible garage door openers, restoring proper functionality. Please read this manual thoroughly before beginning any installation or maintenance procedures.
2. Safety Information
Always prioritize safety when working with garage door openers. Failure to follow these safety guidelines may result in serious injury or property damage.
- Disconnect Power: Before performing any work on the garage door opener, always disconnect the power supply by unplugging the unit or turning off the circuit breaker.
- Read Instructions: Carefully read and understand all instructions in this manual before proceeding.
- Use Proper Tools: Ensure you have the correct tools for the job and use them safely.
- Wear Safety Gear: Wear appropriate personal protective equipment, such as safety glasses and gloves.
- Heavy Components: Garage door components can be heavy and under tension. Exercise caution.
- Professional Assistance: If you are unsure about any step or procedure, consult a qualified technician.
3. Package Contents
Verify that all components listed below are present in your package. If any parts are missing or damaged, contact customer support.

Image: Two complete gear and sprocket replacement kits.

Image: Individual components of one replacement kit.
- Gear and Sprocket Assembly (1 or 2 units, depending on package)
- Worm Gear
- Lubricant (tube)
- Various Washers (thrust washers, spring washers)
- Roll Pins (2)
- Retaining Clip (E-clip)
- Bushings
4. Compatibility
This VIRTIONZ 41A4315-7D Gear Sprocket Replacement Kit is compatible with various garage door opener models, including but not limited to:
- Craftsman: 139.53615sr, 139.53995SRT
- Chamberlain: 2265R, 248730, 41ac050-1, 41CA4220, 41A5021
Always verify your garage door opener's model number before purchasing and installing replacement parts.
5. Installation Instructions
The following steps outline the general procedure for replacing the gear and sprocket assembly. Specific steps may vary slightly depending on your garage door opener model. Refer to your opener's original manual for detailed disassembly instructions.
Step 1: Disconnect Power and Access Opener
- Disconnect Power: Unplug the garage door opener from the electrical outlet or turn off the circuit breaker.
- Open Housing: Remove the outer housing or cover of the garage door opener to access the internal components. This usually involves removing several screws.
Step 2: Remove Old Gear and Sprocket Assembly
- Identify Components: Locate the existing gear and sprocket assembly and the worm gear.
- Remove Retaining Pins/Clips: Carefully remove any roll pins, E-clips, or other fasteners securing the old gear and sprocket assembly to the motor shaft.
- Slide Off Assembly: Gently slide the old gear and sprocket assembly off the motor shaft. Note the order and orientation of any washers or bushings.
- Remove Worm Gear: Remove the old worm gear from the motor shaft.

Image: Hands holding the gear and sprocket assembly and worm gear, illustrating key components.
Step 3: Install New Worm Gear
- Lubricate Shaft: Apply a small amount of the provided lubricant to the motor shaft where the worm gear will sit.
- Install Worm Gear: Slide the new worm gear onto the motor shaft, ensuring it is correctly oriented.
Step 4: Install New Gear and Sprocket Assembly
- Lubricate Components: Apply lubricant to the teeth of the new gear and sprocket assembly and any bushings or bearing surfaces.
- Assemble Washers/Bushings: Place any necessary washers or bushings onto the shaft in the correct order, referring to how the old ones were removed.
- Slide Assembly: Carefully slide the new gear and sprocket assembly onto the motor shaft, ensuring it meshes correctly with the worm gear.
- Secure with Pins/Clips: Insert the new roll pins or retaining clips to secure the assembly in place. Ensure all fasteners are fully seated.
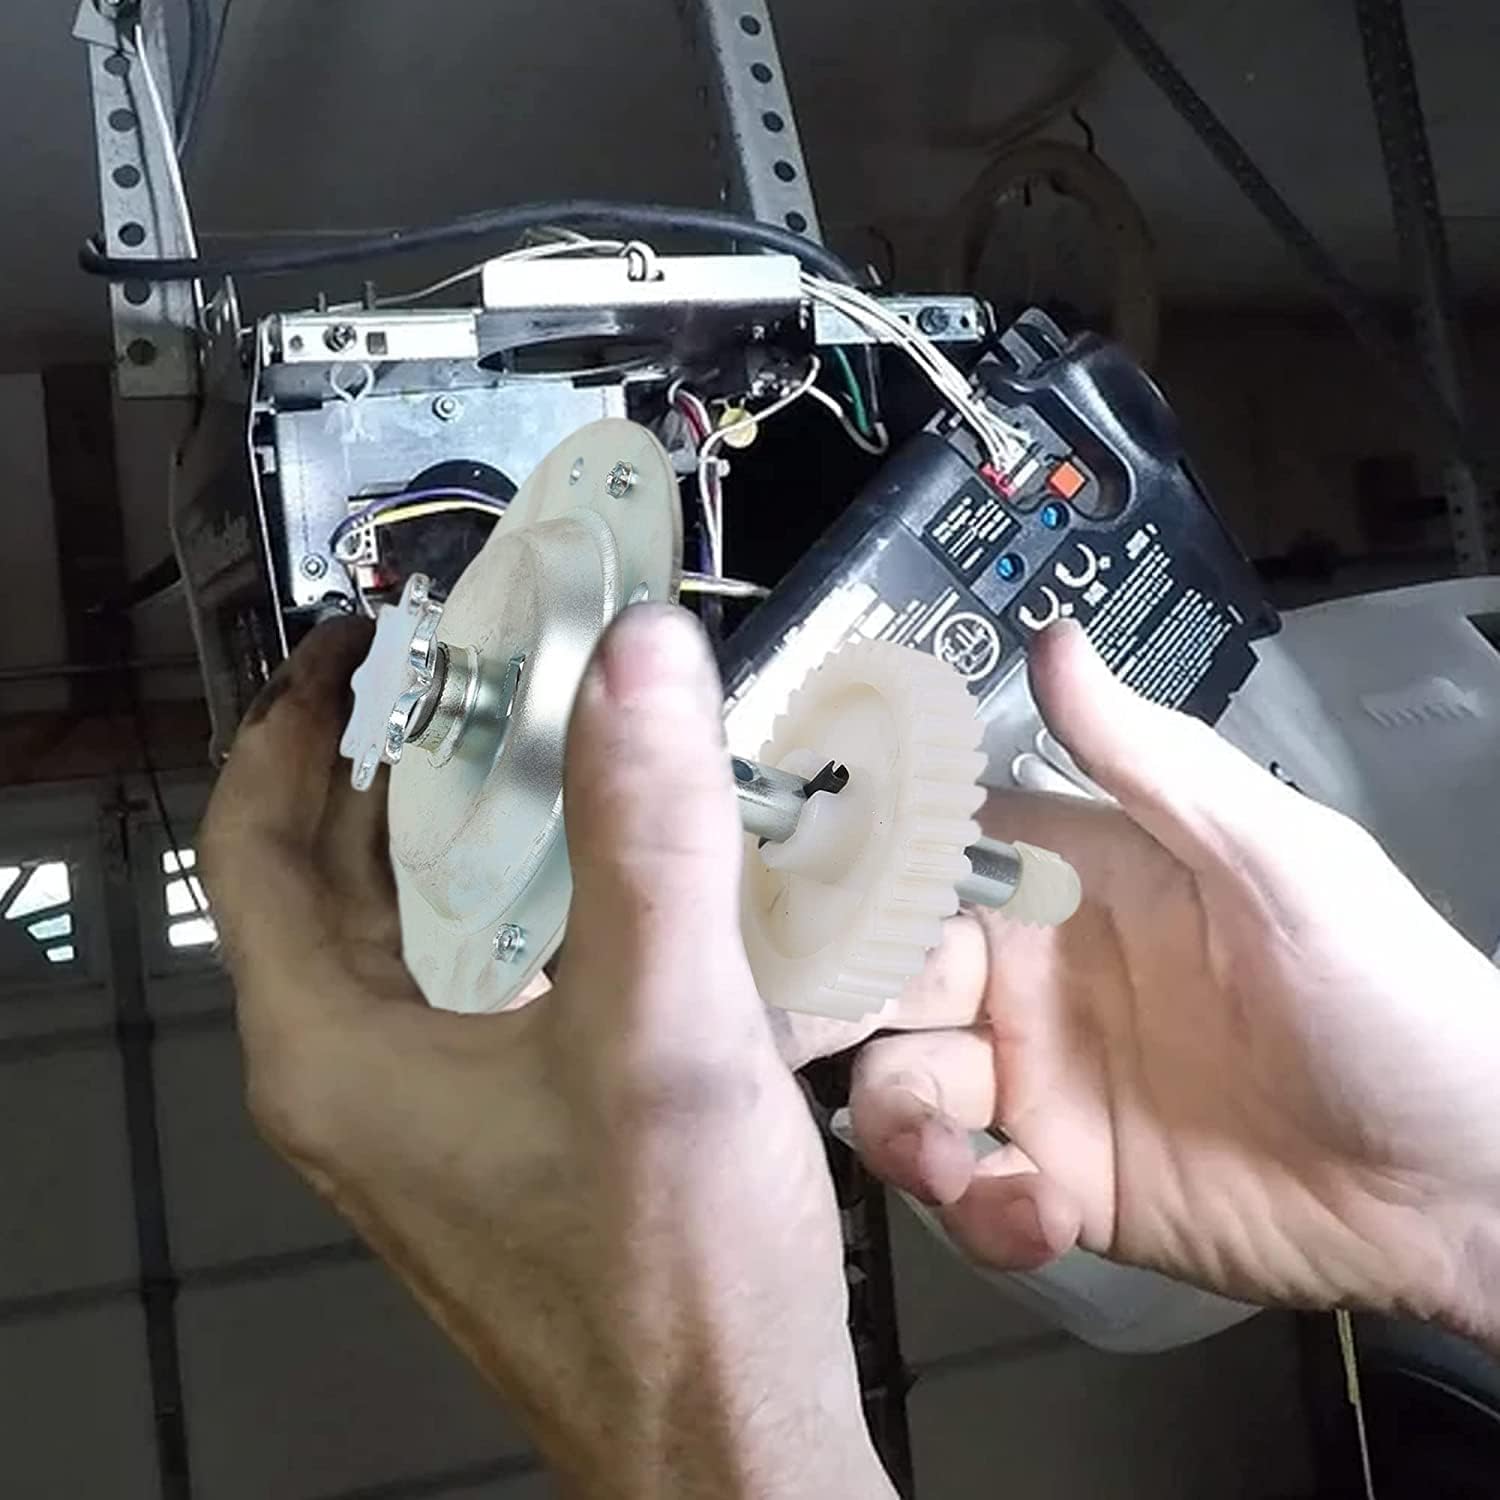
Image: Hands installing the new gear and sprocket assembly.

Image: Exploded view of the gear and sprocket kit components for reference during assembly.
Step 5: Reassemble and Test
- Replace Housing: Reattach the garage door opener housing or cover, securing it with the removed screws.
- Reconnect Power: Plug the garage door opener back into the electrical outlet or turn on the circuit breaker.
- Test Operation: Carefully test the garage door opener's functionality. Ensure the door opens and closes smoothly and that safety features are working correctly. Adjust limits and force settings if necessary, referring to your opener's original manual.
6. Operation
After successful installation of the VIRTIONZ 41A4315-7D Gear Sprocket Replacement Kit, the garage door opener should operate as intended. Use your existing remote controls or wall console to operate the garage door. If the door does not operate smoothly or stops unexpectedly, refer to the Troubleshooting section or your original garage door opener manual for adjustments.
7. Maintenance
Regular maintenance helps ensure the longevity and proper function of your garage door opener and its components.
- Lubrication: Periodically inspect the gear and sprocket assembly for adequate lubrication. Apply a small amount of garage door opener specific grease (lithium-based) if needed. Do not use oil or WD-40.
- Inspection: Annually inspect the gear and sprocket for signs of wear, cracks, or damage. Check for loose fasteners.
- Cleanliness: Keep the area around the gear and sprocket free from dirt, debris, and obstructions.
8. Troubleshooting
If you encounter issues after installing the replacement kit, consider the following common problems and solutions:
| Problem | Possible Cause | Solution |
|---|---|---|
| Opener makes grinding noise but door doesn't move. | Gear teeth stripped or worm gear not engaging. | Re-inspect gear and worm gear installation. Ensure they are properly meshed and secured. |
| Door moves slowly or with difficulty. | Insufficient lubrication, misaligned components, or other opener issues. | Apply more lubricant. Check for proper alignment. Consult original opener manual for force/limit adjustments. |
| Opener does not respond after installation. | Power not reconnected, safety sensors blocked, or internal wiring issue. | Verify power connection. Check safety sensors. If problem persists, consult a professional. |
9. Specifications
- Model Number: 41c4220a
- Product Dimensions: 6.85 x 5.31 x 4.13 inches
- Manufacturer: VIRTIONZ
- Compatibility: Craftsman 139.53615sr, 139.53995SRT; Chamberlain 2265R, 248730, 41ac050-1, 41CA4220, 41A5021
- Batteries Required: No
10. Warranty and Support
For specific warranty information regarding your VIRTIONZ 41A4315-7D Gear Sprocket Replacement Kit, please refer to the product packaging or contact VIRTIONZ customer support directly. If you require further assistance with installation or troubleshooting, please reach out to the manufacturer's support channels.