1. Introduction
This manual provides detailed instructions for setting up, operating, and maintaining your Bmax B7 Power Mini PC. Please read this manual thoroughly before using the device to ensure proper functionality and longevity. The Bmax B7 Power is a compact and powerful mini PC designed for various computing tasks, from everyday productivity to multimedia consumption and light gaming.
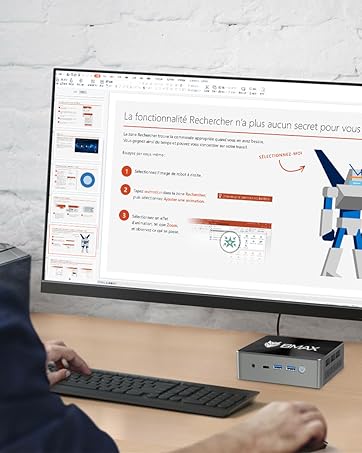
The Bmax B7 Power Mini PC in a typical desktop setup.
2. Package Contents
Upon opening the package, verify that all items listed below are present and in good condition. If any items are missing or damaged, please contact customer support.
- Bmax B7 Power Mini PC
- Power Adapter
- HDMI Cable
- VESA Mount Bracket and Screws
- User Manual (this document)
Video: An unboxing demonstration of the Bmax B7 Power Mini PC, showing the contents of the retail package.
3. Product Overview
The Bmax B7 Power Mini PC features a compact design with essential ports for connectivity and expansion. Familiarize yourself with the port layout before connecting peripherals.
Video: An introductory overview of the Bmax B7 Power Mini PC, highlighting its design, features, and port configuration.
Front Panel
- Power Button: Press to turn the PC on or off.
- USB 3.0 Ports (x2): For connecting high-speed USB devices.
- Type-C Port: For data transfer and display output.
- 3.5mm Headset Jack: For audio output and microphone input.
- Clear CMOS Button: Used to reset BIOS settings (use with caution).
Rear Panel
- HDMI Ports (x2): For connecting to displays.
- USB 2.0 Ports (x2): For connecting standard USB devices.
- Ethernet Port: For wired network connection.
- Power In: Connect the provided power adapter here.
4. Setup Instructions
Follow these steps to set up your Bmax B7 Power Mini PC:
- Connect to a Display: Use the provided HDMI cable to connect the Mini PC to your monitor or TV. The B7 Power supports up to three displays simultaneously.
- Connect Peripherals: Plug in your USB keyboard and mouse into the available USB ports.
- Connect to Network (Optional): For a wired connection, plug an Ethernet cable into the Ethernet port. For wireless, ensure your Wi-Fi network is available during initial setup.
- Connect Power: Connect the power adapter to the "Power In" port on the Mini PC, then plug the adapter into a power outlet.
- Power On: Press the power button on the front panel. The Mini PC will boot up.
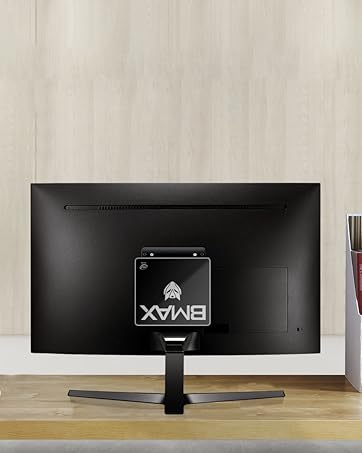
The Bmax B7 Power can be mounted behind a monitor for a clean setup.
5. Operating Instructions
Initial Windows Setup
Upon first boot, you will be guided through the Windows operating system setup process. Follow the on-screen prompts to configure language, region, network settings, and user accounts. Ensure you have your Wi-Fi password ready if you choose a wireless connection.
Connecting to Wi-Fi
The Bmax B7 Power supports Wi-Fi 6 (802.11ax) for high-speed wireless networking. To connect:
- Click the Wi-Fi icon in the system tray (usually bottom-right of the screen).
- Select your desired Wi-Fi network from the list.
- Enter the network security key (password) and click "Connect".
Power Management
- Shut Down: Click the Start button, then Power > Shut down.
- Restart: Click the Start button, then Power > Restart.
- Sleep: Click the Start button, then Power > Sleep.
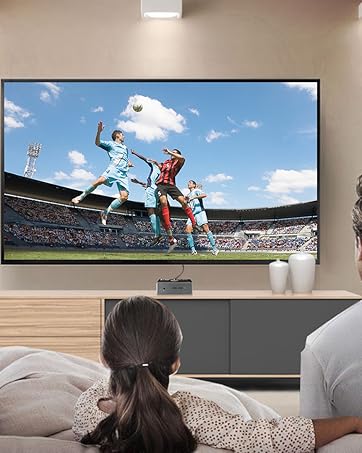
The Bmax B7 Power is suitable for home entertainment, including playing 4K UHD videos.
6. Specifications
| Feature | Detail |
|---|---|
| Model Number | B7 Power |
| Processor | Intel Core i7-11390H (up to 5.0GHz) |
| RAM | 16GB DDR4 (Supports up to 64GB) |
| Storage | 1TB NVMe SSD |
| Wireless Connectivity | 802.11a/b/g/n/ac/ax WiFi 6 |
| Dimensions | 10.51 x 6.14 x 2.91 inches |
| Weight | 1.87 Pounds |
| Manufacturer | BMAX |
| First Available | June 14, 2023 |
7. Maintenance
Regular maintenance helps ensure the optimal performance and lifespan of your Mini PC.
- Cleaning: Use a soft, dry cloth to clean the exterior of the device. For dust accumulation in vents, use compressed air. Ensure the device is powered off and unplugged before cleaning.
- Software Updates: Regularly check for and install operating system updates (e.g., Windows Updates) and driver updates to maintain security and performance.
- Ventilation: Ensure the Mini PC is placed in a well-ventilated area and that its vents are not obstructed to prevent overheating.
8. Troubleshooting
If you encounter issues with your Bmax B7 Power Mini PC, refer to the following common problems and solutions:
No Power
- Ensure the power adapter is securely connected to both the Mini PC and a working power outlet.
- Test the power outlet with another device to confirm it is functional.
- If using a power strip, ensure it is switched on.
No Display Output
- Verify that the HDMI cable is securely connected to both the Mini PC and the monitor.
- Ensure the monitor is powered on and set to the correct input source (e.g., HDMI 1, HDMI 2).
- Try a different HDMI cable or monitor if possible.
Wi-Fi Connectivity Issues
- Check if other devices can connect to your Wi-Fi network.
- Restart your Wi-Fi router and the Mini PC.
- Ensure Wi-Fi drivers are up to date in Device Manager.
- If the issue persists, consider using a wired Ethernet connection as an alternative.
9. Warranty and Support
Your Bmax B7 Power Mini PC comes with a manufacturer's warranty. Please refer to the warranty card included in your package for specific terms and conditions. For technical support, product inquiries, or warranty claims, please contact Bmax customer service through their official website or the contact information provided with your purchase.
For additional resources and FAQs, visit the official Bmax website: Bmax Official Store