1. Introduction
Welcome to the Roco MUSEUMS EDITION German Electric Locomotive E94 279 user manual. This document provides essential information for the safe and proper setup, operation, and maintenance of your highly detailed model locomotive. Please read these instructions carefully before operating the model to ensure optimal performance and longevity.
2. Safety Information
Your Roco model locomotive is a sophisticated product designed for enthusiasts. Observe the following safety guidelines:
- Electrical Safety: Always disconnect power from the track system before placing or removing the locomotive. Ensure all electrical connections are secure and free from damage.
- Small Parts: This product contains small parts and is not suitable for children under 14 years of age due to choking hazards.
- Handling: Handle the locomotive with care, avoiding excessive force. Always hold the model by its body, not by delicate details like pantographs or railings.
- Environment: Operate the model in a clean, dry environment, away from dust, moisture, and extreme temperatures.
3. Package Contents
Upon opening your Roco MUSEUMS EDITION German Electric Locomotive E94 279, please verify that all components are present and undamaged. The locomotive is typically presented in a special collector's packaging.
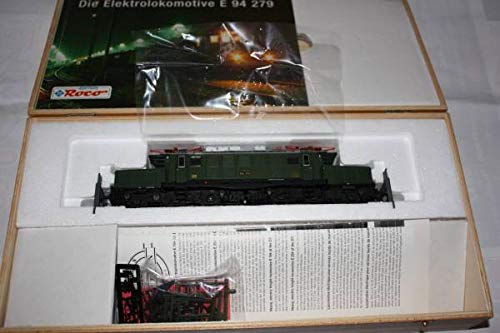
This image displays the premium wooden box packaging for the Roco MUSEUMS EDITION German Electric Locomotive E94 279. The box features the 'MUSEUMS Roco EDITION' logo prominently on its lid, indicating a special collector's item.
The package should contain:
- Roco MUSEUMS EDITION German Electric Locomotive E94 279
- Instruction Manual (this document)
- Accessory bag (may include additional detail parts, couplers, or tools)
If any items are missing or damaged, please contact your retailer or Roco customer support immediately.
4. Setup
4.1 Initial Inspection
- Carefully remove the locomotive from its packaging.
- Inspect the model for any visible damage or loose parts that may have occurred during transit.
- Ensure all wheels are properly seated on their axles and rotate freely.
4.2 Placing on Tracks
- Ensure your track system is clean and free of debris.
- Carefully place the locomotive on the tracks, ensuring all wheels are correctly positioned on the rails.
- Verify that the pantographs (if applicable and raised) do not interfere with overhead structures.
4.3 Power Connection
- Connect your power supply (DC or DCC, depending on your model's version) to the track system according to the power supply's instructions.
- Ensure the power supply is set to the correct voltage and mode for your locomotive.
5. Operating Instructions
5.1 Basic Operation (DC Analog)
- Starting: Slowly increase the voltage from your power controller. The locomotive will begin to move.
- Speed Control: Adjust the voltage to control the speed.
- Direction Change: Briefly turn the voltage to zero, then reverse the polarity on your controller to change direction.
- Stopping: Gradually decrease the voltage to zero.
5.2 Digital Operation (DCC - if applicable)
If your model is equipped with a DCC decoder, refer to your DCC system's manual for specific control instructions. Typically:
- Address: The locomotive will have a default address (usually 3). You may reprogram this using your DCC controller.
- Functions: Use the function buttons on your DCC controller to activate lights, sounds (if equipped), and other features.
5.3 Lighting Functions
The E94 279 typically features directional lighting. In DC operation, lights illuminate based on the direction of travel. In DCC, lights can often be controlled independently via function keys.
6. Maintenance
Regular maintenance ensures the smooth and reliable operation of your Roco locomotive.
6.1 Cleaning
- Wheels: Keep the wheels and track clean. Use a soft cloth or a specialized track cleaning tool. Dirty wheels can lead to poor electrical contact and erratic running.
- Body: Gently wipe the locomotive body with a soft, lint-free cloth. Avoid using harsh chemicals or abrasive materials.
- Electrical Contacts: Periodically clean the electrical pickup shoes or contacts on the underside of the locomotive.
6.2 Lubrication
Lubrication is crucial for moving parts. Refer to the specific diagrams in your model's detailed manual (if provided) for exact lubrication points. Generally:
- Apply a tiny drop of specialized model train oil to axle bearings and gear shafts.
- Use a small amount of model train grease for visible gears.
- Avoid over-lubrication, as this can attract dust and hinder performance.
- Lubricate sparingly, typically after 20-30 hours of operation or if the model shows signs of sluggishness.
7. Troubleshooting
If your locomotive is not performing as expected, consult the following table for common issues and solutions:
| Problem | Possible Cause | Solution |
|---|---|---|
| Locomotive does not move. | No power to track; dirty track/wheels; loose electrical connection; locomotive not on track. | Check power supply; clean track and wheels; ensure all connections are secure; correctly place locomotive on track. |
| Lights are not working. | No power; dirty contacts; bulb/LED failure; incorrect DCC function. | Verify power; clean contacts; check for damaged bulbs/LEDs (consult Roco service); activate correct DCC function. |
| Locomotive runs erratically or stalls. | Dirty track/wheels; insufficient power; mechanical obstruction; worn motor brushes. | Clean track and wheels thoroughly; ensure adequate power supply; check for debris in mechanism; contact Roco service for motor issues. |
| Loud noise during operation. | Lack of lubrication; foreign object in gears; damaged gears. | Lubricate moving parts as per maintenance section; inspect for foreign objects; contact Roco service for gear damage. |
If the problem persists after attempting these solutions, please contact Roco customer support or an authorized service center.
8. Specifications
- Model: German Electric Locomotive E94 279
- Brand: Roco
- Edition: MUSEUMS EDITION
- Scale: H0 (1:87) - Typical for Roco, verify with product packaging if unsure.
- Power System: DC (Analog) / DCC Ready or DCC Fitted (depending on specific model variant)
- Couplers: Standard Roco or NEM 362 coupler pockets
- Minimum Radius: R360mm (typically, refer to specific model details)
9. Warranty and Support
Roco products are manufactured to high-quality standards. This product is covered by a manufacturer's warranty against defects in materials and workmanship. The specific terms and duration of the warranty may vary by region and retailer. Please retain your proof of purchase for warranty claims.
For technical support, spare parts, or warranty service, please contact your authorized Roco dealer or visit the official Roco website for customer service contact information.
Roco Official Website: www.roco.cc


