1. Introduction
This manual provides essential information for the safe and efficient operation, setup, and maintenance of your SPECSTAR 1/2 HP 5 CFM Dual Stage Rotary Vane HVAC Air Vacuum Pump. Please read these instructions thoroughly before initial use and retain this manual for future reference. This vacuum pump is designed for evacuating air and moisture from sealed systems, commonly used in HVAC and refrigeration applications.

Figure 1: SPECSTAR 1/2 HP 5 CFM Dual Stage Rotary Vane HVAC Air Vacuum Pump.
2. Safety Information
Always observe the following safety precautions to prevent personal injury or damage to the equipment.
- Electrical Safety: Ensure the power supply matches the pump's voltage (110V, 60Hz). Do not operate with damaged cords or plugs. Avoid using in wet conditions.
- Personal Protective Equipment: Wear safety glasses and gloves when handling vacuum pump oil or refrigerants.
- Ventilation: Operate the pump in a well-ventilated area to dissipate heat and any oil mist.
- Hot Surfaces: The pump motor and housing may become hot during operation. Avoid direct contact.
- Oil Handling: Use only recommended vacuum pump oil. Avoid skin contact and dispose of used oil responsibly according to local regulations.
- Refrigerant Handling: This pump is for evacuation only. Do not use it to pump flammable or corrosive gases. Always follow proper procedures for handling refrigerants.
- Stability: Place the pump on a stable, level surface to prevent tipping during operation.
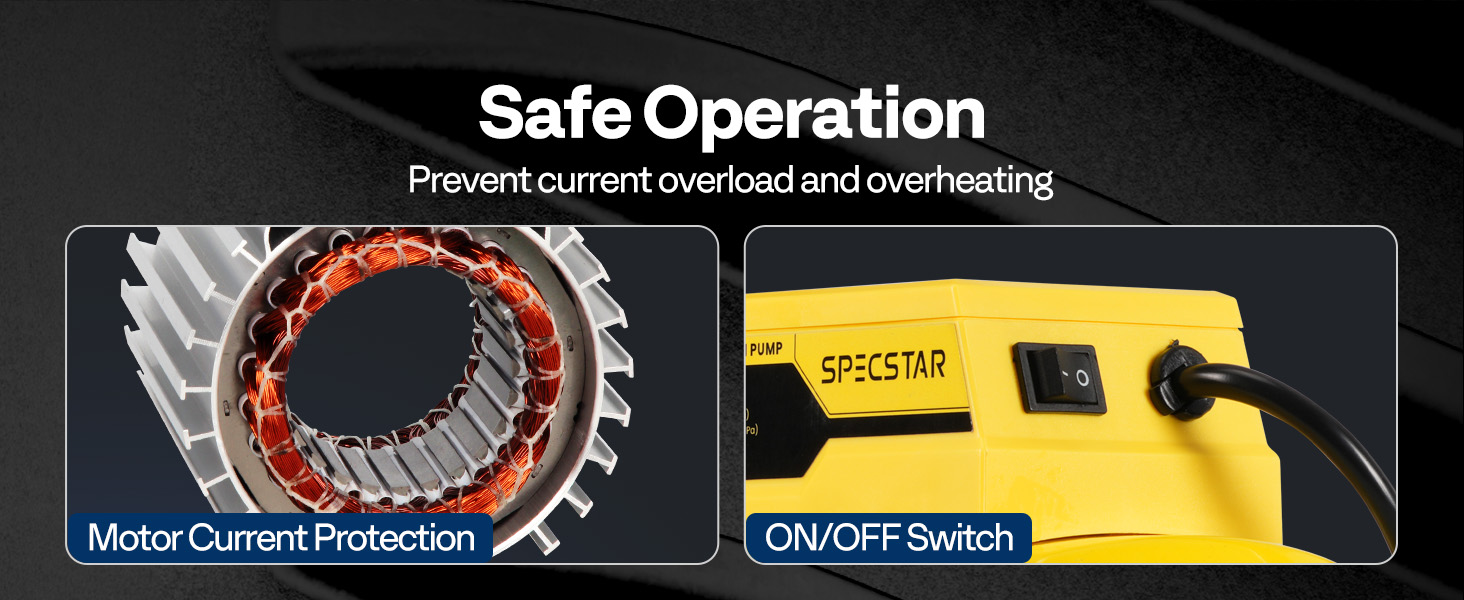
Figure 2: The pump features motor current protection and an easily accessible ON/OFF switch for safe operation.
3. Package Contents
Verify that all items are present and undamaged upon unpacking:
- 1 x SPECSTAR Vacuum Pump
- 1 x 330ml Vacuum Oil bottle
- 1 x 230ml Vacuum Oil bottle
- 1 x User Manual (this document)
4. Product Features
The SPECSTAR vacuum pump incorporates several design elements for effective and reliable performance:
- Powerful Dual-Stage Design: A 1/2 HP motor delivers a 5 CFM flow rate and an ultimate vacuum of 15 Micron (0.2 Pa), ensuring thorough evacuation of sealed systems.
- Durable Construction: Features a high-quality die-cast aluminum housing, a rock-solid iron base, and anti-vibration rubber feet for stability and reduced friction.
- Efficient Cooling: A built-in high-volume cooling fan, large mesh vents, and T-shaped heat fins contribute to efficient heat dissipation, extending pump lifespan.
- Overload Protection: Integrated motor overload protection safeguards the unit from overheating and current surges.
- Anti-Reflux Device: Prevents oil backflow into the system, protecting against contamination.
- User-Friendly Oil Management: Features an oil window for easy monitoring, clearly marked MIN/MAX oil levels, and a quick-drain port for hassle-free oil changes.
- Versatile Inlet Ports: Equipped with 1/4-inch SAE and 1/2-inch ACME intake fittings, compatible with R12, R22, R134a, and R502 systems. A 5/16-inch adapter is required for R410a systems (not included).
- Low Noise Operation: Direct-drive rotary vane design minimizes operational noise and vibration.
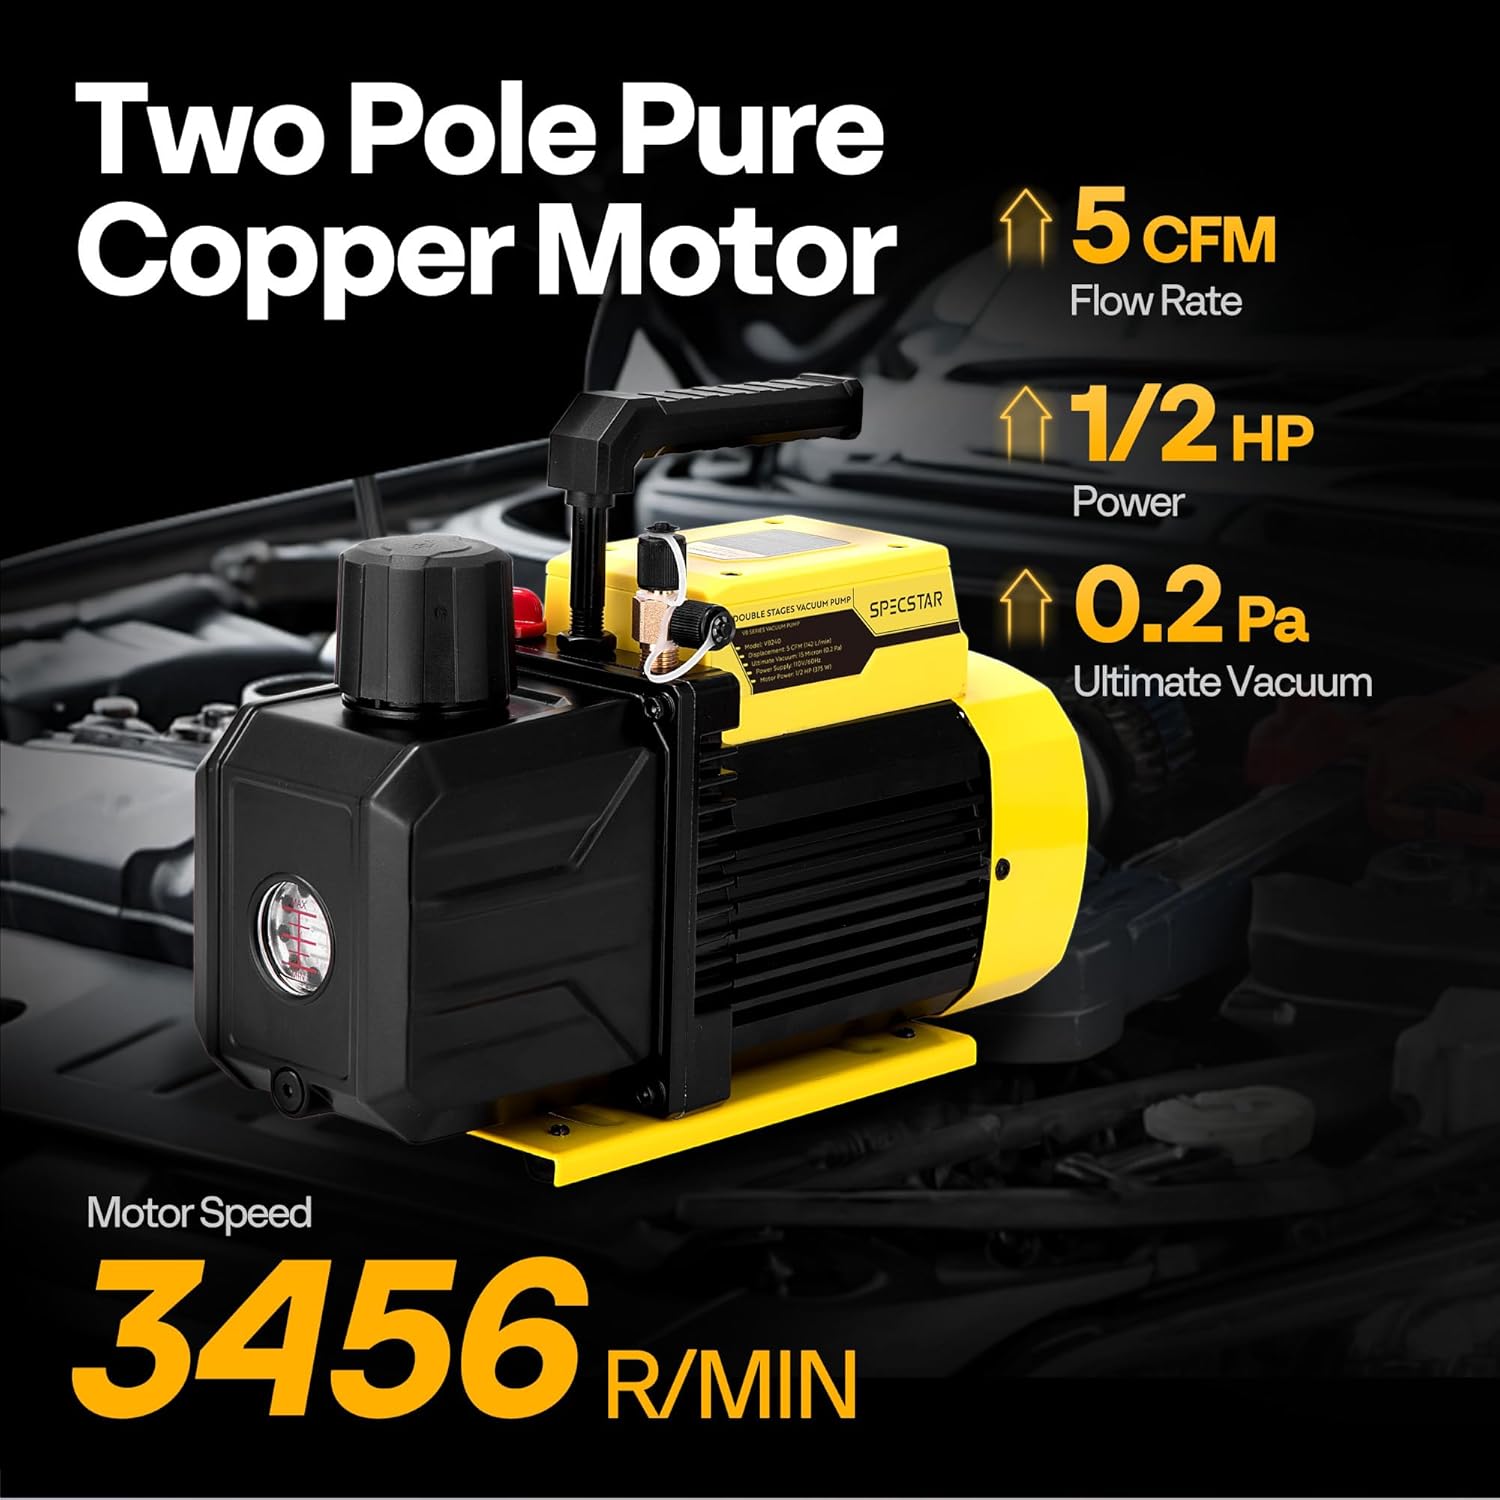
Figure 3: The pump's powerful motor and dual-stage design ensure efficient vacuum performance.

Figure 4: Internal components designed for efficient heat dissipation during operation.

Figure 5: The pump is engineered for low noise operation, minimizing disturbance.
5. Setup
5.1 Initial Oil Filling
- Ensure the pump is on a level surface and powered off.
- Locate the oil fill port (typically with a cap labeled 'Oil Inlet').
- Remove the oil fill cap.
- Carefully pour the provided vacuum pump oil into the reservoir until the oil level is between the MIN and MAX marks on the oil sight glass. Do not overfill.
- Replace the oil fill cap securely.

Figure 6: Oil filling port and exhaust port details. Ensure proper oil level before operation.
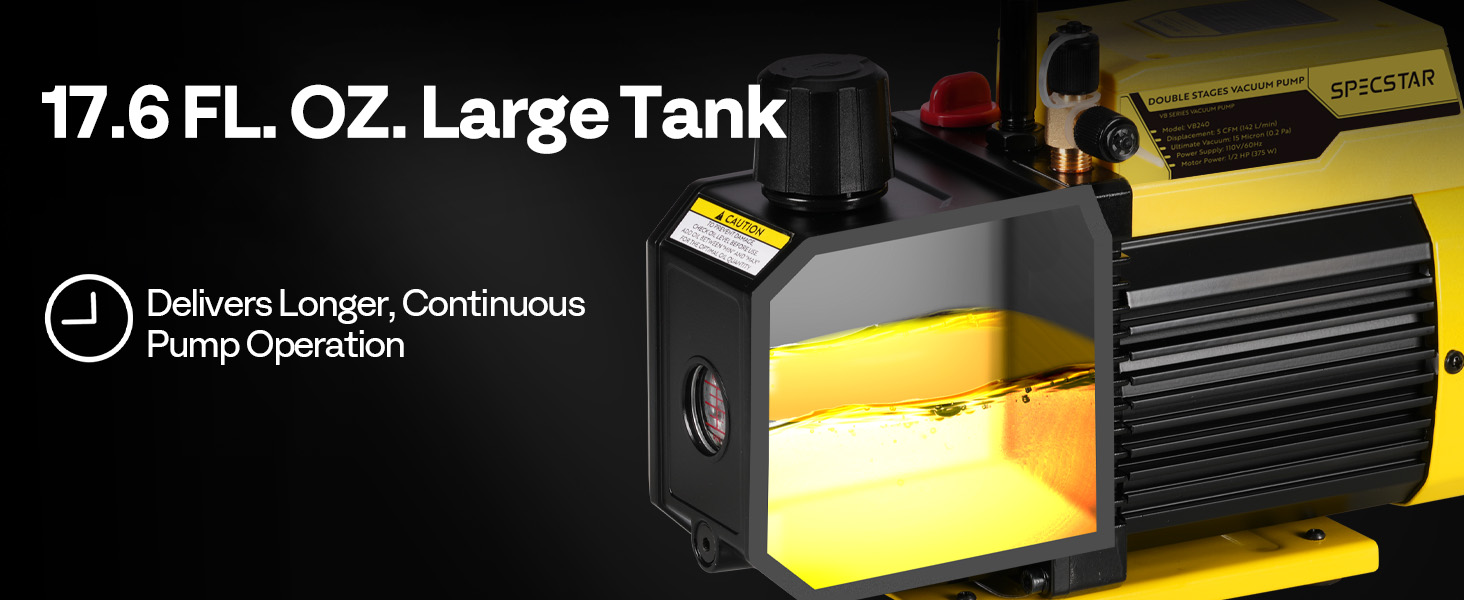
Figure 7: The oil tank features a sight glass for monitoring oil levels between MIN and MAX marks.
5.2 Connecting to a System
- Ensure the system to be evacuated is depressurized and isolated.
- Connect appropriate vacuum hoses from the system to the pump's intake ports. The pump has 1/4-inch SAE and 1/2-inch ACME fittings. For R410a systems, a 5/16-inch adapter is required.
- Tighten all connections to prevent leaks.

Figure 8: Air inlet ports with universal compatibility for various refrigerants.
6. Operating Instructions
6.1 General Operation
- After connecting the pump to the system and ensuring proper oil level, plug the pump into a grounded 110V, 60Hz electrical outlet.
- Turn the power switch to the 'ON' position. The pump will begin to operate.
- Monitor the vacuum gauge (if connected to your system) to observe the evacuation process. The pump is designed to pull a deep vacuum quickly.
- Allow the pump to run until the desired vacuum level is achieved and maintained for the recommended duration for your specific application.
- Once evacuation is complete, close the valves on your manifold gauge set or system to isolate the vacuum.
- Turn the pump off and disconnect the power.
- Carefully disconnect the vacuum hoses from the pump and the system.
6.2 Applications
This vacuum pump is suitable for a wide range of applications, including but not limited to:
- HVAC and refrigeration system evacuation (R12, R22, R134a, R502, R410a with adapter).
- Automotive air conditioning servicing.
- Vacuum drying processes.
- Solvent degassing.
- Material defoaming.
- Wood stabilizing and lamination.
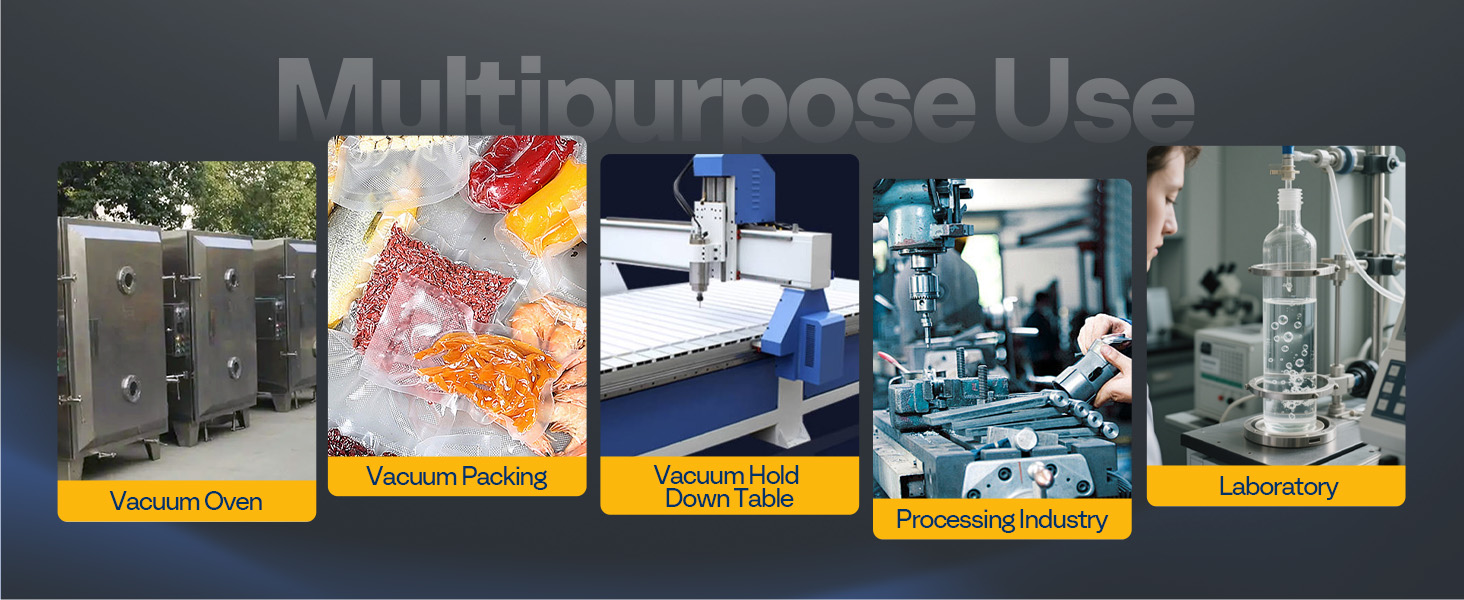
Figure 9: Examples of diverse applications for the vacuum pump.
7. Maintenance
Regular maintenance ensures optimal performance and extends the lifespan of your vacuum pump.
7.1 Checking Oil Level
Before each use, check the oil level through the sight glass. The oil should be between the MIN and MAX marks. Add oil if necessary.
7.2 Changing Vacuum Pump Oil
Change the vacuum pump oil regularly, especially after prolonged use or if the oil appears discolored or contaminated. The frequency depends on usage and application.
- Ensure the pump is off and unplugged.
- Place a suitable container under the oil drain valve located at the bottom of the pump.
- Open the oil drain valve and allow all old oil to drain completely.
- Close the drain valve securely.
- Remove the oil fill cap and pour new vacuum pump oil into the reservoir until the level is between the MIN and MAX marks on the sight glass.
- Replace the oil fill cap.
- Dispose of used oil according to local environmental regulations.
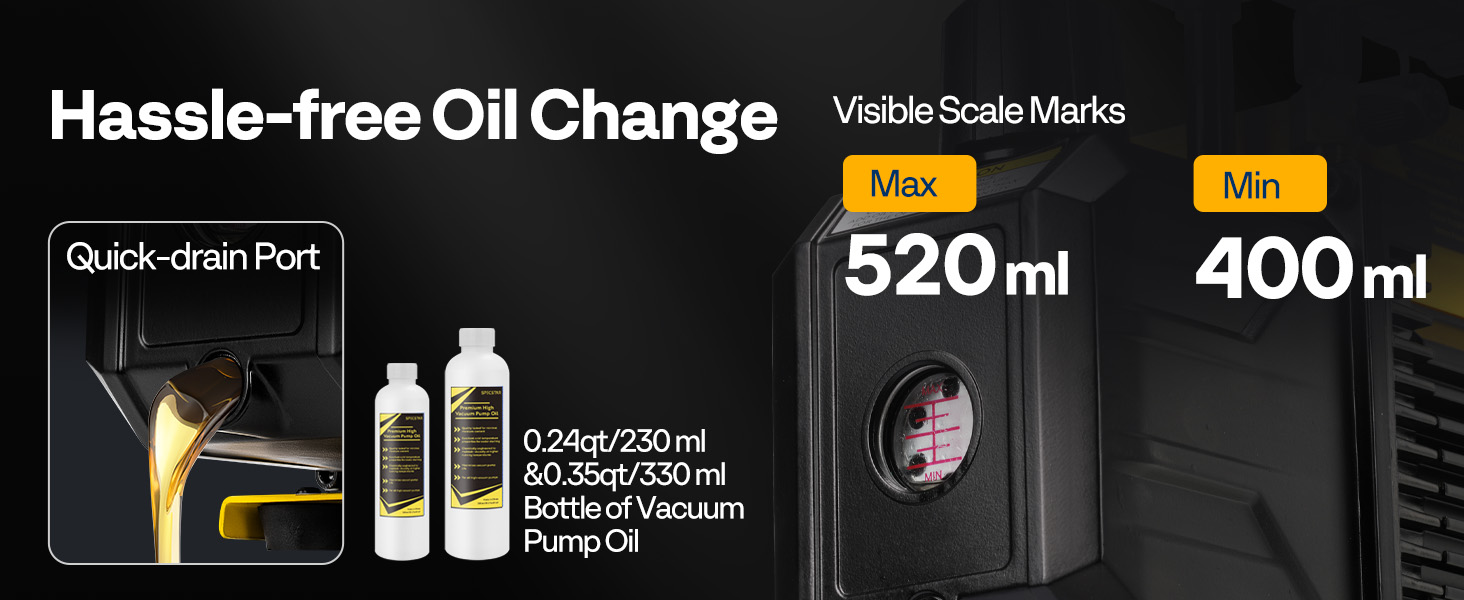
Figure 10: The oil level window and quick-drain port facilitate easy oil management.
7.3 Intake Filter Maintenance
The intake filter prevents impurities from entering the pump. Inspect and clean or replace the filter as needed to maintain optimal performance.
8. Troubleshooting
Refer to the following table for common issues and their solutions.
| Problem | Possible Cause | Solution |
|---|---|---|
| Pump does not start | No power, faulty switch, motor overload protection activated. | Check power connection. Ensure switch is ON. Allow pump to cool if motor overload was triggered. |
| Pump not pulling sufficient vacuum | System leak, low oil level, contaminated oil, clogged intake filter, worn pump components. | Check system for leaks. Verify oil level and add if low. Change oil if contaminated. Clean/replace intake filter. Contact support if components are worn. |
| Excessive noise or vibration | Low oil level, pump not on level surface, internal component issue. | Check oil level. Ensure pump is on a stable, level surface. Contact support for internal issues. |
| Smoke/mist from exhaust port | Normal oil vapor (especially in cold conditions), overfilled oil, contaminated/degraded oil, vacuum leaks, clogged oil mist separator. | A light oil mist is normal. Check oil level (do not overfill). Change oil if degraded. Check for system leaks. Inspect/clean oil mist separator. |

Figure 11: Common causes of exhaust port smoke and their implications.
9. Specifications
| Specification | Value |
|---|---|
| Model | VH1158US-NEW |
| Voltage | 110V |
| Frequency | 60 Hz |
| Power | 1/2 HP (375W) |
| Flow Rate | 5 CFM (142 L/min) |
| Ultimate Vacuum | 15 Micron (0.2 Pa) |
| Duty Cycle | 40 min |
| Recommended Oil Capacity | 0.47 qt (450ml) |
| Inlet Fitting | 1/4 in. SAE & 1/2 in. ACME |
| Product Dimensions | 13.1 x 5.1 x 9.5 inches |
| Item Weight | 19.8 pounds |
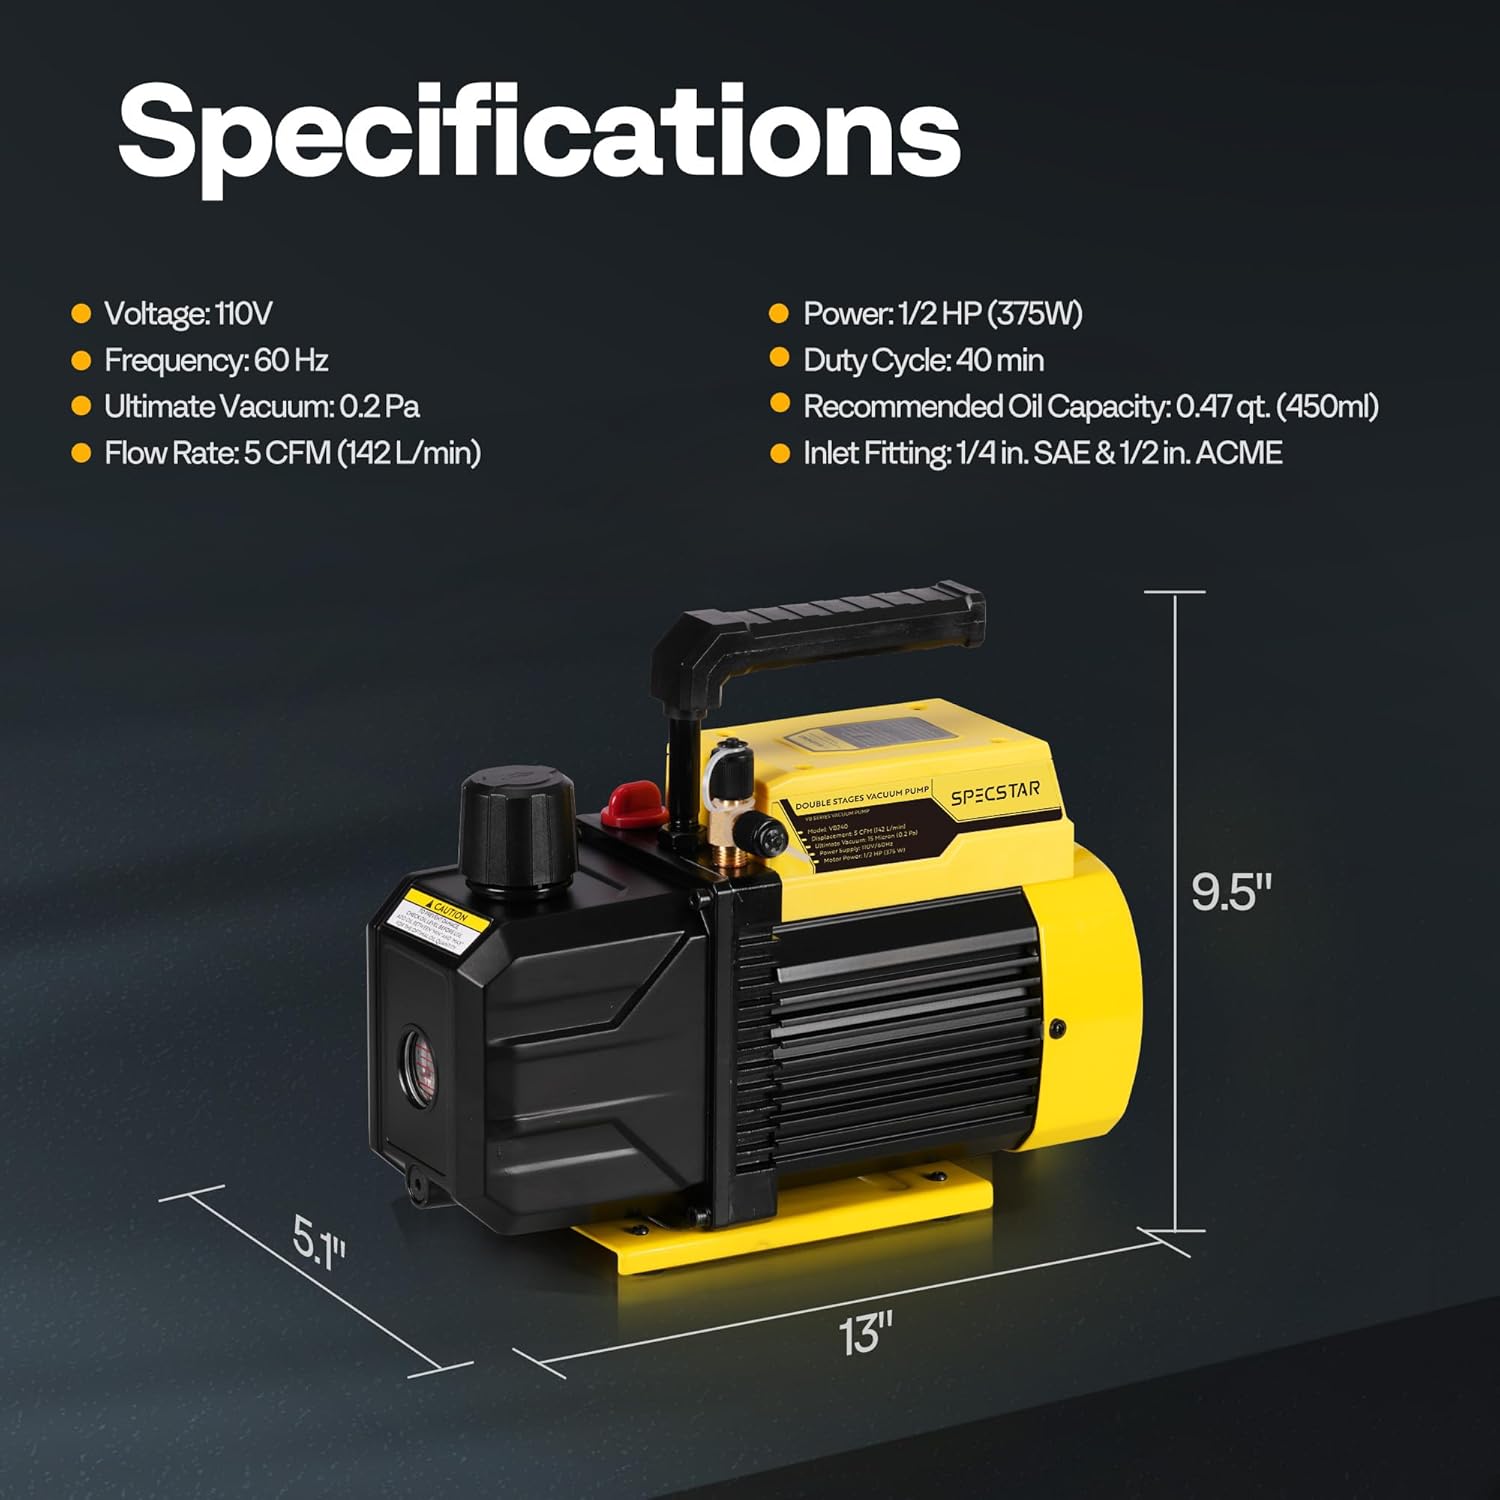
Figure 12: Detailed specifications and dimensions of the vacuum pump.
10. Warranty and Support
For warranty information and technical support, please refer to the documentation provided with your purchase or contact SPECSTAR customer service directly. Keep your purchase receipt as proof of purchase.