Introduction
Thank you for choosing the ReadyWired Turntable Needle Stylus. This manual provides essential information for the proper installation, operation, and maintenance of your new stylus. Designed for optimal sound reproduction, this stylus ensures a high-quality listening experience for your vinyl records. Please read this manual carefully before use to ensure correct handling and to maximize the lifespan of your product.
Compatibility
This ReadyWired Turntable Needle Stylus is specifically designed to be compatible with the following Sansui turntable models:
- Sansui SN-43
- Sansui SN43
- Sansui SC-43
- Sansui SV-43
- Sansui SC43
- Sansui SV43
Ensure your turntable model matches one of the listed compatible models for proper fit and function.
Setup Instructions
Proper installation of your new stylus is crucial for optimal performance and to prevent damage to your records or turntable. Always handle the stylus with care, avoiding contact with the needle tip.
- Power Off: Before beginning, ensure your turntable is completely powered off and unplugged from the electrical outlet to prevent accidental activation.
- Locate Cartridge: Gently lift the tonearm and locate the existing cartridge on your turntable. The stylus is typically attached to the front underside of the cartridge.
- Remove Old Stylus: Carefully grasp the plastic body of the old stylus (not the needle itself) and gently pull it forward and slightly downward. It should slide out of the cartridge housing. Avoid excessive force.
- Inspect New Stylus: Unpack your new ReadyWired stylus. Visually inspect it for any visible damage. The needle tip should be straight and intact.
- Install New Stylus: Align the new stylus with the cartridge housing. The flat top of the stylus should face upwards. Gently push the stylus into the cartridge until it clicks securely into place. Do not force it.
- Verify Installation: Once installed, visually confirm that the stylus is seated flush with the cartridge body and that the needle tip is visible and correctly oriented.
- Test Playback: Plug in and power on your turntable. Carefully place a record on the platter and lower the tonearm to test playback. Listen for clear audio and proper tracking.
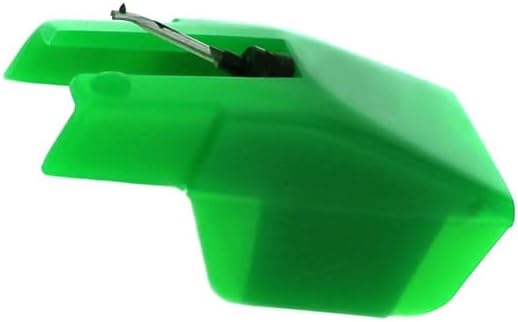
Image 1: Front view of the ReadyWired Turntable Needle Stylus. This image shows the green plastic housing and the metal cantilever with the needle tip extending from the front. This is the primary component that needs to be carefully inserted into the turntable's cartridge.
Operating Your Stylus
Once installed, the stylus operates as part of your turntable's cartridge system. Follow your turntable's specific operating instructions for playing records. Always ensure records are clean before playing to prevent premature wear on the stylus and records.
- Gentle Handling: Always handle the tonearm with care. Avoid dropping the stylus onto the record.
- Tracking Force: If your turntable allows, ensure the tracking force is set according to your turntable's or cartridge's specifications. Incorrect tracking force can damage the stylus or records.
- Anti-Skate: Adjust the anti-skate setting on your turntable to prevent the stylus from pulling towards the center or outer edge of the record.
Maintenance and Care
Regular maintenance will extend the life of your stylus and ensure consistent sound quality.
- Stylus Cleaning:
- Use a soft stylus brush (not included) to gently brush the needle tip from back to front (away from the cantilever).
- Perform this cleaning regularly, ideally before or after each listening session, to remove dust and debris.
- Do not use solvents or harsh chemicals, as these can damage the stylus or its adhesive.
- Record Cleaning: Keep your vinyl records clean. Dust and grime on records are the primary causes of stylus wear and poor sound quality.
- Storage: When not in use, ensure the tonearm is secured in its rest and, if applicable, the stylus guard is in place to protect the needle.
- Replacement: Stylus tips wear out over time. The lifespan depends on usage and care, but typically ranges from 500 to 1000 hours of playback. Replace your stylus when you notice a degradation in sound quality, increased distortion, or visible wear on the tip.

Image 2: Angled view of the ReadyWired Turntable Needle Stylus. This perspective highlights the overall shape of the stylus housing and the precise angle of the needle, which is critical for accurate tracking of record grooves.
Troubleshooting
If you encounter issues with your stylus, refer to the following common problems and solutions:
| Problem | Possible Cause | Solution |
|---|---|---|
| No sound or very low sound | Stylus not fully seated; turntable not powered on; amplifier/receiver issues; damaged stylus. | Ensure stylus is clicked into place. Check all power connections. Verify amplifier/receiver settings. Inspect stylus for damage; replace if necessary. |
| Distorted or muffled sound | Dirty stylus; worn stylus; incorrect tracking force; dirty record. | Clean stylus with a stylus brush. Check tracking force settings. Clean the record. If distortion persists, stylus may need replacement. |
| Skipping or jumping | Dirty record; incorrect tracking force or anti-skate; damaged stylus; turntable not level. | Clean record. Adjust tracking force and anti-skate. Inspect stylus for bent cantilever or damaged tip. Ensure turntable is on a level surface. |
| Stylus falls out of cartridge | Not properly installed; incompatible cartridge. | Re-install stylus, ensuring it clicks into place. Verify cartridge compatibility with the stylus model. |
If the problem persists after attempting these solutions, consult your turntable's user manual or contact a qualified technician.
Product Specifications
- Product Type: Turntable Needle Stylus
- Brand: ReadyWired
- Compatibility: Sansui SN-43, SN43, SC-43, SV-43, SC43, SV43 series turntables
- Material: High-quality plastic housing, precision-engineered needle tip
- Color: Green (as pictured)
- Expected Lifespan: Approximately 500-1000 hours of playback (varies with usage and maintenance)
Warranty and Support
ReadyWired products are manufactured to high standards. For specific warranty information or technical support, please refer to the contact information provided with your purchase or visit the ReadyWired official website. Keep your proof of purchase for any warranty claims.
For further assistance, please contact your retailer or the ReadyWired customer support team.