1. Introduction
This manual provides comprehensive instructions for the installation, operation, and maintenance of your AnseTo 10W Solar Irrigation System. This automatic drip irrigation kit is designed to provide efficient and precise watering for various plant environments, including gardens, plant beds, and greenhouses, utilizing solar power for sustainable operation. Please read this manual thoroughly before using the product to ensure proper function and longevity.

Figure 1.1: Overview of the AnseTo Solar Irrigation System components, including the solar panel, control unit, tubing, and drip emitters.
2. Safety Information
Please observe the following safety precautions to prevent injury or damage to the product:
- Always ensure the kit is properly connected to a water source to prevent leaks and water damage.
- Keep the kit away from young children and pets to prevent accidental ingestion of small parts.
- Handle the solar-powered components with care to avoid damage.
- Do not attempt to modify or disassemble the main control unit or solar panel. Refer to qualified personnel for repairs.
- Ensure the water reservoir is stable and cannot tip over, especially when placed in areas accessible to children or pets.
3. Product Features
The AnseTo Solar Irrigation System offers a range of features designed for efficient and convenient plant watering:
- Solar Powered: Equipped with a 10W solar panel, the system operates independently without external power sources, making it eco-friendly and cost-effective.
- Automatic Drip Irrigation: Delivers water directly to the plant roots, minimizing waste and promoting healthier plant growth.
- Versatile Application: Suitable for various environments including gardens, plant beds, greenhouses, balconies, and indoor potted plants.
- High Water Volume: Capable of delivering up to 2 liters per minute, ensuring adequate watering for a variety of plants.
- Anti-Siphon Device: Prevents water backflow, maintaining system integrity and preventing contamination of the water source.
- Indicator Light Alarm: Provides visual alerts for low water levels or system malfunctions.
- Precise Watering: Ensures water penetrates deep into the soil, allowing plants to absorb moisture more fully and grow vigorously.
- Indoor and Outdoor Use: Features IP65 waterproof and sunlight-resistant materials for outdoor durability, and a rechargeable lithium battery for indoor use without fear of running out of power.
- Customizable Watering Schedules: Offers 210 different watering methods with adjustable durations (1-30 minutes) and intervals (3 hours to 7 days).

Figure 3.1: The automatic watering system efficiently irrigating plants in raised garden beds.
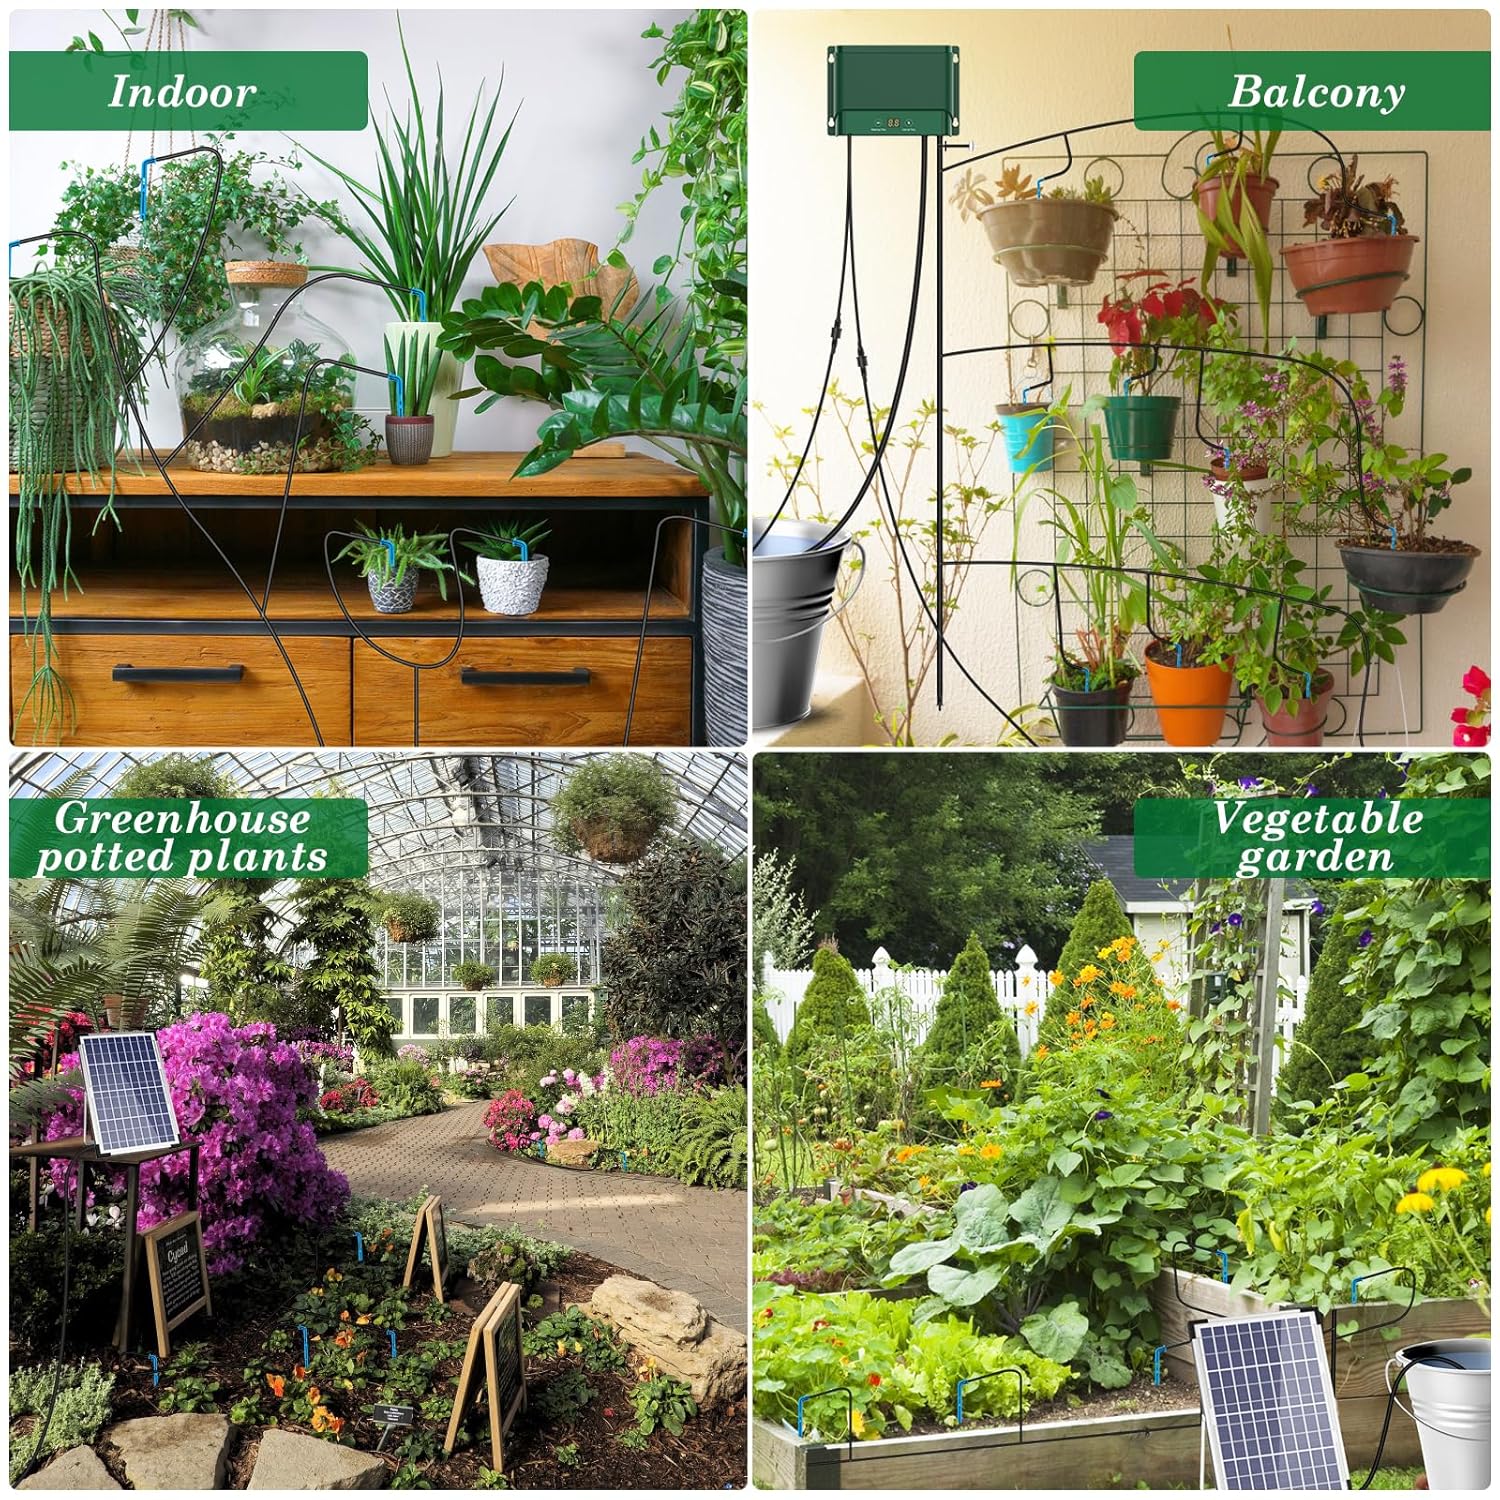
Figure 3.2: Versatility of the system for indoor, balcony, greenhouse, and vegetable garden applications.

Figure 3.3: Details of the control unit highlighting large water volume, anti-siphon device, and indicator light alarm.

Figure 3.4: Illustration of precise watering, delivering water directly to the plant's root system.
4. Setup
Follow these steps to set up your AnseTo Solar Irrigation System:
- Prepare Tubing: Cut the main tubing and branch tubing to your desired lengths based on your plant layout. Ensure enough tubing is available to reach all plants and connect to the control unit and water source.
- Connect to Control Unit: Connect the main water inlet tube from your water reservoir to the designated inlet port on the control unit. Connect the main outlet tube from the control unit to your irrigation line.
- Install Main and Branch Pipes: Lay out the main irrigation pipe. Use straight-through connectors to extend the main pipe as needed.
- Connect Sub-Pipes: Use T-connectors to branch off from the main pipe to create sub-pipes that will lead to individual plants.
- Insert Drip Tubes: Insert the smaller drip tubes into the ends of the sub-pipes. Place the drip emitters near the base of each plant. Ensure the drip emitters are securely placed to prevent dislodgement.
- Position Solar Panel: Place the solar panel in a location that receives maximum direct sunlight throughout the day. Connect the solar panel cable to the control unit.
- Fill Water Reservoir: Ensure your water reservoir (e.g., bucket, tank) is filled with water. The system's pump will draw water from this source.
- Activate System: Press the power button on the control unit to activate the system.

Figure 4.1: Visual guide for the easy installation process of the irrigation system.
5. Operation
The control unit allows you to customize watering schedules. Refer to the display and buttons on the unit:
- Watering Duration (Min): Use the 'Min' button to set how long the system waters during each cycle. Options typically range from 1 to 30 minutes.
- Interval Time (H): Use the 'H' button to set the frequency of watering cycles. Available intervals include 3 hours, 6 hours, 12 hours, 1 day, 2 days, 3 days, or 7 days.
- Automatic Operation: Once set, the system will automatically water your plants according to the programmed schedule, drawing water from your reservoir.
- Water Level Sensor: The system is equipped with a water level sensor in the pump unit. If the water level in your reservoir is too low, the system will stop operating and may trigger an alarm to prevent dry running of the pump.

Figure 5.1: Setting watering duration and interval time on the control unit.
6. Maintenance
Regular maintenance ensures optimal performance and extends the lifespan of your irrigation system:
- Clean Filter: Periodically check and clean the filter located at the water inlet to prevent blockages from debris in your water source. A clogged filter can reduce water flow or cause system errors.
- Inspect Tubing and Drip Emitters: Regularly check all tubing for kinks, leaks, or damage. Ensure drip emitters are not clogged and are delivering water consistently. Clean or replace as necessary.
- Solar Panel Cleaning: Keep the solar panel clean from dust, dirt, and debris to ensure maximum sunlight absorption and charging efficiency. Wipe gently with a soft, damp cloth.
- Winter Storage: In regions with freezing temperatures, it is recommended to drain all water from the system and store the control unit, pump, and solar panel indoors during winter months to prevent damage from freezing.
7. Troubleshooting
If you encounter issues with your AnseTo Solar Irrigation System, refer to the following common problems and solutions:
| Problem | Possible Cause | Solution |
|---|---|---|
| E3 Error Code / System Beeps | Insufficient number of plants/drip emitters connected to the system, or low water pressure. The system may require a minimum load to operate correctly. | Ensure at least 30 drip emitters are connected and properly installed. Check for kinks or blockages in the tubing that might reduce water pressure. Ensure the water reservoir has sufficient water. |
| Pump Not Pumping / Loss of Pressure | Clogged filter, damaged pump diaphragm/valve, or air in the system. | Clean the water inlet filter. Check for any air bubbles in the tubing. If a pump component (e.g., umbrella valve) is suspected to be broken, contact customer support for replacement parts or service. |
| Tubing Splitting at Connections | Tubing is too rigid or not properly softened before connection, or insufficient clamping. | Before connecting, briefly warm the ends of the tubing in hot water to make them more pliable. Ensure connections are secure. Use hose clamps where provided or necessary to reinforce connections. |
| System Not Charging / Low Power | Solar panel is dirty, obstructed, or not receiving enough direct sunlight. | Clean the solar panel surface. Relocate the solar panel to an area with maximum direct sunlight exposure. Ensure the solar panel cable is securely connected to the control unit. |
| Inconsistent Watering | Clogged drip emitters, uneven tubing layout, or insufficient water pressure. | Inspect and clean all drip emitters. Ensure tubing is laid out as evenly as possible to maintain consistent pressure. Check water reservoir level. |
8. Specifications
| Feature | Detail |
|---|---|
| Product Dimensions | 15 x 10 x 4 inches (Control Unit & Solar Panel); 5.42 Pounds (Total Weight) |
| Model Number | BSV-IC006 |
| Brand | AnseTo |
| Tubing Length | 5 meters (included) |
| Power Source | Solar Powered (10W Solar Panel) |
| Watering Duration | Adjustable from 1 to 30 minutes |
| Watering Interval | Adjustable (3H, 6H, 12H, 1D, 2D, 3D, 7D) |
| Water Flow Rate | Up to 2 Liters/minute |
| Water Resistance | IP65 (for outdoor components) |
9. Warranty & Support
For warranty information, technical support, or to inquire about replacement parts, please contact AnseTo customer service. Keep your purchase receipt as proof of purchase.
You can typically find contact information on the product packaging, the official AnseTo website, or through your retailer's customer service portal.
For more information, visit the AnseTo Store on Amazon.