
1. Introduction
This manual provides detailed instructions for the assembly, installation, operation, and maintenance of your new Generic Grey Shaker Sink Base Bathroom Vanity, 24" Width. Please read all instructions carefully before beginning assembly and installation. Keep this manual for future reference.
This product is designed to enhance your bathroom space with its classic shaker design and durable construction. It features soft-close hinges and is ready-to-assemble.
2. Safety Information
- Always follow local plumbing and building codes.
- Ensure all connections are secure to prevent leaks.
- Use appropriate safety gear (gloves, eye protection) during assembly and installation.
- Do not overtighten screws, as this may damage the material.
- Keep small parts away from children.
- This product does not include a sink, faucet, handles, or top. Ensure you have all necessary components before starting.
- For wall-mounted installations, ensure the wall structure can support the weight of the vanity and its contents.
3. Package Contents
Please verify that all parts listed below are present before beginning assembly.
- Vanity Cabinet Components (various plywood panels for frame, doors, etc.)
- Six-way adjustable concealed hinges with Soft Close function
- Assembly Hardware (screws, dowels, cam locks, etc.)
- Instruction Manual
Note: This product does not include a sink, faucet, handles, or top. These items must be purchased separately.
4. Tools Required
The following tools are recommended for assembly and installation:
- Phillips Head Screwdriver
- Hammer
- Drill (for wall mounting)
- Level
- Measuring Tape
- Pencil
5. Assembly Instructions
Follow these steps to assemble your vanity cabinet. Refer to the provided images and videos for visual guidance.
5.1 Cabinet Frame Assembly
Begin by identifying all cabinet panels and hardware. Assemble the base and side panels according to the diagrams in the assembly video. Ensure all cam locks and screws are tightened securely.

Figure 1: Vanity Dimensions (21"D x 24"W x 34.5"H)
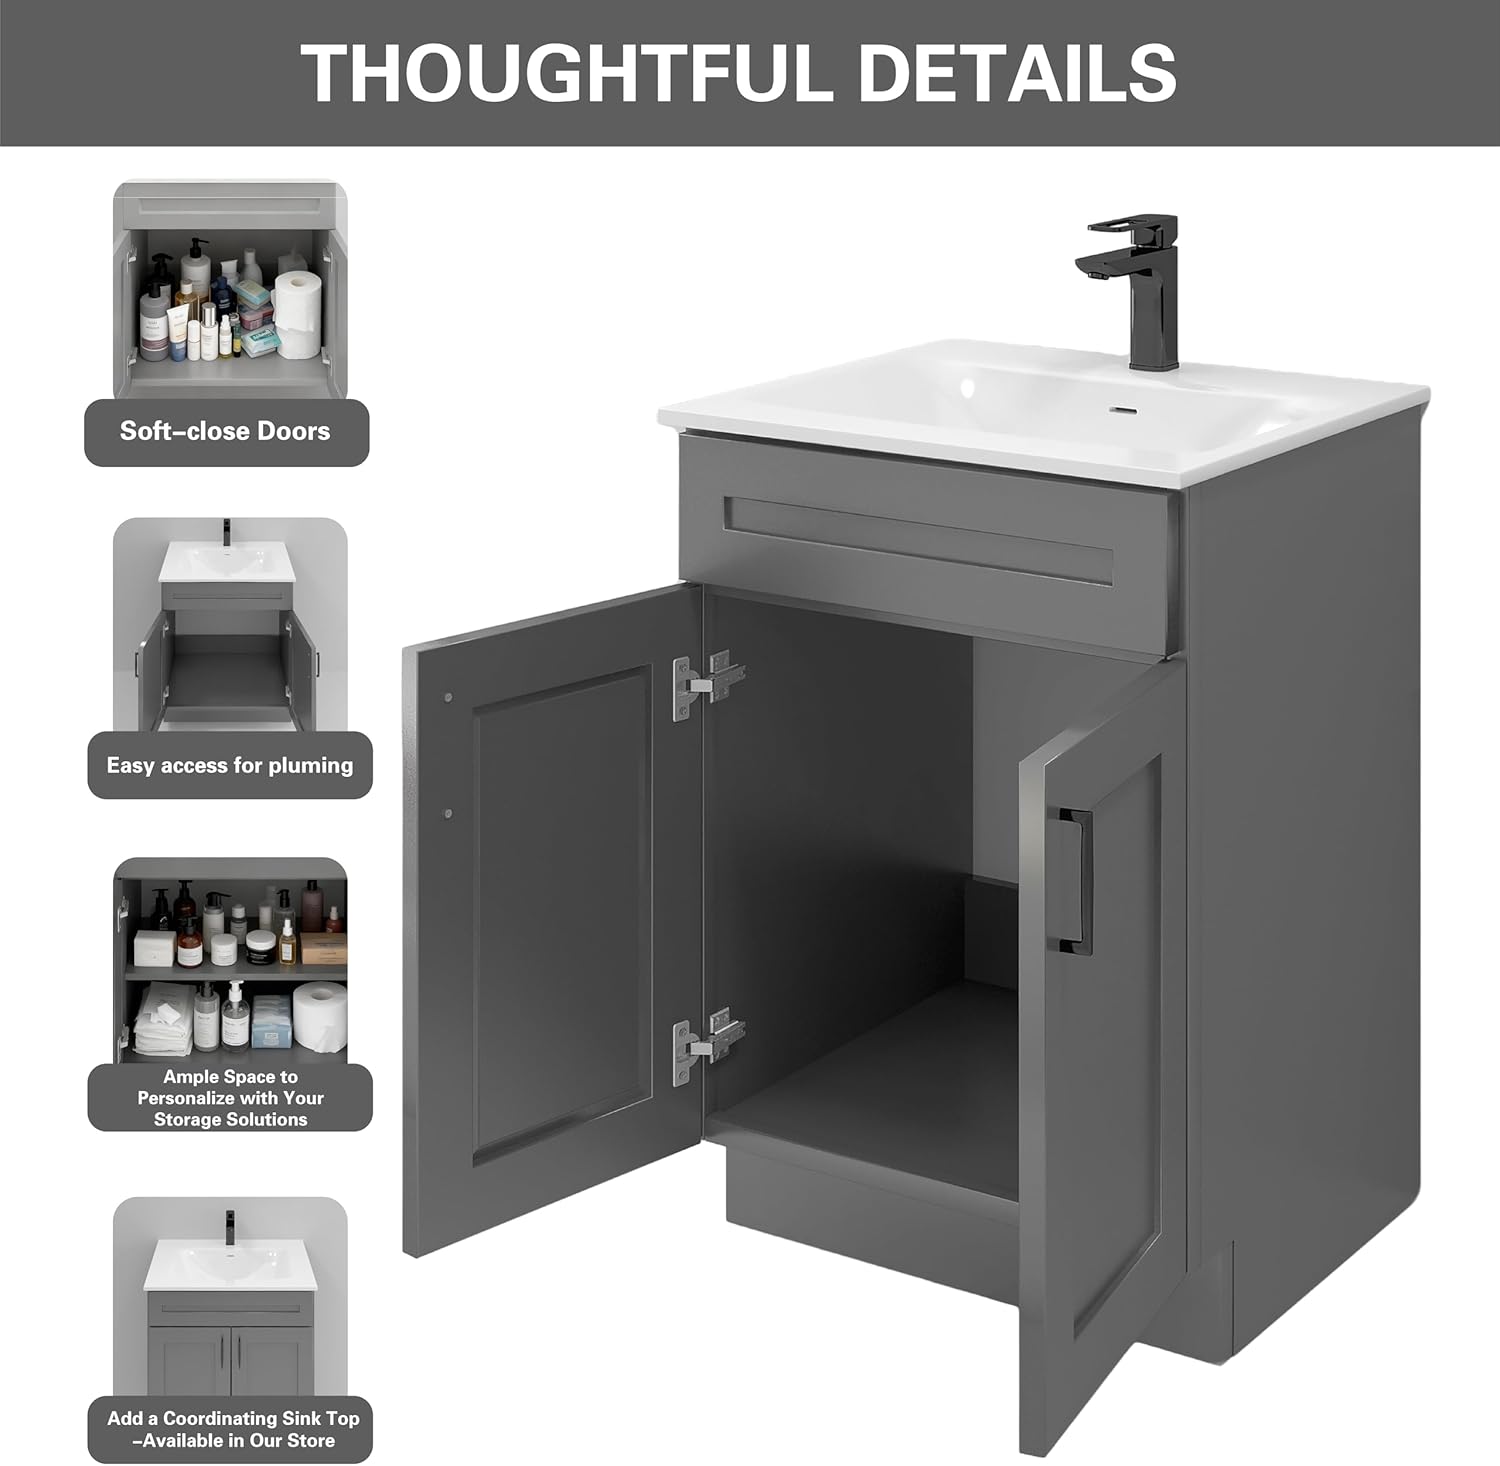
Figure 2: Construction details including plywood box material, soft-close hinges, and panel thickness.
Video 1: Assembly Guide for Vanity Cabinet. This video demonstrates the step-by-step process of assembling the vanity cabinet frame and attaching the doors.
5.2 Door and Handle Installation
Attach the six-way adjustable concealed hinges to the cabinet doors and then to the cabinet frame. Adjust the hinges as needed to ensure proper door alignment and soft-close functionality. Install your chosen handles (not included) onto the pre-drilled holes in the doors.

Figure 3: Interior view of the vanity with doors open, showing ample storage space.
Video 2: 24 Inch Bathroom Vanity Installation. This video provides a detailed guide for installing a 24-inch bathroom vanity, including door and handle attachment.
6. Installation (Wall-Mounting)
If you choose to secure your vanity to the wall, follow these steps:
- Position the assembled vanity against the wall in its desired location.
- Using a pencil, mark the wall through the pre-drilled holes in the vanity's back panel or through the L-shaped brackets (if included for wall mounting).
- Move the vanity away from the wall.
- Drill pilot holes at the marked locations on the wall. Insert appropriate wall anchors if necessary (e.g., for drywall).
- Reposition the vanity against the wall, aligning the holes.
- Secure the vanity to the wall using screws through the back panel or L-shaped brackets into the wall anchors. Ensure the vanity is level and stable.
Video 3: Cabinet Wall-Mounting Hardware Installation. This video demonstrates how to properly secure a cabinet to the wall using mounting hardware.
7. Operating Instructions
7.1 Soft-Close Doors
Your vanity is equipped with six-way adjustable concealed hinges featuring a soft-close function. This allows the doors to close gently and silently, preventing slamming and reducing wear and tear.
7.2 Storage Access
The cabinet provides ample space for plumbing access and general storage. The open interior allows for flexible organization of your bathroom essentials.

Figure 4: Thoughtful details including soft-close doors, easy plumbing access, and ample storage space.
8. Maintenance and Care
To maintain the appearance and longevity of your vanity, follow these care instructions:
- Clean surfaces regularly with a soft, damp cloth.
- Avoid using abrasive cleaners, harsh chemicals, or ammonia-based products, as these can damage the finish.
- Wipe up spills immediately to prevent water damage.
- Periodically check and tighten all hardware connections.
- For minor scratches or scuffs, consult a professional or use a touch-up kit designed for painted wood finishes.
9. Troubleshooting
9.1 Loose Doors or Misaligned Hinges
If doors appear loose or are not closing properly, adjust the six-way adjustable concealed hinges. Small screws on the hinges allow for vertical, horizontal, and depth adjustments. Refer to the hinge manufacturer's instructions or a general hinge adjustment guide for detailed steps.
9.2 Water Leaks
If you experience water leaks, immediately turn off the water supply. Check all plumbing connections (sink, faucet, drain) for proper sealing and tightness. Re-tighten or re-seal as necessary. If the problem persists, consult a qualified plumber.
10. Specifications
| Feature | Detail |
|---|---|
| Model Name | VA-GS-V2421 |
| Brand | Generic |
| Color | Grey |
| Product Dimensions | 21"D x 24"W x 34.5"H |
| Item Weight | 46 Pounds |
| Mounting Type | Floor Mount |
| Door Style | Shaker |
| Door Material | Solid wood birch with MDF center core panel |
| Door Thickness | 3/4" |
| Box Material | Plywood (American Face frame / Framed box type) |
| Box Panel Thickness | 1/2" side panels, 1/4" back panel with 3" frame |
| Hinges | Six-way adjustable concealed hinges with Soft Close function |
| Number of Shelves | 1 |
| Assembly Required | Yes |
| UPC | 604467507289 |
11. Warranty and Support
For warranty information or product support, please refer to the documentation provided at the time of purchase or contact the retailer directly. Keep your proof of purchase for any warranty claims.
