Introduction
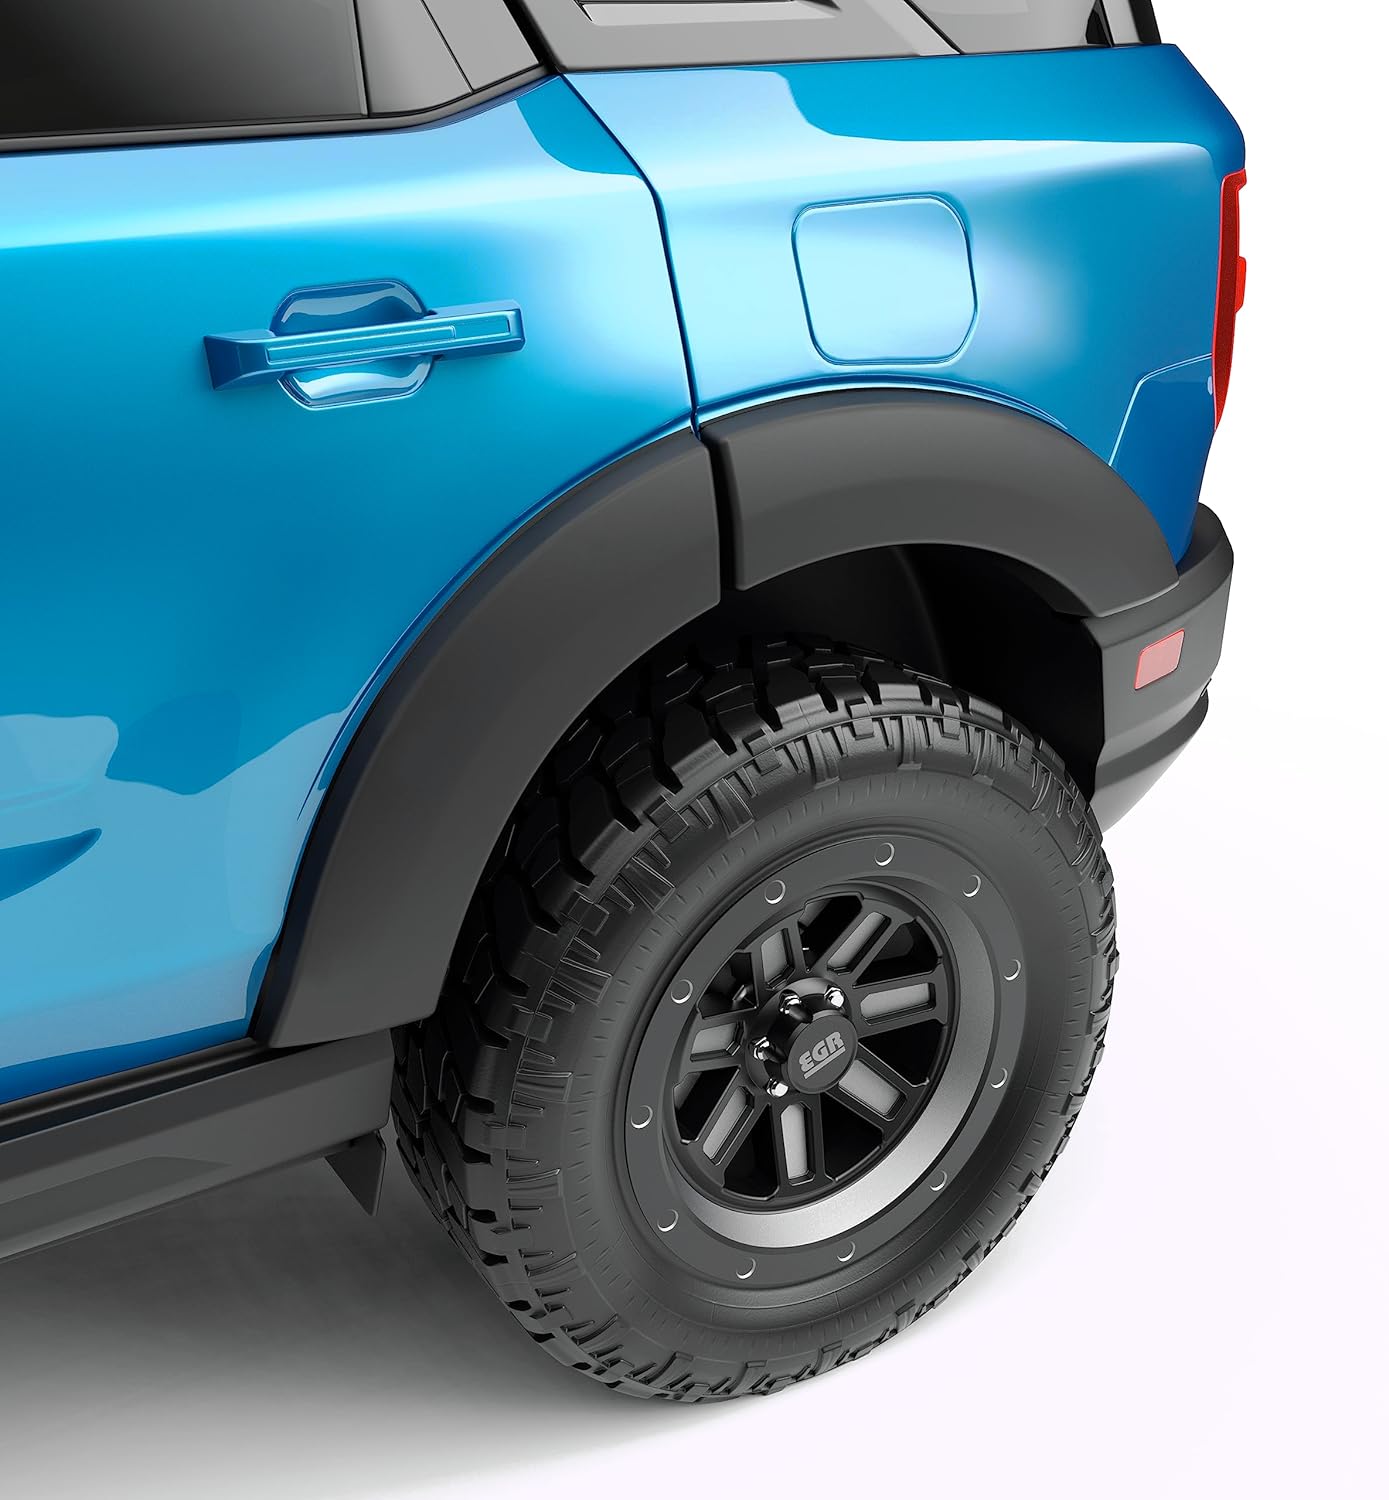
This manual provides comprehensive instructions for the installation, operation, and maintenance of your EGR 753564 Rugged Look Fender Flare Truck Accessory Set. These fender flares are designed to provide additional tire coverage and enhance the aesthetic of select Ford Bronco Sport models with a matte black finish.
What's in the Box
- EGR 753564 Rugged Look Fender Flare Truck Accessory Set (Matte Black Finish)
- Corrosion-resistant hardware for installation
- Detailed installation instructions (refer to the Setup section of this manual)
Safety Information
Always prioritize safety during installation and maintenance. Read all instructions thoroughly before beginning. If you are unsure about any step, consult a qualified automotive professional.
- Ensure the vehicle is parked on a level surface with the parking brake engaged.
- Wear appropriate personal protective equipment, such as gloves and eye protection.
- Keep all components and tools away from children and pets.
- Handle components carefully to avoid scratches or damage to the product or vehicle.
- Dispose of packaging materials responsibly.
Setup and Installation
The EGR 753564 Fender Flare set features a no-drill installation process, utilizing existing mounting points and corrosion-resistant hardware for a secure fit. It is designed for select Ford Bronco Sport models.
Pre-Installation Check
- Unpack all components and verify that all parts listed in "What's in the Box" are present and undamaged. Inspect the flares for any manufacturing defects or transit damage.
- Clean the vehicle's fender areas thoroughly where the flares will be installed. Ensure surfaces are dry and free of dirt, wax, or grease.
Installation Steps
- Positioning the Flares: Carefully align each fender flare with the corresponding wheel well on your Ford Bronco Sport. The flares are custom-fit for specific positions (front left, front right, rear left, rear right).
- Securing Hardware: Utilize the provided corrosion-resistant hardware. The no-drill design means you will use existing factory holes or clips. Refer to the specific mounting points for your vehicle model.
- Tightening Fasteners: Securely tighten all fasteners. Do not overtighten, as this may damage the flares or the vehicle's body. Ensure a snug fit that prevents movement.
- Repeat for all Flares: Follow the same procedure for all four fender flares.
- Final Inspection: After installation, visually inspect all flares to ensure they are properly seated and securely attached.


Operating and Features
Once installed, your EGR Rugged Look Fender Flares provide several functional and aesthetic benefits:
- Additional Tire Coverage: These flares extend beyond the vehicle's original fender line, offering increased protection against road debris, mud, and rocks kicked up by your tires. This helps preserve your vehicle's paint finish.
- Rugged Aesthetic: The matte black finish and traditional bolt-on look (without actual drilling) contribute to a more aggressive, off-road appearance for your Ford Bronco Sport.
- UV Protection: The flares are manufactured with UV protection to resist fading and chalking from sun exposure, ensuring they maintain their new appearance for an extended period.
- Paintable Surface: While supplied in a matte black finish, the ABS plastic material is ready for optional paint, allowing for customization to match or contrast with your vehicle's color scheme.


Maintenance
Proper maintenance will ensure the longevity and appearance of your EGR fender flares.
- Cleaning: Regularly clean the fender flares with mild automotive soap and water. Avoid abrasive cleaners or harsh chemicals that could damage the matte finish or UV protective coating. Rinse thoroughly and dry with a soft cloth to prevent water spots.
- Inspection: Periodically check the flares for any signs of loosening, cracks, or damage. Ensure all mounting hardware remains secure. Tighten any loose fasteners as needed, being careful not to overtighten.
- Scratch Prevention: While durable, the matte finish can show scratches from sharp objects or abrasive contact. Exercise care when washing or working around the flares.
Troubleshooting
This section addresses common concerns you might encounter with your fender flares.
| Problem | Possible Cause | Solution |
|---|---|---|
| Flares appear loose or rattle. | Mounting hardware is not sufficiently tightened. | Inspect all fasteners and gently tighten them until the flare is secure. Do not overtighten. |
| Scratches or minor surface imperfections. | Handling during installation, transit damage, or abrasive cleaning. | For minor scratches on matte finish, specialized matte finish repair products may be available. For significant damage or defects upon receipt, contact customer support immediately. |
| Flares do not fit correctly. | Incorrect model application or improper alignment during installation. | Ensure the product is compatible with your specific Ford Bronco Sport model. Re-read installation instructions and re-attempt alignment. If issues persist, contact customer support. |
Specifications
| Attribute | Detail |
|---|---|
| Manufacturer | EGR |
| Brand | EGR |
| Model Number | 753564 |
| Item Weight | 12 pounds |
| Product Dimensions | 48 x 20.6 x 7 inches |
| Exterior Material | ABS-UV Plastic |
| Finish | Matte Black |
| Installation Type | No-Drill |
| Compatibility | Select Ford Bronco Sport Models |
Warranty and Support
For specific warranty details regarding your EGR 753564 Fender Flare set, please refer to the warranty documentation included with your purchase or visit the official EGR website. Warranty terms typically cover manufacturing defects.
If you require technical assistance, have questions about installation, or need to report a defect, please contact EGR customer support directly. Contact information can usually be found on the manufacturer's website or product packaging.
Note: While third-party protection plans may be offered at the point of purchase, these are separate from the manufacturer's warranty.
Official Product Videos
No official product videos from the seller were available for this specific model at the time of manual creation. Please check the manufacturer's official website or product page for any future video resources.


