Golpart
Golpart Heavy Duty Rolling Garment Rack User Manual
Model: EA_503B
1. Introduction
This manual provides detailed instructions for the assembly, operation, and maintenance of your Golpart Heavy Duty Rolling Garment Rack. Please read this manual thoroughly before assembly and use to ensure proper function and longevity of the product.

Figure 1.1: Golpart Heavy Duty Rolling Garment Rack in use, showcasing its storage capacity for hanging clothes and boxed items.
2. Product Features
- Powerful Load-Bearing Capability: Constructed from sturdy black-coated steel with a pipe diameter of 25.4mm (1 inch). Each metal shelf supports up to 150 lbs, with a total distributed capacity of 600 lbs. Hanging rods accommodate up to 100 lbs.
- Versatile Storage: Features three tiers of adjustable wire shelving and two hanging rods, allowing for customizable storage configurations for various items including clothes, shoes, and folded goods.
- Effortless Mobility & Secure Stability: Equipped with four 360° swivel wheels, two of which are lockable, providing both easy movement and secure placement.
- Premium Quality Craftsmanship: Made from high-quality iron pipe with water and rust-resistant coating, ensuring stability, sturdiness, and long-term durability.
- Quick and Easy Assembly: Designed for straightforward setup with clear instructions.
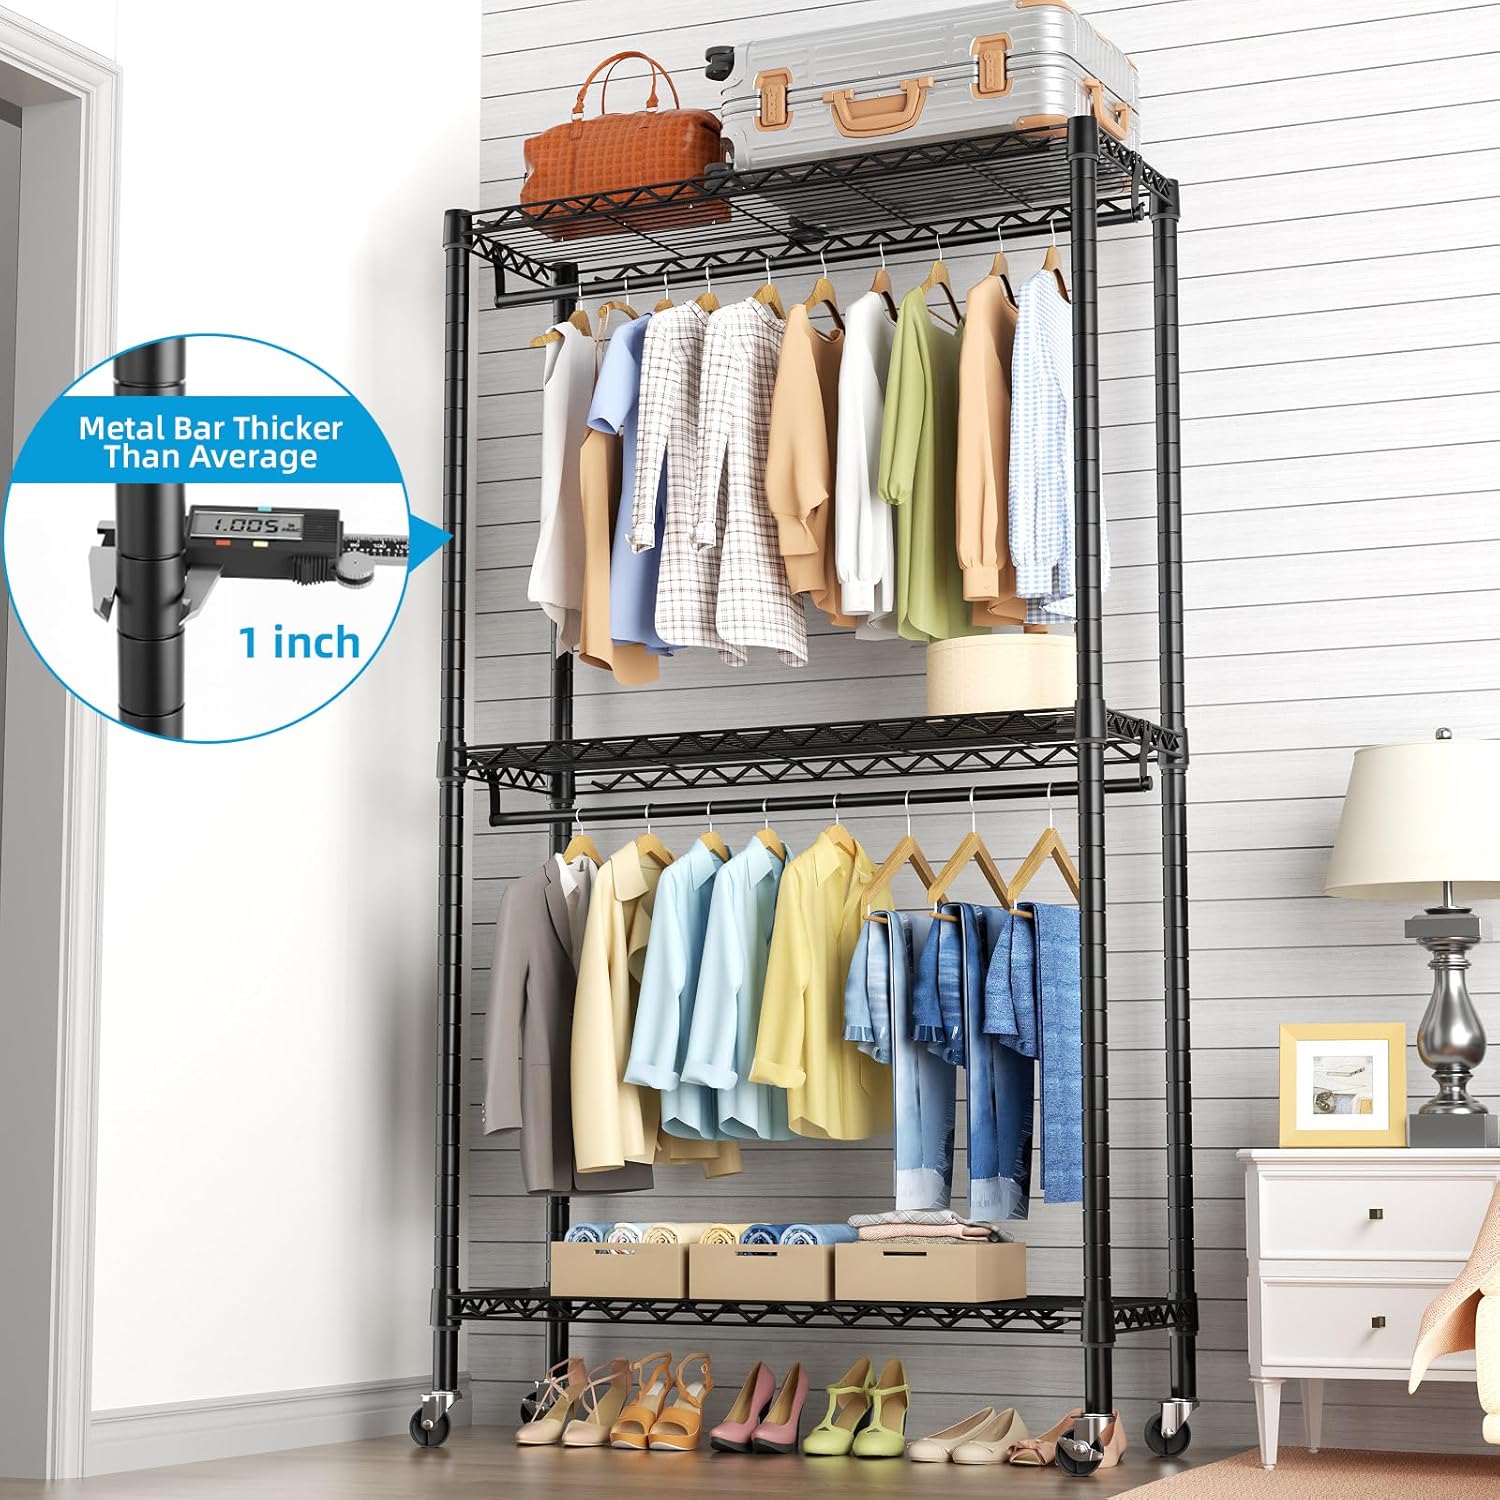
Figure 2.1: Detail showing the 1-inch pipe diameter, highlighting the robust construction.
3. Package Contents
Before beginning assembly, ensure all parts are present and undamaged. Refer to the assembly video for a visual representation of the components.
- Vertical Support Poles (various lengths)
- Wire Shelves (3 tiers)
- Hanging Rods (2 units)
- Plastic Clips (for shelf attachment)
- Swivel Wheels (4 units, 2 with locks)
- Leveling Feet (optional alternative to wheels)
- Assembly Wrench (small tool for tightening wheels/feet)
4. Assembly Instructions
Assembly is designed to be straightforward. It is recommended to have a second person assist during certain steps, especially when lifting and positioning shelves.
4.1. Video Guide
For a visual step-by-step guide, please watch the official installation video:
Video 4.1: Official installation guide for the Golpart Rolling Garment Rack. This video demonstrates the complete assembly process from unboxing to final setup.
4.2. Step-by-Step Guide
- Attach Wheels/Leveling Feet: Screw the four swivel wheels (or leveling feet) into the bottom of the four lower vertical support poles. Ensure the two lockable wheels are positioned on the same side for easier access. Tighten with the provided wrench.
- Install Plastic Clips: Locate the grooves on the vertical poles. Snap the two-part plastic clips around the poles at the desired height for your first shelf. Ensure the arrows on the clips point upwards and the clips are securely seated in the grooves. Use single rings for shelf placement, avoiding double rings.
- Assemble First Shelf: Carefully slide the first wire shelf down over the top of the poles until it rests firmly on the installed plastic clips. Ensure all four sleeves fit snugly onto the poles.
- Add Hanging Rods (Lower): If installing a lower hanging rod, attach the hanging rod brackets to the desired vertical poles below the first shelf.
- Extend Poles: If assembling a taller unit, connect the upper vertical poles to the lower poles. Ensure they click securely into place.
- Install Remaining Shelves and Rods: Repeat steps for installing plastic clips and sliding down the remaining wire shelves and hanging rods at your preferred heights.
- Secure Shelves: Once all shelves are in place, gently tap down on each corner of the shelves with a rubber mallet (not included) or a padded object to ensure they are fully seated and stable.

Figure 4.2: Visual guide for installing plastic clips and adjusting shelf height. Ensure clips are correctly positioned in the grooves for stability.
5. Operation and Adjustment
Your Golpart Garment Rack is designed for flexible use and easy adjustment.
- Adjusting Shelf Height: The wire shelves can be repositioned at any height along the vertical poles. To adjust, remove items from the shelf, lift the shelf off its clips, reposition the plastic clips to the desired new height, and then lower the shelf back onto the clips.
- Utilizing Hanging Rods: The two hanging rods can be placed at various heights to accommodate different garment lengths, from long dresses to shorter shirts and pants.
- Mobility: To move the rack, unlock the two lockable wheels by flipping their levers. Once moved to the desired location, engage the wheel locks to secure the rack in place.

Figure 5.1: The 360° swivel wheels provide easy mobility, while the lockable casters ensure stability when the rack is stationary.

Figure 5.2: Examples of customizable configurations, illustrating how shelves and rods can be adjusted to suit individual storage needs.
6. Care and Maintenance
- Cleaning: Wipe down the metal surfaces with a soft, damp cloth. For stubborn dirt, a mild soap solution can be used, followed by drying thoroughly to prevent water spots.
- Rust Prevention: The rack features a rust-resistant coating. To maintain this, avoid prolonged exposure to excessive moisture. If used in a damp environment, ensure good ventilation.
- Weight Distribution: Distribute weight evenly across shelves and hanging rods to prevent strain on any single point and maintain stability. Do not exceed the maximum load capacities.
- Regular Inspection: Periodically check all connections, especially the plastic clips and wheel attachments, to ensure they remain secure. Tighten any loose components as needed.
7. Troubleshooting
| Problem | Possible Cause | Solution |
|---|---|---|
| Rack is wobbly/unstable. | Plastic clips not fully seated in grooves; uneven weight distribution; loose wheel/leveling feet. | Ensure all plastic clips are securely snapped into the pole grooves. Gently tap down on shelf corners. Redistribute weight. Tighten wheels/leveling feet. |
| Shelf slides down after assembly. | Plastic clips not installed correctly (e.g., on double rings or upside down). | Remove the shelf and re-install the plastic clips, ensuring arrows point up and they are on single grooves. Refer to Figure 4.2. |
| Wheels do not roll smoothly or lock. | Debris in wheels; lock mechanism engaged/stuck. | Clean any debris from the wheels. Ensure the lock levers are fully disengaged for rolling or fully engaged for locking. |
8. Specifications
- Brand: Golpart
- Model Number: EA_503B
- Material: Metal (Black-coated steel)
- Product Dimensions: 18"D x 35.7"W x 79.13"H (including wheels)
- Pipe Diameter: 25.4mm (1 inch)
- Number of Shelves: 3 (adjustable)
- Hanging Rods: 2
- Max Load Capacity per Shelf: 150 lbs
- Max Load Capacity per Hanging Rod: 100 lbs
- Total Distributed Load Capacity: 600 lbs
- Installation Type: Free Standing
- Special Features: Sturdy, Durable, Portable, Rust-Proof, Heavy Duty, With Adjustable Shelves, Lockable Swivel Wheels

Figure 8.1: Key dimensions and weight capacity of the Golpart Garment Rack.
9. Warranty and Support
For warranty information, technical support, or to download the original PDF installation manual, please refer to the official Golpart website or contact customer service through your purchase platform.
You can also access the Installation Manual (PDF) directly via this link: Golpart Garment Rack Installation Manual PDF
Ask a question about this manual
Ask about setup, troubleshooting, compatibility, parts, safety, or missing instructions. Manuals+ will review the question and use this page’s manual context to help answer it.