Traxxas 9595
Traxxas 9595 - Front & Rear Sway Bar Kit User Manual
Model: 9595 | Brand: Traxxas
1. Introduction
The Traxxas 9595 Front & Rear Sway Bar Kit is designed to enhance the handling and stability of your remote-controlled vehicle. Sway bars, also known as anti-roll bars, connect the left and right suspension components, reducing body roll during cornering and improving overall traction and responsiveness. This kit provides a comprehensive solution for optimizing your vehicle's suspension performance.
This kit includes a variety of sway bars to allow for tuning options, enabling you to customize your vehicle's handling characteristics for different terrains and driving styles.
2. Package Contents
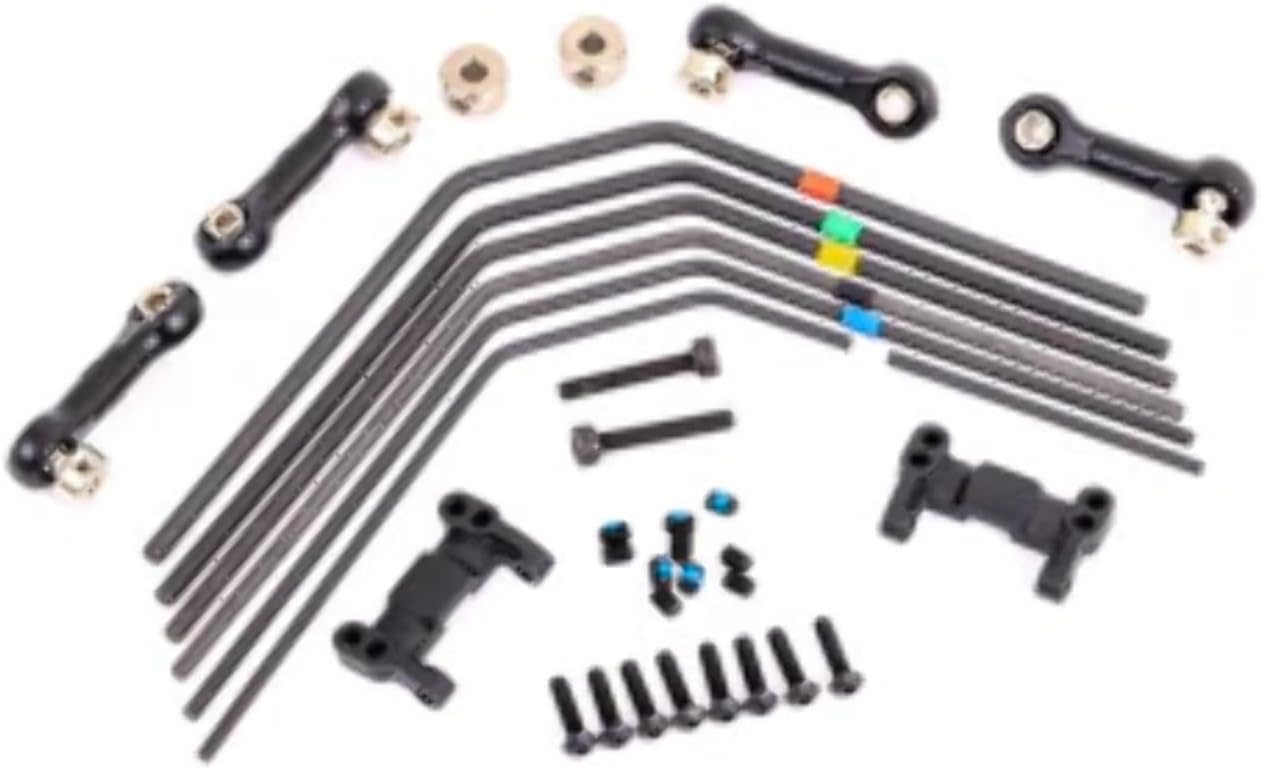
Figure 2.1: Overview of the Traxxas 9595 Front & Rear Sway Bar Kit components. The image displays various parts including multiple sway bars of different thicknesses, end links, mounting hardware, and bushings, all neatly arranged on a white background.
Upon opening the package, please verify that all components are present and undamaged. The Traxxas 9595 Front & Rear Sway Bar Kit typically includes the following items:
- Six (6) Sway Bars (various thicknesses for tuning)
- Sway Bar End Links
- Mounting Hardware (screws, nuts, washers)
- Bushings and Spacers
- Instruction Sheet (if applicable, not part of this manual)
If any parts are missing or damaged, please contact Traxxas customer support or your retailer immediately.
3. Setup and Installation
Installation of the sway bar kit requires basic mechanical skills and common RC tools. Refer to your vehicle's specific instruction manual for detailed disassembly and reassembly procedures of the suspension components.
3.1. Tools Required
- Hex wrenches (appropriate sizes for your vehicle)
- Nut drivers (appropriate sizes)
- Small pliers
- Thread-locking compound (optional, for metal-to-metal screws)
3.2. Installation Steps (General)
- Prepare the Vehicle: Ensure your RC vehicle is clean and stable. Remove the wheels and any body panels necessary to access the suspension.
- Identify Mounting Points: Locate the designated mounting points for the front and rear sway bars on your vehicle's chassis and suspension arms. These are typically near the shock towers and lower suspension arms.
- Assemble Sway Bar Links: Attach the sway bar end links to the chosen sway bar using the provided hardware. Ensure the links move freely without binding.
- Mount Sway Bar: Securely mount the sway bar to the chassis using the provided brackets and screws. Do not overtighten, as this can restrict movement.
- Connect End Links: Attach the other end of the sway bar links to the suspension arms. Adjust the length of the links if necessary to ensure the sway bar is level and not pre-loaded.
- Repeat for Other Axle: Follow the same procedure for the other axle (front or rear, depending on where you started).
- Final Checks: Before reassembling the vehicle, manually cycle the suspension to ensure there is no binding and that the sway bars operate smoothly. Check all fasteners for tightness.
For optimal performance, ensure that the sway bars are installed symmetrically and that the end links are of equal length on each side of an axle.
4. Operating Principles and Tuning
Sway bars influence how your vehicle handles weight transfer during cornering. A stiffer sway bar reduces body roll and can make the vehicle feel more responsive, while a softer sway bar allows for more body roll, which can improve traction on uneven surfaces.
4.1. Tuning Guidelines
- Stiffer Front Sway Bar: Increases understeer (vehicle tends to push wide in corners). Useful for high-grip surfaces or to reduce front-end dive.
- Softer Front Sway Bar: Decreases understeer, increases front-end grip. Useful for loose surfaces.
- Stiffer Rear Sway Bar: Increases oversteer (vehicle tends to rotate more easily in corners). Useful for tight tracks or to increase steering response.
- Softer Rear Sway Bar: Decreases oversteer, increases rear-end grip. Useful for slippery surfaces or to stabilize the rear.
Experiment with different sway bar thicknesses (if provided in your kit) to find the optimal setup for your driving style and track conditions. Make small adjustments and test the vehicle's behavior after each change.
5. Maintenance
Regular maintenance of your sway bar kit will ensure its longevity and consistent performance.
- Inspection: Periodically inspect the sway bars, end links, and mounting hardware for signs of wear, bending, or damage.
- Cleaning: After use, especially in dirty or dusty conditions, clean the sway bar components to prevent dirt buildup from hindering movement. Use a soft brush and mild cleaner if necessary.
- Fastener Check: Ensure all screws and nuts remain tight. Apply thread-locking compound to metal screws if they tend to loosen.
- Lubrication: If any pivot points or bushings show signs of friction, apply a small amount of dry lubricant or silicone grease, being careful not to attract dirt.
6. Troubleshooting
If you experience issues after installing the sway bar kit, consider the following common troubleshooting steps:
- Vehicle Handling Worsens:
- Sway bar too stiff: Try a softer sway bar.
- Incorrect installation: Re-check that the sway bar is level and not pre-loaded. Ensure end links are of equal length.
- Sway Bar Binding/Sticking:
- Overtightened mounting hardware: Loosen screws slightly to allow free movement.
- Dirt or debris: Clean the components thoroughly.
- Damaged parts: Inspect for bent sway bars or worn bushings/links. Replace if necessary.
- Excessive Body Roll (after installation):
- Sway bar too soft: Try a stiffer sway bar.
- Loose mounting: Ensure all mounting hardware is securely fastened.
If problems persist, consult online forums, Traxxas support resources, or a local hobby shop for further assistance.
7. Specifications
| Attribute | Detail |
|---|---|
| Product Name | Front & Rear Sway Bar Kit |
| Model Number | 9595 |
| Brand | Traxxas |
| Includes | 6 Sway Bars, End Links, Mounting Hardware |
| Product Dimensions | 8.3 x 3 x 0.7 inches |
| Item Weight | 3.99 ounces |
| Manufacturer | Traxxas |
| ASIN | B0C75J65F9 |
| Date First Available | June 1, 2017 |
8. Warranty and Support
Traxxas products are known for their quality and durability. For specific warranty information regarding your Traxxas 9595 Front & Rear Sway Bar Kit, please refer to the official Traxxas website or the documentation included with your original vehicle purchase, as warranty terms can vary.
For technical support, replacement parts, or any inquiries not covered in this manual, please contact Traxxas Customer Support directly:
- Traxxas Official Website: traxxas.com
- Customer Service Contact: Refer to the "Support" or "Contact Us" section on the official Traxxas website for phone numbers, email, or online support forms.
Always purchase genuine Traxxas replacement parts to ensure compatibility and maintain the performance of your vehicle.