1. Introduction
This manual provides essential information for the safe and effective operation, maintenance, and troubleshooting of your RYOBI 18V ONE+ HP Brushless 8-1/4" Table Saw. Please read this manual thoroughly before using the tool and keep it for future reference.
The RYOBI 18V ONE+ HP Brushless 8-1/4 in. Table Saw is designed for controlled and accurate cuts, offering corded cutting performance with the convenience of a cordless system. It features a powerful brushless motor, advanced electronics, and is optimized for use with HIGH PERFORMANCE lithium-ion batteries.
2. Safety Information
Always follow basic safety precautions to reduce the risk of fire, electric shock, and personal injury. Keep work area clean and well-lit. Do not operate power tools in explosive atmospheres, such as in the presence of flammable liquids, gases or dust. Always wear appropriate personal protective equipment, including eye protection, hearing protection, and a dust mask.
Ensure the tool is disconnected from the power source (battery) before making any adjustments, changing accessories, or storing the tool. Keep children and bystanders away while operating a power tool. Do not overreach; keep proper footing and balance at all times.
3. Setup
Before initial use, ensure all components are present and undamaged. The table saw comes with a push stick, blade guard assembly with anti-kickback pawls, carbide-tipped blade, rip fence, miter gauge, and blade wrenches.

Figure 3.1: RYOBI 18V ONE+ HP Brushless 8-1/4" Table Saw with included accessories.
3.1 Assembly
- Unpacking: Carefully remove the table saw and all accessories from the packaging. Inspect for any shipping damage.
- Blade Installation: Ensure the power source is disconnected. Use the provided blade wrenches to securely install the carbide-tipped blade onto the arbor. Follow the directional arrow on the blade for correct rotation.
- Blade Guard and Anti-Kickback Pawls: Attach the blade guard assembly and anti-kickback pawls. These are crucial safety features and should always be in place during operation.
- Rip Fence: Install the adjustable self-aligning material fence. Ensure it slides smoothly and locks securely into position.
- Miter Gauge: Familiarize yourself with the miter gauge for angled cuts.
- Push Stick: Locate the integrated on-board storage for the push stick. Always use the push stick for narrow cuts.
3.2 Power Source
This table saw operates on the RYOBI 18V ONE+ battery system. Ensure you are using HIGH PERFORMANCE lithium-ion batteries for optimal performance. Battery and charger are sold separately.
4. Operating Instructions
Always ensure the work area is clear and stable. Before each cut, verify the blade is clean and sharp, and all safety guards are in place.
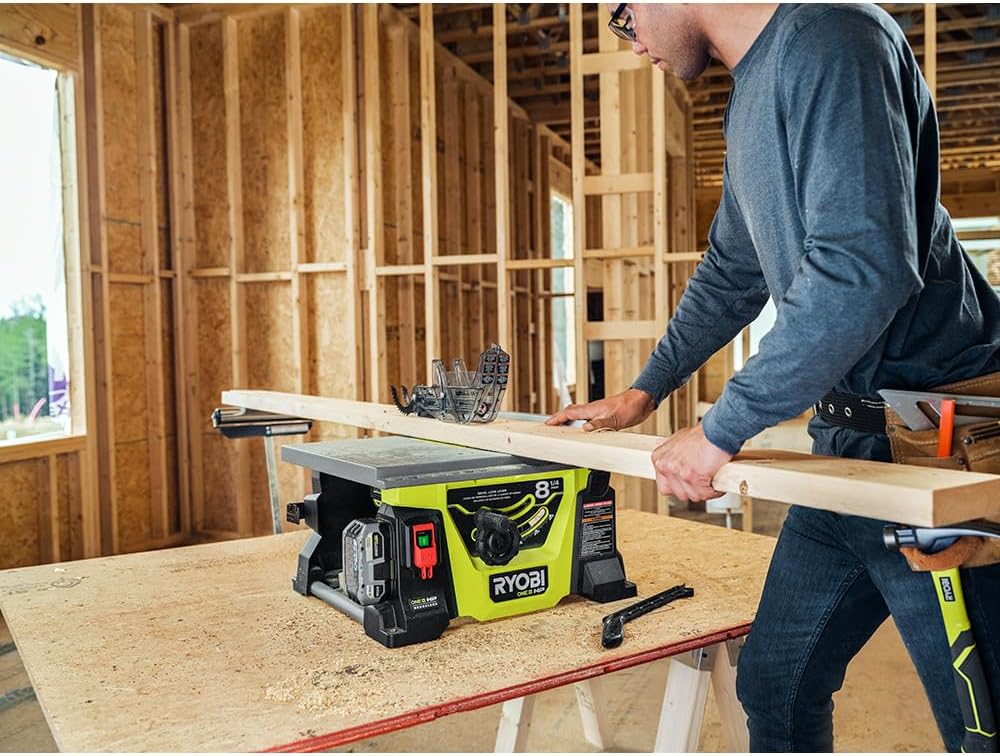
Figure 4.1: Proper technique for feeding material into the table saw.
4.1 Basic Operation
- Adjusting Blade Height: Use the rack and pinion blade height adjustment to set the blade depth. The blade should extend approximately 1/8 inch above the workpiece.
- Setting Rip Fence: Position the rip fence for the desired cut width. The saw offers a 12-inch rip cut capacity to the right of the blade. Ensure the fence is parallel to the blade and securely locked.
- Powering On: Insert a charged 18V ONE+ HP battery. Press the power switch to turn on the saw. The blade will reach up to 4,500 RPM for fast and accurate cuts.
- Making a Cut: Hold the workpiece firmly against the fence and the table. Slowly and steadily feed the material into the blade. Always use the push stick for narrow cuts or when your hands are close to the blade.
- Powering Off: Release the power switch to turn off the saw. Wait for the blade to come to a complete stop before removing the workpiece or making adjustments.
4.2 Cutting Capacity
- Rip Cut Capacity: Up to 12 inches to the right of the blade.
- Linear Feet per Charge: Capable of ripping up to 240 linear feet per charge when using (2) 4.0 Ah HIGH PERFORMANCE batteries.
5. Maintenance
Regular maintenance ensures the longevity and safe operation of your table saw. Always disconnect the battery before performing any maintenance.
- Cleaning: After each use, clear sawdust and debris from the table, blade, and motor housing using a brush or compressed air. Do not use solvents.
- Blade Inspection: Regularly inspect the blade for sharpness, damage, or missing teeth. Replace dull or damaged blades immediately.
- Fence and Miter Gauge: Keep the rip fence and miter gauge clean and ensure they slide freely and lock securely.
- Power Cord (if applicable) and Battery Contacts: Inspect for any damage. Keep battery contacts clean.
- Storage: Store the table saw in a clean, dry place, out of reach of children. Utilize the integrated on-board storage for accessories.
6. Troubleshooting
If you encounter issues with your table saw, refer to the following common problems and solutions:
| Problem | Possible Cause | Solution |
|---|---|---|
| Saw does not start. | Battery not charged or improperly inserted. | Ensure battery is fully charged and correctly seated. |
| Blade binds or cuts slowly. | Dull or dirty blade; improper blade height; material binding. | Replace or clean blade; adjust blade height; ensure material is not binding. |
| Inaccurate cuts. | Rip fence not parallel; miter gauge not set correctly. | Verify rip fence is parallel to blade; check miter gauge settings. |
| Excessive vibration. | Damaged blade; loose components. | Inspect blade for damage; tighten all fasteners. |
If the problem persists after attempting these solutions, contact RYOBI customer support.
7. Specifications
| Feature | Detail |
|---|---|
| Brand | RYOBI |
| Model Number | PBLTS01B |
| Voltage | 18 Volts |
| Wattage | 746 watts |
| Speed | 4500 RPM |
| Blade Diameter | 8-1/4 inches |
| Rip Cut Capacity (Right) | 12 inches |
| Product Dimensions (L x W x H) | 20"L x 12"W x 24"H |
| Special Feature | Brushless Motor |
| Included Components | Bare Tool (Battery and charger sold separately) |
8. Warranty and Support
This RYOBI table saw is backed by a Limited Warranty. For specific warranty terms and conditions, please refer to the warranty card included with your product or visit the official RYOBI website.
For technical assistance, parts, or service, please contact RYOBI customer support. Contact information can typically be found on the product packaging or the official RYOBI website.
Always provide your model number (PBLTS01B) and serial number when contacting support to ensure efficient service.