1. Introduction
Thank you for choosing the REES52 Easythreed X7 3D Printer. This manual provides essential information for the safe and efficient operation, setup, and maintenance of your new 3D printer. Please read this manual thoroughly before using the device to ensure optimal performance and longevity.
The Easythreed X7 is a DIY FDM 3D printer designed for high-accuracy printing with a generous build volume of 235x235x250mm. It features a high-temperature extruder and hotbed, making it compatible with a wide range of filaments.
2. Product Overview
The REES52 Easythreed X7 is engineered for versatility and ease of use, featuring a touch screen for intuitive control and a robust design for stable printing.
Key Features:
- Large Printing Size: 235 x 235 x 250mm
- High Extruder Temperature: Up to 310℃, compatible with high-temperature materials.
- Fast Heating Hotbed: Reaches 110℃ in approximately 5 minutes.
- Touch Screen Operation: 2.4" LCD display for user-friendly control.
- Wide Filament Compatibility: Supports 1.75mm PLA, ABS, TPU, Peek, POM, PETG, PVA, WOOD, and more.
- Simple Assembly Process: Designed for straightforward setup.
Components:
The Easythreed X7 3D Printer kit includes the main printer unit and a 250g PLA filament spool to get you started.
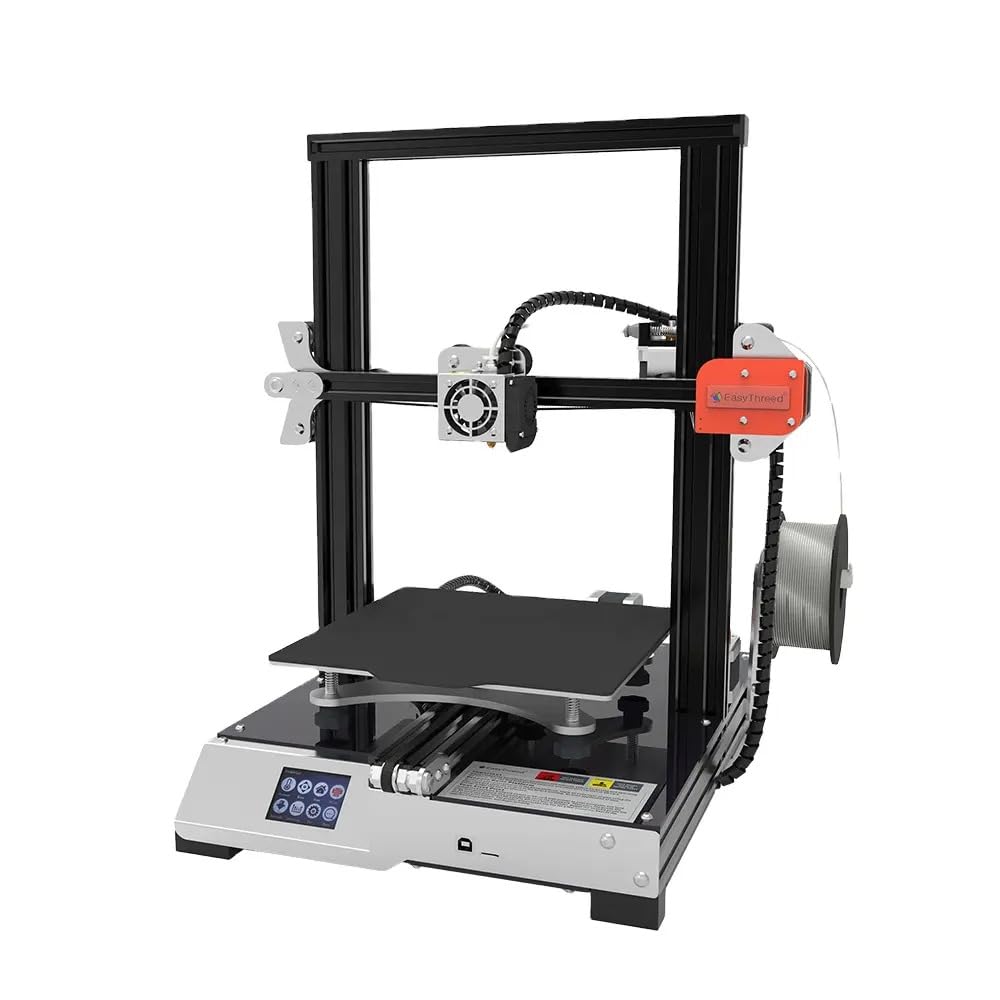
Figure 2.1: Front view of the REES52 Easythreed X7 3D Printer, showcasing its sturdy frame and build platform.
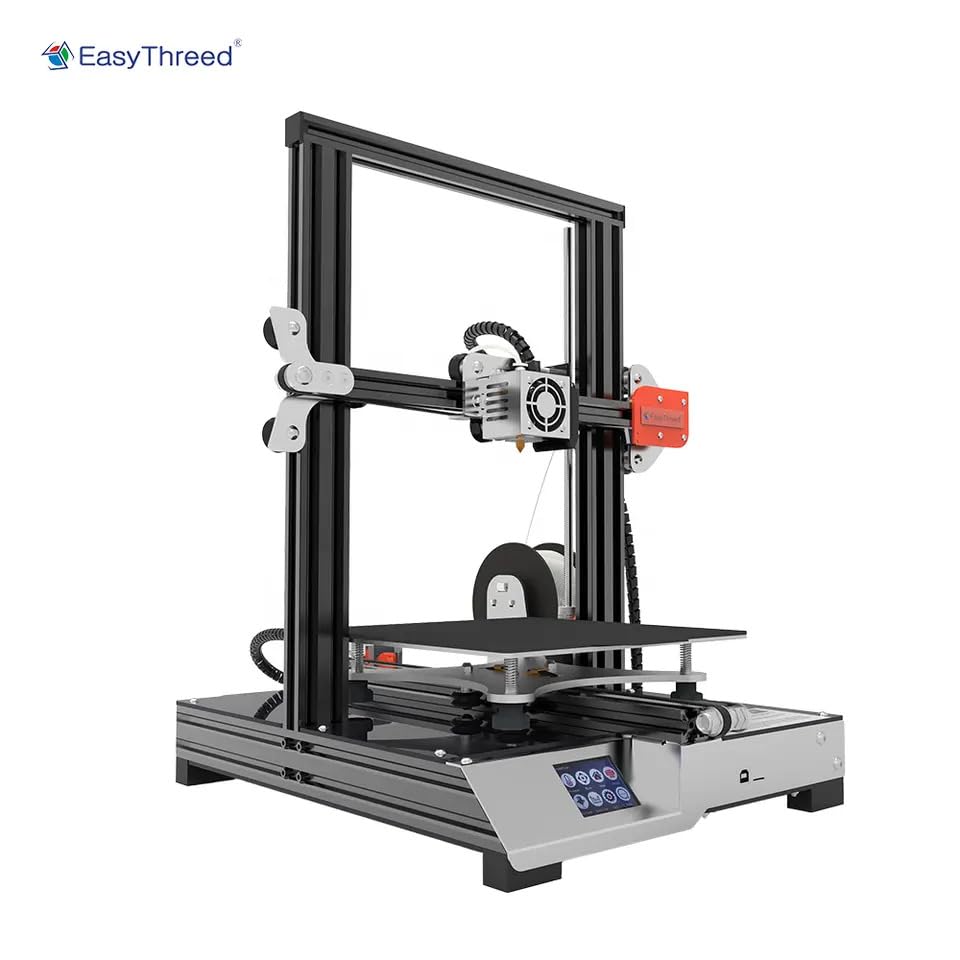
Figure 2.2: Side view of the REES52 Easythreed X7 3D Printer, highlighting the filament holder and extruder assembly.

Figure 2.3: The Easythreed X7 3D Printer, emphasizing its precision, touch LCD, and overall quality.
3. Setup
The Easythreed X7 is designed for a simple assembly process. Follow these general steps for initial setup:
3.1 Unboxing and Placement
- Carefully remove all components from the packaging.
- Place the printer on a stable, level surface in a well-ventilated area, away from direct sunlight and drafts.
- Remove any protective films or ties from moving parts.
3.2 Assembly
While the X7 is a DIY kit, its assembly is straightforward. Refer to the included quick start guide or assembly instructions for detailed, step-by-step guidance on connecting the frame, gantry, and print head components. Ensure all screws are tightened securely.
3.3 Power Connection
- Connect the power cable to the printer and then to a suitable power outlet (110-240V, 50/60Hz).
- Turn on the printer using the power switch.
3.4 Initial Bed Leveling
Accurate bed leveling is crucial for successful prints. The Easythreed X7 may require manual or assisted leveling. Consult the specific instructions for your model to ensure the print nozzle is at the correct distance from the build plate across all points.
4. Operating Instructions
Operating the Easythreed X7 involves preparing your 3D model, loading filament, and initiating the print process.
4.1 Software Installation and Slicing
- Install a compatible slicing software such as CURA or SIMPLIFY3D on your computer.
- Import your 3D model (STL, OBJ format) into the slicer.
- Configure print settings (layer height, infill, print speed, temperatures) according to your filament type and desired print quality. Recommended print speed is 20-80mm/s.
- Slice the model to generate a G-code file.
- Save the G-code file to an SD card.
4.2 Loading Filament
- Ensure the extruder is heated to the appropriate temperature for your filament (e.g., 180-220℃ for PLA, 220-250℃ for ABS).
- Mount the filament spool onto the designated holder.
- Gently feed the filament into the extruder's input hole until it is gripped by the gears.
- Use the touch screen controls to 'Load Filament' or manually push the filament until it extrudes smoothly from the nozzle.
4.3 Starting a Print
- Insert the SD card containing your G-code file into the printer's SD card slot.
- Navigate the touch screen menu to 'Print from SD' or a similar option.
- Select your desired G-code file from the list.
- The printer will begin heating the hotbed and extruder to the specified temperatures before starting the print.
4.4 Monitoring and Removing Prints
- Monitor the first few layers of your print to ensure proper adhesion and extrusion.
- Once the print is complete and the hotbed has cooled, carefully remove the printed object from the removable build platform.
5. Maintenance
Regular maintenance ensures consistent print quality and extends the lifespan of your Easythreed X7 3D Printer.
5.1 Nozzle Cleaning
Periodically clean the nozzle to prevent clogs. Heat the nozzle to printing temperature and gently wipe away any excess filament with a heat-resistant cloth. For stubborn clogs, use a thin needle or cleaning filament.
5.2 Build Plate Maintenance
Clean the build plate after each print to remove any residue. Use isopropyl alcohol for general cleaning. If using an adhesive, ensure it is applied evenly and replaced as needed.
5.3 Axis Lubrication
Apply a small amount of lithium grease or similar lubricant to the smooth rods and lead screws every few months to ensure smooth movement of the print head and build plate.
5.4 General Cleaning
Keep the printer free of dust and filament debris. Use compressed air or a soft brush to clean fans and other components.
6. Troubleshooting
This section addresses common issues you might encounter with your 3D printer.
6.1 Print Not Sticking to Build Plate
- Solution: Re-level the build plate. Ensure the hotbed temperature is appropriate for the filament. Clean the build plate thoroughly. Apply an adhesive (e.g., glue stick, hairspray) if necessary.
6.2 Filament Not Extruding
- Solution: Check if the nozzle is clogged (see Maintenance). Ensure the extruder temperature is correct. Verify that the filament is loaded correctly and not tangled.
6.3 Poor Print Quality (Layer Shifting, Stringing)
- Solution: Check belt tension and ensure all mechanical components are secure. Adjust retraction settings in your slicer to reduce stringing. Ensure print speed is within the recommended range (20-80mm/s).
6.4 Printer Not Powering On
- Solution: Verify the power cable is securely connected to both the printer and the power outlet. Check the power switch position. Ensure the power supply is functioning correctly.
7. Specifications
| Feature | Specification |
|---|---|
| Model | Easythreed X7 |
| Technology | FDM (Fused Deposition Modeling) |
| Build Volume | 235 x 235 x 250 mm |
| Nozzle Diameter | 0.4 mm |
| Layer Thickness | 0.05 - 0.4 mm |
| Printing Accuracy | 0.05 - 0.2 mm |
| Extruder Temperature | 180 - 310 ℃ |
| Hotbed Temperature | Up to 110 ℃ |
| Print Speed | 20 - 180 mm/s (Recommended: 20 - 80 mm/s) |
| Filament Diameter | 1.75 mm |
| Compatible Filaments | PLA, ABS, TPU, Peek, POM, PETG, PVA, WOOD |
| Slice Software | CURA, SIMPLIFY3D |
| File Format (Input) | STL, OBJ |
| File Format (Output) | G-code |
| Operating Panel | 2.4" LCD Display with Touch Screen |
| Print Connectivity | SD Card, USB Cable |
| Supported OS | Windows XP/7/8/10 (32/64 bit), iOS (with CURA) |
| Power Supply | 110-240V, 50/60Hz, 350W |
| Machine Size | 390 x 350 x 440 mm |
| Net Weight | 7.5 kg |
| Certifications | CE, FCC, RoHS |
8. Warranty Information
The REES52 Easythreed X7 3D Printer comes with a manufacturer's warranty. For detailed information regarding warranty terms, conditions, and duration, please refer to the warranty card included in your product packaging or contact the seller/manufacturer directly. Keep your proof of purchase for warranty claims.
9. Support
Should you encounter any issues not covered in this manual or require further assistance, please contact REES52 customer support or your authorized reseller. Provide your product model (X7) and a detailed description of the issue for efficient support.


