1. Introduction
This manual provides comprehensive instructions for the installation, operation, and maintenance of the Dieffematic ROCKET 230V/220V Garage Door Automation Kit. This kit is designed to automate overhead garage doors, offering convenience and security. It features a single 230V/220V motor and is engineered for installation without the need for welding, simplifying the setup process.
Please read this manual carefully before beginning installation or operation to ensure safe and correct use of the product. Keep this manual for future reference.
2. Safety Information
Important Safety Instructions:
- Installation and electrical connections must be performed by qualified personnel in accordance with local electrical codes and regulations.
- Disconnect power to the garage door opener before performing any maintenance or repairs.
- Keep hands, feet, and clothing clear of the garage door and its moving parts.
- Do not allow children to play with the garage door opener or its controls.
- Ensure the garage door is balanced and in good working order before installing the automation kit. An unbalanced door can cause serious injury.
- Install the wall control button at least 1.5 meters (5 feet) above the floor and away from all moving parts of the door.
- Regularly inspect the system for signs of wear or damage. Do not operate if damaged.
3. Package Contents
The Dieffematic ROCKET automation kit typically includes the following components:
- 1x 230V/220V Motor Unit
- 1x Control Unit (integrated or separate)
- 2x Remote Controls
- Mounting Brackets and Hardware
- Rail/Track System (may vary by kit version)
- Instruction Manual (this document)
Please verify all components are present and undamaged upon unboxing. Contact your supplier immediately if any parts are missing or damaged.
4. Setup and Installation
The Dieffematic ROCKET kit is designed for "no welding" installation, simplifying the process. However, professional installation is highly recommended to ensure safety and proper functionality.
4.1 Pre-Installation Checks
- Ensure the garage door operates smoothly manually and is properly balanced.
- Verify that there is a suitable 230V/220V power outlet near the installation area.
- Clear the installation area of any obstructions.
4.2 Mounting the Motor Unit
- Attach the rail system to the garage door header and ceiling, ensuring it is level and securely fastened.
- Mount the motor unit to the end of the rail system, typically near the garage door opening.
- Connect the door arm to the garage door and the trolley on the rail system.
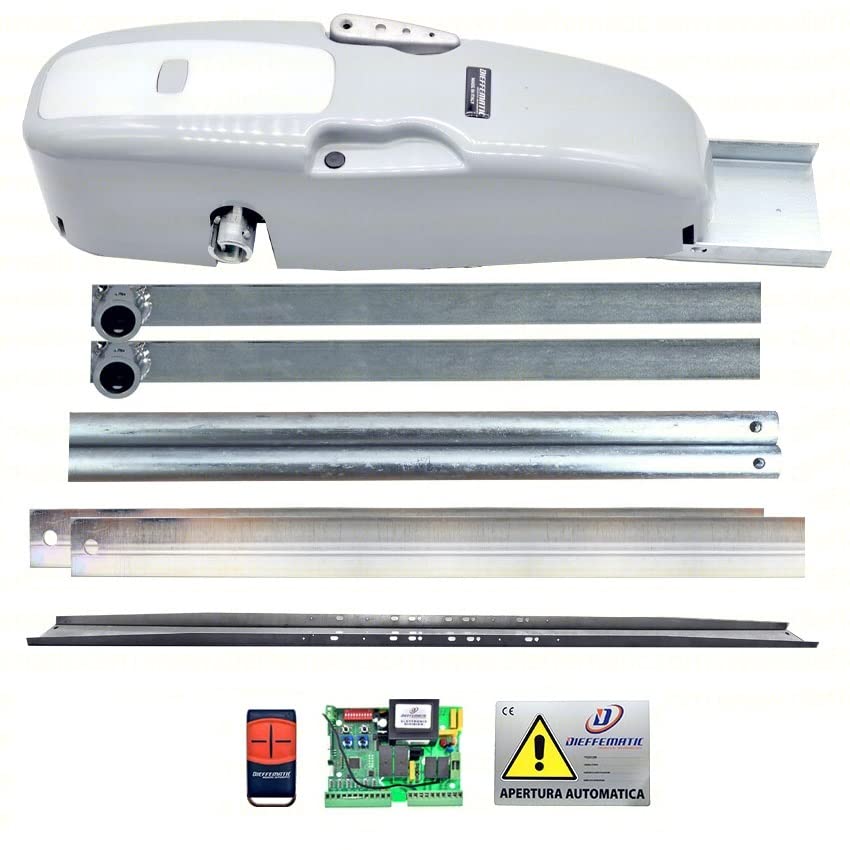
Image 1: Dieffematic ROCKET motor unit and rail system. This image shows the main motor unit connected to the rail, ready for installation above a garage door.
4.3 Electrical Connection
- Connect the motor unit to the 230V/220V power supply. Ensure proper grounding.
- If applicable, connect safety sensors (photocells) and wall control buttons according to the wiring diagram provided with the kit.
- Warning: All electrical work must be performed by a certified electrician.
4.4 Limit Switch Adjustment
After installation, adjust the open and close limit switches to ensure the door stops at the correct positions without over-traveling or straining the motor. Refer to the specific instructions in your kit for detailed adjustment procedures.
5. Operating Instructions
5.1 Basic Operation
- Open Door: Press the designated button on the remote control or wall control. The door will open to its programmed upper limit.
- Close Door: Press the designated button again. The door will close to its programmed lower limit.
- Stop Door: Press the button during operation to stop the door at any point.
5.2 Remote Control Pairing
To pair additional remote controls or re-pair existing ones:
- Locate the "Learn" or "Program" button on the control unit (refer to your specific control unit's diagram).
- Press and release the "Learn" button. An indicator light will illuminate.
- Within 30 seconds, press the desired button on your remote control. The indicator light will flash or change color to confirm successful pairing.
- Test the remote control to ensure it operates the garage door.
6. Maintenance
Regular maintenance ensures the longevity and safe operation of your Dieffematic ROCKET automation kit.
- Monthly:
- Check the garage door balance. If the door is unbalanced, contact a professional for adjustment.
- Inspect all moving parts, cables, and springs for wear or damage.
- Test the safety reversal system by placing an object (e.g., a 2x4 board) in the door's path. The door should reverse upon contact.
- Annually:
- Lubricate rollers, hinges, and bearings with a garage door lubricant. Do not lubricate plastic parts.
- Check all mounting hardware for tightness.
- Have a professional inspect the entire system.
Caution: Do not attempt to repair springs or cables yourself. These are under high tension and can cause severe injury. Contact a qualified garage door technician.
7. Troubleshooting
| Problem | Possible Cause | Solution |
|---|---|---|
| Motor does not respond to remote/wall control. |
|
|
| Door reverses immediately after starting to close. |
|
|
| Door does not open or close completely. |
|
|
If you encounter problems not listed here or if solutions do not resolve the issue, please contact Dieffematic customer support or a qualified technician.
8. Specifications
| Model: | ROCKET 230V/220V |
| Power Supply: | 230V / 220V |
| Motor Type: | Single Motor |
| Installation Type: | No Welding Required |
| ASIN: | B0C6R4S7VP |
| Manufacturer Reference: | 225488276297 |
9. Warranty and Support
For warranty information, please refer to the documentation provided at the time of purchase or contact your retailer. Dieffematic products are designed for reliability, but should you require technical assistance or support, please contact Dieffematic customer service directly or the authorized dealer from whom you purchased the kit.
When contacting support, please have your product model (ROCKET 230V/220V) and ASIN (B0C6R4S7VP) readily available.