Introduction
Thank you for choosing the SUNZOE SZ_SDI9340 Shower Faucet Set. This manual provides essential information for the safe installation, operation, and maintenance of your new shower system. Please read these instructions thoroughly before beginning installation and retain them for future reference.
Safety Information
- Ensure all local plumbing and building codes are followed during installation.
- Turn off the main water supply before starting any installation or maintenance work.
- The pressure-balanced valve is designed to prevent scalding by maintaining a consistent water temperature. Do not tamper with the factory settings of the anti-scald mechanism.
- If you are unsure about any part of the installation, consult a qualified plumber.
- This shower holder requires drilling and screwing for secure installation. Do not attempt adhesive mounting.
Package Contents
Verify that all components listed below are present in your package:

Image: All components of the SUNZOE SZ_SDI9340 Shower Faucet Set, including the shower head, handheld spray, valve body, tub spout, and accessories.
- 10-Inch Overhead Shower (304 Stainless Steel)
- Pressure Balanced Shower Valve (Brass)
- 12-Inch Adjustable Extension Arm (Brass)
- 6-Inch Firm Shower Arm (304 Stainless Steel)
- 5-Inch Large Size Handheld Shower (ABS)
- 59-Inch Shower Hose (304 Stainless Steel)
- 360° Adjustable Shower Holder (ABS)
- Tub Spout (304 Stainless Steel)
- Plumber's Tape
- Screw Set
- Installation Manual (this document)
Installation
Pre-Installation Notes
Important: The included valve body is specific to the SUNZOE system. If you are replacing an existing shower system from another brand (e.g., Moen, Delta), you must remove their valve body and trims before installing the SUNZOE valve. Compatibility with other brands' existing valve bodies is not guaranteed.

Image: Comparison of the SUNZOE valve body with incompatible valve bodies from other manufacturers.
Installation Steps (General Overview)
- Prepare the Wall: Ensure the wall opening is correctly sized for the valve body. Turn off the main water supply.
- Install the Valve Body: Connect the hot and cold water lines to the designated NPT 1/2" inlets on the brass valve body. Connect the mixed water outlets for the overhead shower and tub spout. Secure the valve body within the wall.
- Install Shower Arm and Head: Attach the 6-inch firm shower arm to the wall connection, then connect the 12-inch adjustable extension arm. Finally, attach the 10-inch overhead shower head. Ensure all connections are sealed with plumber's tape. The overhead shower head features a 360° swivel for angle adjustment.
- Install Tub Spout: Connect the tub spout to its designated water outlet. The metal tub spout is designed for high flow rate.
- Install Handheld Shower: Mount the 360° adjustable shower holder to the wall using the provided screws. Connect the 59-inch shower hose to the handheld spray and the wall outlet. Place the handheld spray in the holder.
- Install Trim and Handle: Secure the decorative trim plate and install the single handle onto the valve stem.
- Test for Leaks: Turn on the main water supply and check all connections for leaks.

Image: Detailed view of the cUPC certified pressure balanced valve body, showing connections for hot, cold, and mixed water.

Image: The 10-inch overhead shower head with its adjustable extension arm, demonstrating its flexibility and coverage.

Image: The metal tub spout with its diverter, illustrating its function.
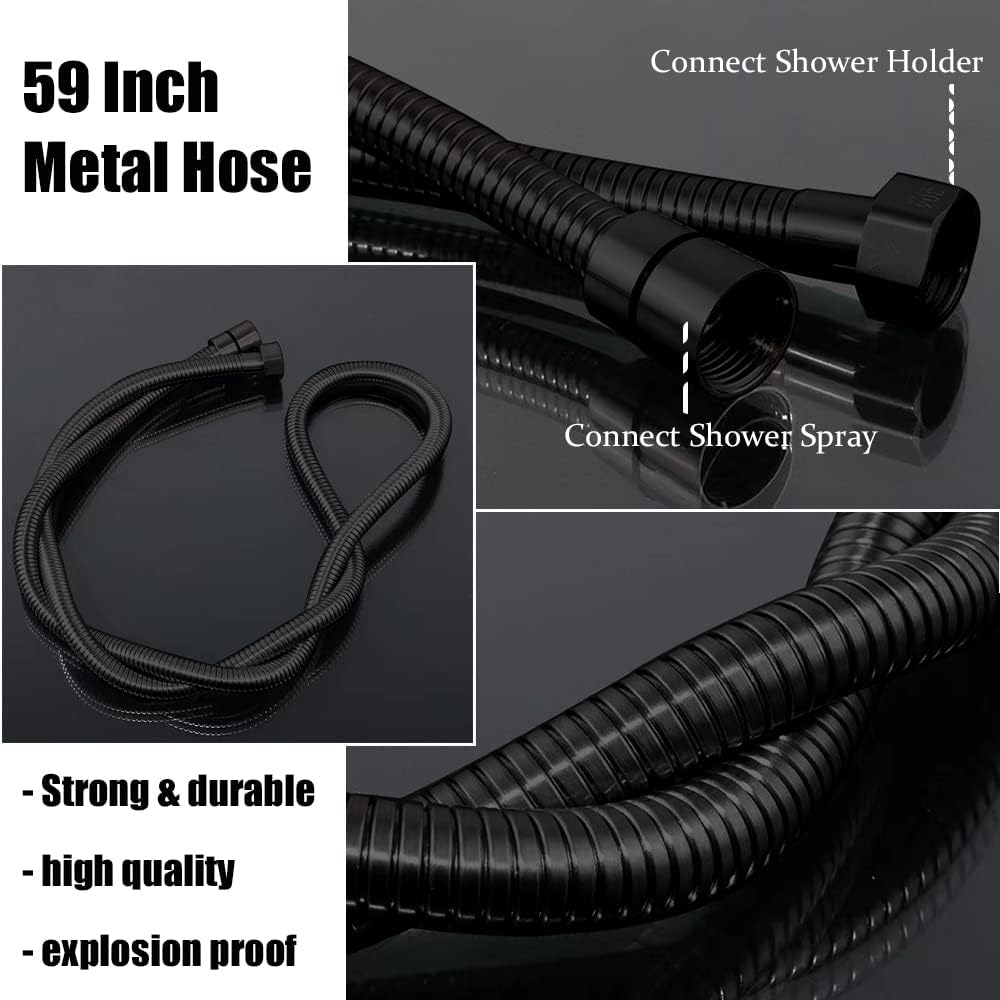
Image: The 59-inch metal shower hose, emphasizing its quality and durability.
Operating Instructions
Water Flow Control
The single handle controls both water temperature and flow. Rotate the handle to adjust temperature and pull it out to increase flow.
Diverter Function
The integrated diverter knob allows you to switch between different water outlets:
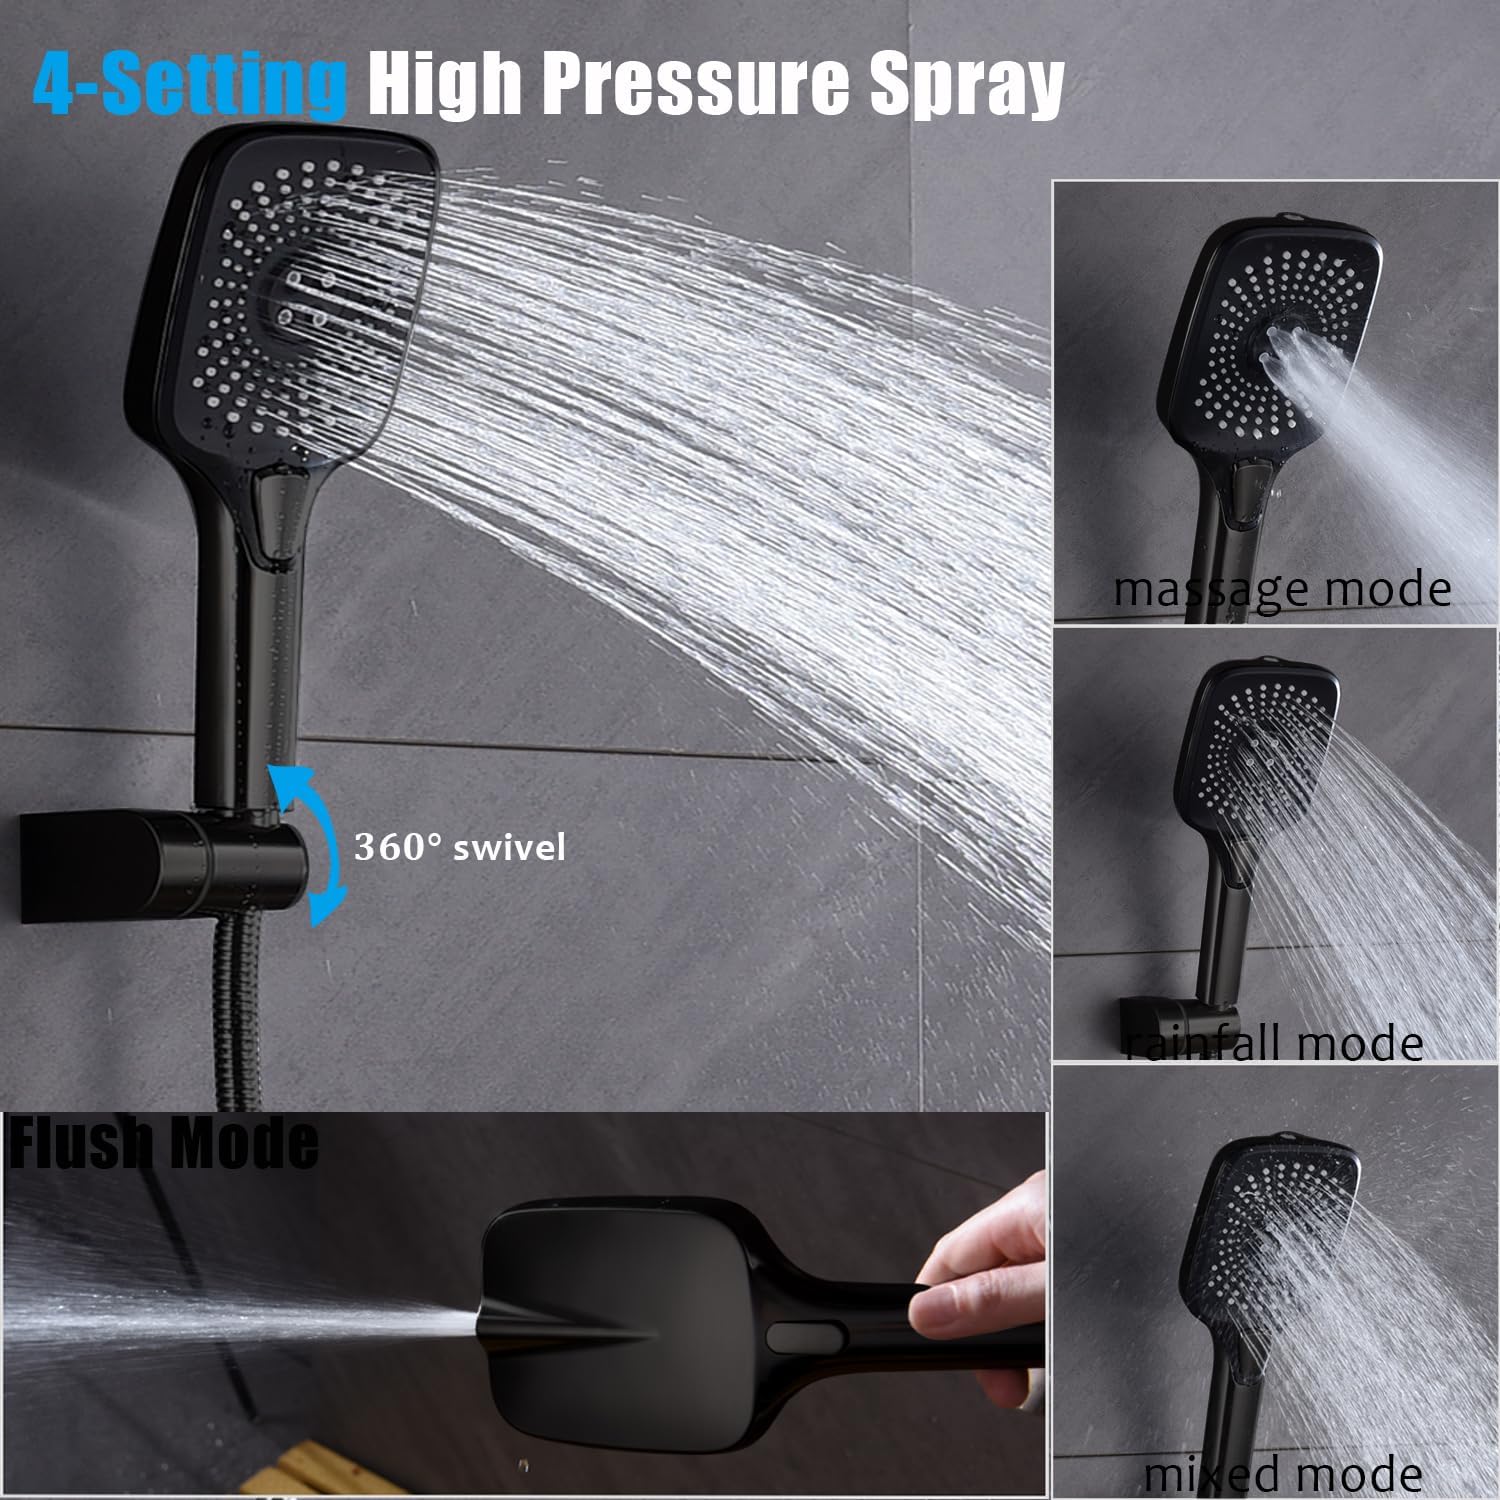
Image: The diverter knob and its three positions for selecting water output.
- Mode 1: Only Overhead Shower
- Mode 2: Overhead Shower + Handheld Spray Together
- Mode 3: Only Handheld Spray
Handheld Spray Modes
The handheld spray offers four distinct water modes, selectable via a switch on the spray head:

Image: The handheld spray demonstrating its four different water modes.
- Massage Mode: Concentrated stream for targeted relief.
- Rainfall Mode: Gentle, wide coverage.
- Mixed Mode: Combination of massage and rainfall.
- Flush Mode: High-pressure jet for cleaning surfaces like floors or walls.
Tub Spout Operation
To fill the bathtub, ensure the diverter is set to the tub spout position. The tub spout features a high flow rate for quick filling. To switch to shower, pull up the knob on the tub spout.
Maintenance
Cleaning
- Clean the shower head and handheld spray nozzles regularly by gently touching the rubber nozzles to dislodge mineral buildup.
- Wipe all surfaces with a soft, damp cloth. Avoid abrasive cleaners, harsh chemicals, or scouring pads, as these can damage the finish.
- For stubborn water spots, use a mild soap solution or a vinegar-based cleaner specifically designed for bathroom fixtures. Rinse thoroughly after cleaning.
Anti-Scald Valve
The anti-scald pressure balance valve is factory-set to ensure safe water temperatures. No user adjustment is typically required or recommended for this component.
Troubleshooting
Refer to the table below for common issues and their potential solutions:
| Problem | Possible Cause | Solution |
|---|---|---|
| Low water pressure from shower head or handheld spray. | Mineral buildup in nozzles; partially closed shut-off valve; debris in the system. | Clean rubber nozzles on shower head/handheld spray. Ensure shut-off valves are fully open. Check for debris in the valve or supply lines (consult a plumber if necessary). |
| Water not hot enough. | Hot water heater setting too low; anti-scald device limiting temperature (less common for this model). | Check your hot water heater temperature setting. This model's anti-scald valve is factory set; if issues persist, consult a plumber. |
| Leaks at connections. | Loose connections; insufficient plumber's tape; damaged O-rings/gaskets. | Ensure all connections are tightened properly. Reapply plumber's tape if necessary. Inspect O-rings and gaskets for damage and replace if found. |
| Diverter not switching properly. | Debris in diverter mechanism; worn diverter cartridge. | Flush the system to clear debris. If the issue persists, the diverter cartridge may need replacement (contact support). |
Specifications
| Feature | Detail |
|---|---|
| Model Number | SZ_SDI9340 |
| Brand | SUNZOE |
| Color | Matte Black |
| Material | Stainless Steel, Brass, Engineered Plastic (ABS) |
| Finish Type | Black |
| Installation Method | Wall-Mounted |
| Number of Handles | 1 |
| Head Size (Overhead Shower) | 10 inches |
| Product Dimensions | 41.4 x 25.91 x 12.95 cm |
| Item Weight | 4.13 kg |
| Certifications | cUPC Certified Anti-Scald Valve |
Warranty and Support
Warranty Information
SUNZOE offers a 10-year free replacement for parts and lifetime product service. This warranty covers manufacturing defects and functional issues under normal use.
Customer Support
For any issues, questions, or warranty claims, please contact SUNZOE customer service:
- Email: HomeToSunzoe@outlook.com
Our support team is committed to resolving your issues with 100% satisfaction.