1. Introduction
This manual provides detailed instructions for the installation, operation, and maintenance of your Hodozzy 4G+128G Car Stereo, designed specifically for Honda CRV models from 1997 to 2001. This unit features a 9-inch Incell touch screen, Wireless CarPlay, Wireless Android Auto, GPS navigation, DSP audio processing, Wi-Fi connectivity, FM/RDS radio, and supports a rear view camera. Please read this manual thoroughly before use to ensure proper functionality and safety.
2. Package Contents
Verify that all items listed below are included in your package:
- Hodozzy Car Stereo Unit (9-inch Incell Screen)
- Power Cable
- RCA Cable
- Installation Tool
- Rear Camera
- Microphone (MIC)
- GPS Antenna
- USB Cable
- Rear Camera Input Cable
- User Manual

Image: Overview of included accessories and the main unit's dimensions.
3. Installation Guide
3.1. Pre-Installation Check
Before beginning installation, ensure your vehicle's ignition is off and the battery is disconnected. Confirm compatibility with your Honda CRV (1997-2001 models).
3.2. Wiring Instructions
Carefully connect the provided wiring harnesses to the corresponding ports on the car stereo and your vehicle's wiring system. Refer to the diagrams below for correct connections.

Image: Detailed view of the rear connection ports on the car stereo unit.

Image: Comprehensive wiring diagram illustrating connections for power, audio, video, and accessories.
3.3. Mounting the Unit
After completing the wiring, carefully mount the head unit into the dashboard. Ensure all cables are securely connected and not pinched. Test the unit before fully reassembling the dashboard.
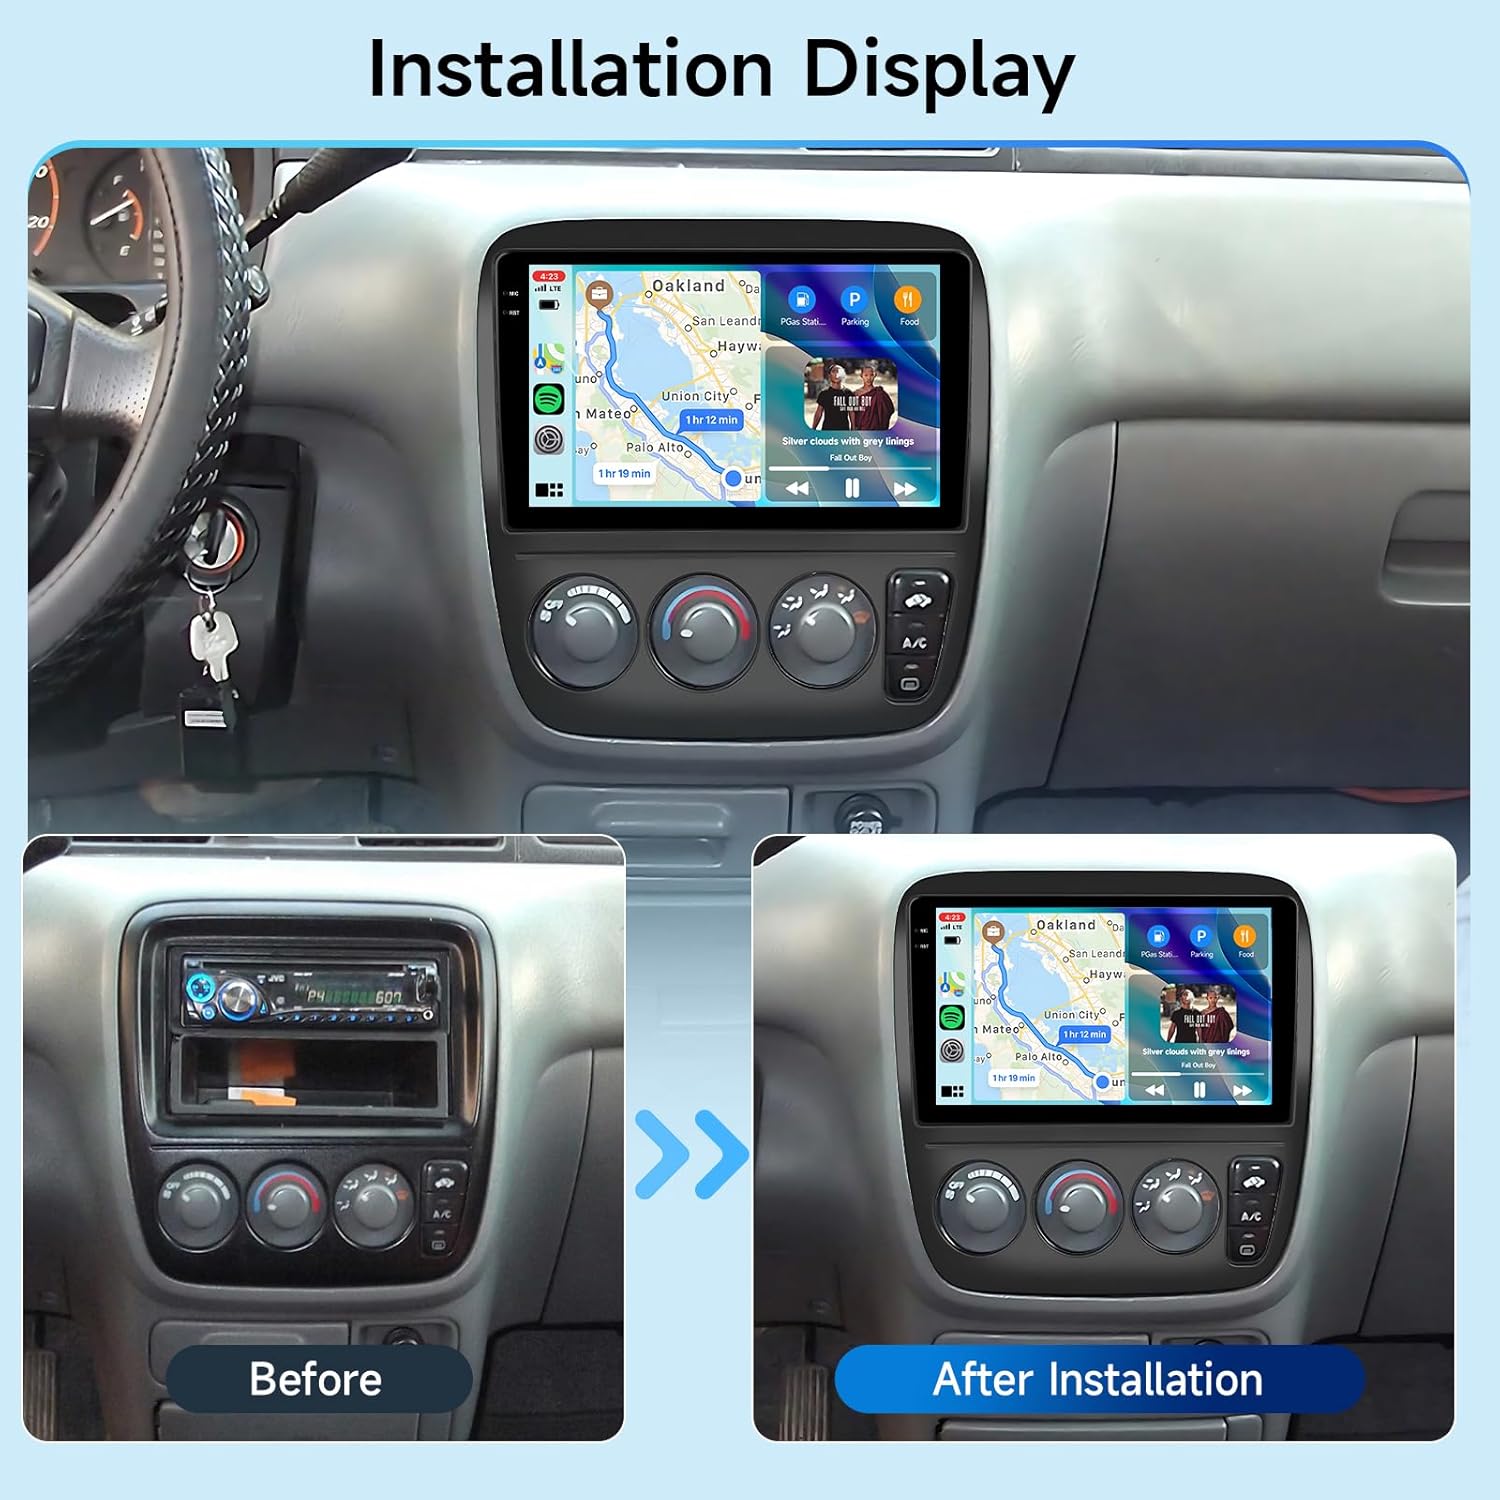
Image: Visual comparison of the dashboard before and after the car stereo installation.
4. Initial Setup
4.1. Powering On
Once installed, reconnect the vehicle battery. Turn the ignition to the ACC or ON position. The unit should power on automatically. The initial cold start may take approximately 10 seconds.
4.2. Connecting to Wi-Fi
Navigate to the 'Settings' menu on the head unit. Select 'Network & Internet' and then 'Wi-Fi'. Choose your desired Wi-Fi network and enter the password to connect. This enables online features like live traffic updates and app downloads.

Image: Screen display demonstrating GPS navigation and Wi-Fi connection status.
5. Operating Instructions
5.1. Wireless CarPlay and Android Auto
The unit supports both Wireless CarPlay and Wireless Android Auto. To connect, enable Bluetooth and Wi-Fi on your smartphone. Pair your phone with the car stereo via Bluetooth. Once paired, the system will prompt you to activate CarPlay or Android Auto wirelessly. Alternatively, a wired connection can be established via USB.

Image: Visual representation of CarPlay, Android Auto, and MirrorLink functionalities.
5.2. MirrorLink Function
MirrorLink allows you to display your smartphone's screen directly onto the car stereo. Connect your iOS or Android device via USB or wirelessly (if supported by your device) and follow the on-screen prompts to activate MirrorLink.
5.3. GPS Navigation
The unit comes with pre-installed offline maps. For online navigation with real-time traffic updates, ensure the unit is connected to Wi-Fi or a mobile hotspot. You can download additional navigation applications from the app store.

Image: Illustration of GPS navigation with online and offline map capabilities, alongside Wi-Fi functionality.
5.4. Audio Features (DSP, FM/RDS Radio, Bluetooth)
- DSP (Digital Sound Processor): Access the 36-band DSP equalizer in the audio settings to customize sound output. Adjust bass, treble, and other audio parameters for an optimized listening experience.
- FM/RDS Radio: Tune into FM radio stations. The RDS (Radio Data System) feature displays station information, song titles, and other data where available.
- Bluetooth: Connect your smartphone via Bluetooth for hands-free calling and audio streaming (A2DP). The unit automatically syncs contacts for easy access.

Image: Consolidated view of various audio features including DSP, Bluetooth, and FM/RDS radio, along with other functionalities.
5.5. Steering Wheel Control (SWC)
The unit supports integration with your vehicle's existing steering wheel controls. Access the SWC learning function in the settings menu to map your steering wheel buttons to the car stereo's functions (e.g., volume, track skip, answer call).
5.6. Rear View Camera
When the vehicle is shifted into reverse, the car stereo automatically displays the feed from the connected rear view camera, providing parking assistance.
Image: Depiction of the rear view camera display and the interface for configuring steering wheel controls.
5.7. User Interface and Customization
The unit offers 15 customizable UI themes. You can drag and drop icons on the home screen to personalize your layout. Day/Night mode switching is also available for optimal visibility.
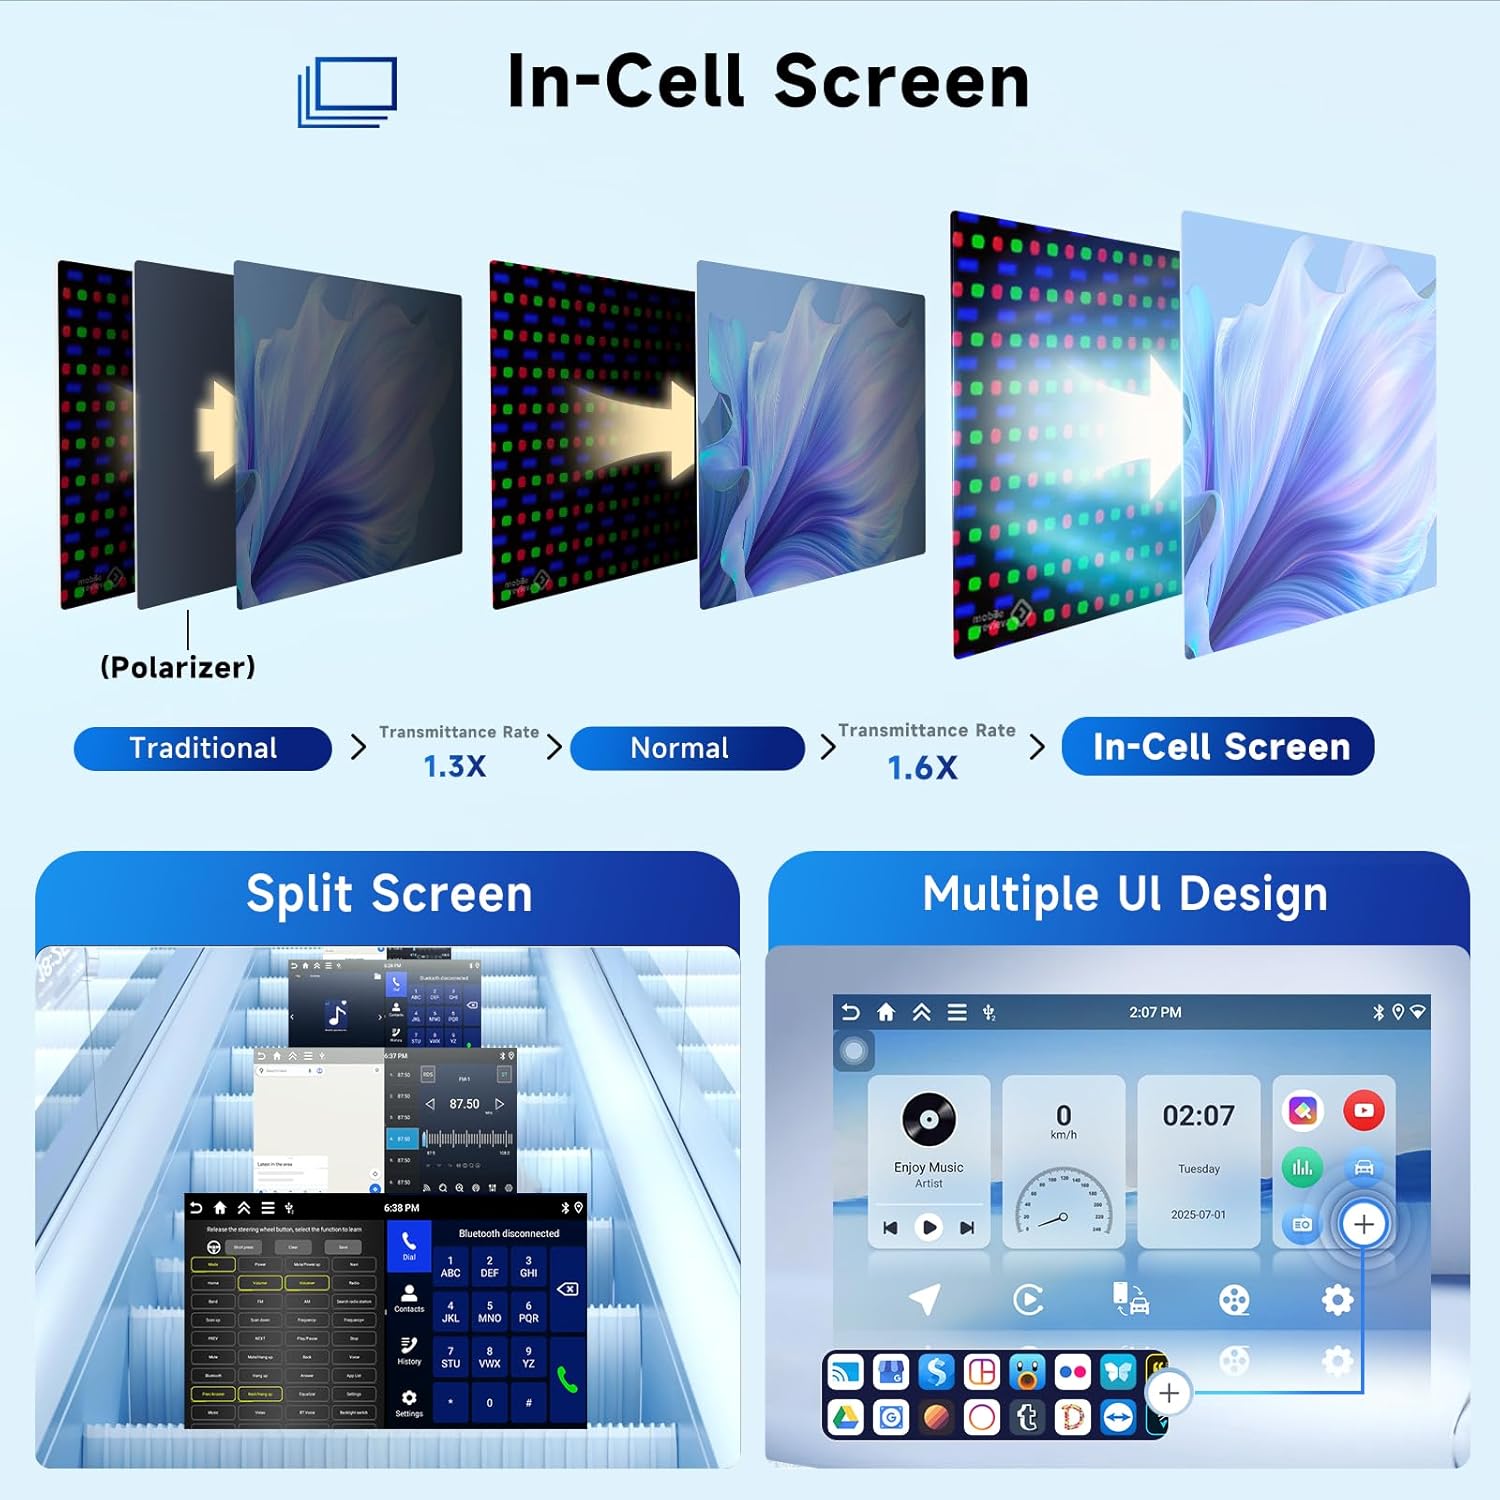
Image: Explanation of In-Cell screen technology, demonstration of split-screen functionality, and various user interface designs.
5.8. Split Screen Functionality
Utilize the split-screen feature to run two applications simultaneously, such as navigation and music playback, enhancing multitasking capabilities.
6. Maintenance
6.1. Screen Cleaning
To clean the Incell touch screen, power off the unit. Use a soft, lint-free cloth lightly dampened with water or a screen-specific cleaning solution. Avoid abrasive materials or harsh chemicals.
6.2. General Care
Keep the unit free from dust and debris. Avoid exposing it to extreme temperatures or direct sunlight for prolonged periods. Ensure proper ventilation around the unit.
7. Troubleshooting
7.1. No Power
- Check all power connections and fuses.
- Ensure the vehicle battery is properly connected and charged.
7.2. No Sound
- Verify speaker connections.
- Check volume levels and mute settings.
- Ensure the correct audio source is selected.
7.3. GPS Signal Loss
- Ensure the GPS antenna is properly installed and has a clear view of the sky.
- Move the vehicle to an open area away from tall buildings or dense foliage.
7.4. CarPlay/Android Auto Not Connecting
- Ensure Bluetooth and Wi-Fi are enabled on your smartphone and the car stereo.
- Forget the device from your phone's Bluetooth settings and re-pair.
- Try connecting with a different USB cable if using a wired connection.
- Restart both your phone and the car stereo.
8. Specifications
| Brand | Hodozzy |
| Model | 4G+128G |
| Vehicle Service Type | Car (Honda CRV 1997-2001) |
| Screen Size | 9 Inches |
| Touch Screen Type | In-cell |
| Memory Storage Capacity | 128 GB |
| RAM | 4 GB |
| Connectivity Technology | Bluetooth, Wi-Fi |
| Special Features | Android Auto, Apple CarPlay, Bluetooth, GPS, DSP, FM RDS |
| Map Type | Worldwide (Offline maps included) |
| Included Components | Backup camera, GPS antenna, Microphone |
| Item Weight | 1.38 Kilograms |
9. Warranty and Support
9.1. Warranty Information
This product comes with a 2-year warranty from the date of purchase. Please retain your proof of purchase for warranty claims. The warranty covers manufacturing defects and malfunctions under normal use conditions.
9.2. Customer Support
For technical assistance, troubleshooting, or warranty inquiries, please contact Hodozzy customer support. Refer to the contact information provided with your purchase or visit the official Hodozzy website for support resources.