1. Introduction
Thank you for choosing the KENT Diamond Induction Cooktop 2000W. This appliance is designed for efficient, fast, and safe cooking, offering a modern alternative to traditional gas and electric cookers. This manual provides essential information for the safe and effective use, maintenance, and troubleshooting of your new induction cooktop. Please read it thoroughly before operation and retain it for future reference.
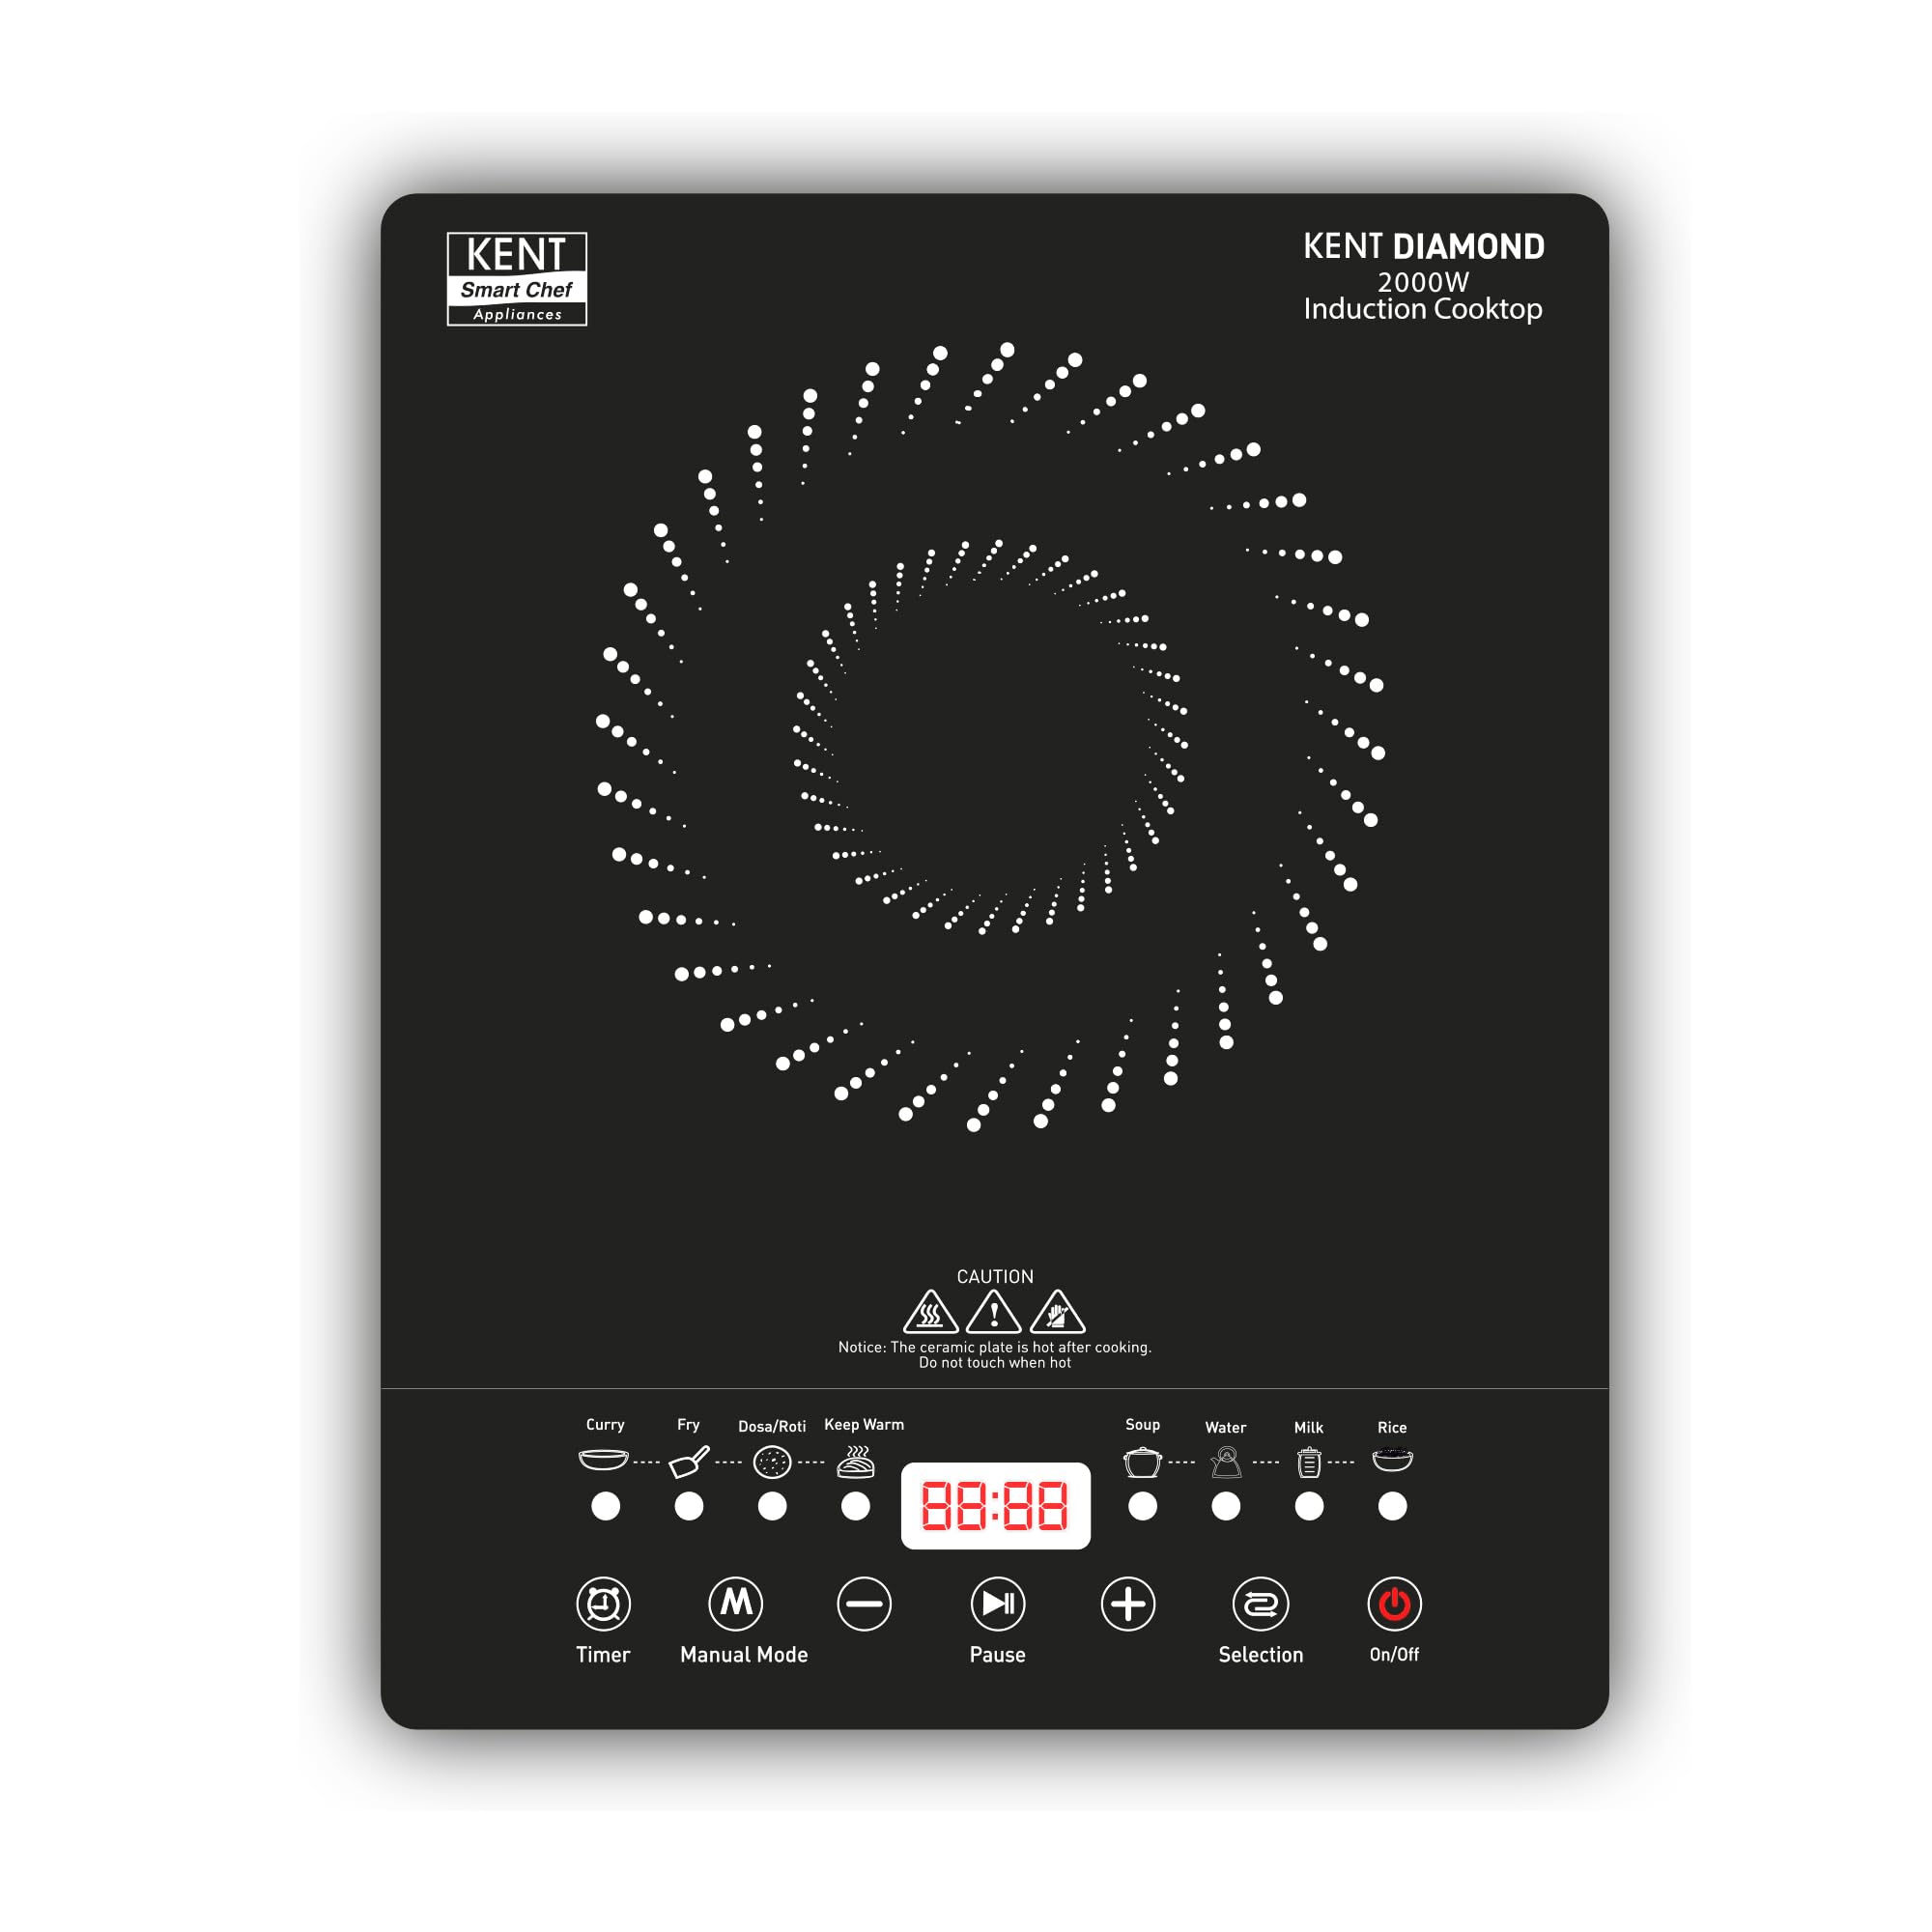
Image 1.1: The KENT Diamond Induction Cooktop 2000W. This image displays the sleek black cooktop with its control panel and induction heating zone.
2. Safety Instructions
To ensure safe operation and prevent damage, please observe the following safety precautions:
- Do not immerse the appliance, power cord, or plug in water or other liquids.
- Ensure the voltage indicated on the appliance matches your local power supply before connecting.
- Place the cooktop on a stable, flat, heat-resistant surface, away from flammable materials.
- Do not operate the appliance if the power cord or plug is damaged, or if the appliance malfunctions or has been damaged in any way.
- Use only induction-compatible cookware. Non-magnetic cookware will not heat.
- Keep children and pets away from the appliance during operation.
- The ceramic plate remains hot after cooking. Do not touch when hot.
- Do not block the air vents on the cooktop, as this can lead to overheating.
- Unplug the appliance when not in use and before cleaning.
- Do not place metallic objects such as knives, forks, spoons, or lids on the induction cooktop surface, as they can become hot.
3. Product Overview
The KENT Diamond Induction Cooktop features a durable microcrystalline glass top and intuitive feather touch buttons with an LED display for ease of use.
Key Features:
- 2000W Power: Provides fast and efficient heating.
- 8 Preset Menus: Includes Curry, Fry, Roti, Keep Warm, Soup, Water, Milk Boiling, and Rice for convenient cooking.
- Preset Timer Function: Allows you to set cooking duration.
- Milk Boiling Function: Designed to prevent milk spillage during boiling.
- Keep Warm Function: Maintains food temperature for extended periods.
- Adjustable Temperature: Offers precise control over cooking heat.
- Digital LED Display: Provides clear visibility of settings and status.
- Feather Touch Buttons: For smooth and easy operation.
- Microcrystalline Glass Top: Ensures safer cooking and easy cleaning.
- Overheat Protection & Auto Turn-Off: Enhances safety by preventing overheating.

Image 3.1: Close-up of the control panel. This image highlights the feather touch buttons and LED display for various functions like Timer, Manual Mode, Pause, Selection, and On/Off, along with indicators for preset menus.
4. Setup
- Unpacking: Carefully remove the cooktop from its packaging. Retain the packaging for future storage or transport.
- Placement: Place the induction cooktop on a dry, stable, and level surface. Ensure there is adequate ventilation around the unit (at least 10 cm clearance from walls or other appliances).
- Power Connection: Plug the power cord into a grounded electrical outlet with the correct voltage (220 Volts).
- Initial Cleaning: Wipe the glass surface with a soft, damp cloth before first use.
5. Operating Instructions
5.1. Basic Operation
- Place induction-compatible cookware centrally on the heating zone.
- Press the On/Off button to power on the cooktop. The LED display will illuminate.
- Select a cooking function using the Selection button or choose a preset menu.
- Adjust temperature or power level using the + and - buttons.
- To turn off, press the On/Off button again. The fan may continue to run for a short period to cool the unit.
5.2. Using Preset Menus
The cooktop features 8 preset menus for common cooking tasks:
- Curry
- Fry
- Roti (Dosa/Roti)
- Keep Warm
- Soup
- Water
- Milk Boiling
- Rice
To use a preset menu, press the Selection button repeatedly until the desired menu indicator lights up. The cooktop will automatically adjust power and temperature settings for that specific task.

Image 5.1: The cooktop displaying the 8 preset menu options. This image shows the cooktop with various dishes, illustrating the versatility of its preset functions for different cooking needs.
5.3. Temperature and Power Adjustment
In Manual Mode, you can precisely control the temperature or power level using the + and - buttons to suit your cooking requirements.
5.4. Timer Function
Press the Timer button to set a cooking duration. Use the + and - buttons to adjust the time. The cooktop will automatically switch off once the set time has elapsed.
5.5. Milk Boiling Function
This specialized function is designed to boil milk without spillage. Select the Milk Boiling preset, and the cooktop will manage the heating process to prevent overflow.

Image 5.2: The cooktop demonstrating the auto-off function during milk boiling. This image shows milk boiling in a pot on the cooktop, highlighting the safety feature that prevents spillage.
5.6. Keep Warm Function
Activate the Keep Warm preset to maintain your food at an optimal serving temperature after cooking. This function is ideal for keeping dishes warm until ready to serve.
6. Maintenance and Cleaning
Regular cleaning ensures the longevity and optimal performance of your induction cooktop.
- Always unplug the cooktop and allow it to cool completely before cleaning.
- Wipe the microcrystalline glass surface with a soft, damp cloth and mild detergent. For stubborn stains, use a non-abrasive cleaner specifically designed for ceramic or induction cooktops.
- Do not use abrasive pads, harsh chemicals, or steel wool, as these can scratch the surface.
- Clean the exterior body with a soft, damp cloth. Do not allow water to enter the internal components.
- Ensure the ventilation openings are free from dust and debris. Use a soft brush or vacuum cleaner to gently clear them.

Image 6.1: The cooktop showcasing its full microcrystalline glass top. This image emphasizes the smooth, durable, and easy-to-clean surface of the induction cooktop.
7. Troubleshooting
If you encounter issues with your KENT Diamond Induction Cooktop, refer to the following common problems and solutions:
| Problem | Possible Cause | Solution |
|---|---|---|
| Cooktop does not turn on. | No power supply; Power cord not properly plugged in. | Check power outlet and ensure the cord is securely plugged in. |
| Cookware is not heating. | Cookware is not induction-compatible; Cookware is too small or too large for the heating zone. | Use induction-compatible cookware (magnetic base). Ensure cookware size is appropriate for the heating zone. |
| Display shows an error code (e.g., E0, E1). | Specific error condition (e.g., overheating, sensor fault). | Refer to the specific error code in a more detailed manual (if available) or contact customer support. Try unplugging and re-plugging the unit after a few minutes. |
| Fan continues to run after turning off. | Normal cooling process. | This is normal. The fan will stop automatically once the internal components have cooled down. |
If the problem persists after attempting these solutions, please contact KENT customer support.
8. Specifications
Detailed technical specifications for the KENT Diamond Induction Cooktop 2000W:
| Specification | Value |
|---|---|
| Brand | KENT |
| Model | 116130 |
| Installation Type | Countertop |
| Wattage | 2000W |
| Voltage | 220 Volts |
| Number of Heating Elements | 1 |
| Burner Type | Radiant |
| Control Console | Push Button |
| Material | Plastic (with Microcrystalline Glass Top) |
| Color | Black |
| Item Weight | 2 kg |
| Item Dimensions (LxWxH) | 28 x 35 x 6 Centimeters |
9. What's in the Box
The product package typically includes:
- KENT Diamond Induction Cooktop Unit
- User Manual
Note: The JSON input mentioned "Includes 1 leaf" which is likely a data error. The standard contents for such an appliance are listed above.
10. Warranty and Support
Your KENT Diamond Induction Cooktop is covered by a manufacturer's warranty. Please refer to the warranty card included with your product for specific terms and conditions, including the warranty period and coverage details.
For technical assistance, service requests, or any queries regarding your product, please contact KENT customer support through their official website or the contact information provided in your warranty documentation.


