MELLCOM 12' x 20' Dark Grey
MELLCOM Louvered Pergola User Manual
Model: 12' x 20' Dark Grey
Brand: MELLCOM
Introduction
Thank you for choosing the MELLCOM Louvered Pergola. This manual provides essential information for the safe assembly, operation, and maintenance of your new outdoor structure. Designed with an adjustable aluminum rainproof roof, integrated drainage, and included curtains and netting, this pergola offers a versatile and comfortable outdoor living space. Please read this manual thoroughly before beginning assembly or use.

Figure 1: The MELLCOM Louvered Pergola providing a shaded outdoor living area next to a pool.
Safety Information
- Always follow all assembly instructions carefully. Ensure all parts are correctly installed and securely fastened before use.
- Do not attempt to assemble the pergola during strong winds or adverse weather conditions.
- Regularly inspect all connections and components for tightness and damage. Tighten any loose fasteners immediately.
- Ensure the pergola is anchored to a stable, level surface to prevent tipping or movement. Expansion screws are provided for securing to hardened ground.
- Keep children and pets away from the assembly area during installation.
- Do not hang heavy objects from the pergola frame or louvers.
- In case of heavy snow accumulation, it is recommended to open the louvers to prevent excessive weight on the roof structure.
- Avoid using abrasive cleaners or sharp objects that could damage the finish or materials.
Important:
Ensure proper installation, handling, and securing of the pergola according to the provided instructions and recommendations for safe and optimal use.
Components List
The MELLCOM Louvered Pergola is shipped in multiple boxes. Verify all components are present and undamaged before beginning assembly. Refer to the detailed parts list provided in your separate assembly guide for specific quantities and identification.
Key Structural Components:
- Aluminum Alloy Frame (Beams, Posts)
- Powder-Coated Steel Louver Roof Panels
- Adjustable Crank Handles and Winding Mechanisms
- Integrated Gutter System Components
- Base Plates and Expansion Screws for Anchoring
Included Accessories:
- Removable Privacy Curtains
- Removable Insect Netting
- Humanized Straps for securing curtains/netting
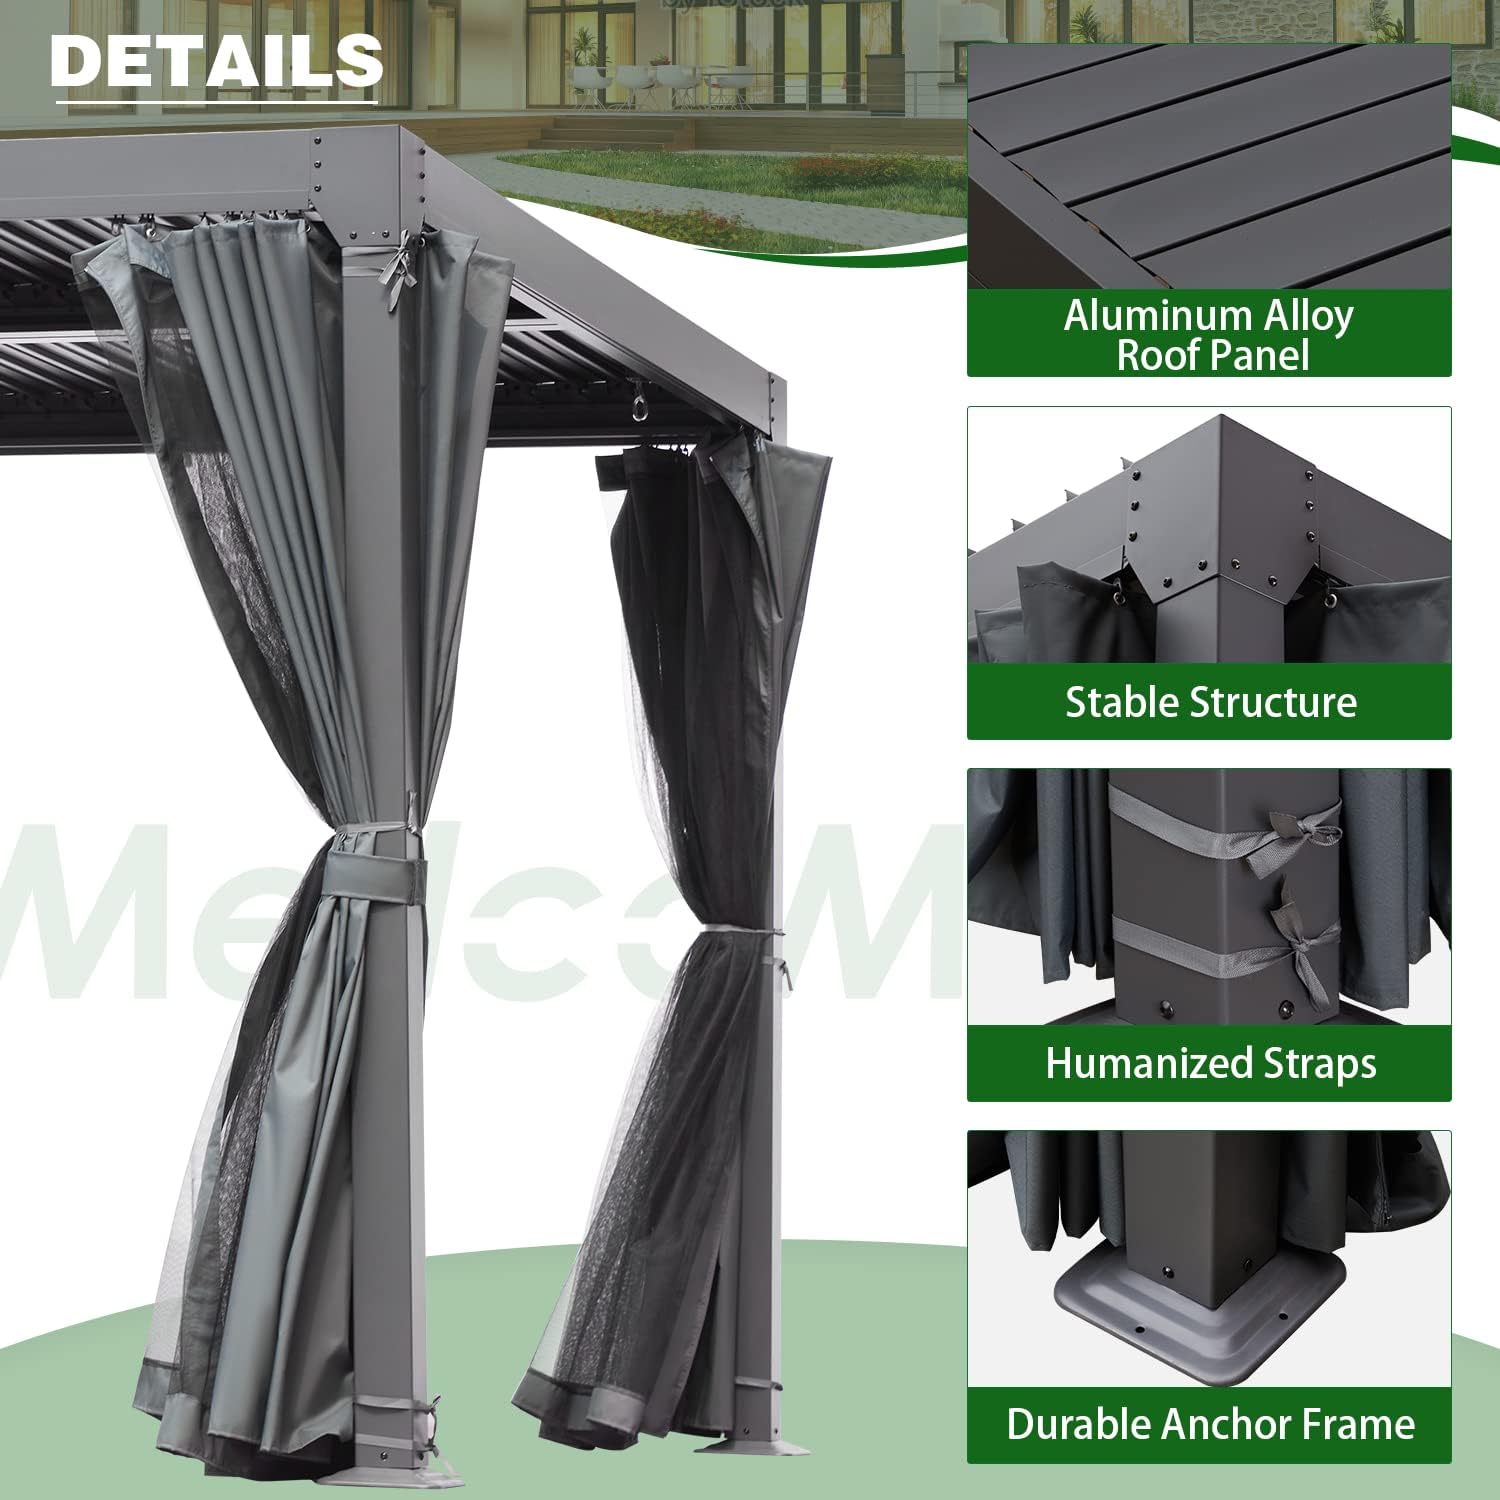
Figure 2: Detailed view of pergola components including the aluminum alloy roof panel, stable structural connections, humanized straps for curtains, and the durable anchor frame.
Setup and Assembly
Assembly typically requires 3-4 people and takes approximately 2-3 hours. Follow the step-by-step pictorial instructions provided in your separate assembly manual. Ensure you have adequate space and all necessary tools before starting.
Key Assembly Steps:
- Site Preparation: Choose a level, stable surface for installation. Clear any debris or obstacles.
- Unpacking and Inspection: Carefully unpack all boxes and verify contents against the parts list. Report any missing or damaged parts to customer service immediately.
- Frame Assembly: Assemble the main aluminum alloy frame according to the diagrams. Ensure all bolts are finger-tight initially.
- Louver Installation: Install the powder-coated steel louver panels onto the roof structure. Pay attention to the orientation for proper drainage.
- Drainage System Connection: Connect the integrated gutter system components to ensure efficient water runoff.
- Anchoring: Secure the pergola to the ground using the provided base plates and expansion screws. This is crucial for stability and wind resistance.
- Curtain and Netting Attachment: Install the privacy curtains and insect netting onto the designated tracks. Utilize the humanized straps to secure them when not in use or during windy conditions.
- Final Tightening: Once the entire structure is assembled and aligned, fully tighten all bolts and fasteners.

Figure 3: Dimensional overview of the MELLCOM Louvered Pergola (12' x 20' model), indicating key measurements for planning your installation space.
Operating Instructions
The MELLCOM Louvered Pergola features an adjustable roof system that allows you to control sunlight and weather protection.
Adjusting the Louvered Roof:
- The louvered roof consists of multiple independently controlled sections. Each section is operated by a durable crank handle.
- To open the louvers: Turn the crank handle in the direction indicated for opening. This will rotate the louvers to allow sunlight and airflow.
- To close the louvers: Turn the crank handle in the opposite direction. The louvers will fully close, creating a rainproof roof and providing maximum shade and protection from the elements.
- You can adjust the louvers to any angle between fully open and fully closed to achieve desired light and shade levels.

Figure 4: Mechanism for adjusting the louvers. Turn the handle to transition between open (allowing light) and closed (providing shade and rain protection) positions.
Concealed Drainage System:
The pergola is equipped with a concealed drainage system. When the louvers are closed, rainwater is collected from each panel and channeled into the built-in gutter system. The water then drains down through the hollow columns, preventing accumulation on the roof and keeping the area underneath dry.

Figure 5: Illustration of the concealed drainage system, demonstrating how water is efficiently directed away from the roof and through the pergola's support columns.
Using Curtains and Netting:
- The included privacy curtains and insect netting can be drawn around the perimeter of the pergola for added privacy, sun protection, or to keep insects out.
- Use the humanized straps located at the upper, middle, and lower sections of the curtains and mesh to secure them to the columns. This prevents them from flying around in strong winds.
Maintenance
Regular maintenance will extend the life and appearance of your MELLCOM Louvered Pergola.
- Cleaning: Clean the aluminum frame and louver panels with a mild soap and water solution. Rinse thoroughly with clean water and dry with a soft cloth. Avoid harsh chemicals or abrasive materials that could damage the powder-coated finish.
- Drainage System: Periodically check the louver panels and drainage channels for any debris (leaves, dirt) that might obstruct water flow. Clear any blockages to ensure proper drainage.
- Fasteners: Annually, or more frequently if exposed to high winds, check all bolts and screws to ensure they remain tight. Re-tighten as necessary.
- Curtains and Netting: The curtains and netting can be removed for cleaning. Follow the care instructions on their labels. Store them indoors during prolonged periods of non-use or severe weather to prolong their lifespan.
- Winter Care: In areas with heavy snowfall, it is recommended to keep the louvers open to prevent snow accumulation and excessive weight on the roof structure.
Troubleshooting
| Problem | Possible Cause | Solution |
|---|---|---|
| Louvers not opening/closing smoothly | Debris in mechanism, loose connections, or mechanism wear. | Inspect for debris and clear. Check and tighten all connections. If wear is evident, contact customer service for replacement parts. |
| Water pooling on roof or leaking | Louvers not fully closed, drainage channels blocked, or improper installation. | Ensure louvers are fully closed. Clear any debris from drainage channels. Review assembly instructions for proper installation of roof panels and drainage system. |
| Pergola feels unstable or wobbly | Loose anchor bolts, uneven ground, or incomplete frame assembly. | Check and tighten all anchor bolts. Ensure the ground surface is level. Verify all frame connections are secure according to assembly instructions. |
| Curtains/Netting not staying in place | Straps not secured, or strong winds. | Ensure all humanized straps are properly fastened. Consider additional securing methods in extremely windy conditions if necessary. |
If you encounter issues not listed here or require further assistance, please contact MELLCOM customer service.
Specifications
- Brand: MELLCOM
- Model: Louvered Pergola with Adjustable Aluminum Rainproof Roof
- Dimensions (L x W x H): 227"L x 141"W x 88"H (12' x 20' model)
- Material: Aluminum Alloy Frame, Powder-Coated Steel Louvers
- Color: Dark Grey
- Item Weight: Approximately 521 Pounds
- Water Resistance Level: Waterproof (when louvers are closed)
- Wind Resistance: 50-80 MPH
- Occupancy: Up to 16 People
- Assembly Required: Yes
- Included: Privacy Curtains, Insect Netting
Warranty and Support
MELLCOM stands behind the quality of its products. For specific warranty details, please refer to the warranty card included with your purchase or visit the official MELLCOM website. If you have any questions, require replacement parts, or need technical assistance, please contact MELLCOM customer service directly.
Customer Service: Refer to your purchase documentation or the MELLCOM brand store on Amazon for contact information.
Online Resources: For additional information, FAQs, and product support, visit the MELLCOM Store on Amazon.
Related Documents - 12' x 20' Dark Grey
 |
YYCP004 Carport Assembly Instructions Step-by-step guide for assembling the YYCP004 carport, including a parts list and assembly diagrams. |
 |
MELLCOM YYCP-003SG-A Carport Installation Guide Detailed installation instructions for the MELLCOM YYCP-003SG-A carport, covering assembly steps, parts list, and hardware requirements for setting up your outdoor storage shelter. |
 |
XWSS-197 Outdoor Storage Shed Assembly Instructions Comprehensive step-by-step assembly guide for the XWSS-197 outdoor storage shed by MELLCOM. Includes a detailed parts list and clear instructions for building your garden shed. |
 |
Harbor Freight Greenhouse Owner's Manual & Safety Instructions Comprehensive owner's manual and safety instructions for the Harbor Freight 16' L x 10' W x 10'3" H Greenhouse, including assembly guides, parts lists, and maintenance information. |
 |
MELLCOM YYCP005 10x20 ft Heavy Duty Carport Assembly Instructions Detailed assembly guide for the MELLCOM YYCP005 10x20 ft Heavy Duty Carport. This manual provides step-by-step instructions, part identification, and diagrams for constructing a durable outdoor storage shelter for vehicles and equipment. |
Ask a question about this manual
Ask about setup, troubleshooting, compatibility, parts, safety, or missing instructions. Manuals+ will review the question and use this page’s manual context to help answer it.