1. Product Overview
The klarus XT11S is a high-performance, rechargeable tactical flashlight designed for reliability and versatility. It delivers a powerful 1100 lumens with a beam distance of up to 330 meters, making it suitable for a wide range of applications from outdoor adventures to tactical operations. Its intuitive dual tail switches and side switch provide quick access to various lighting modes, including Turbo, High, Medium, Low, Strobe, and SOS.
Key features include a 2600mAh rechargeable battery with extended runtime, convenient USB-C fast charging, and an intelligent battery capacity indicator. The flashlight also incorporates an Innovative Temperature Protection System (ITS) to prevent overheating and is constructed from durable aircraft-grade aluminum, offering IPX8 waterproofing and 1-meter impact resistance.

Image: The Klarus XT11S Tactical Flashlight, showcasing its sleek design and powerful LED emitter.
2. Setup and Charging
2.1 Battery Installation
The klarus XT11S typically comes with a 2600mAh 18650 Lithium-Ion battery. To install or replace the battery:
- Unscrew the tail cap of the flashlight counter-clockwise.
- Insert the 18650 battery with the positive (+) end facing towards the head of the flashlight.
- Screw the tail cap back on clockwise until it is securely tightened.
2.2 Initial Charging
Before first use, it is recommended to fully charge the battery. The XT11S features a convenient USB-C charging port.
- Locate the USB-C charging port on the side of the flashlight, usually protected by a rubber cover.
- Gently lift the rubber cover to expose the port.
- Connect the provided USB-C cable to the flashlight and plug the other end into a compatible USB power source (e.g., wall adapter, power bank, computer USB port).
- The battery indicator light will show the charging status:
- Red Light: Charging in progress.
- Green Light: Charging complete.
- Orange Light: Abnormal condition (e.g., charging error).
- Once charging is complete, disconnect the cable and securely close the rubber cover to maintain water resistance.

Image: Visual representation of the smart digital charging system and battery status indicators.

Image: The USB-C charging port with its protective cover, illustrating various compatible charging sources like PC/Laptop, Mains Socket, and Vehicle.

Image: Detailed view of the USB-C charging port and the battery indicator light, showing different charge levels (Green: 70%-100%, Orange: 30%-70%, Red Flashing: <10%).
3. Operating Instructions
The klarus XT11S features a versatile triple switch design for intuitive control.
3.1 Switch Functions
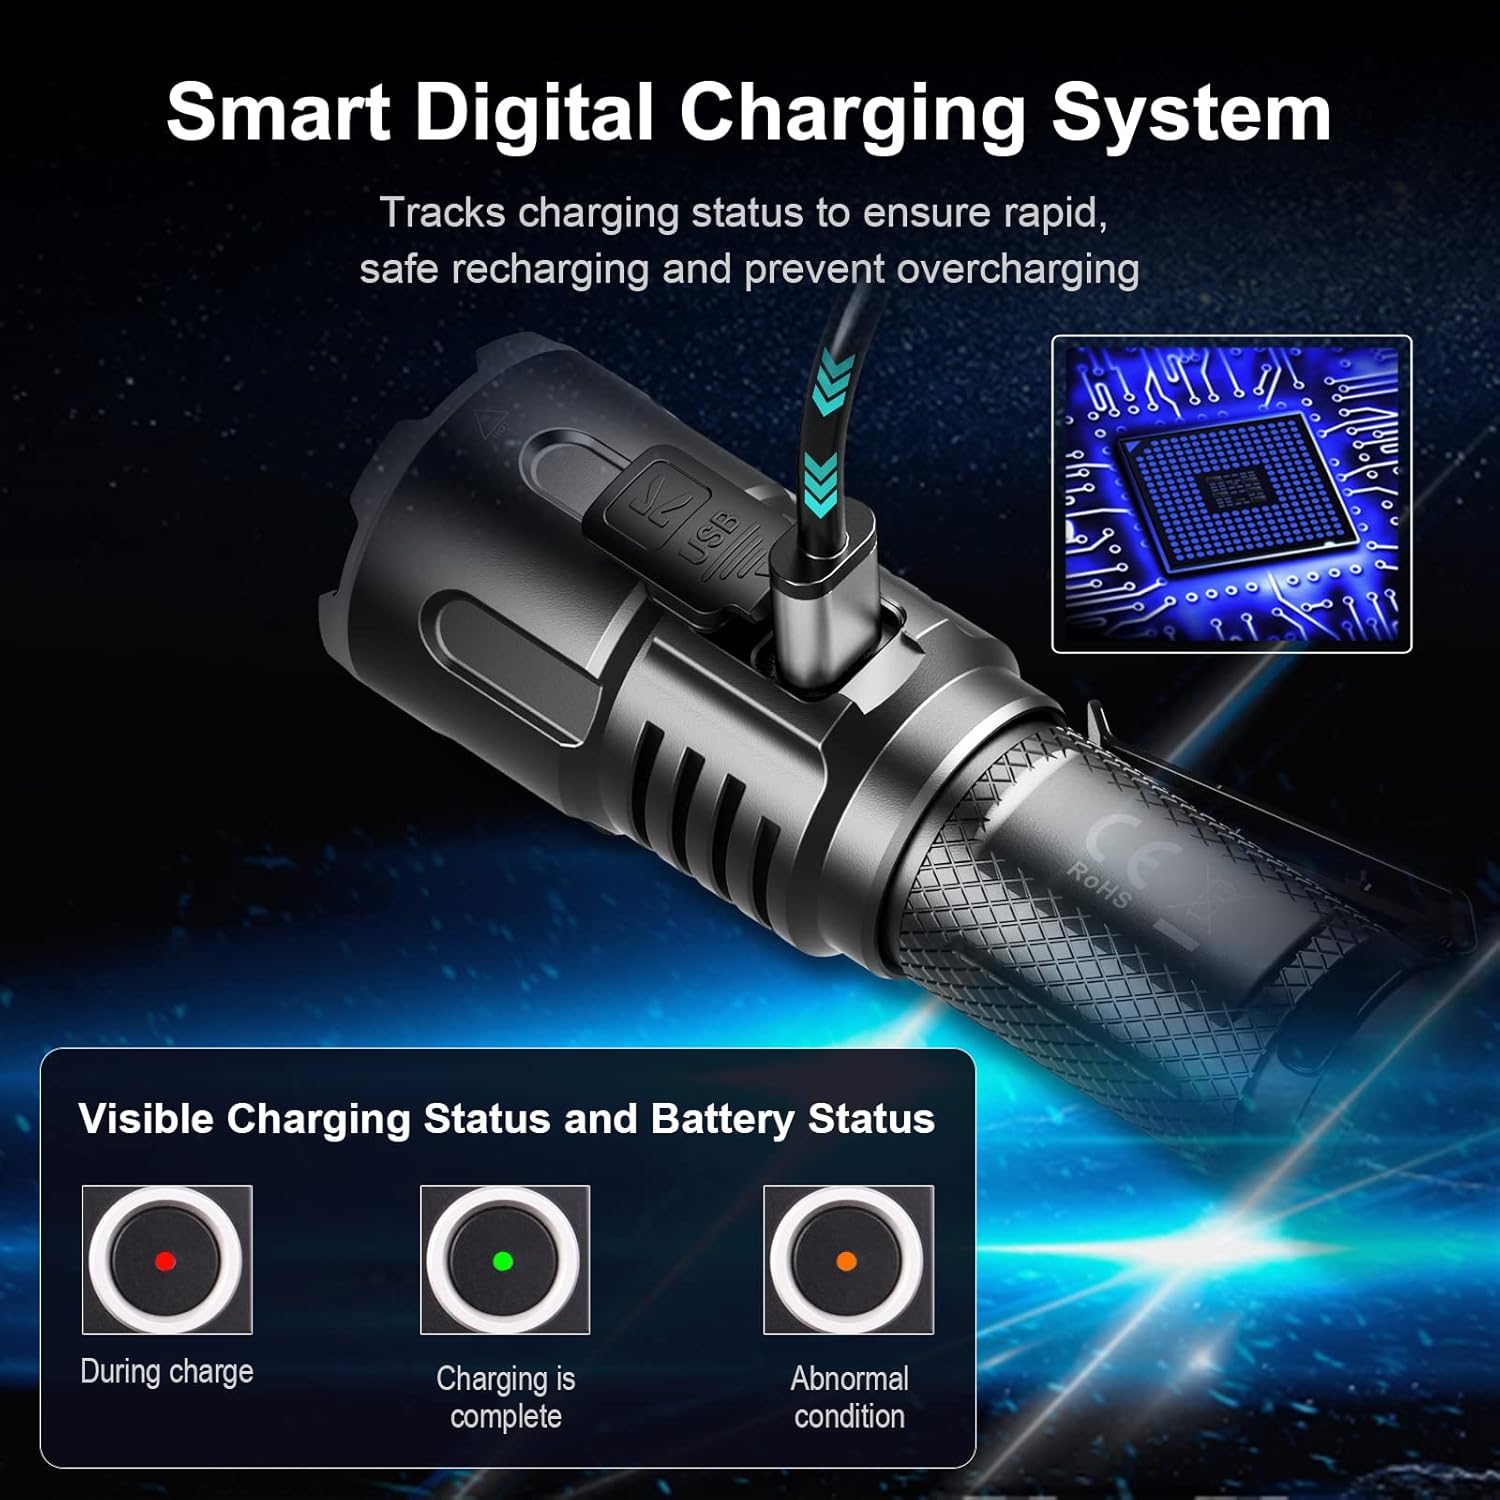
Image: Diagram illustrating the Primary Switch (tail cap), Mode Switch (tail cap), and Side Switch functions.
- Primary Switch (Tail Cap): Used for Momentary-ON, ON/OFF, and Constant-ON functions.
- Mode Switch (Tail Cap): Provides quick access to Instant Strobe or Instant Low-light, depending on the selected user setting.
- Side Switch: Controls ON/OFF, Mode Change, Instant Low-light, STROBE, SOS, LOCK Function, and Memorized Function.
3.2 Lighting Modes and Output
The XT11S offers multiple lighting modes to suit various needs:
- Turbo: 1100 Lumens (maximum output)
- High: 400 Lumens
- Medium: 100 Lumens
- Low: 10 Lumens
- Strobe: 1100 Lumens (for disorienting)
- SOS: 100 Lumens (for signaling)
The flashlight features a constant current output to prevent flickering, ensuring stable illumination.

Image: Comparison showing stable light from constant current versus flickering from PWM circuit.
3.3 Mode Operation Demonstration
Video: A demonstration of the Klarus XT11S flashlight's various lighting modes, including Turbo, High, Medium, Low, Strobe, and SOS, showcasing their respective lumen outputs and effects.
3.4 One-Handed Operation
The tactical design of the XT11S, with its enlarged contact area, allows for easy one-handed operation, even when wearing gloves.

Image: A person demonstrating one-handed operation of the Klarus XT11S flashlight while wearing gloves, highlighting its ergonomic design.
4. Maintenance
Proper maintenance ensures the longevity and optimal performance of your klarus XT11S flashlight.
- Cleaning: Regularly wipe the flashlight body with a clean, soft cloth. For stubborn dirt, use a slightly damp cloth. Do not use harsh chemicals or abrasive materials.
- Threads and O-rings: Periodically lubricate the threads and O-rings with silicone grease to maintain water resistance and smooth operation. Inspect O-rings for wear and tear and replace if necessary.
- Battery Care: Charge the battery regularly, even if the flashlight is not in frequent use, to prevent deep discharge. If storing for an extended period, charge the battery to approximately 50% and remove it from the flashlight. Store in a cool, dry place.
- Contacts: Ensure the battery contacts and the flashlight's internal contacts are clean and free of debris. Use a cotton swab with a small amount of rubbing alcohol if necessary.
5. Troubleshooting
If you encounter issues with your klarus XT11S, refer to the following common problems and solutions:
| Problem | Possible Cause | Solution |
|---|---|---|
| Flashlight does not turn on. | Low or depleted battery. Incorrect battery installation. Loose tail cap. Dirty contacts. | Charge the battery fully. Ensure battery is inserted with positive (+) end towards the head. Tighten the tail cap securely. Clean battery and flashlight contacts. |
| Light is dim or flickers. | Low battery. Poor contact. | Recharge the battery. Clean battery and flashlight contacts. Ensure tail cap is fully tightened. |
| Flashlight gets hot quickly. | Operating on Turbo mode for extended periods. | This is normal for high-output flashlights. The Intelligent Temperature Protection System (ITS) will automatically reduce output to prevent damage. Switch to a lower mode if prolonged use is required. |
| Charging indicator shows orange. | Abnormal charging condition. | Check the USB cable and power source. Ensure the battery is correctly inserted. If the issue persists, try a different battery or contact customer support. |
6. Specifications
Detailed specifications for the klarus XT11S Tactical Flashlight:
- Model: XT11S
- Light Source: LED
- Maximum Brightness: 1100 Lumens
- Maximum Beam Distance: 330 Meters
- Battery: 1 x 2600mAh 18650 Lithium-Ion (included)
- Charging: USB-C Fast Charging
- Maximum Runtime: Up to 260 hours (on Low mode)
- Material: Aircraft-grade Aluminum Alloy
- Water Resistance: IPX8 (submersible up to 2 meters)
- Impact Resistance: 1 Meter
- Dimensions: Approximately 1"D x 1"W x 3.93"H (25.4mm x 34.9mm x 139mm)
- Weight: Approximately 4.4 ounces (124.3 grams) excluding battery
- Special Features: Dual Tail Switches, Side Switch, Intelligent Temperature Protection System (ITS), Battery Capacity Indicator.

Image: The Klarus XT11S flashlight next to a smartphone, illustrating its compact and lightweight dimensions (139mm length, 34.9mm head diameter, 25.4mm body diameter).

Image: The Klarus XT11S flashlight submerged in water, demonstrating its IPX8 waterproof rating, suitable for use in severe weather conditions.

Image: The Klarus XT11S flashlight next to metalworking tools, emphasizing its construction from high-quality aviation aluminum alloy for strength and durability.

Image: The Klarus XT11S flashlight with icons indicating its IPX8 waterproof rating (up to 2m underwater) and 1-meter drop protection, highlighting its resilience in harsh environments.

Image: A collage of images showing the Klarus XT11S flashlight being used in various scenarios such as camping, tactical operations, walking, repairing, and duty, demonstrating its versatility.
7. Warranty and Support
klarus products are manufactured to high quality standards. For specific warranty details, please refer to the warranty card included with your product or visit the official klarus website. Generally, klarus offers a limited warranty against defects in materials and workmanship.
For technical support, troubleshooting assistance beyond this manual, or warranty claims, please contact klarus customer service through their official website or the retailer from whom you purchased the product. Keep your proof of purchase for warranty purposes.
Note: The warranty description provided in the product data was minimal ("1."). Please consult the official Klarus website or product packaging for comprehensive warranty terms and conditions.