1. Introduction
Welcome to your GNCGarden Hunter Eco Logic ELC-401I-E Indoor Irrigation Programmer. This manual provides detailed instructions for installation, operation, and maintenance of your new irrigation controller. Please read this manual thoroughly before use to ensure proper functioning and longevity of the product.
2. Safety Information
Please observe the following safety precautions:
- Ensure the power supply matches the specifications (230V AC input, 24V AC output).
- Do not expose the unit to direct water spray or extreme weather conditions. This is an indoor programmer.
- Disconnect power before performing any wiring or maintenance.
- Keep out of reach of children.
- Do not attempt to repair the unit yourself. Contact qualified personnel for service.
3. Package Contents
Verify that all items are present in the package:
- Hunter Eco Logic ELC-401I-E Irrigation Programmer Unit
- 24V AC Transformer (Input: 230V AC, Output: 24V AC, 0.625A)
- User Manual (This document)
- Mounting Hardware (Screws, anchors)

Image: Hunter Eco Logic ELC-401I-E Irrigation Programmer Unit
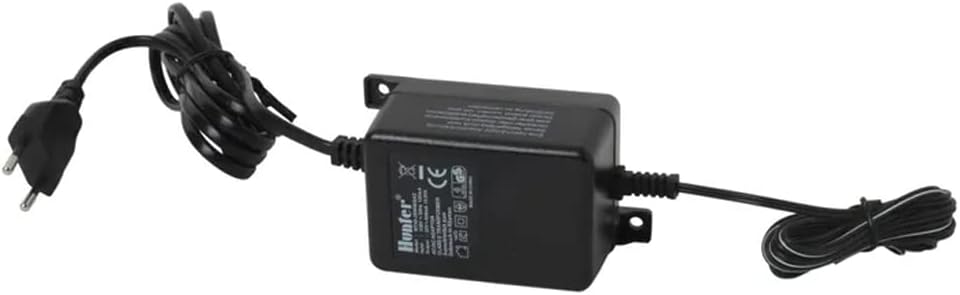
Image: 24V AC Transformer
4. Setup and Installation
4.1 Mounting the Controller
Choose a suitable indoor location away from direct sunlight, heat sources, and moisture. Use the provided mounting hardware to secure the controller to a wall.
4.2 Wiring the Controller
Follow these steps for proper wiring:
- Power Connection: Connect the 24V AC output from the transformer to the terminals labeled "24VAC" on the controller.
- Valve Wiring: Connect one wire from each solenoid valve to its corresponding station terminal (e.g., "1", "2", "3", etc.). Connect the common wire from all solenoids to the "C" (Common) terminal.
- Sensor Connection (Optional): If using a rain or soil sensor, connect it to the "SEN" terminals.

Image: Controller back panel with wiring terminals

Image: Wiring diagram for valves and controller

Image: Controller with cover open, showing terminals

Image: Controller mounted, showing sensor compatibility
5. Operating Instructions
5.1 Initial Setup
Upon first power-up, you will need to set the current date and time using the navigation buttons on the controller.
Image: Controller display and control buttons
5.2 Programming Watering Schedules
The Eco Logic controller offers two independent programs (Program A and Program B). Each program can have up to 4 start times.
- Setting Start Times: Navigate to "Start Times" on the display and use the buttons to set the desired start times for each program.
- Setting Run Times: Navigate to "Run Times" and set the duration for each station within the program. Each station can run for up to 4 hours.
- Water Days: Select specific days of the week, odd/even days, or interval watering based on your irrigation needs.
5.3 QuickCheck Technology
The integrated QuickCheck technology allows for simple diagnosis of potential wiring faults in the irrigation field. It helps detect and troubleshoot issues efficiently by indicating which station might have a problem.
5.4 Short-Circuit Protection
The system detects wiring faults and, in case of a short circuit, prevents damage to the system at the affected station bridge without affecting the overall operation of the irrigation system. This protects your controller and connected components.
5.5 Seasonal Adjustment / Suspend Watering
The automatic off-season watering suspension feature allows you to program the system to pause watering for up to 7 days. This is useful for seasonal changes, during rainy periods, or when irrigation is not needed.
6. Maintenance
To ensure optimal performance and longevity of your irrigation programmer, follow these maintenance guidelines:
- Regularly check wiring connections for corrosion or damage. Ensure all terminals are securely fastened.
- Keep the controller clean and free from dust and debris. Use a soft, dry cloth for cleaning.
- Ensure the power supply is stable and free from fluctuations.
- There are no user-serviceable parts inside the controller. Do not attempt to open the casing beyond accessing the wiring terminals.
7. Troubleshooting
If you encounter issues with your irrigation programmer, refer to the table below for common problems and their solutions.
| Problem | Possible Cause | Solution |
|---|---|---|
| Controller not powering on | No power from transformer; faulty transformer; loose connection | Check power outlet; verify transformer output; secure connections. |
| Specific zone not watering | Faulty solenoid; wiring issue to the valve; program error for that zone | Use QuickCheck to diagnose wiring; check solenoid for functionality; verify program settings for the specific zone. |
| System short circuit detected | Wiring fault in a station or common wire | Identify and repair the wiring fault using QuickCheck. Isolate the problematic station. |
| Difficulty programming | User unfamiliarity with interface or sequence | Refer to the "Operating Instructions" section (Section 5) and follow the steps carefully. Practice setting programs. |
For further assistance, please contact GNCGarden customer support.
8. Specifications
- Model: Hunter Eco Logic ELC-401I-E
- Input Voltage (Transformer): 230V AC
- Output Voltage (Controller): 24V AC, 0.625A
- Programs: 2 independent programs
- Start Times per Program: Up to 4
- Max Run Time per Station: Up to 4 hours
- Dimensions (Controller): Approximately 30 x 15 x 10 cm (11.8 x 5.9 x 3.9 inches)
- Weight: 950 grams (2.09 lbs)
- Features: QuickCheck Technology, Short-Circuit Protection, Seasonal Adjustment
9. Warranty and Support
This product comes with a standard manufacturer's warranty. For warranty claims, technical support, or inquiries regarding spare parts availability, please contact GNCGarden customer service. Refer to your purchase receipt for specific warranty terms and duration.
Contact Information: Please visit the GNCGarden official website or refer to your product packaging for the most up-to-date contact details.