1. Introduction
Thank you for choosing the XTRONS TX121L-TV Car Navigation System. This manual provides detailed instructions for the installation, operation, and maintenance of your new device. Please read this manual thoroughly before use to ensure proper functionality and to maximize your user experience.
Key Features:
- Upgraded Android 13 Operating System
- 10.1-inch QLED Touch Screen with 1280*720 HD Resolution
- Rotatable Monitor for Horizontal and Vertical Display
- Built-in 4G Module with SIM Card Support
- Wireless Apple CarPlay & Wireless/Wired Android Auto
- Screen Mirroring Functionality
- Multi-Window Display for simultaneous app usage
- Powerful 8-Core Processor with 4GB RAM + 64GB ROM
- Bluetooth 5.0 for Hands-Free Calling and Audio Streaming
- Full-Seg Tuner Compatible (external tuner required for TV viewing)
- Supports 1080P and 2K Video Playback
2. Product Overview
The XTRONS TX121L-TV system is designed for seamless integration into your vehicle's dashboard, offering advanced navigation and entertainment features.
Components:

Figure 2.1: Main unit, remote control, and external tuner for the XTRONS TX121L-TV system.
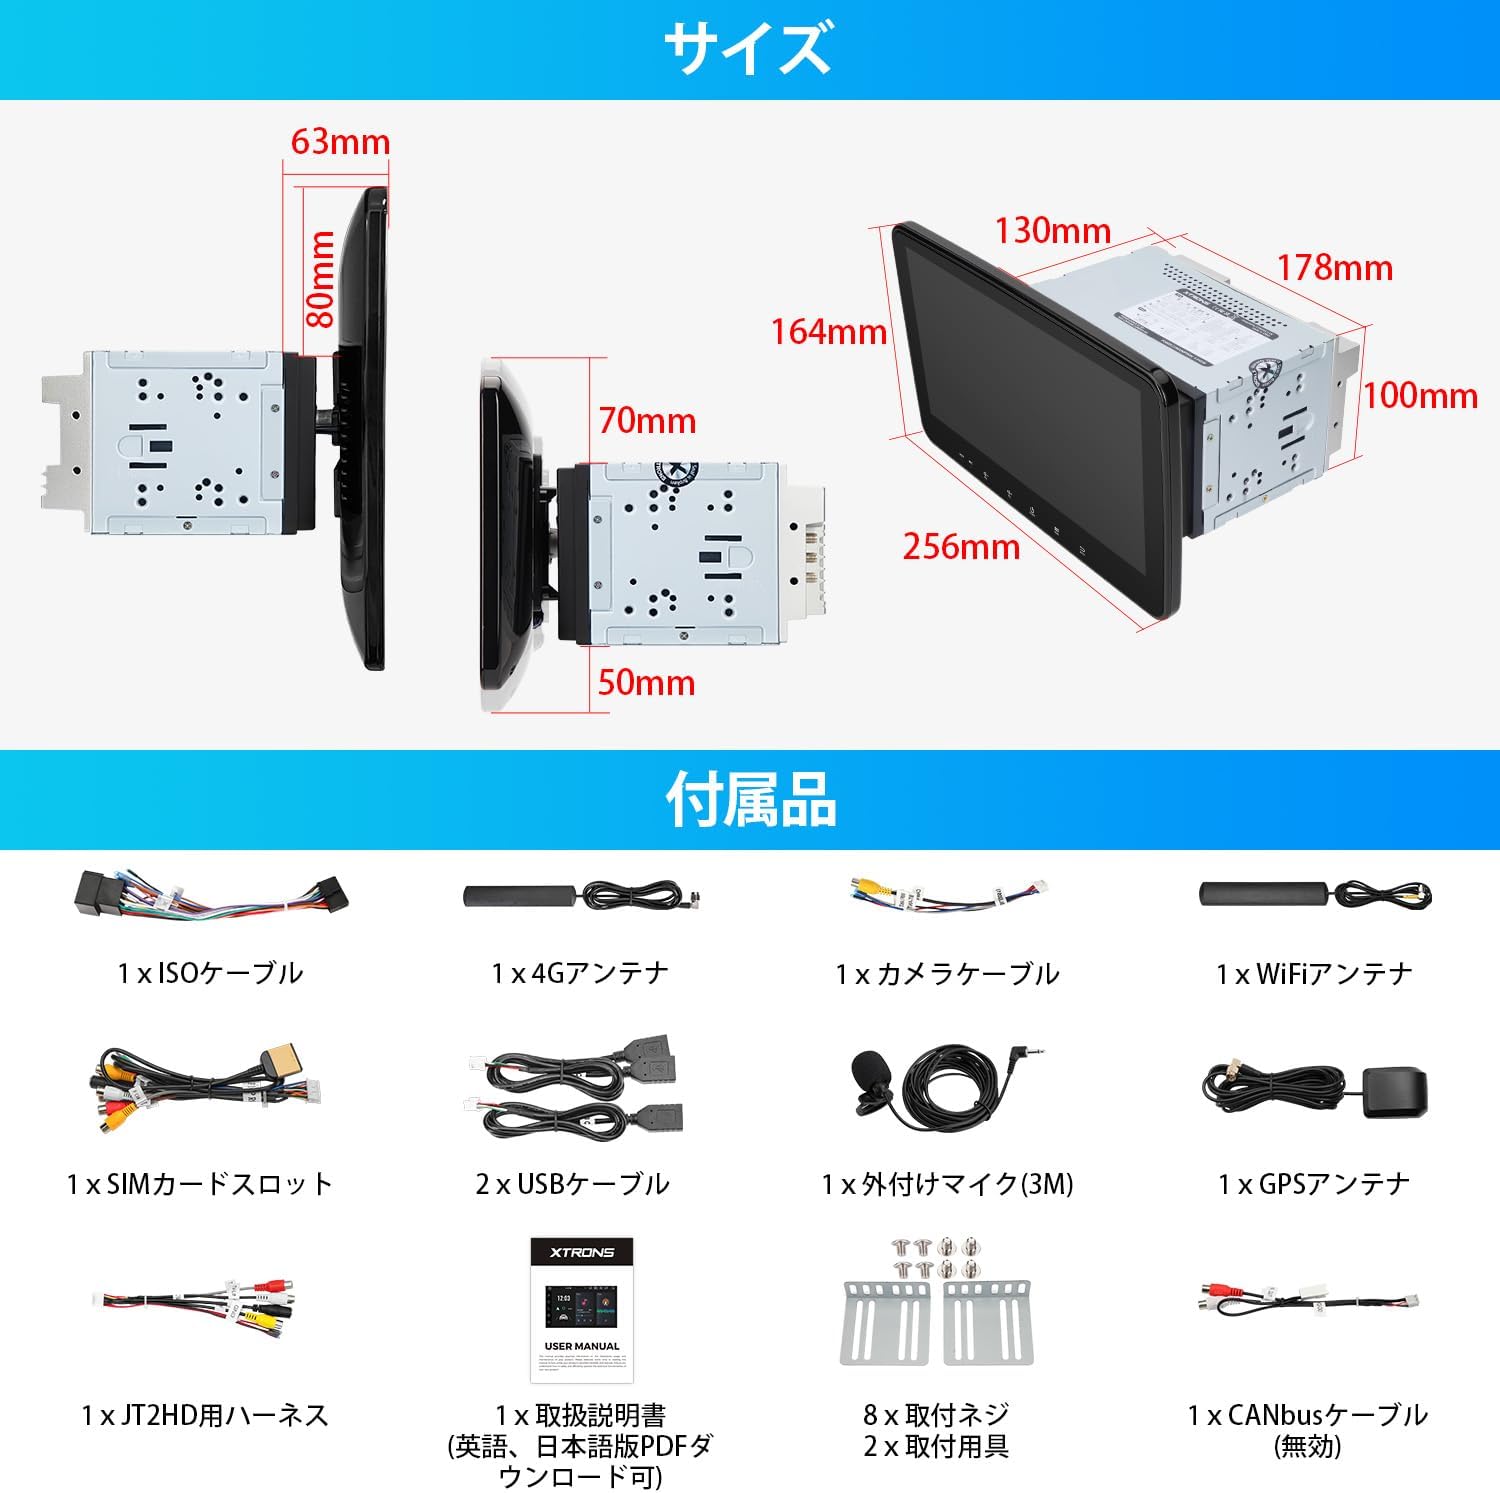
Figure 2.2: Detailed diagram illustrating the dimensions of the main unit and a comprehensive list of included accessories such as cables, antennas, and mounting hardware.
Controls and Interface:
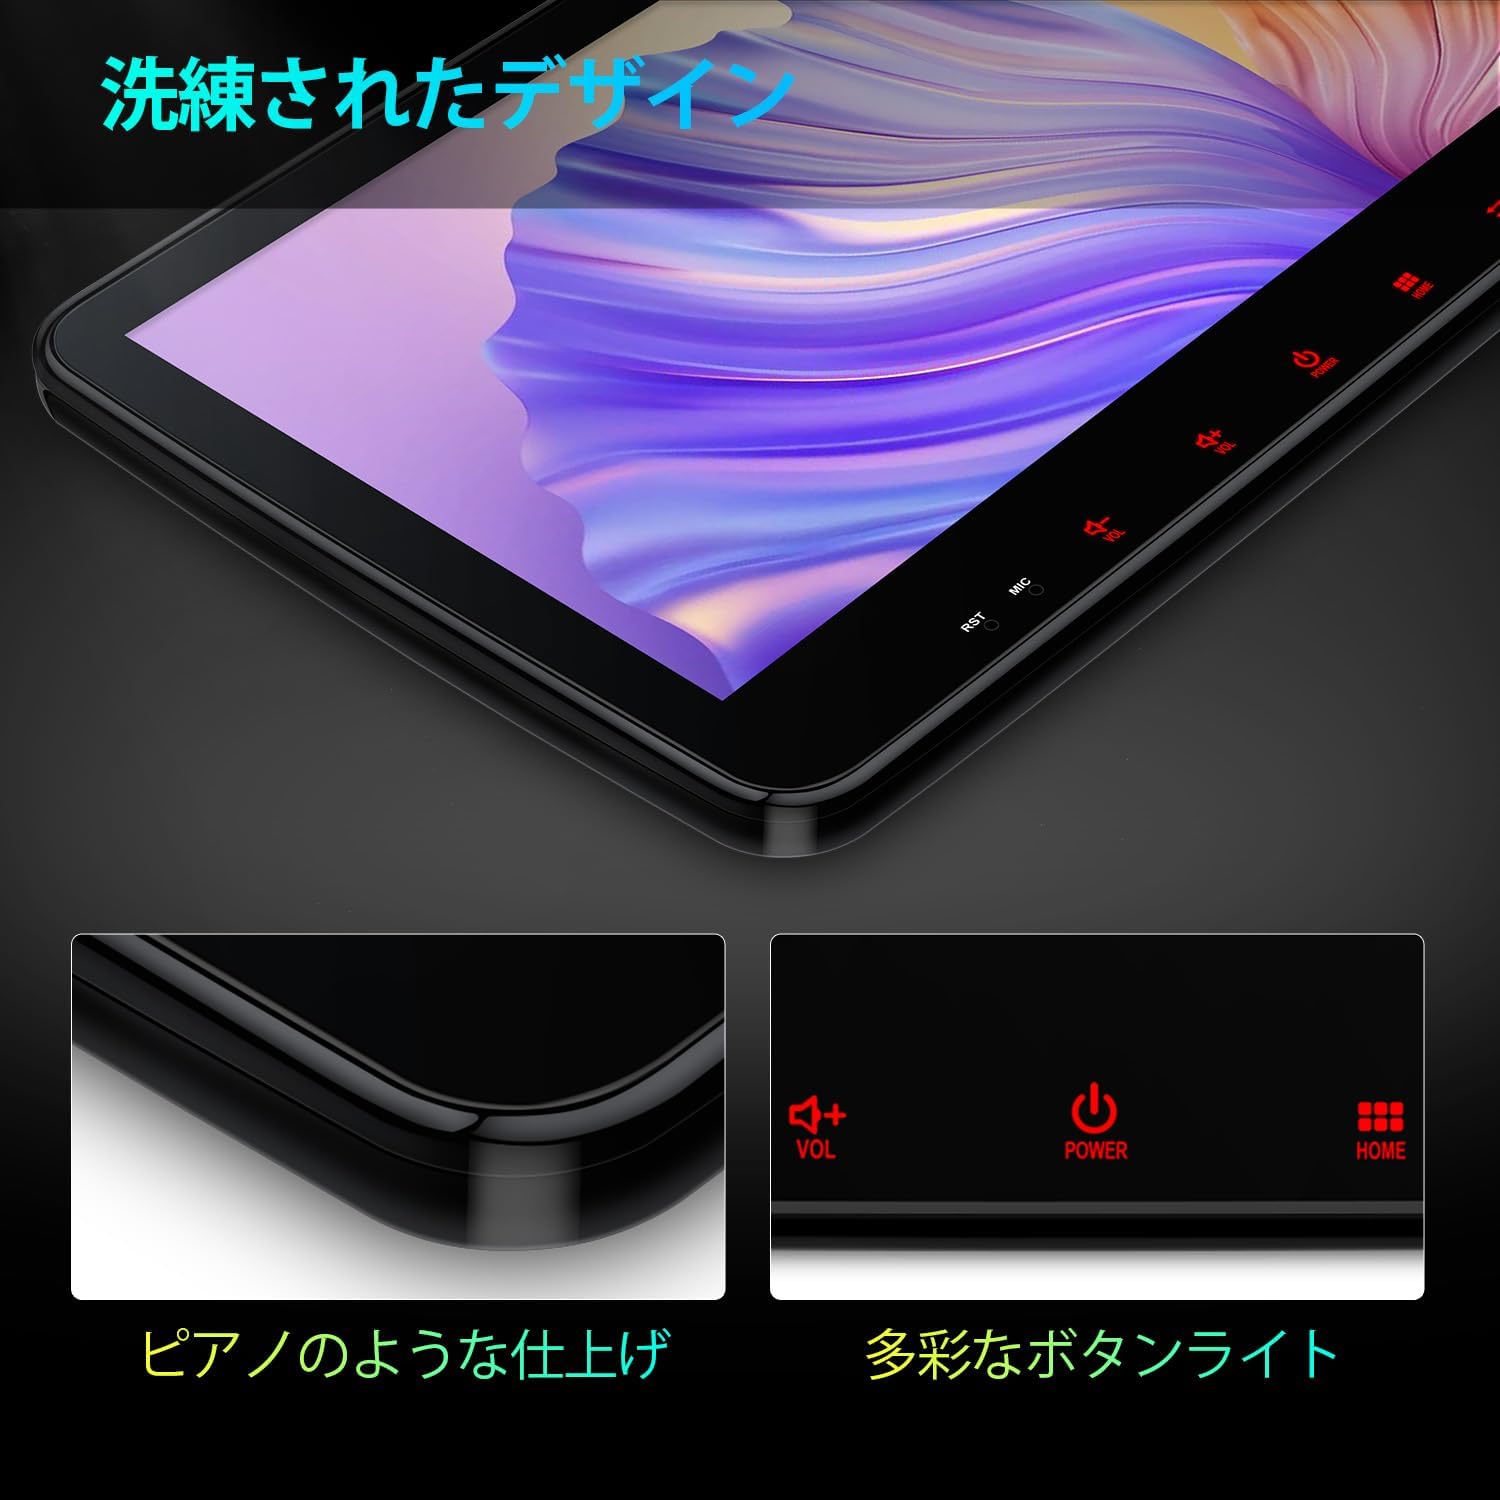
Figure 2.3: The device features a sleek design with a piano-like finish and multi-color button illumination for enhanced visibility and aesthetics.
The system features a responsive QLED touch screen for primary interaction, complemented by physical buttons for essential functions like volume, power, and home access. The user interface is designed for intuitive navigation, with a dark background to minimize distraction while driving.
3. Setup
3.1 Installation:
Follow these steps to install the monitor. Ensure the ACC wiring is not powered during installation.
- Connect the cable from the main unit to the monitor.
- Using both hands, pull the two clips on the back of the monitor outwards.
- Align the back of the monitor with the bracket on the main unit.
- Slide the monitor down from the top of the main unit's bracket and push the clips into place at the appropriate position to complete the installation.

Figure 3.1: Visual guide for the 4-step monitor installation process.
3.2 Initial Configuration:
After installation, power on the device. You may need to set up the language, time zone, and connect to a network.
SIM Card Insertion:
The unit features a built-in 4G communication module. Insert a micro SIM card into the dedicated slot to access the internet directly from the unit. This allows for easy and secure internet access.

Figure 3.2: Illustration of the built-in 4G module and SIM card slot. Note that a SIM card needs to be purchased separately.
Network Connection:
You can connect to the internet via the built-in 4G module (with SIM card), Wi-Fi tethering, or USB tethering. Once connected, you can use the built-in Play Store to install applications like Google Maps and YouTube.
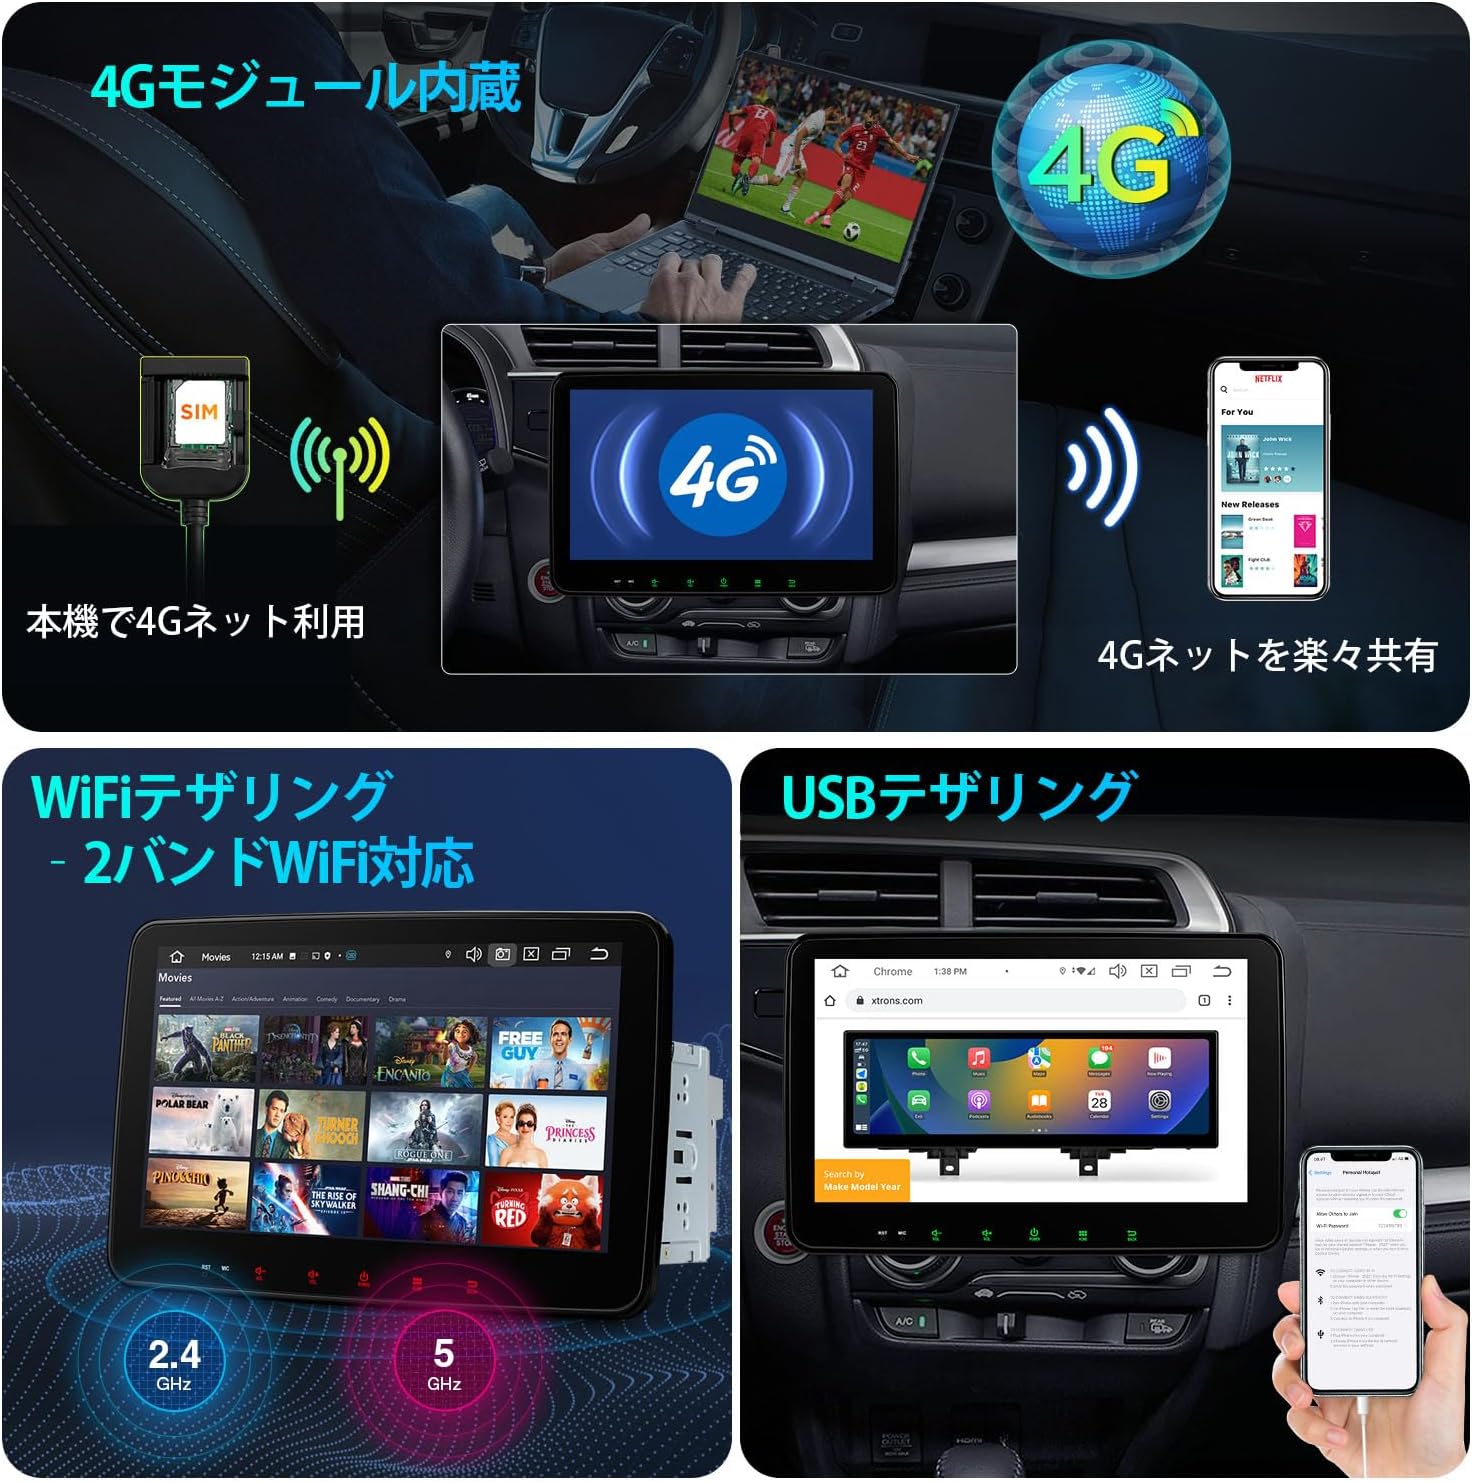
Figure 3.3: Various methods for connecting the device to the internet, including 4G, Wi-Fi tethering, and USB tethering.
4. Operating Instructions
4.1 Display Features:
The 10.1-inch QLED screen offers a high-resolution display (1280x720 pixels) for vivid images and videos. The monitor is rotatable, allowing you to switch between horizontal and vertical display modes for optimal viewing of navigation, videos, or other content.

Figure 4.1: The rotatable monitor design allows for both horizontal and vertical viewing, enhancing versatility.

Figure 4.2: The monitor can be tilted up to 30 degrees and rotated horizontally up to 40 degrees, with vertical movement within a 5cm range, allowing for free adjustment to the most comfortable viewing angle.
4.2 Smartphone Integration:
CarPlay & Android Auto:
The system supports wireless Apple CarPlay and both wireless and wired Android Auto. This allows you to easily connect your iPhone or Android smartphone to the navigation unit and operate phone calls, music, and maps directly from the car's display. Please note that video apps are not supported via CarPlay/Android Auto.
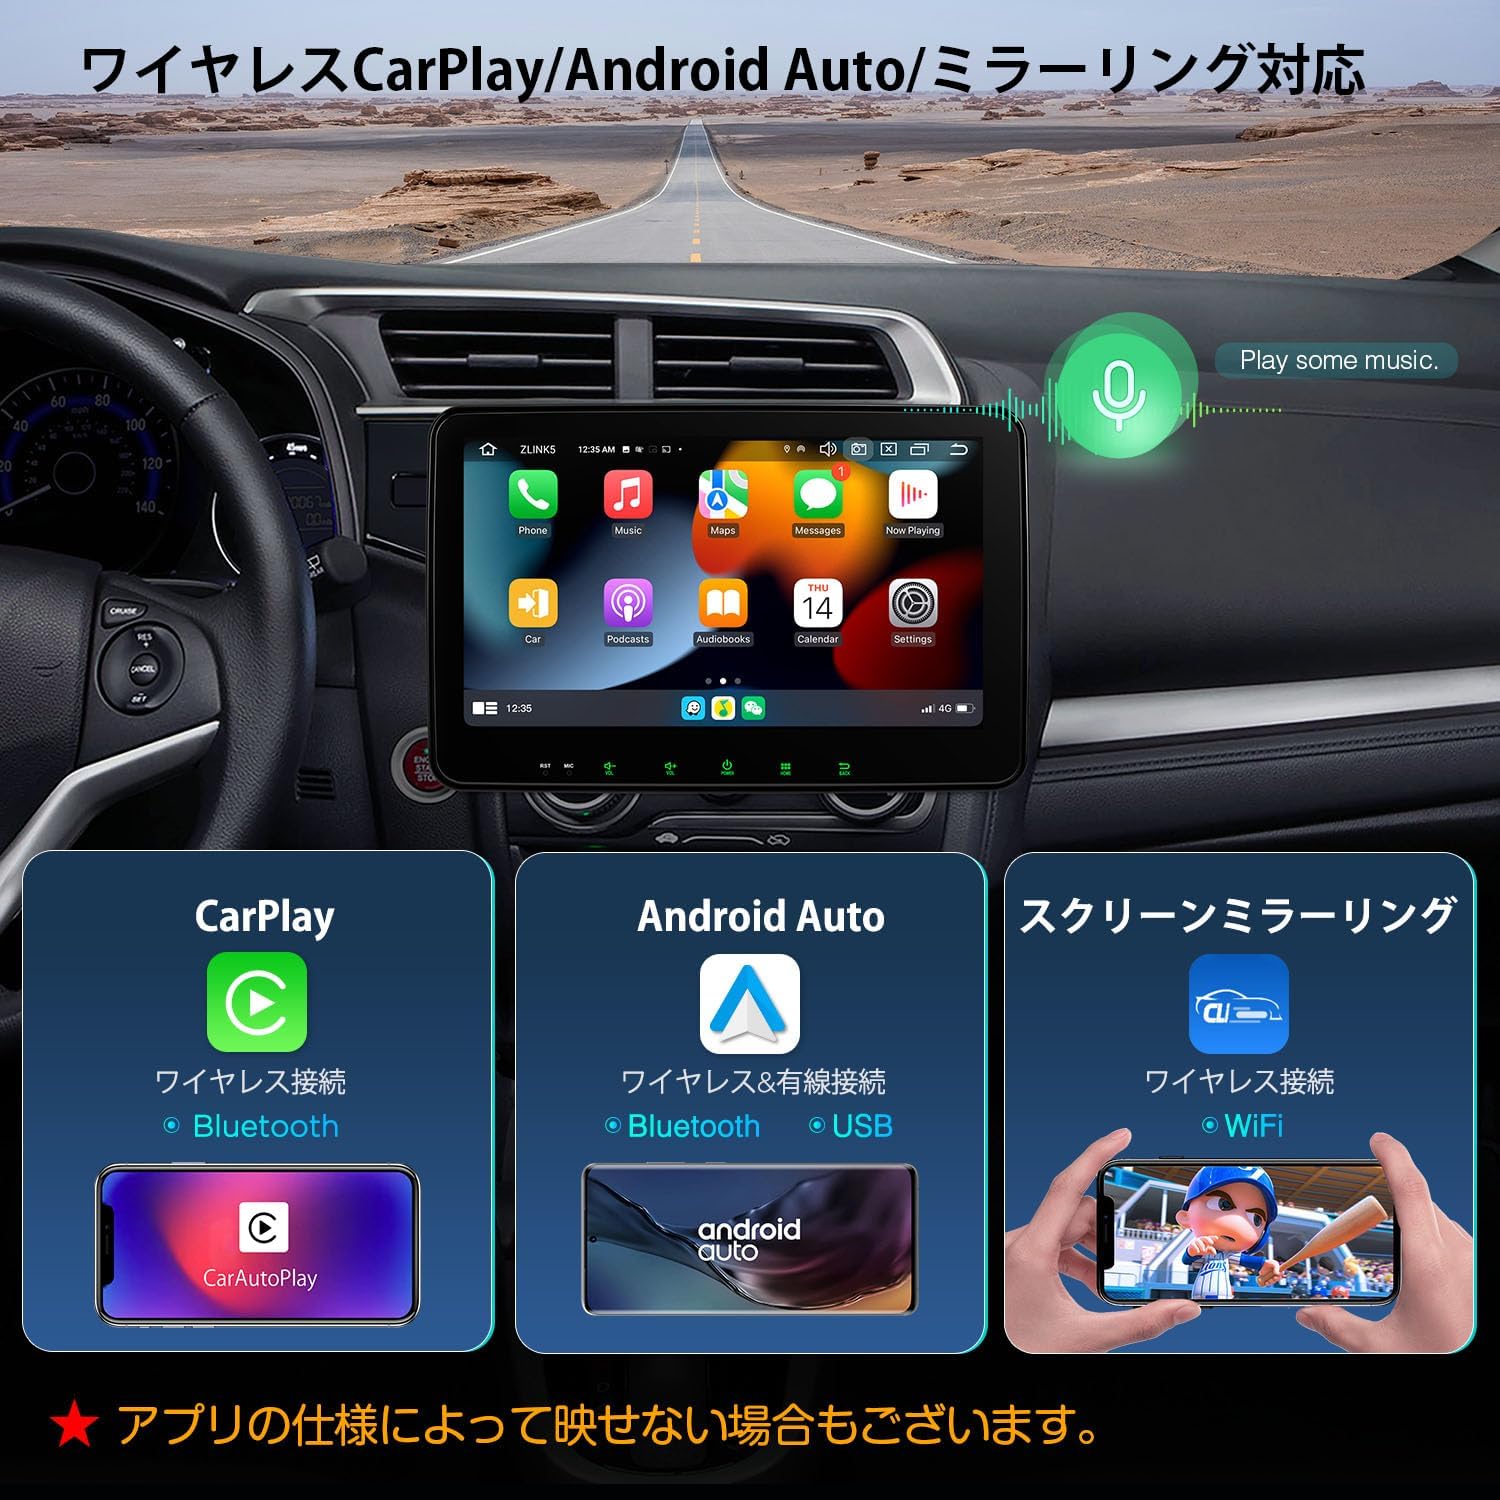
Figure 4.3: Connectivity options for wireless CarPlay, wireless/wired Android Auto, and wireless screen mirroring.

Figure 4.4: Detailed view of wireless CarPlay and wireless/wired Android Auto connections.
Screen Mirroring:
Use the built-in Carbilink app to mirror photos, music, and videos from your smartphone directly to the navigation unit's screen.
4.3 Multimedia and Connectivity:
Bluetooth 5.0:
Enjoy stable and fast connections for hands-free calls and Bluetooth audio streaming. The system supports phone synchronization and call history display.

Figure 4.5: Bluetooth 5.0 provides stable and fast connections for hands-free calling and music playback.
Full-Seg TV (Optional):
By connecting an external digital TV tuner (e.g., XTRONS JT2HD), you can enjoy TV programs on the 10.1-inch screen. The system supports touch-linked operation with compatible tuners.

Figure 4.6: Instructions for connecting an external digital TV tuner to enable TV viewing on the unit.

Figure 4.7: The XTRONS touch-linked cable allows for TV operation directly from the touch panel when connected to a compatible tuner. Note: Using this cable may disable remote control operation for the TV, limiting control to touch only.
Multi-Window Display:
The system supports running two applications simultaneously on the screen, enhancing multitasking capabilities.
5. Maintenance
To ensure the longevity and optimal performance of your XTRONS TX121L-TV system, follow these general maintenance guidelines:
- Cleaning the Screen: Use a soft, lint-free cloth to gently wipe the screen. For stubborn smudges, slightly dampen the cloth with water or a screen-safe cleaner. Avoid harsh chemicals or abrasive materials.
- General Cleaning: Keep the unit free from dust and debris. Use a soft brush or compressed air to clean vents and ports.
- Temperature: Avoid exposing the unit to extreme temperatures, both hot and cold, as this can affect performance and lifespan.
- Liquid Contact: Prevent any liquids from entering the unit. In case of accidental spills, immediately power off the device and consult a professional.
6. Troubleshooting
If you encounter any issues with your XTRONS TX121L-TV system, please refer to the following common troubleshooting tips. If the problem persists, contact customer support.
- No Power: Check all power connections and ensure the vehicle's ignition is on. Verify fuses if necessary.
- No Sound: Check volume levels, audio source selection, and speaker connections. Ensure the mute function is not activated.
- Touch Screen Unresponsive: Try restarting the unit. Ensure the screen is clean and free from obstructions.
- GPS Signal Lost: Ensure the GPS antenna is properly installed and has a clear view of the sky. Move to an open area if in a covered location.
- Bluetooth Connection Issues: Ensure Bluetooth is enabled on both the unit and your smartphone. Try unpairing and re-pairing the devices.
- App Freezing/Crashing: Close and reopen the app. If the issue persists, try clearing the app's cache or reinstalling it.
- Poor 4G/WiFi Connectivity: Check SIM card insertion and data plan. Ensure you are within network coverage. For WiFi, check router settings and signal strength.
For more detailed troubleshooting or issues not listed here, please refer to the comprehensive PDF manual available for download or contact XTRONS customer support.
7. Specifications
| Feature | Specification |
|---|---|
| Screen Size | 10.1 inches |
| Display Type | QLED |
| Tuner Type | Full-Seg (compatible) |
| Total USB Ports | 2 |
| Available Memory Card Slots | 1 MicroSD slot |
| Map Type | Supports online maps like Google Maps |
| Product Dimensions | 17.8 x 12 x 10 cm; 4 kg |
| Manufacturer Reference | TX121L-TV |
| Manufacturer | UG ELECTRONICS |
| Brand | XTRONS |
| Model Name | TX122L TV (Note: Product listing shows TX121L-TV, but specifications list TX122L TV) |
| Compatible Vehicle Type | Passenger Car |
| Connectivity Technology | Bluetooth |
| Included Components | Main unit, cables, etc. |
| Audio Output Mode | Stereo |
| Mounting Type | Dashboard Mount |
Optional Accessories:

Figure 7.1: Various optional accessories available for the system, such as cameras (CAM005Y/CAM009S/CAM721/CAM1080), OBD2/OBD04 for vehicle data, DVR (DVR028S/DVR027) for driving recording, and USB RCA adapters for video output.
Note: This model does not have built-in video output functionality. For video output, a separately sold USB RCA adapter is required.
8. Warranty and Support
XTRONS products come with a 1-year warranty. We are committed to providing high-quality products and excellent customer service.
User Manual Download:
A PDF version of the Japanese user manual is available for download from the official XTRONS community website:
Download Japanese User Manual (PDF)
Customer Support:
If you have any questions, concerns, or require technical assistance, please do not hesitate to contact us via email. Our support team will be happy to assist you.


