Important Safety Instructions
WARNING: RISK OF ELECTRIC SHOCK. Disconnect power at the fuse box or circuit breaker before installation or servicing.
- Always turn off the main power supply at the circuit breaker before beginning installation.
- Consult a qualified electrician if you are not familiar with electrical wiring.
- Use only E12 base bulbs. Do not exceed the maximum wattage of 60 watts per bulb.
- Ensure all connections are secure and properly insulated.
- Do not install this fixture in wet locations unless specifically rated for such use. This product is rated for indoor use.
- Handle glass components with care to prevent breakage.
Product Overview
The Lamomo 3019C-3B Semi Flush Mount Ceiling Light combines vintage aesthetics with modern functionality, designed to illuminate and enhance various indoor spaces.
Features
- Upgraded Large Size: Measuring 30.9 x 19.8 x 11.7 cm, designed to brighten every corner of your room.
- Semi-Flush Design & Modern Look: Features a unique hand-blown vintage glass shade with an engraved floral design and a brushed metal base.
- Unique 3-Bulb E12 Socket: Accommodates three E12 base bulbs (not included) up to 60 watts each, providing wider and brighter illumination. Recommended bulb length is no longer than 4 inches (10 cm).
- Wide Applications: Ideal for living rooms, hallways, bedrooms, foyers, kitchens, mudrooms, stairwells, closets, kids' rooms, dining rooms, and craft rooms. Also suitable for commercial areas like bars, cafes, hotels, and restaurants.
- Easy Installation: Includes all mounting accessories and clear 3-step guidance for quick setup. An extra spare mounting kit is provided.
Components
- Mounting Hardware (included)
- Ceiling Canopy
- Fixture Body with 3 E12 Sockets
- Glass Shade
- Mounting Screws
- Wire Nuts
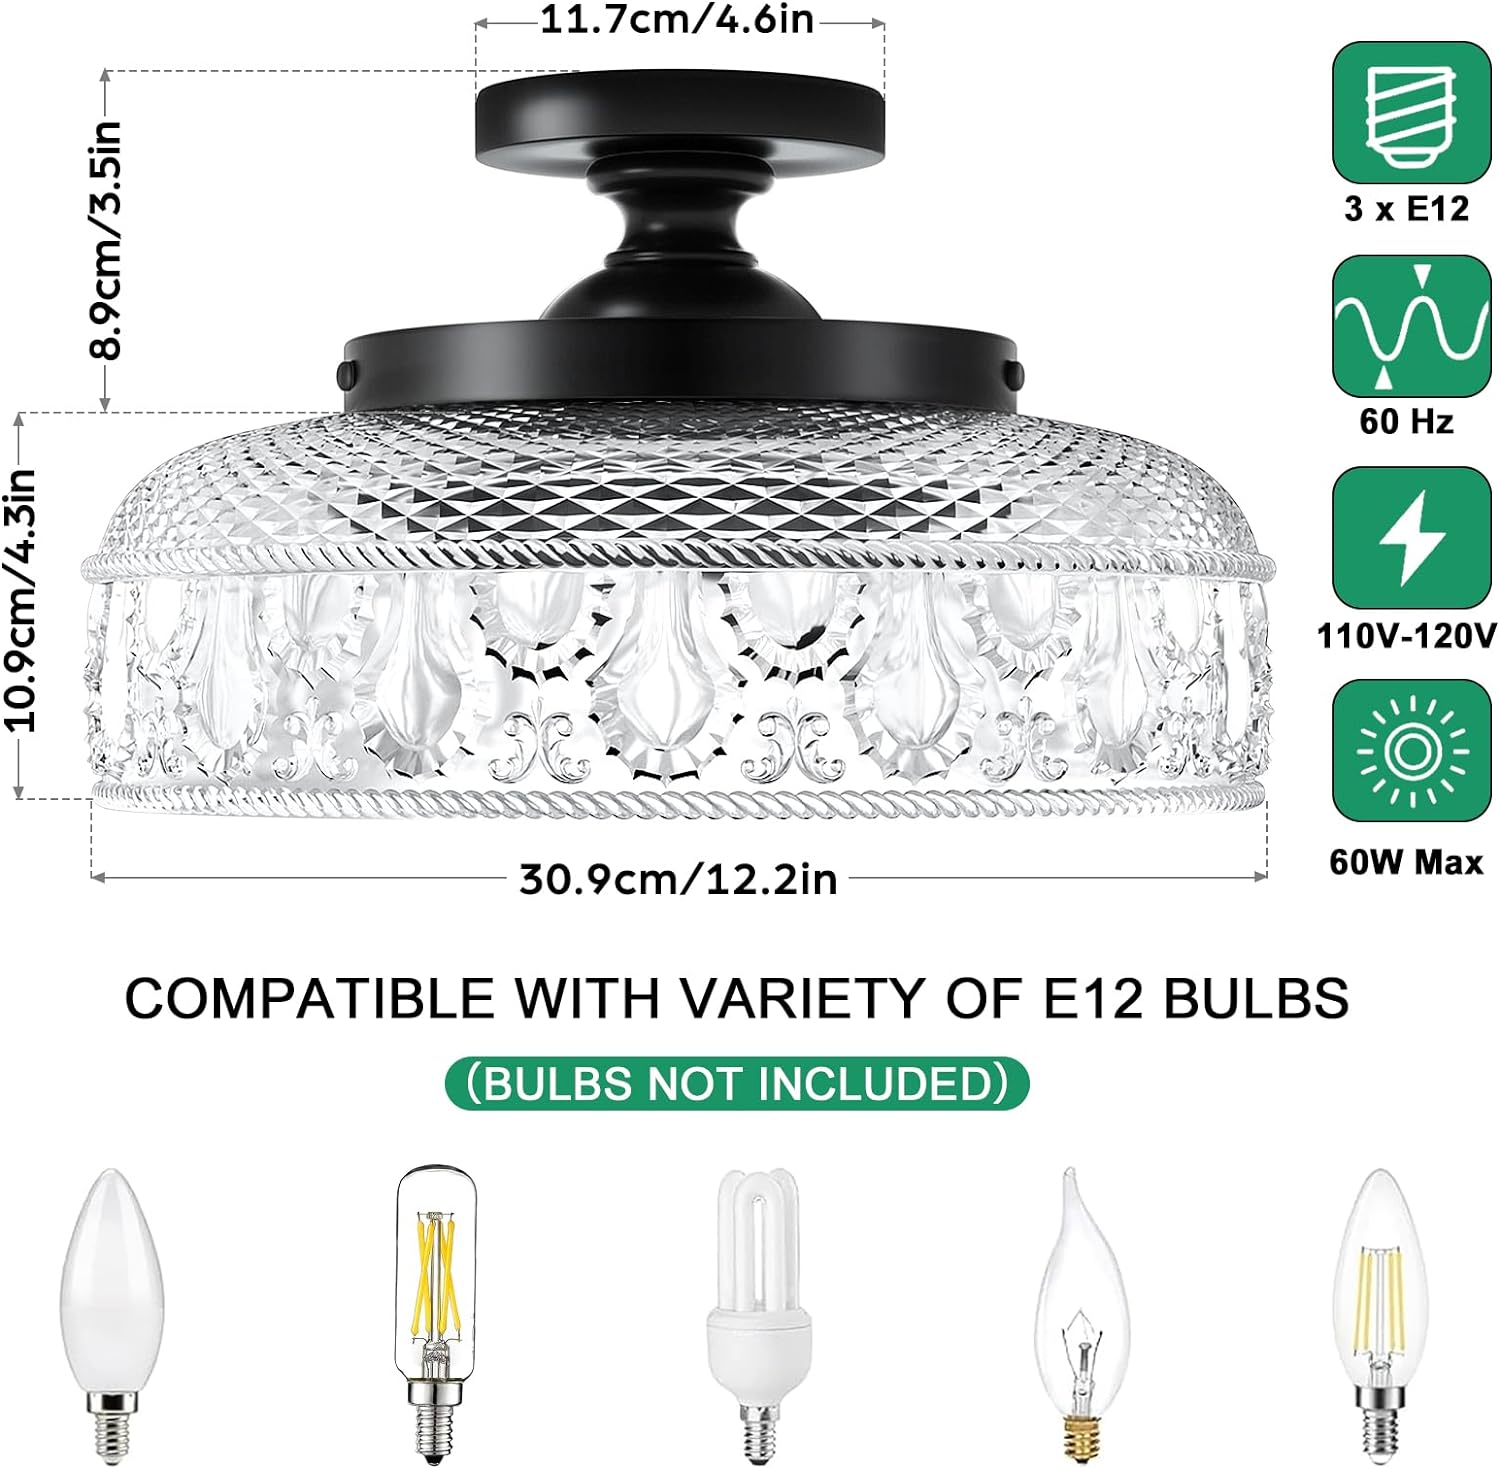
Figure 1: Overall view of the Lamomo Semi Flush Mount Ceiling Light.
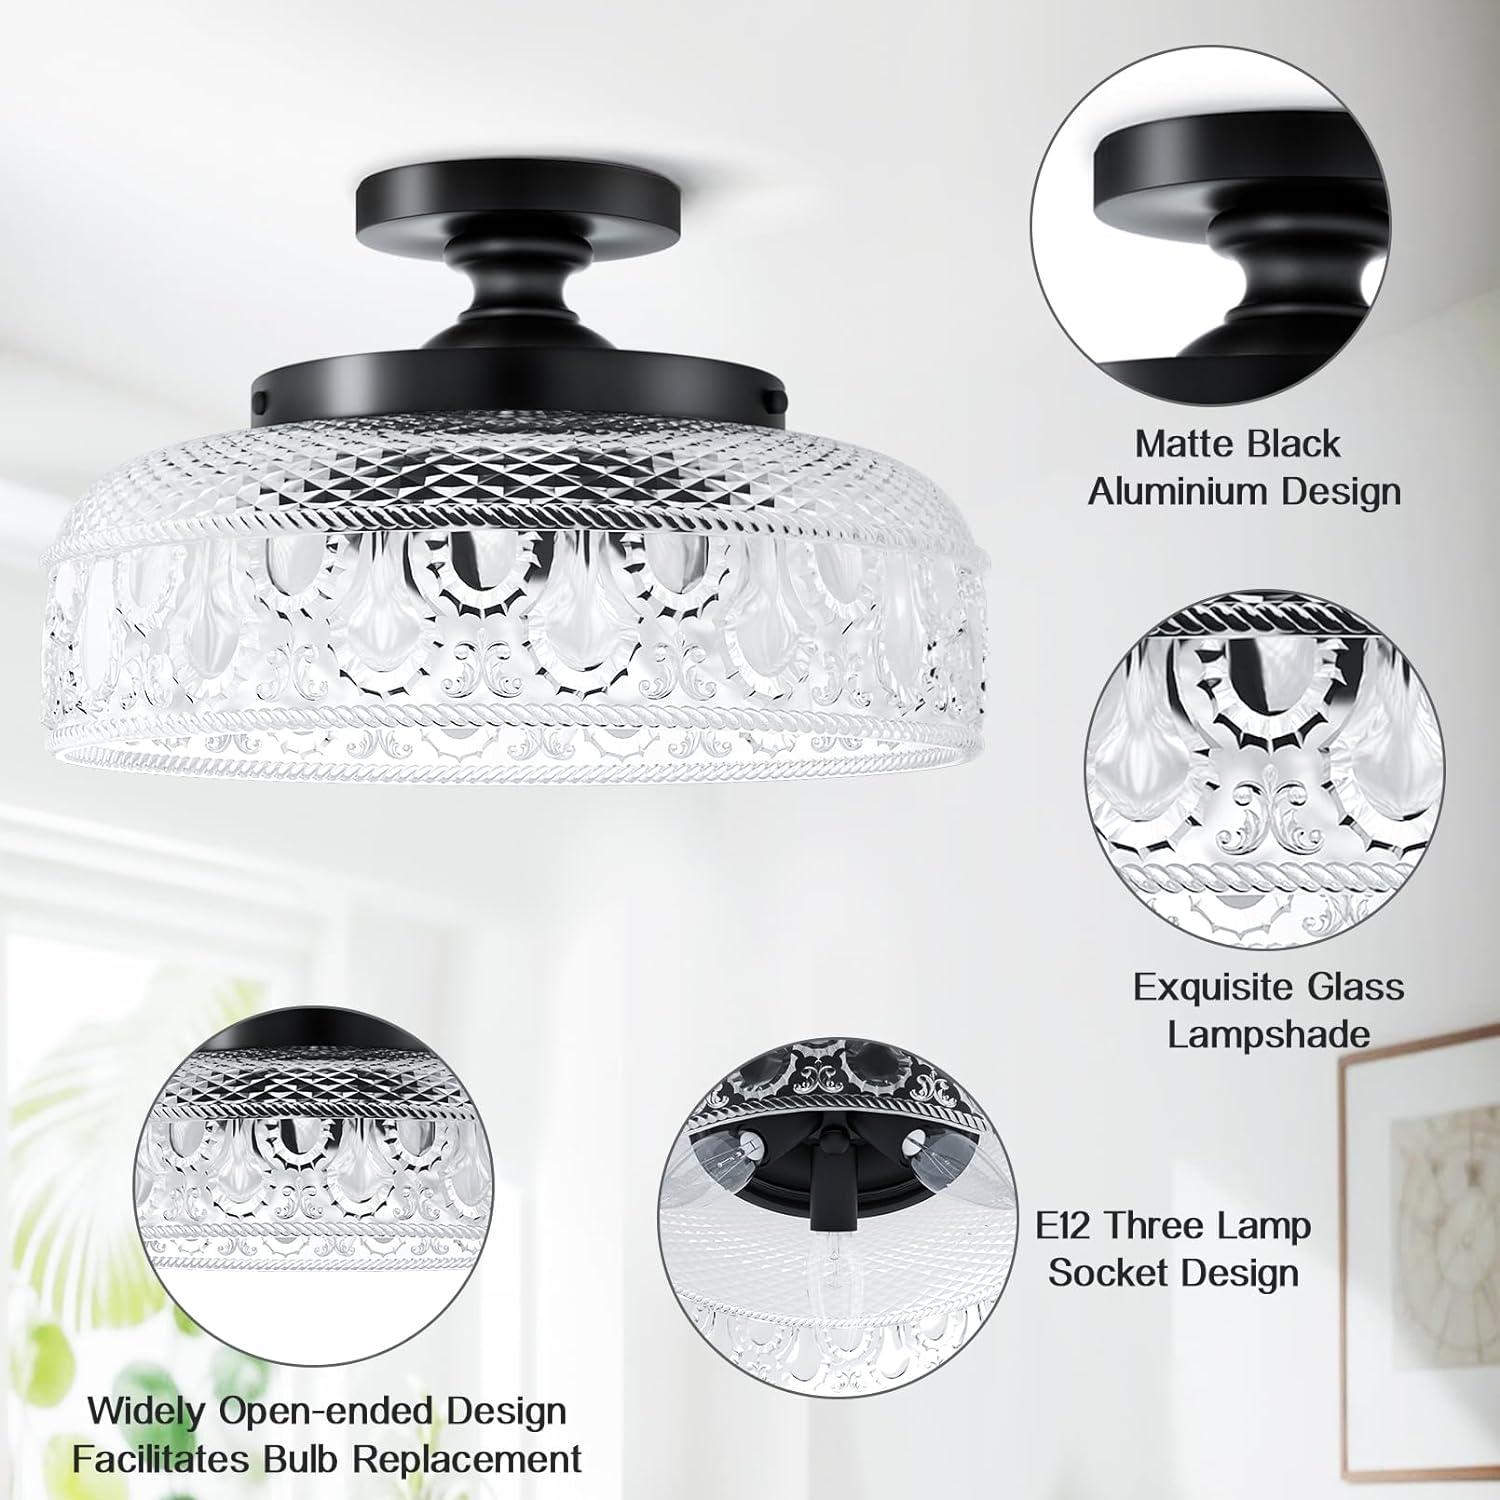
Figure 2: Product dimensions, showing a diameter of 12.2 inches (30.9 cm).

Figure 3: Various E12 bulb types compatible with the fixture (bulbs not included).
Specifications
| Attribute | Value |
|---|---|
| Brand | Lamomo |
| Model Name | 3019C-3B |
| Color | Black |
| Material | Aluminum, Glass |
| Style | Modern |
| Light Fixture Form | Close to Ceiling |
| Product Dimensions | 13.62"L x 13.62"W x 6.69"H (30.9 x 19.8 x 11.7 cm) |
| Indoor/Outdoor Usage | Indoor |
| Power Source | AC/DC |
| Installation Type | Semi Flush Mount |
| Number of Light Sources | 3 |
| Voltage | 120 Volts (AC) |
| Wattage | 60 watts (Max per bulb) |
| Bulb Base | E12 |
| Assembly Required | Yes |
Installation Instructions
Before You Begin
Ensure you have the following tools and materials:
- Screwdriver
- Wire strippers
- Electrical tape (optional)
- E12 base bulbs (max 60W each, not included)
Always turn off the power at the circuit breaker before installation. Professional electrician is recommended for safety.
Step-by-Step Installation
- Secure the Hanging Plate:
Attach the circular hanging plate to your ceiling junction box using the provided screws. Ensure it is firmly secured.
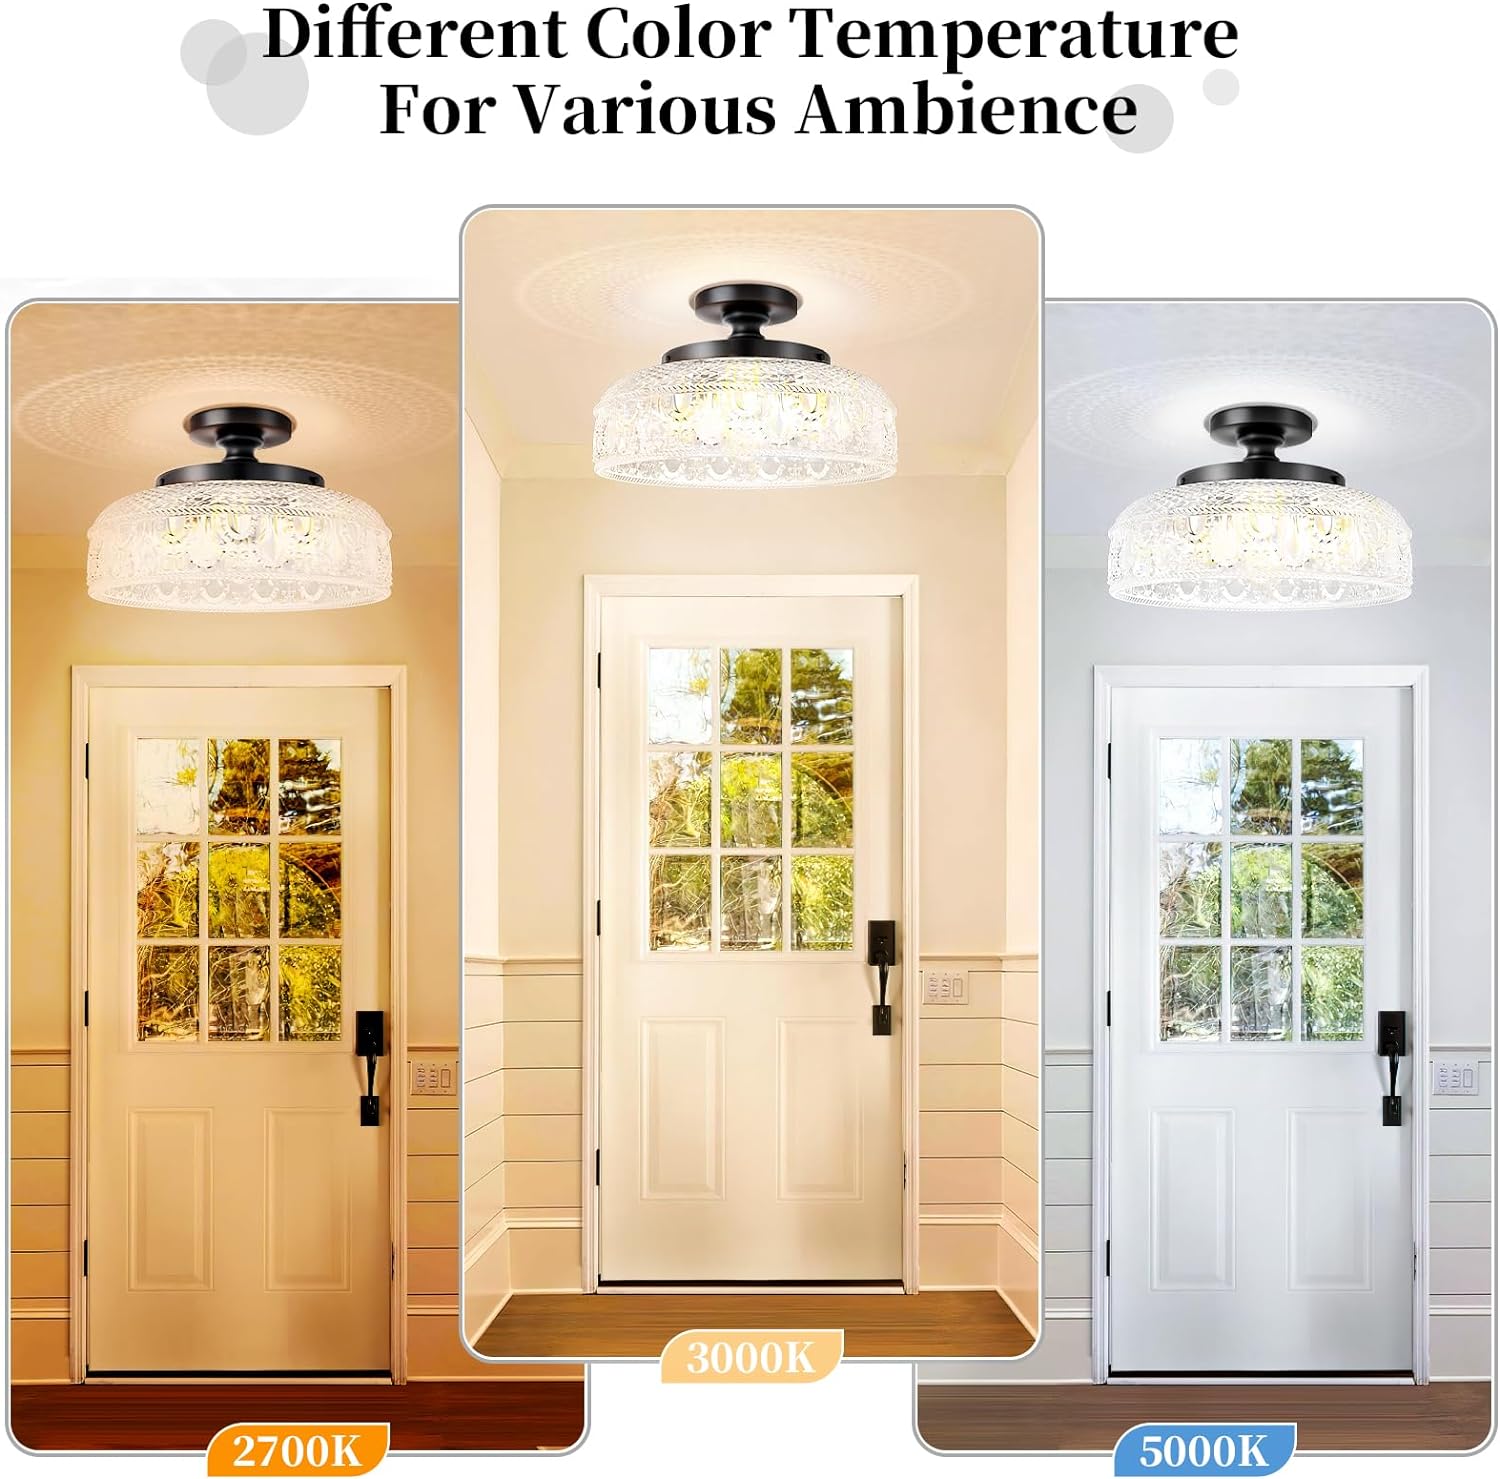
Figure 4: Secure the hanging plate with screws.
- Connect the Wires:
Connect the fixture's wires to your household electrical wires. Typically, connect the black wire from the fixture to the black wire from the ceiling, the white wire from the fixture to the white wire from the ceiling, and the ground wire to the ground wire. Use wire nuts to secure connections and electrical tape for added insulation if desired.

Figure 5: Connect the wires using wire nuts.
- Attach the Fixture Body and Glass Shade:
Carefully align the fixture body with the hanging plate and secure it. Then, place the glass shade onto the fixture body and tighten the three screws on the base to securely hold the glass in place. Do not overtighten.

Figure 6: Tighten the three screws on the base to secure the glass.
- Install the E12 Bulbs:
Screw three E12 base bulbs into the sockets. Ensure they are fully seated but do not overtighten. Remember, bulbs are not included.

Figure 7: Install the three E12 bulbs.
Operating Instructions
Once installed, restore power at the circuit breaker. The light fixture can be operated using a standard wall switch connected to the circuit. For dimmable functionality, ensure you use dimmable E12 bulbs and a compatible dimmer switch (not included).

Figure 8: Example of the light fixture in a bedroom, showing on and off states.
Maintenance
- Cleaning: To clean the fixture, ensure the power is off. Wipe the metal parts with a soft, dry cloth. For the glass shade, use a soft, damp cloth with a mild, non-abrasive cleaner if necessary. Avoid harsh chemicals that may damage the finish or glass.
- Bulb Replacement: Before replacing bulbs, turn off the power at the circuit breaker. Allow bulbs to cool completely. Unscrew old bulbs and replace with new E12 base bulbs, ensuring they do not exceed 60 watts each.
Troubleshooting
| Problem | Possible Cause | Solution |
|---|---|---|
| Light does not turn on | No power to the fixture; Loose wiring; Faulty bulb | Check circuit breaker; Verify wire connections; Replace bulbs. |
| Flickering light | Loose bulb; Incorrect bulb type; Loose wiring | Tighten bulbs; Ensure bulbs are compatible and not exceeding wattage; Check wire connections. |
| Light is too dim/bright | Incorrect bulb wattage; Non-dimmable bulbs with dimmer switch | Use appropriate wattage bulbs; Replace with dimmable bulbs if using a dimmer switch. |
Warranty and Support
For warranty information or technical support, please refer to the product packaging or contact Lamomo customer service directly. Keep your purchase receipt for any warranty claims.


