1. Introduction
This manual provides essential instructions for the safe and effective use of the GEDORE Spring Preload Tool Extension Kit KL-0029-150. This kit is designed to assist in the compression and decompression of automotive coil springs, particularly during suspension component servicing. Please read this manual thoroughly before operating the tool to ensure proper function and user safety.
2. Safety Information
WARNING: Improper use of spring compressors can result in serious injury or death. Coil springs store significant energy and can release it violently if not handled correctly.
- Always wear appropriate personal protective equipment (PPE), including safety glasses and heavy-duty gloves.
- Ensure the tool is in good working condition before each use. Inspect for any damage, wear, or missing parts.
- Never use damaged or modified tools.
- Ensure the vehicle is properly supported on jack stands and the wheels are chocked before beginning any suspension work.
- Follow vehicle manufacturer's service procedures and specifications.
- Do not exceed the maximum load capacity of the tool.
- Keep hands and other body parts clear of the spring and compression mechanism during operation.
- Use only for its intended purpose: compressing and decompressing automotive coil springs.
- If you are unsure about any step, consult a qualified automotive technician.
3. Package Contents
Verify that all components are present and undamaged upon opening the package:
- GEDORE Spring Preload Tool Extension Kit KL-0029-150 (consisting of various components for spring compression)
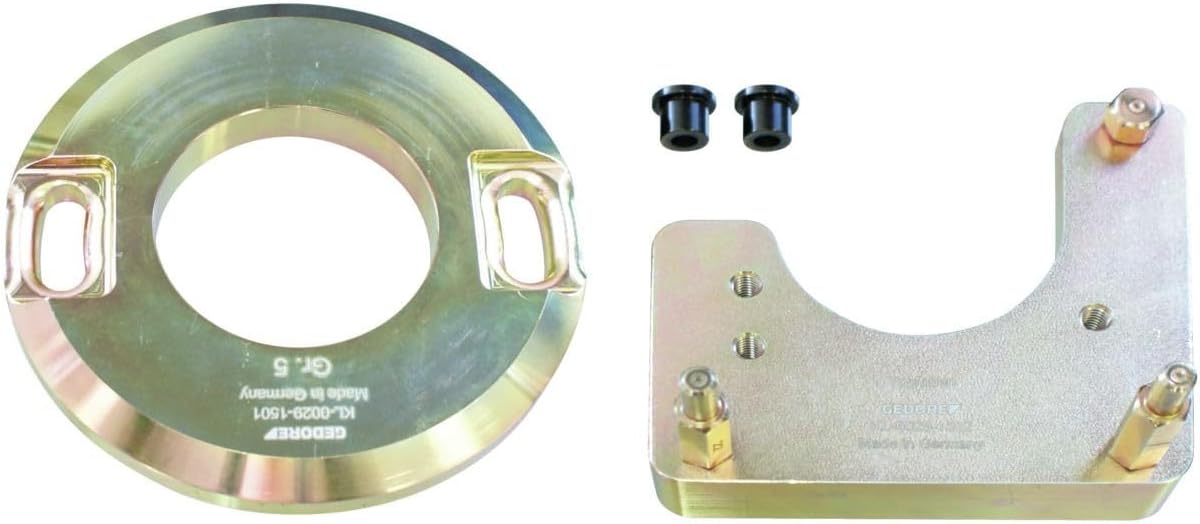
Figure 1: Components of the GEDORE Spring Preload Tool Extension Kit KL-0029-150. This image displays the main circular compression plate, an angled support bracket, and two small black bushings.
4. Setup and Assembly
Before using the tool, ensure you have identified the correct components for your specific vehicle application. The extension kit is designed to work in conjunction with a main spring compressor unit (sold separately).
- Vehicle Preparation: Safely lift and support the vehicle according to the manufacturer's instructions. Remove the wheel and any other components necessary to access the strut or shock absorber assembly.
- Component Identification: Identify the specific spring and strut assembly you are working on. The extension kit components are designed to adapt to various spring diameters and strut designs.
- Assemble the Compression Plate: Attach the appropriate compression plate (e.g., the large circular plate shown in Figure 1) to the main spring compressor unit. Ensure it is securely fastened.
- Positioning the Support Bracket: If required for your application, attach the angled support bracket (also shown in Figure 1) to the strut assembly or the main compressor unit, ensuring it provides stable support for the spring.
- Lubrication: Apply a light coat of appropriate lubricant to the threads of the spring compressor's lead screws to ensure smooth operation and prevent galling.
5. Operating Instructions
These instructions outline the general procedure for using the GEDORE Spring Preload Tool Extension Kit. Always refer to your vehicle's specific service manual for detailed steps.
- Install the Compressor: Carefully position the assembled spring compressor (with the extension kit components) onto the coil spring. Ensure the compression plates are seated firmly and evenly on the spring coils, typically near the top and bottom.
- Secure the Tool: Ensure all hooks, clamps, or bolts securing the compressor to the spring are tightened according to the main compressor unit's instructions. The spring must be held securely and symmetrically.
- Compress the Spring: Using the appropriate wrench or power tool (as specified by the main compressor unit), slowly and incrementally compress the spring. Alternate tightening the lead screws (if multiple are present) to ensure even compression.
- Monitor Compression: Continuously observe the spring and the tool during compression. Stop immediately if you notice any unusual sounds, bending, or slipping of components. Compress only enough to relieve tension on the strut's top nut or to allow for removal/installation of components.
- Component Removal/Installation: Once the spring is safely compressed, you can proceed with removing or installing the strut components (e.g., top mount, bearing, shock absorber).
- Decompress the Spring: After reassembling the strut, slowly and carefully decompress the spring by reversing the tightening process. Ensure the spring seats properly in its mounts as tension is released.
- Remove the Tool: Once the spring is fully decompressed and seated, remove the spring compressor and extension kit components.
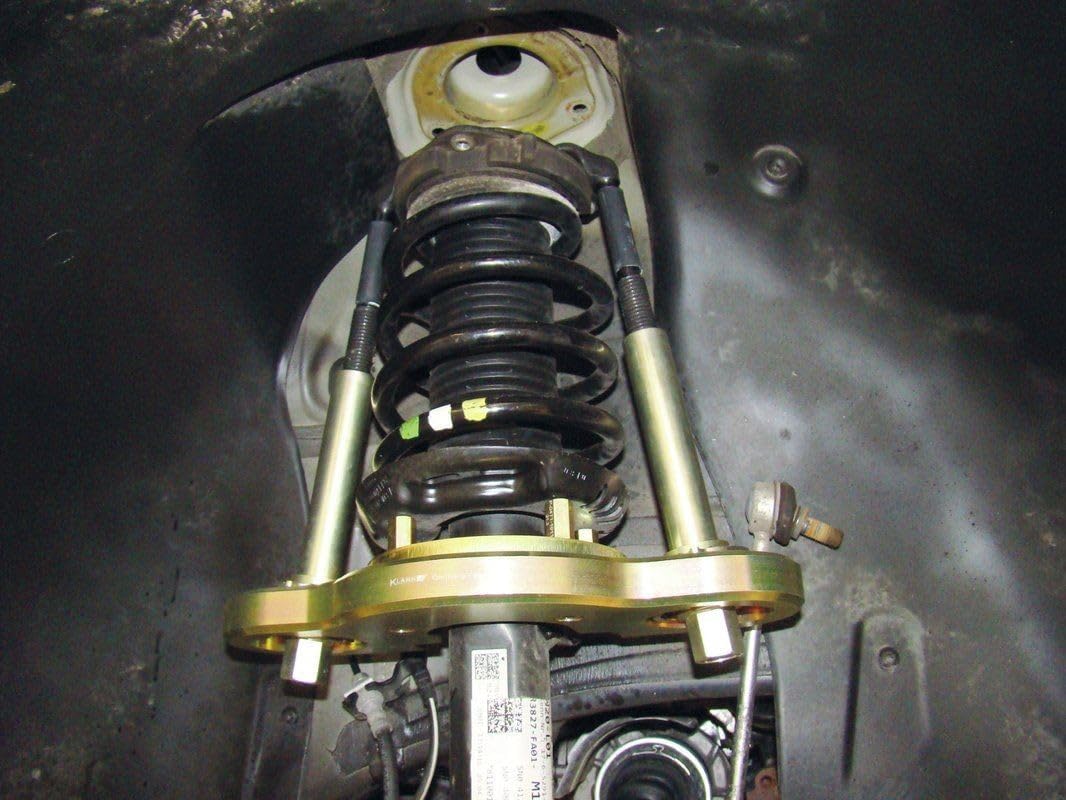
Figure 2: The spring preload tool extension kit installed on a vehicle's strut assembly, demonstrating proper placement for spring compression.

Figure 3: A close-up view of the GEDORE spring preload tool extension kit compressing a coil spring, showing the secure engagement of the compression plates.

Figure 4: An illustrative diagram showing the internal mechanism of the spring preload tool compressing a coil spring.

Figure 5: A detailed diagram illustrating the top plate of the spring preload tool, showing how it engages with the spring.

Figure 6: A detailed diagram illustrating the bottom plate of the spring preload tool, showing its engagement with the spring and strut.
6. Maintenance
Proper maintenance ensures the longevity and safe operation of your GEDORE Spring Preload Tool Extension Kit.
- Cleaning: After each use, clean all components to remove dirt, grease, and debris. Use a mild cleaner and a cloth.
- Lubrication: Periodically apply a light coat of machine oil or grease to moving parts, especially the threads of any lead screws (if applicable to your main compressor unit), to prevent corrosion and ensure smooth operation.
- Inspection: Regularly inspect all components for signs of wear, cracks, bends, or other damage. Pay close attention to the compression plates, hooks, and bolts. Replace any damaged parts immediately.
- Storage: Store the kit in a clean, dry place, away from moisture and extreme temperatures, to prevent rust and degradation.
7. Troubleshooting
If you encounter issues while using the tool, consider the following:
- Tool Slipping:
- Ensure the compression plates are correctly seated on the spring coils and are not angled.
- Verify that all securing bolts/hooks are fully tightened.
- Confirm the tool is compatible with the spring diameter and type.
- Difficulty Compressing:
- Check if the lead screws are adequately lubricated.
- Ensure the tool is not binding due to misalignment.
- Verify that the spring is not excessively stiff for the tool's capacity.
- Unusual Noises:
- Stop operation immediately.
- Inspect all components for damage or improper seating.
- Do not resume until the cause is identified and rectified.
8. Specifications
| Brand | GEDORE |
| Model | KL-0029-150 |
| Item Weight | 8.23 pounds |
| Product Dimensions | 8.46 x 6.3 x 4.33 inches |
| Manufacturer Part Number | KL-0029-150 |
| Exterior Finish | Painted |
9. Warranty and Support
For warranty information or technical support regarding your GEDORE Spring Preload Tool Extension Kit KL-0029-150, please refer to the official GEDORE website or contact their customer service department. Keep your purchase receipt as proof of purchase.
Official GEDORE Website: www.gedore.com