
Odyssey Toys 91055
Ultralight Camera Drone User Manual
Brand: Odyssey Toys | Model: 91055
Introduction
Thank you for purchasing the Odyssey Toys Ultralight Camera Drone. This manual provides essential information for the safe operation, setup, maintenance, and troubleshooting of your new drone. Please read this manual thoroughly before operating the device to ensure proper function and to avoid damage or injury.
Important Safety Information
- Age Recommendation: This product is intended for users aged 14 years and older. Adult supervision is recommended for younger users.
- Flight Environment: Operate the drone in open, clear areas, away from people, animals, buildings, and power lines. Avoid flying in strong winds or adverse weather conditions.
- Battery Safety: Use only the specified batteries and charging methods. Do not overcharge or short-circuit batteries. Dispose of batteries responsibly.
- Propeller Safety: Keep hands, face, and loose clothing away from rotating propellers. Always turn off the drone before handling propellers.
- Water Exposure: Do not expose the drone or its components to water or moisture.
- Modifications: Do not attempt to modify or disassemble the drone. Unauthorized modifications may void the warranty and compromise safety.
What's in the Box
Verify that all components are present before proceeding with setup.
- 1 x Ultralight Camera Drone
- 2 x Spare Propellers
- 4 x Landing Gear
- 1 x Remote Controller
- 1 x USB Charging Cable
- 1 x Instruction Manual (this document)
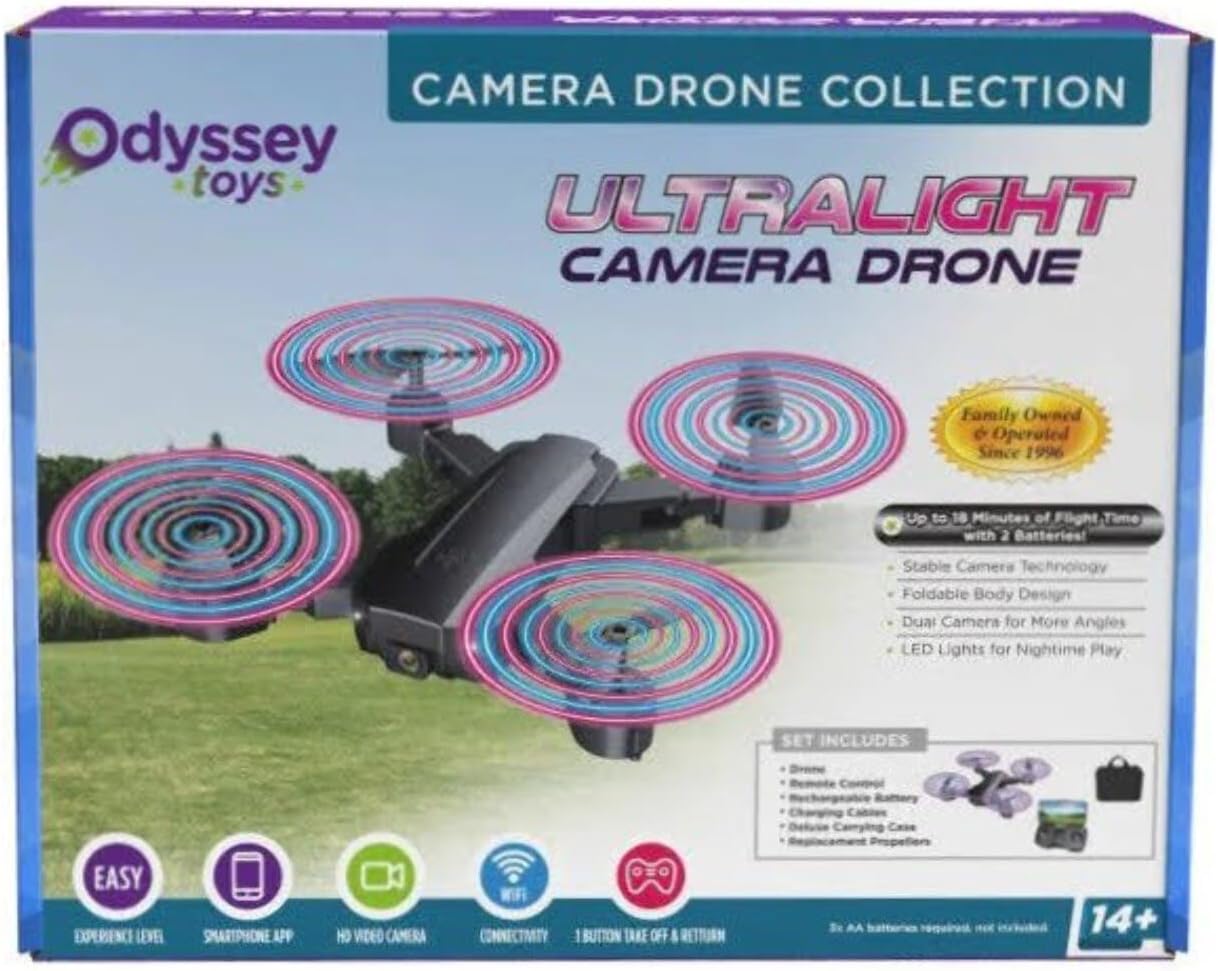
Image: The retail packaging for the Odyssey Toys Ultralight Camera Drone, illustrating the drone, remote controller, and other included accessories.
Setup Guide
1. Charging the Drone Battery
- Locate the drone's battery compartment and carefully remove the battery.
- Connect the drone battery to the provided USB charging cable.
- Plug the USB cable into a standard USB power adapter (not included) or a computer USB port.
- The indicator light on the USB cable will illuminate during charging and turn off when fully charged. Charging typically takes 60-90 minutes.
- Once charged, reinsert the battery into the drone, ensuring it is securely connected.
2. Installing Controller Batteries
- Open the battery compartment on the back of the remote controller.
- Insert 3 x AAA batteries (not included), ensuring correct polarity (+/-).
- Close the battery compartment securely.

Image: The drone's remote controller, designed to hold a smartphone for live video feed and advanced controls.
3. Attaching Landing Gear (if applicable)
If your drone model requires assembly of landing gear:
- Identify the four landing gear pieces.
- Align each landing gear piece with the corresponding slot on the drone's underside.
- Gently push until it clicks into place. Ensure all four are securely attached.
4. Pairing the Drone and Controller
- Place the drone on a flat, level surface.
- Turn on the drone by pressing the power button. The drone's indicator lights will flash.
- Turn on the remote controller. The controller's indicator light will also flash.
- Push the left joystick (throttle) all the way up, then all the way down.
- Both the drone and controller lights will become solid, indicating successful pairing.
Operating Instructions
Basic Flight Controls
- Left Joystick (Throttle/Yaw):
- Push up: Increase altitude (Ascend)
- Push down: Decrease altitude (Descend)
- Push left/right: Rotate drone left/right (Yaw)
- Right Joystick (Pitch/Roll):
- Push up/down: Move drone forward/backward (Pitch)
- Push left/right: Move drone left/right (Roll)

Image: The Ultralight Camera Drone in its unfolded state, ready for flight, showcasing its four propellers and central camera.
Take-off and Landing
- One-Key Take-off: After pairing, press the One-Key Take-off button (usually marked with an arrow pointing up). The drone will automatically ascend to a stable hovering altitude.
- Manual Take-off: After pairing, push both joysticks simultaneously to the bottom-outward corners to unlock the motors. Then, slowly push the left joystick (throttle) up to ascend.
- One-Key Landing: Press the One-Key Landing button (usually marked with an arrow pointing down). The drone will automatically descend and land gently.
- Manual Landing: Slowly pull the left joystick (throttle) down until the drone lands. Once landed, hold the left joystick down for a few seconds to stop the motors.
Camera Operation
The drone is equipped with an integrated camera. To utilize its full features, download the companion app (refer to the app store for "Odyssey Drone" or similar). Once connected via Wi-Fi:
- Photo Capture: Tap the camera icon on the app interface or press the dedicated photo button on the controller (if available).
- Video Recording: Tap the video icon on the app interface or press the dedicated video button on the controller (if available) to start/stop recording.
- Live View: The app provides a real-time video feed from the drone's camera to your smartphone.
Maintenance
Cleaning
- Use a soft, dry cloth to wipe down the drone's body after each flight.
- Remove any dust or debris from the motors and propellers using a small brush or compressed air.
- Do not use water or chemical cleaners, as they may damage electronic components.
Propeller Replacement
If a propeller is damaged, replace it immediately to ensure stable flight.
- Identify the damaged propeller. Note that propellers are marked 'A' or 'B' and must be replaced with the corresponding type.
- Gently pull the damaged propeller straight up from its motor shaft.
- Align the new propeller (A or B) with the motor shaft and push it down firmly until it is seated.
Storage
- Store the drone and controller in a cool, dry place, away from direct sunlight and extreme temperatures.
- Remove batteries from both the drone and controller if storing for extended periods to prevent leakage.
Troubleshooting
Refer to the table below for common issues and their solutions.
| Problem | Possible Cause | Solution |
|---|---|---|
| Drone does not respond to controller. | Not paired; low battery; out of range. | Re-pair drone and controller; charge drone/controller batteries; ensure drone is within operating range. |
| Drone drifts during flight. | Not calibrated; uneven surface at take-off; strong wind. | Perform gyroscope calibration (refer to controller instructions); take off from a level surface; avoid flying in windy conditions. |
| Propellers do not spin. | Motors not unlocked; damaged propellers; motor malfunction. | Unlock motors (push joysticks to bottom-outward); replace damaged propellers; contact support if motors are faulty. |
| Camera feed is choppy or disconnected. | Weak Wi-Fi signal; too far from drone; app issue. | Ensure strong Wi-Fi connection; stay within optimal range; restart app and drone. |
Specifications
| Feature | Detail |
|---|---|
| Product Dimensions | 10 x 1.2 x 4 inches (unfolded) |
| Item Weight | 1.2 pounds |
| Model Number | 91055 |
| ASIN | B0C69TP5HC |
| Manufacturer | Odyssey Toys |
| Flight Time | Up to 10 minutes (approx.) |
| Charging Time | 60-90 minutes (approx.) |
| Control Range | Up to 50 meters (approx.) |
Warranty and Support
Limited Warranty
Odyssey Toys warrants this product against defects in materials and workmanship for a period of 90 days from the original date of purchase. This warranty does not cover damage caused by accident, misuse, abuse, improper operation, or unauthorized modification. Proof of purchase is required for all warranty claims.
Customer Support
For technical assistance, troubleshooting, or warranty inquiries, please contact Odyssey Toys customer support:
- Website: www.odysseytoys.com
- Email: support@odysseytoys.com
- Phone: Refer to the Odyssey Toys website for current contact numbers.
Please have your product model number (91055) and proof of purchase ready when contacting support.
Ask a question about this manual
Ask about setup, troubleshooting, compatibility, parts, safety, or missing instructions. Manuals+ will review the question and use this page’s manual context to help answer it.